wiring CHEVROLET EPICA 2004 1.G Owners Manual
[x] Cancel search | Manufacturer: CHEVROLET, Model Year: 2004, Model line: EPICA, Model: CHEVROLET EPICA 2004 1.GPages: 338, PDF Size: 2.38 MB
Page 73 of 338
Leaving Your Vehicle
If you are leaving your vehicle, take your keys. All of
the doors, except for the driver’s door, can be locked
from the outside by pushing down the door lock and then
closing the door. The driver’s door can only be locked
from the outside by using the key or the remote keyless
entry transmitter.
Trunk
To unlock the trunk from the outside, insert the key and
turn the trunk lock cylinder or use the remote keyless
entry transmitter.
When closing the trunk, close from the center to ensure
it fully latches. Although you may use one hand to
unlock the trunk, it is recommended that two hands on
the upper surface be used to close the trunk.
{CAUTION:
It can be dangerous to drive with the trunk lid
open because carbon monoxide (CO) gas can
come into your vehicle. You can not see or
smell CO. It can cause unconsciousness and
even death. If you must drive with the trunk lid
open or if electrical wiring or other cable
connections must pass through the seal
between the body and the trunk lid:
Make sure all other windows are shut.
Turn the fan on your heating or cooling
system to its highest speed and select the
control setting that will force outside air
into your vehicle. See Climate Control
System in the Index.
If you have air outlets on or under the
instrument panel, open them all the way.
SeeEngine Exhaust on page 2-29.
2-11
Page 131 of 338
Safety Belt Reminder Light
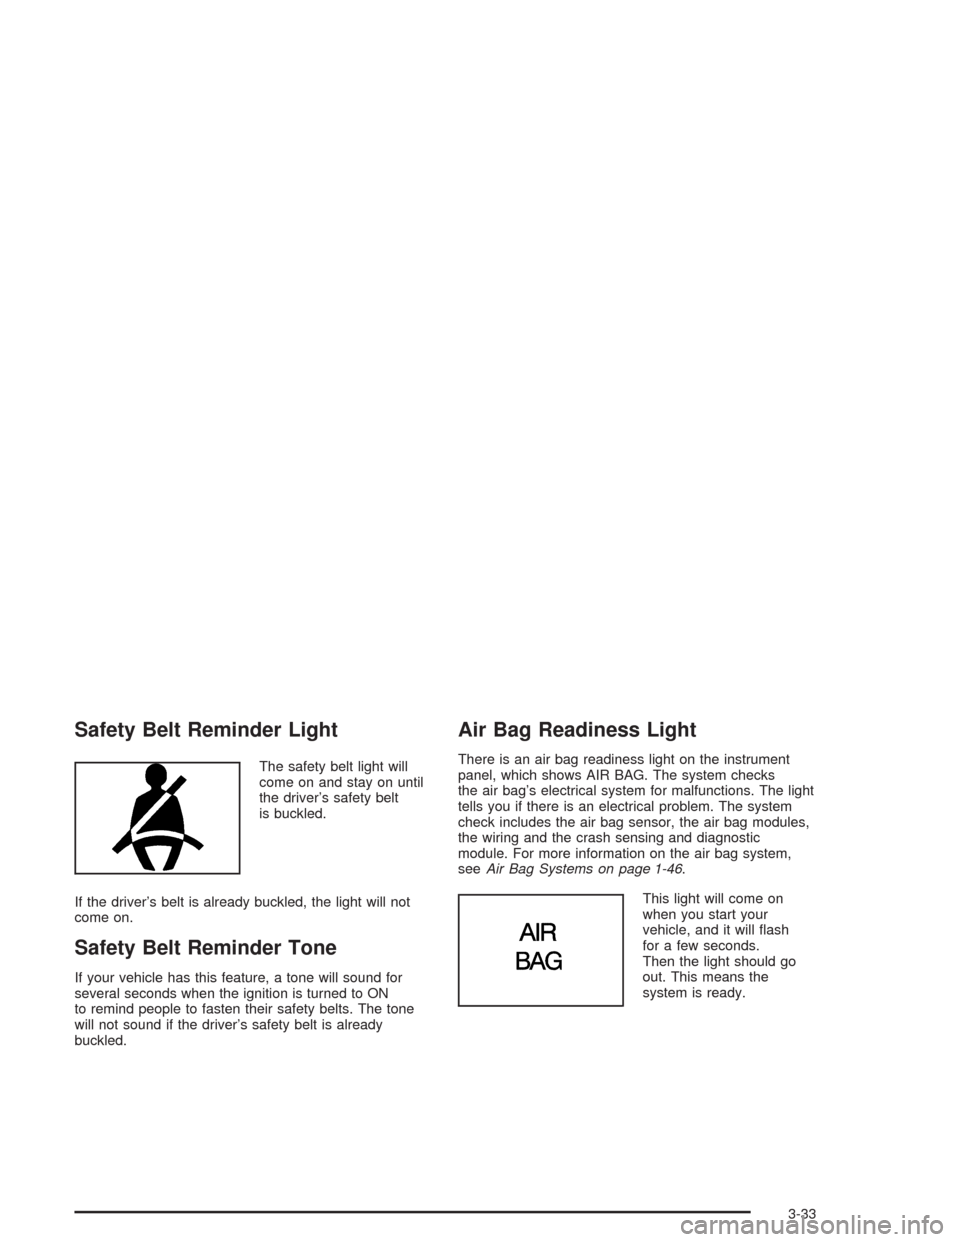
The safety belt light will
come on and stay on until
the driver’s safety belt
is buckled.
If the driver’s belt is already buckled, the light will not
come on.
Safety Belt Reminder Tone
If your vehicle has this feature, a tone will sound for
several seconds when the ignition is turned to ON
to remind people to fasten their safety belts. The tone
will not sound if the driver’s safety belt is already
buckled.
Air Bag Readiness Light
There is an air bag readiness light on the instrument
panel, which shows AIR BAG. The system checks
the air bag’s electrical system for malfunctions. The light
tells you if there is an electrical problem. The system
check includes the air bag sensor, the air bag modules,
the wiring and the crash sensing and diagnostic
module. For more information on the air bag system,
seeAir Bag Systems on page 1-46.
This light will come on
when you start your
vehicle, and it will flash
for a few seconds.
Then the light should go
out. This means the
system is ready.
3-33
Page 196 of 338
Appearance Care............................................5-68
Cleaning the Inside of Your Vehicle.................5-69
Care of Safety Belts......................................5-72
Weatherstrips...............................................5-72
Cleaning the Outside of Your Vehicle.................5-72
Sheet Metal Damage.....................................5-74
Finish Damage.............................................5-74
Underbody Maintenance................................5-75
Chemical Paint Spotting.................................5-75
Vehicle Care/Appearance Materials..................5-75
Vehicle Identi�cation......................................5-77
Vehicle Identification Number (VIN).................5-77
Service Parts Identification Label.....................5-77Electrical System............................................5-78
Add-On Electrical Equipment..........................5-78
Headlamp Wiring..........................................5-78
Windshield Wiper Fuses................................5-78
Power Windows and Other Power Options.......5-78
Fuses and Circuit Breakers............................5-79
Capacities and Speci�cations..........................5-85
Section 5 Service and Appearance Care
5-2
Page 236 of 338
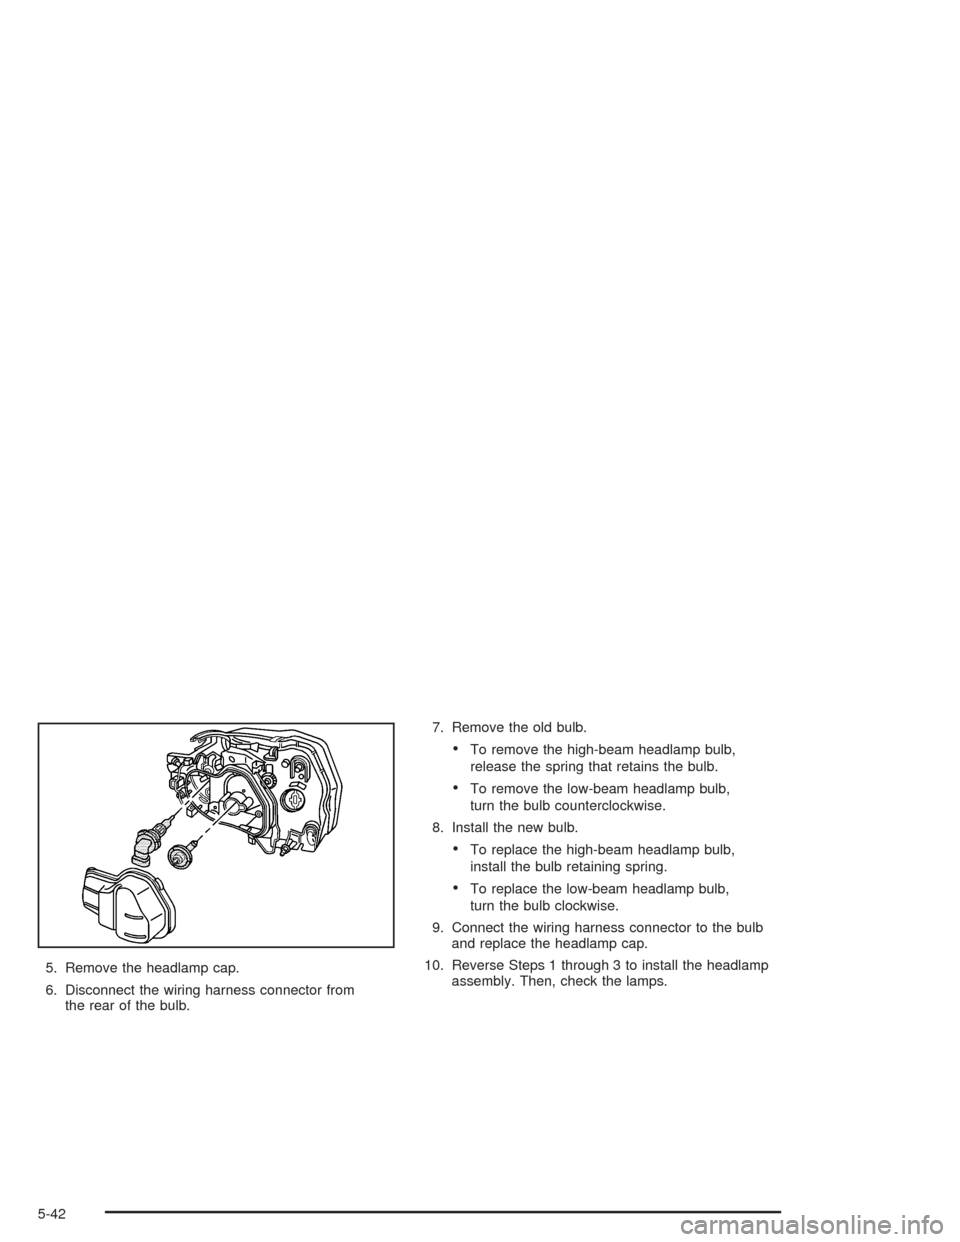
5. Remove the headlamp cap.
6. Disconnect the wiring harness connector from
the rear of the bulb.7. Remove the old bulb.
•To remove the high-beam headlamp bulb,
release the spring that retains the bulb.
•To remove the low-beam headlamp bulb,
turn the bulb counterclockwise.
8. Install the new bulb.
•To replace the high-beam headlamp bulb,
install the bulb retaining spring.
•To replace the low-beam headlamp bulb,
turn the bulb clockwise.
9. Connect the wiring harness connector to the bulb
and replace the headlamp cap.
10. Reverse Steps 1 through 3 to install the headlamp
assembly. Then, check the lamps.
5-42
Page 237 of 338
Front Turn Signal Lamps
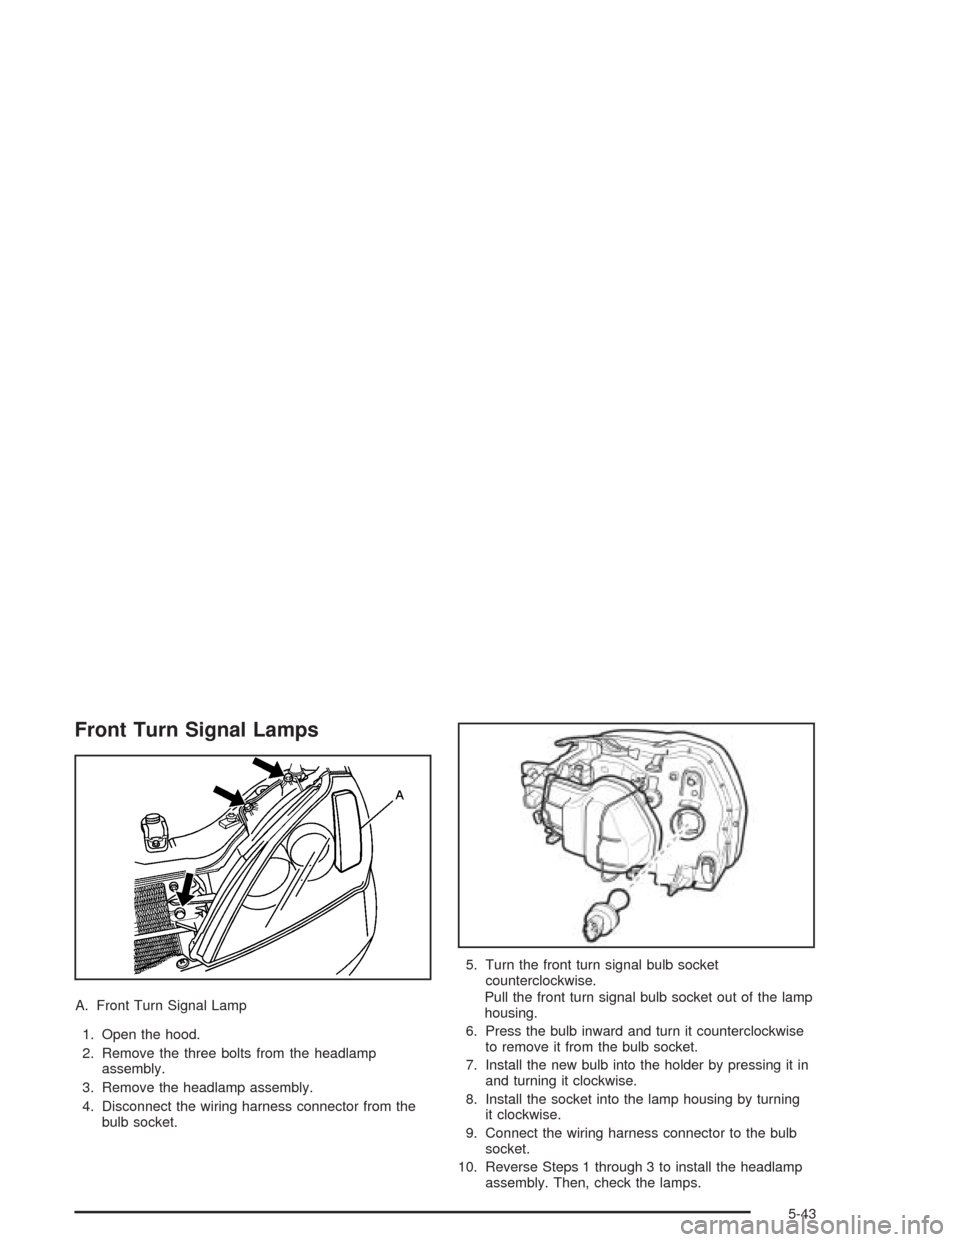
A. Front Turn Signal Lamp
1. Open the hood.
2. Remove the three bolts from the headlamp
assembly.
3. Remove the headlamp assembly.
4. Disconnect the wiring harness connector from the
bulb socket.5. Turn the front turn signal bulb socket
counterclockwise.
Pull the front turn signal bulb socket out of the lamp
housing.
6. Press the bulb inward and turn it counterclockwise
to remove it from the bulb socket.
7. Install the new bulb into the holder by pressing it in
and turning it clockwise.
8. Install the socket into the lamp housing by turning
it clockwise.
9. Connect the wiring harness connector to the bulb
socket.
10. Reverse Steps 1 through 3 to install the headlamp
assembly. Then, check the lamps.
5-43
Page 272 of 338
Electrical System
Add-On Electrical Equipment
Notice:Don’t add anything electrical to your vehicle
unless you check with your dealer �rst. Some
electrical equipment can damage your vehicle and
the damage wouldn’t be covered by your warranty.
Some add-on electrical equipment can keep other
components from working as they should.
Your vehicle has an air bag system. Before attempting
to add anything electrical to your vehicle, seeServicing
Your Air Bag-Equipped Vehicle on page 1-54.
Headlamp Wiring
The headlamp wiring is protected by fuses, one for
each headlamp, in the fuse block. An electrical overload
will cause the lamps to turn off. If this happens, have
your headlamp wiring checked right away.
Windshield Wiper Fuses
The windshield wiper motor is protected by an internal
circuit breaker and a fuse. If the motor overheats due
to heavy snow, etc., the wiper will stop until the
motor cools. If the overload is caused by some electrical
problem and not snow, etc., be sure to get it fixed.
Power Windows and Other Power
Options
Circuit breakers in the fuse block protect the power
windows and other power accessories. When the current
load is too heavy, the circuit breaker opens and
closes, protecting the circuit until the problem is fixed or
goes away.
5-78
Page 273 of 338
Fuses and Circuit Breakers
The wiring circuits in your vehicle are protected from
short circuits by a combination of fuses, circuit breakers
and fusible thermal links in the wiring itself.
Look at the silver-colored band inside the fuse. If the
band is broken or melted, replace the fuse. Be sure you
replace a bad fuse with a new one of the identical
size and rating.
Five spare fuses are provided in the engine compartment
fuse block. If you ever have a problem on the road and do
not have a spare fuse, you can borrow one that has the
same amperage. Just pick a feature of your vehicle that
you can get along without — like the radio or cigarette
lighter — and use its fuse, if it is the correct amperage.
Replace it as soon as you can.
There are two fuse blocks in your vehicle: the instrument
panel fuse block and the engine compartment fuse block.
There is a fuse puller located on the engine compartment
fuse block. It can be used to easily remove fuses from the
fuse block.
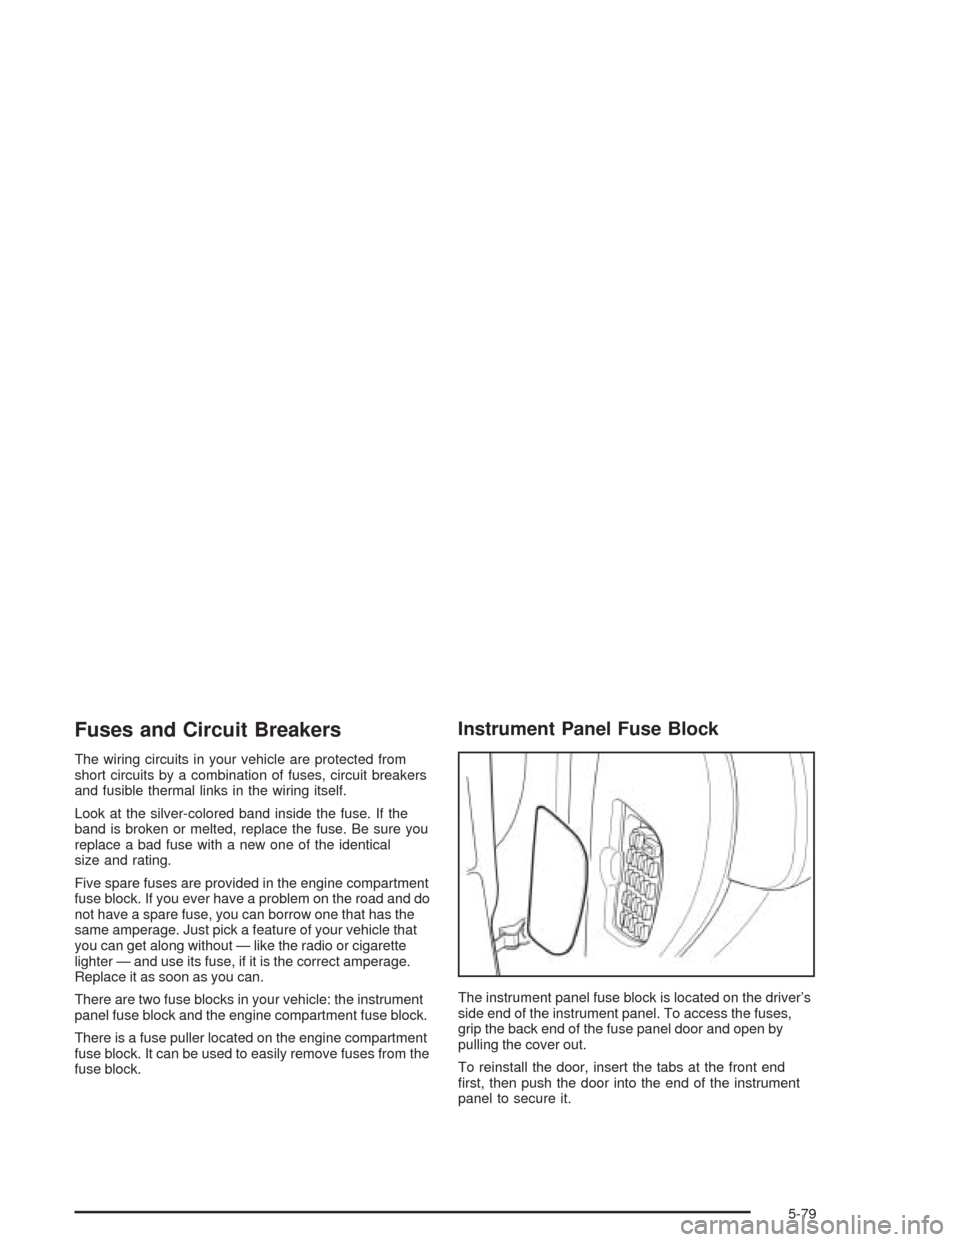
Instrument Panel Fuse Block
The instrument panel fuse block is located on the driver’s
side end of the instrument panel. To access the fuses,
grip the back end of the fuse panel door and open by
pulling the cover out.
To reinstall the door, insert the tabs at the front end
first, then push the door into the end of the instrument
panel to secure it.
5-79
Page 327 of 338
Driving
At Night.....................................................4-15
City...........................................................4-19
Defensive..................................................... 4-2
Drunken....................................................... 4-2
Freeway.....................................................4-20
Hill and Mountain Roads..............................4-22
In Rain and on Wet Roads...........................4-16
Winter........................................................4-24
Driving on Snow or Ice....................................4-25
Driving Through Deep Standing Water...............4-18
Driving Through Flowing Water.........................4-18
E
Electrical System
Add-On Equipment......................................5-78
Fuses and Circuit Breakers...........................5-79
Headlamp Wiring.........................................5-78
Power Windows and Other Power Options......5-78
Windshield Wiper Fuses...............................5-78
Emergency Trunk Release Handle.....................2-12Emissions Inspection and Maintenance
Programs...................................................3-41
Engine
Air Cleaner/Filter.........................................5-17
Battery.......................................................5-35
Check and Service Engine Soon Light............3-39
Coolant......................................................5-19
Coolant Heater............................................2-21
Coolant Temperature Gage...........................3-39
Cooling System Inspection............................6-23
Engine Compartment Overview......................5-12
Exhaust.....................................................2-29
Oil .............................................................5-13
Overheating................................................5-22
Starting......................................................2-20
Engine Compartment Fuse Block......................5-81
Engine Coolant Level Check.............................6-18
Engine Oil Additives........................................5-16
Engine Oil Level Check...................................6-18
Entry Lighting.................................................3-16
Event Data Recorders (EDR)............................7-10
Express-Down Window....................................2-14
Exterior Lamps...............................................3-13
5
Page 328 of 338
F
Filter
Engine Air Cleaner......................................5-17
Finding a Station............................................3-48
Finish Care....................................................5-73
Finish Damage...............................................5-74
Flash-to-Pass Feature....................................... 3-8
Flat Tire........................................................5-61
Flat Tire, Changing.........................................5-62
Fluid
Automatic Transaxle.....................................5-19
Power Steering...........................................5-30
Windshield Washer......................................5-31
FM ...............................................................3-59
Fog Lamps....................................................3-15
Folding the Seatback........................................ 1-9
Footnotes................................................6-6, 6-13
Fuel............................................................... 5-5
Additives...................................................... 5-6
California Fuel.............................................. 5-6
Filling a Portable Fuel Container....................5-10
Filling Your Tank........................................... 5-7
Fuels in Foreign Countries.............................. 5-7
Gage.........................................................3-44
Gasoline Octane........................................... 5-5
Gasoline Specifications.................................. 5-5
Low Warning Light.......................................3-45
System Inspection.......................................6-22Fuses
Fuses and Circuit Breakers...........................5-79
Windshield Wiper.........................................5-78
G
Gage
Engine Coolant Temperature.........................3-39
Fuel..........................................................3-44
Speedometer..............................................3-32
Tachometer.................................................3-32
Gasoline
Octane........................................................ 5-5
Specifications............................................... 5-5
Glove Box.....................................................2-33
GM Mobility Program for Persons with
Disabilities.................................................... 7-5
H
Hazard Warning Flashers................................... 3-6
Head Restraints............................................... 1-8
Headlamp
Aiming.......................................................5-40
Headlamp High/Low-Beam Changer.................... 3-8
Headlamp Wiring............................................5-78
6