clock CHEVROLET EPICA 2005 1.G Owners Manual
[x] Cancel search | Manufacturer: CHEVROLET, Model Year: 2005, Model line: EPICA, Model: CHEVROLET EPICA 2005 1.GPages: 340, PDF Size: 2.19 MB
Page 105 of 340
Instrument Panel Overview...............................3-4
Hazard Warning Flashers................................3-5
Other Warning Devices...................................3-5
Horn.............................................................3-6
Tilt Wheel.....................................................3-6
Turn Signal/Multifunction Lever.........................3-6
Turn and Lane-Change Signals........................3-7
Headlamp High/Low-Beam Changer..................3-7
Flash-to-Pass.................................................3-7
Windshield Wipers..........................................3-8
Windshield Washer.........................................3-9
Cruise Control..............................................3-10
Exterior Lamps.............................................3-13
Headlamps on Reminder................................3-13
Daytime Running Lamps (DRL).......................3-14
Fog Lamps..................................................3-15
Exterior Lighting Battery Saver........................3-15
Instrument Panel Brightness...........................3-15
Dome Lamp.................................................3-16
Entry Lighting...............................................3-16
Map Lamps.................................................3-16
Accessory Power Outlets...............................3-17
Ashtrays and Cigarette Lighter........................3-18
Clock..........................................................3-18Climate Controls............................................3-19
Climate Control System.................................3-19
Automatic Climate Control System...................3-22
Outlet Adjustment.........................................3-28
Passenger Compartment Air Filter...................3-29
Warning Lights, Gages, and Indicators............3-30
Instrument Panel Cluster................................3-30
Speedometer and Odometer...........................3-32
Trip Odometer..............................................3-32
Tachometer.................................................3-32
Safety Belt Reminder Light.............................3-32
Safety Belt Reminder Tone............................3-33
Airbag Readiness Light..................................3-33
Passenger Airbag Status Indicator...................3-34
Charging System Light..................................3-35
Brake System Warning Light..........................3-36
Anti-Lock Brake System Warning Light.............3-37
Speed Sensitive Power Steering (SSPS)
Warning Light...........................................3-37
Traction Control System (TCS)
Warning Light...........................................3-38
Traction Control System Active Light...............3-38
Traction Off Light..........................................3-39
Section 3 Instrument Panel
3-1
Page 109 of 340
The main components of your instrument panel are
the following:
A. Air Outlet. SeeOutlet Adjustment on page 3-28.
B. Instrument Panel Cluster. SeeInstrument Panel
Cluster on page 3-30.
C. Digital Clock. SeeClock on page 3-18.
D. Hazard Warning Flashers Button. SeeHazard
Warning Flashers on page 3-5.
E. Climate Control System. SeeClimate Control
System on page 3-19.
F. Outside Power Mirror Control. SeeOutside Power
Mirrors on page 2-30.
G. Instrument Panel Brightness Thumbwheel. See
Instrument Panel Brightness on page 3-15.
H. Hood Release. SeeHood Release on page 5-11.
I. Coinholder. SeeCoinholder(s) on page 2-31.
J. Horn. SeeHorn on page 3-6.
K. Audio System. SeeAudio System(s) on page 3-47.
L. Cigarette Lighter and Ashtray. SeeAshtrays and
Cigarette Lighter on page 3-18.
M. Glove Box. SeeGlove Box on page 2-31.Hazard Warning Flashers
Your hazard warning flashers let you warn others. They
also let police know you have a problem. Your front
and rear turn signal lamps will flash on and off.
The hazard warning
flasher button is located
near the center of the
instrument panel.
Your hazard warning flashers work no matter what
position your key is in, and even if the key is not in.
Press the button to make the front and rear turn signal
lamps flash on and off. Press the button again to
turn the flashers off.
When the hazard warning flashers are on, your turn
signals will not work.
Other Warning Devices
If you carry reflective triangles, you can set them up at
the side of the road about 300 feet (100 m) behind
your vehicle.
3-5
Page 122 of 340
Ashtrays and Cigarette Lighter
The front ashtray and cigarette lighter are located at the
lower part of the center instrument panel, behind a
cover. Press in the cover and it will automatically open.
To remove the front ashtray for cleaning, pull the bin
out. To replace, press the bin back into place.
The rear ashtray is located at the rear of the center
console. To remove the rear ashtray, press in the
retaining spring and pull the bin out. To replace the rear
ashtray, insert the bottom tabs first and then press in
the retaining spring and push the ashtray closed.
Notice:If you put papers or other �ammable items
in the ashtray, hot cigarettes or other smoking
materials could ignite them and possibly damage
your vehicle. Never put �ammable items in the
ashtray.
The cigarette lighter is located to the right of the front
ashtray. To use it, turn the ignition to ACC or ON, push
the cigarette lighter in all the way and let go. When it
is ready, it will pop back out by itself.
Notice:Holding a cigarette lighter in while it is
heating will not allow the lighter to back away from
the heating element when it is hot. Damage from
overheating may occur to the lighter or heating
element. Do not hold a cigarette lighter in while it
is heating.
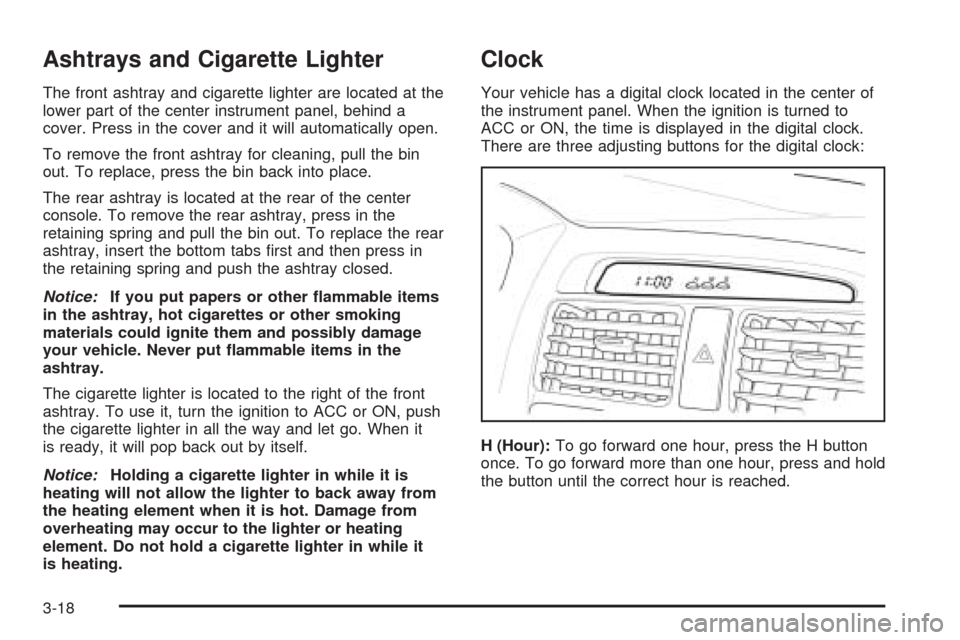
Clock
Your vehicle has a digital clock located in the center of
the instrument panel. When the ignition is turned to
ACC or ON, the time is displayed in the digital clock.
There are three adjusting buttons for the digital clock:
H (Hour):To go forward one hour, press the H button
once. To go forward more than one hour, press and hold
the button until the correct hour is reached.
3-18
Page 123 of 340
M (Minute):To go forward one minute, press the
M button once. To go forward more than one minute,
press and hold the button until the correct minute
is reached.
S (Set):To reset the time to the nearest hour, press the
S button.
For example, if the set button is pressed while the time
is between 8:00 and 8:29, the display is set to 8:00.
If this button is pressed while the time is between 8:30
and 8:59, the display is set to 9:00.
After disconnecting the battery or replacing the fuse,
reset the clock.Climate Controls
Climate Control System
Your vehicle may have a manual climate control
system. With this system you can control the heating,
cooling and ventilation for your vehicle.
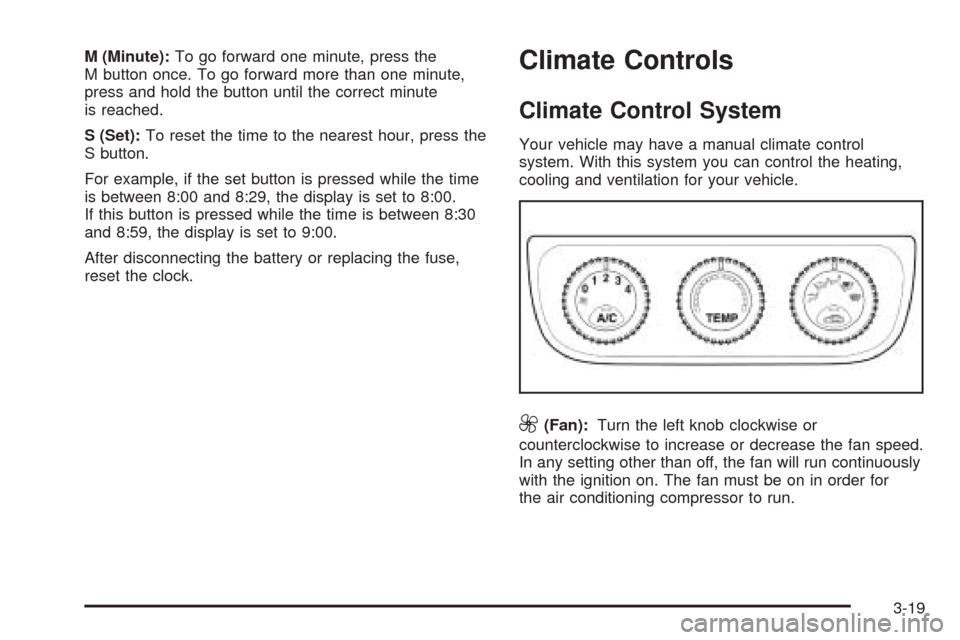
9(Fan):Turn the left knob clockwise or
counterclockwise to increase or decrease the fan speed.
In any setting other than off, the fan will run continuously
with the ignition on. The fan must be on in order for
the air conditioning compressor to run.
3-19
Page 124 of 340
0 (Off):To turn the fan off, turn the knob all the way
counterclockwise to the off position.
TEMP (Temperature):Turn the middle knob clockwise
or counterclockwise to manually increase or decrease
the temperature inside your vehicle. Turn the knob to the
blue area to get cool air and to the red area to get
warm air.
To change the current mode, select one of the following
from the right knob:
E(Vent):This mode directs air to the instrument
panel outlets.
((Bi-Level):This mode directs about half of the air
to the instrument panel outlets, and then directs the
remaining air to the floor outlets.
5(Floor):This mode directs most of the air to the
floor outlets. If your vehicle has rear outlets, some of the
air will also be directed to them. Be sure to keep the
area under the front seats clear to allow the flow of air to
the rear compartment.
The right knob can also be used to select the defog and
defrost modes. Information on defogging and defrosting
can be found later in this section.
?(Recirculation):This mode keeps outside air
from coming in the vehicle. It can be used to prevent
outside air and odors from entering your vehicle or
to help heat or cool the air inside your vehicle more
quickly. Press this button to turn the recirculation mode
on or off. When the button is pressed, an indicator
light in the button will come on. Using the recirculation
mode for extended periods may cause your windows
to fog. If this happens, select the defrost mode.
A/C (Air Conditioning):Press this button to turn the
air conditioning compressor on and off. When A/C
is pressed, an indicator light in the button will come on
to let you know that air conditioning is activated.
On hot days, open the windows to let hot inside air
escape; then close them. This helps to reduce the time
it takes for your vehicle to cool down. It also helps
the system to operate more efficiently.
For quick cool down on hot days, do the following:
1. Select the vent mode.
2. Select the highest fan speed.
3. Press the A/C button.
4. Select the recirculation mode.
5. Select the coolest temperature.
3-20
Page 128 of 340
Turn the knob clockwise to increase the desired
temperature by 1°F (0.5°C). Turn the knob
counterclockwise to decrease the desired temperature
by 1°F (0.5°C).
Do not cover the solar sensor located in the center of
the instrument panel, near the windshield. For more
information on the solar sensor, see “Sensors” later in
this section.
Manual Operation
w9x
(Fan):Press the up arrow to increase the
fan speed and the down arrow to decrease the fan
speed. AUTO mode is cancelled when this button is
pressed.
MODE:Press this button repeatedly to cycle through
and choose the mode of air delivery into the vehicle. The
system will stay in the selected mode until MODE is
pressed again or until the AUTO button is pressed.
Whenever MODE is pressed, the display will show the
current system settings for five seconds before
returning the display to the exterior temperature.
E(Vent):This mode directs air to the instrument
panel outlets.
((Bi-level):This mode directs about half of the air to
the instrument panel outlets, and then directs the
remaining air to the floor outlets.
5(Floor):This mode directs most of the air to the
floor outlets. If your vehicle has rear outlets, some of the
air will also be directed to them. Be sure to keep the
area under the front seats clear to allow the flow of air to
the rear compartment.
The mode button can also be used to select the defog
mode. Information on defogging and defrosting can
be found later in this section.
?(Recirculation):Press this button to keep outside
air from coming in the vehicle. It can be used to
prevent outside air and odors from entering your vehicle
or to help heat or cool the air inside your vehicle
more quickly. Press this button to turn the recirculation
mode on or off.
Using the recirculation mode for extended periods may
cause your windows to fog. If this happens, select
the defrost mode.
3-24
Page 177 of 340
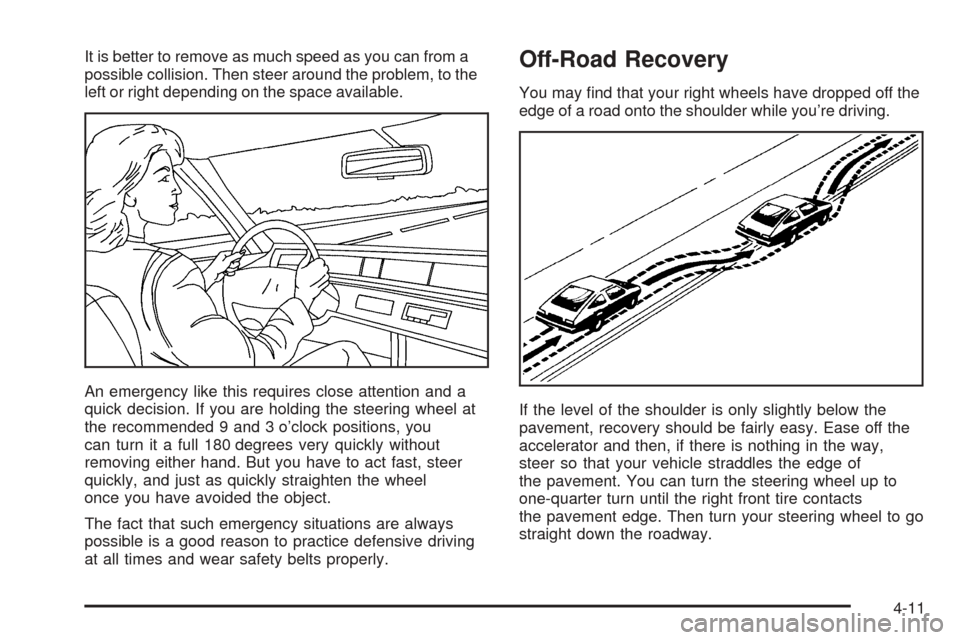
It is better to remove as much speed as you can from a
possible collision. Then steer around the problem, to the
left or right depending on the space available.
An emergency like this requires close attention and a
quick decision. If you are holding the steering wheel at
the recommended 9 and 3 o’clock positions, you
can turn it a full 180 degrees very quickly without
removing either hand. But you have to act fast, steer
quickly, and just as quickly straighten the wheel
once you have avoided the object.
The fact that such emergency situations are always
possible is a good reason to practice defensive driving
at all times and wear safety belts properly.Off-Road Recovery
You may find that your right wheels have dropped off the
edge of a road onto the shoulder while you’re driving.
If the level of the shoulder is only slightly below the
pavement, recovery should be fairly easy. Ease off the
accelerator and then, if there is nothing in the way,
steer so that your vehicle straddles the edge of
the pavement. You can turn the steering wheel up to
one-quarter turn until the right front tire contacts
the pavement edge. Then turn your steering wheel to go
straight down the roadway.
4-11
Page 211 of 340
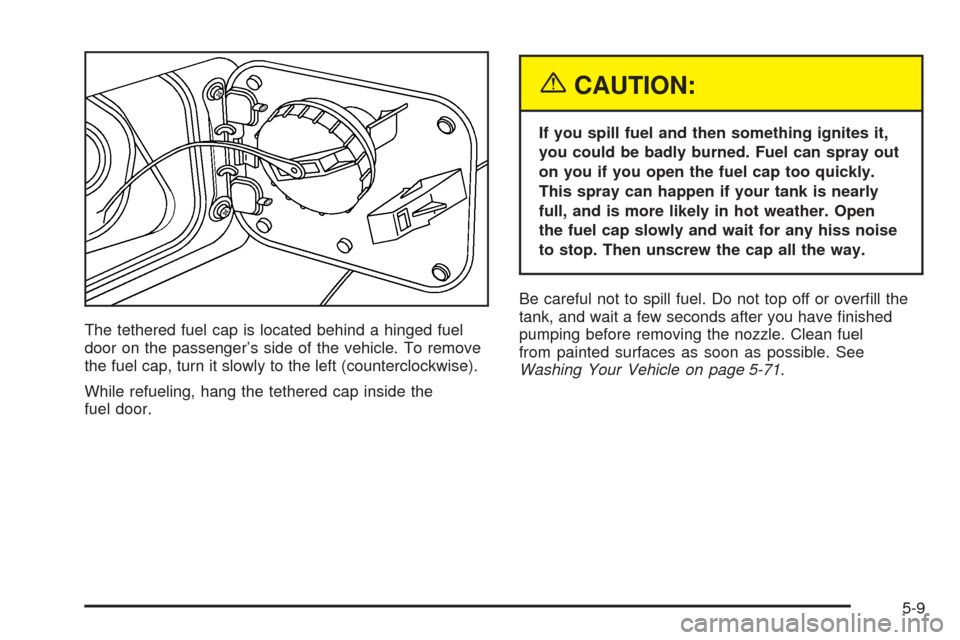
The tethered fuel cap is located behind a hinged fuel
door on the passenger’s side of the vehicle. To remove
the fuel cap, turn it slowly to the left (counterclockwise).
While refueling, hang the tethered cap inside the
fuel door.
{CAUTION:
If you spill fuel and then something ignites it,
you could be badly burned. Fuel can spray out
on you if you open the fuel cap too quickly.
This spray can happen if your tank is nearly
full, and is more likely in hot weather. Open
the fuel cap slowly and wait for any hiss noise
to stop. Then unscrew the cap all the way.
Be careful not to spill fuel. Do not top off or overfill the
tank, and wait a few seconds after you have finished
pumping before removing the nozzle. Clean fuel
from painted surfaces as soon as possible. See
Washing Your Vehicle on page 5-71.
5-9
Page 212 of 340
When replacing the fuel cap, turn it to the right
(clockwise) until it clicks. Make sure the cap is fully
installed. The diagnostic system can determine if the fuel
cap has been left off or improperly installed. This
would allow fuel to evaporate into the atmosphere. See
Malfunction Indicator Lamp on page 3-41.
{CAUTION:
If a �re starts while you are refueling, do not
remove the nozzle. Shut off the �ow of fuel by
shutting off the pump or by notifying the
station attendant. Leave the area immediately.
Notice:If you need a new fuel cap, be sure to get
the right type. Your dealer can get one for you.
If you get the wrong type, it may not �t properly.
This may cause your malfunction indicator lamp to
light and may damage your fuel tank and emissions
system. SeeMalfunction Indicator Lamp on
page 3-41.
Filling a Portable Fuel Container
{CAUTION:
Never �ll a portable fuel container while it is in
your vehicle. Static electricity discharge from
the container can ignite the gasoline vapor.
You can be badly burned and your vehicle
damaged if this occurs. To help avoid injury to
you and others:
Dispense gasoline only into approved
containers.
Do not �ll a container while it is inside a
vehicle, in a vehicle’s trunk, pickup bed or
on any surface other than the ground.
Bring the �ll nozzle in contact with the
inside of the �ll opening before operating
the nozzle. Contact should be maintained
until the �lling is complete.
Do not smoke while pumping gasoline.
5-10
Page 229 of 340
{CAUTION:
You can be burned if you spill coolant on hot
engine parts. Coolant contains ethylene glycol
and it will burn if the engine parts are hot
enough. Do not spill coolant on a hot engine.
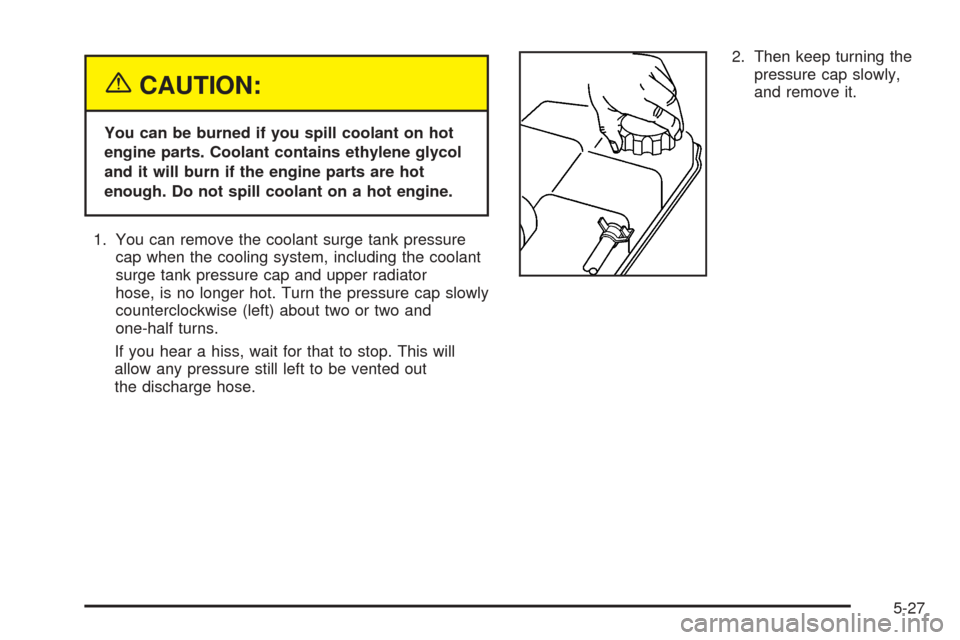
1. You can remove the coolant surge tank pressure
cap when the cooling system, including the coolant
surge tank pressure cap and upper radiator
hose, is no longer hot. Turn the pressure cap slowly
counterclockwise (left) about two or two and
one-half turns.
If you hear a hiss, wait for that to stop. This will
allow any pressure still left to be vented out
the discharge hose.2. Then keep turning the
pressure cap slowly,
and remove it.
5-27