remote start CHEVROLET EPICA 2005 1.G Owners Manual
[x] Cancel search | Manufacturer: CHEVROLET, Model Year: 2005, Model line: EPICA, Model: CHEVROLET EPICA 2005 1.GPages: 340, PDF Size: 2.19 MB
Page 71 of 340

Keys...............................................................2-2
Remote Keyless Entry System.........................2-4
Remote Keyless Entry System Operation...........2-5
Doors and Locks.............................................2-7
Door Locks....................................................2-7
Central Door Unlocking System........................2-8
Power Door Locks..........................................2-8
Door Ajar Reminder........................................2-9
Rear Door Security Locks................................2-9
Lockout Protection........................................2-10
Trunk..........................................................2-10
Windows........................................................2-12
Power Windows............................................2-13
Sun Visors...................................................2-13
Theft-Deterrent Systems..................................2-14
Theft-Deterrent System..................................2-14
Immobilizer..................................................2-15
Immobilizer Operation....................................2-16
Starting and Operating Your Vehicle................2-17
New Vehicle Break-In....................................2-17
Ignition Positions..........................................2-17Starting Your Engine.....................................2-18
Engine Coolant Heater..................................2-19
Automatic Transaxle Operation.......................2-20
Parking Brake..............................................2-24
Shifting Into Park (P).....................................2-25
Shifting Out of Park (P).................................2-26
Parking Over Things That Burn.......................2-27
Engine Exhaust............................................2-27
Running Your Engine While You Are Parked. . . .2-28
Mirrors...........................................................2-29
Manual Rearview Mirror.................................2-29
Automatic Dimming Rearview Mirror................2-29
Outside Power Mirrors...................................2-30
Outside Convex Mirror...................................2-31
Outside Heated Mirrors..................................2-32
Storage Areas................................................2-32
Glove Box...................................................2-32
Cupholder(s)................................................2-32
Coinholder(s)................................................2-32
Sunglasses Storage Compartment...................2-33
Center Console Storage Area.........................2-33
Rear Seat Armrest........................................2-33
Sunroof.........................................................2-34
Section 2 Features and Controls
2-1
Page 75 of 340

Remote Keyless Entry System
Operation
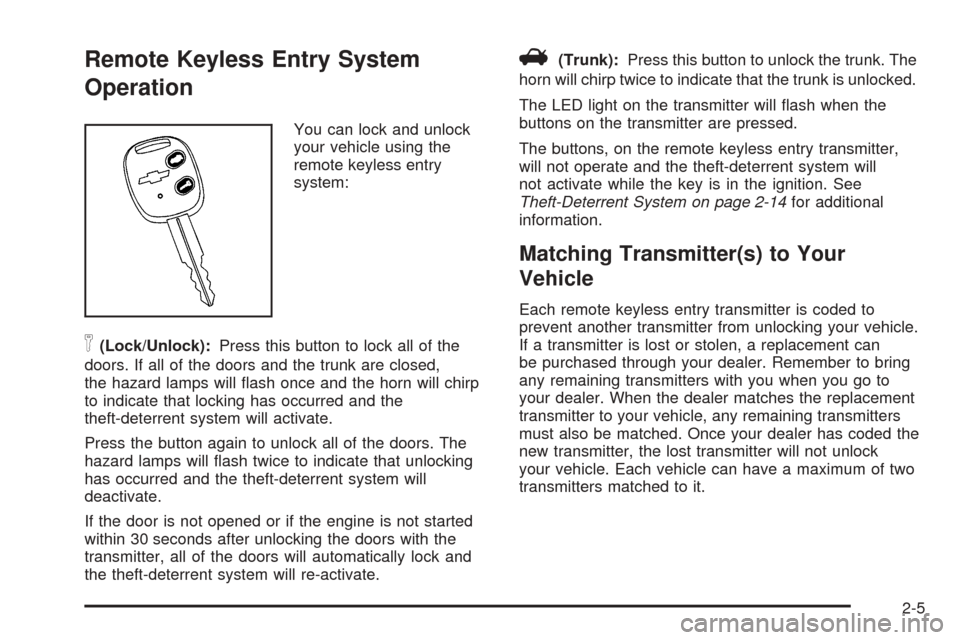
You can lock and unlock
your vehicle using the
remote keyless entry
system:
n(Lock/Unlock):Press this button to lock all of the
doors. If all of the doors and the trunk are closed,
the hazard lamps will flash once and the horn will chirp
to indicate that locking has occurred and the
theft-deterrent system will activate.
Press the button again to unlock all of the doors. The
hazard lamps will flash twice to indicate that unlocking
has occurred and the theft-deterrent system will
deactivate.
If the door is not opened or if the engine is not started
within 30 seconds after unlocking the doors with the
transmitter, all of the doors will automatically lock and
the theft-deterrent system will re-activate.
V(Trunk):Press this button to unlock the trunk. The
horn will chirp twice to indicate that the trunk is unlocked.
The LED light on the transmitter will flash when the
buttons on the transmitter are pressed.
The buttons, on the remote keyless entry transmitter,
will not operate and the theft-deterrent system will
not activate while the key is in the ignition. See
Theft-Deterrent System on page 2-14for additional
information.
Matching Transmitter(s) to Your
Vehicle
Each remote keyless entry transmitter is coded to
prevent another transmitter from unlocking your vehicle.
If a transmitter is lost or stolen, a replacement can
be purchased through your dealer. Remember to bring
any remaining transmitters with you when you go to
your dealer. When the dealer matches the replacement
transmitter to your vehicle, any remaining transmitters
must also be matched. Once your dealer has coded the
new transmitter, the lost transmitter will not unlock
your vehicle. Each vehicle can have a maximum of two
transmitters matched to it.
2-5
Page 85 of 340

Disarming the System
To disarm the system, do one of the following:
•Unlock the driver’s or passenger’s front door using
the key.
•Press the lock/unlock button on the transmitter.
- The LED light on the transmitter will flash.
- All of the doors will unlock.
- The hazard warning lamps will flash twice.
- The theft-deterrent mode will disarm.
If the door is not opened or if the engine is not started
within 30 seconds after disarming the system with
the transmitter, all of the doors will automatically lock
and the theft-deterrent mode will re-arm.
How the System Alarm is Activated
If a door or the trunk is opened without using the key or
the remote keyless entry transmitter, the horn will
sound and the lamps will flash for up to 30 seconds.
How to Turn Off the System Alarm
If the system alarm is active, it can be deactivated using
one of the following methods:
•Press the lock/unlock button on the remote keyless
entry transmitter.
•Unlock the driver’s or passenger’s front door using
the key.Otherwise, the alarm will automatically stop after
30 seconds. The system will then lock the doors and
reactivate the theft-deterrent system.
How to Detect a Tamper Condition
If the hazard lamps flash once when the lock/unlock
button on the remote keyless entry transmitter is
pressed, the theft-deterrent system alarm was activated
while you were away.
Immobilizer
This device complies with Part 15 of the FCC Rules.
Operation is subject to the following two conditions:
1. This device may not cause interference.
2. This device must accept any interference received,
including interference that may cause undesired
operation.
This device complies with RSS-210 of Industry Canada.
Operation is subject to the following two conditions:
1. This device may not cause interference.
2. This device must accept any interference received,
including interference that may cause undesired
operation of the device.
Changes or modifications to this system by other than
an authorized service facility could void authorization to
use this equipment.
2-15
Page 239 of 340

{CAUTION:
Fans or other moving engine parts can injure
you badly. Keep your hands away from moving
parts once the engine is running.
5. Check that the jumper cables do not have loose or
missing insulation. If they do, you could get a
shock. The vehicles could be damaged too.
Before you connect the cables, here are some
basic things you should know. Positive (+) will go to
positive (+) or to a remote positive (+) terminal if
the vehicle has one. Negative (−) will go to a heavy,
unpainted metal engine part or to a remote
negative (−) terminal if the vehicle has one.
Do not connect positive (+) to negative (−)oryou
will get a short that would damage the battery
and maybe other parts too. And do not connect the
negative (−) cable to the negative (−) terminal on
the dead battery because this can cause sparks.
6. Connect the red positive (+) cable to the positive (+)
terminal of the dead battery. Use a remote
positive (+) terminal if the vehicle has one.
7. Do not let the other end touch metal. Connect it to
the positive (+) terminal of the good battery. Use a
remote positive (+) terminal if the vehicle has one.8. Now connect the black negative (−) cable to the
negative (−) terminal of the good battery. Use a
remote negative (−) terminal if the vehicle has one.
Do not let the other end touch anything until the
next step. The other end of the negative (−) cable
does notgo to the dead battery. It goes to a
heavy, unpainted metal engine part or to a remote
negative (−) terminal on the vehicle with the
dead battery.
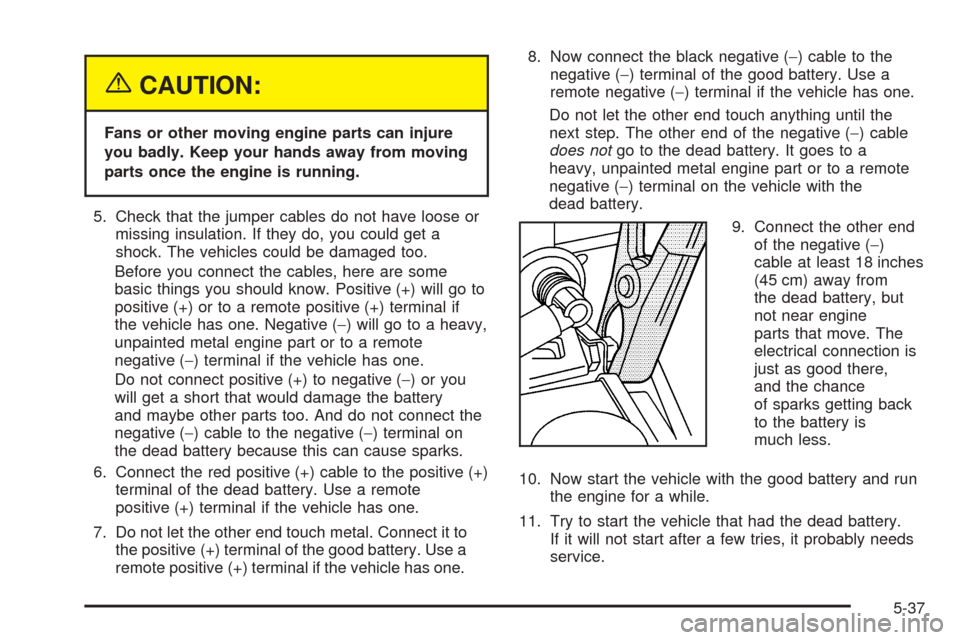
9. Connect the other end
of the negative (−)
cable at least 18 inches
(45 cm) away from
the dead battery, but
not near engine
parts that move. The
electrical connection is
just as good there,
and the chance
of sparks getting back
to the battery is
much less.
10. Now start the vehicle with the good battery and run
the engine for a while.
11. Try to start the vehicle that had the dead battery.
If it will not start after a few tries, it probably needs
service.
5-37