lock CHEVROLET EQUINOX 2006 1.G Owners Manual
[x] Cancel search | Manufacturer: CHEVROLET, Model Year: 2006, Model line: EQUINOX, Model: CHEVROLET EQUINOX 2006 1.GPages: 382, PDF Size: 2.32 MB
Page 1 of 382
Seats and Restraint Systems........................... 1-1
Front Seats
............................................... 1-2
Rear Seats
..............................................1-10
Safety Belts
.............................................1-12
Child Restraints
.......................................1-30
Airbag System
.........................................1-55
Restraint System Check
............................1-66
Features and Controls..................................... 2-1
Keys
........................................................ 2-2
Doors and Locks
....................................... 2-6
Windows
.................................................2-11
Theft-Deterrent Systems
............................2-13
Starting and Operating Your Vehicle
...........2-15
Mirrors
....................................................2-27
OnStar
®System
......................................2-32
Storage Areas
.........................................2-34
Sunroof
..................................................2-41
Instrument Panel............................................. 3-1
Instrument Panel Overview
.......................... 3-4
Climate Controls
......................................3-18
Warning Lights, Gages, and Indicators
........3-23
Audio System(s)
.......................................3-38Driving Your Vehicle....................................... 4-1
Your Driving, the Road, and Your Vehicle
..... 4-2
Towing
...................................................4-36
Service and Appearance Care.......................... 5-1
Service
..................................................... 5-3
Fuel
......................................................... 5-5
Checking Things Under the Hood
...............5-10
All-Wheel Drive
........................................5-39
Bulb Replacement
....................................5-41
Windshield Wiper Blade Replacement
.........5-45
Tires
......................................................5-47
Appearance Care
.....................................5-74
Vehicle Identi�cation
.................................5-83
Electrical System
......................................5-84
Capacities and Speci�cations
.....................5-89
Maintenance Schedule..................................... 6-1
Maintenance Schedule
................................ 6-2
Customer Assistance and Information.............. 7-1
Customer Assistance and Information
........... 7-2
Reporting Safety Defects
...........................7-13
Index................................................................ 1
2006 Chevrolet Equinox Owner ManualM
Page 8 of 382
Front Seats
Manual Seats
{CAUTION:
You can lose control of the vehicle if you try to
adjust a manual driver’s seat while the vehicle
is moving. The sudden movement could startle
and confuse you, or make you push a pedal
when you do not want to. Adjust the driver’s
seat only when the vehicle is not moving.
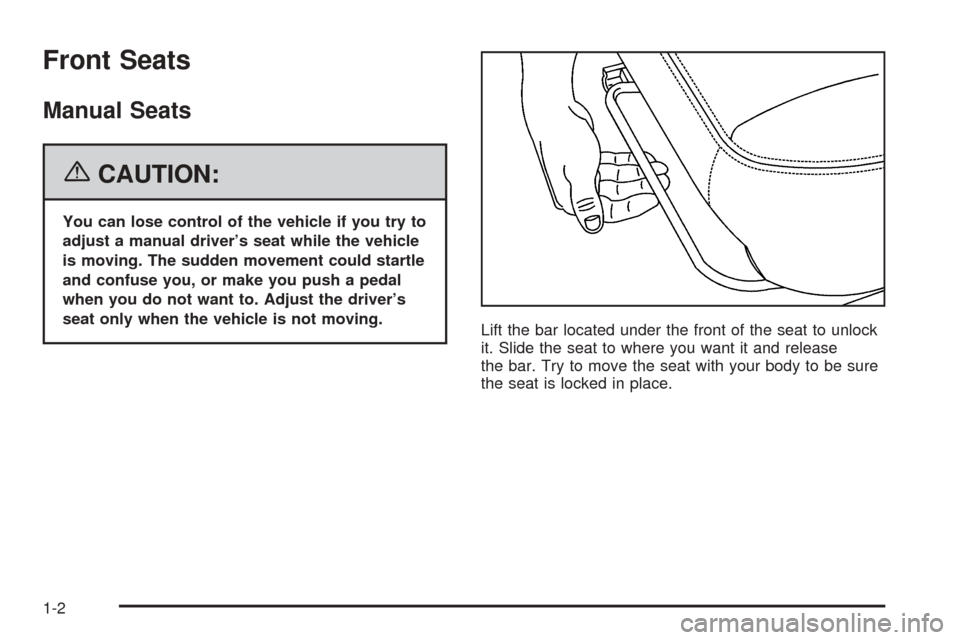
Lift the bar located under the front of the seat to unlock
it. Slide the seat to where you want it and release
the bar. Try to move the seat with your body to be sure
the seat is locked in place.
1-2
Page 10 of 382
Manual Lumbar
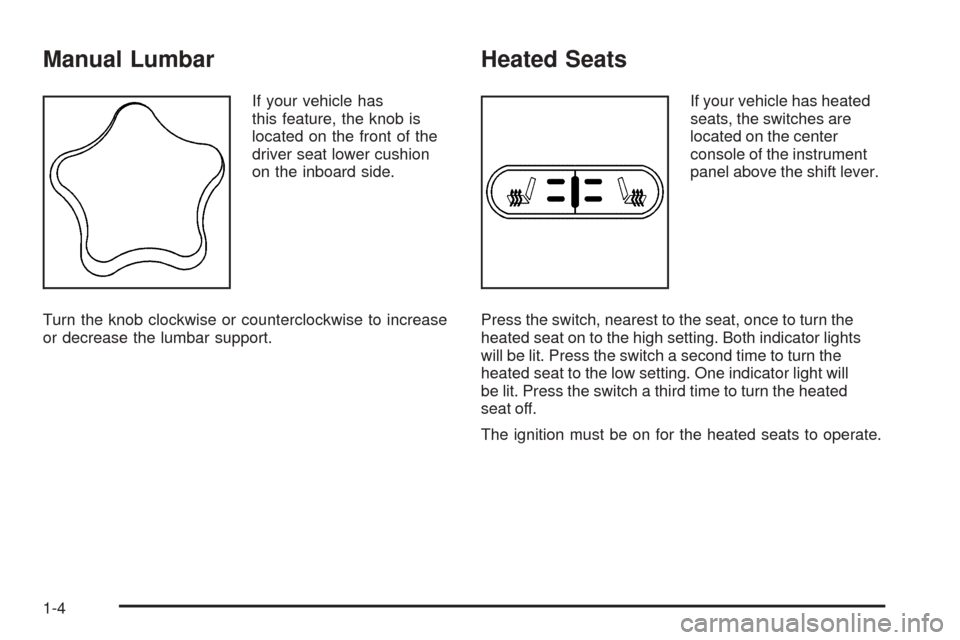
If your vehicle has
this feature, the knob is
located on the front of the
driver seat lower cushion
on the inboard side.
Turn the knob clockwise or counterclockwise to increase
or decrease the lumbar support.
Heated Seats
If your vehicle has heated
seats, the switches are
located on the center
console of the instrument
panel above the shift lever.
Press the switch, nearest to the seat, once to turn the
heated seat on to the high setting. Both indicator lights
will be lit. Press the switch a second time to turn the
heated seat to the low setting. One indicator light will
be lit. Press the switch a third time to turn the heated
seat off.
The ignition must be on for the heated seats to operate.
1-4
Page 11 of 382
Reclining Seatbacks
{CAUTION:
If the seatback is not locked, it could move
forward in a sudden stop or crash. That could
cause injury to the person sitting there. Always
push and pull on the seatback to be sure it
is locked.
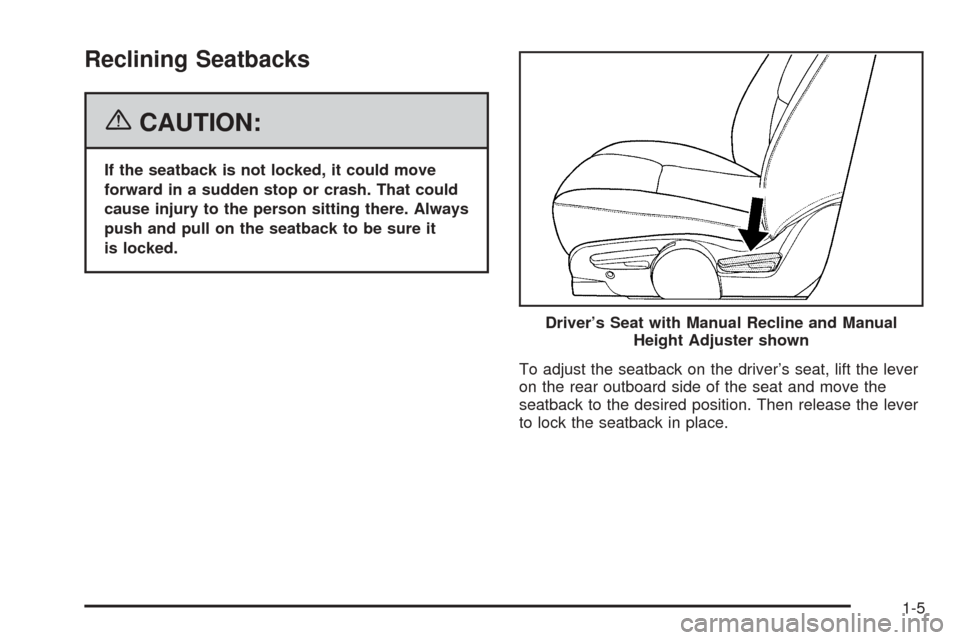
To adjust the seatback on the driver’s seat, lift the lever
on the rear outboard side of the seat and move the
seatback to the desired position. Then release the lever
to lock the seatback in place.Driver’s Seat with Manual Recline and Manual
Height Adjuster shown
1-5
Page 12 of 382
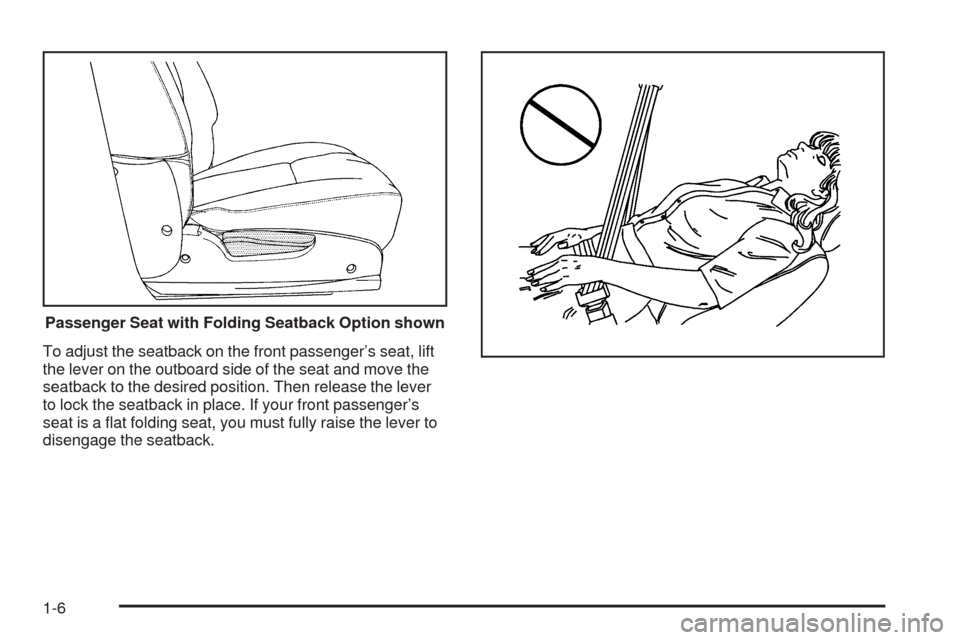
To adjust the seatback on the front passenger’s seat, lift
the lever on the outboard side of the seat and move the
seatback to the desired position. Then release the lever
to lock the seatback in place. If your front passenger’s
seat is a �at folding seat, you must fully raise the lever to
disengage the seatback.Passenger Seat with Folding Seatback Option shown
1-6
Page 15 of 382
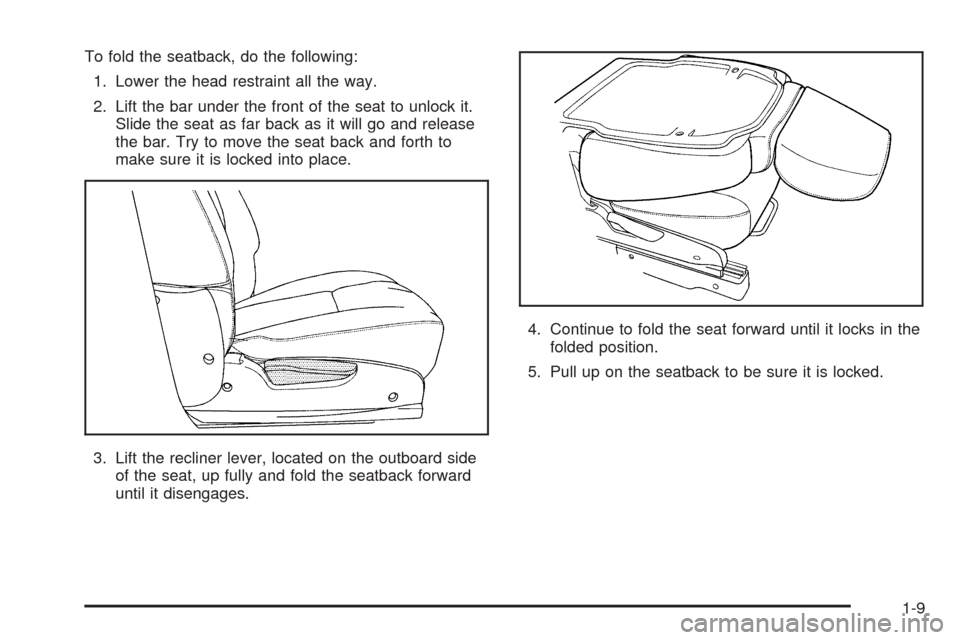
To fold the seatback, do the following:
1. Lower the head restraint all the way.
2. Lift the bar under the front of the seat to unlock it.
Slide the seat as far back as it will go and release
the bar. Try to move the seat back and forth to
make sure it is locked into place.
3. Lift the recliner lever, located on the outboard side
of the seat, up fully and fold the seatback forward
until it disengages.4. Continue to fold the seat forward until it locks in the
folded position.
5. Pull up on the seatback to be sure it is locked.
1-9
Page 16 of 382
To raise the seatback, do the following:
1. Lift the recliner lever, located on the outboard side
of the seat, up fully and push up on the seatback.
2. Continue raising the seatback until the seatback
re-engages.
{CAUTION:
If the seatback is not locked, it could move
forward in a sudden stop or crash. That could
cause injury to the person sitting there. Always
push and pull on the seatback to be sure it
is locked.
3. Push and pull on the seatback to make sure it is
locked in place.
The recliner lever is also used to recline the seatback
while a passenger is seated. SeeReclining Seatbacks
on page 1-5.
Rear Seats
Split Folding Rear Seat
The rear split bench seatbacks have three available
positions — folded forward, upright, or partially reclined.
Both of the seatbacks can be moved to any of the
three positions independent of the other seatback
position. The rear bench seat can also be moved
forward and rearward.
{CAUTION:
If the seatback is not locked, it could move
forward in a sudden stop or crash. That could
cause injury to the person sitting there. Always
push and pull on the seatback to be sure it
is locked.
1-10
Page 18 of 382
To recline the seatback, do the following:
1. Lift and hold the lever located on top of the
seatback.
2. Tilt the seatback rearward, then release the lever
when the seatback is in the desired position.
To slide the entire seat forward or rearward, do the
following:
1. Lift and hold the release bar located under the front
of the seat cushion to unlock the seat.
2. Slide the seat to the desired position.
3. Release the bar.
4. Try to move the seat back and forth to ensure the
seat is locked in place.Safety Belts
Safety Belts: They Are for Everyone
This part of the manual tells you how to use safety
belts properly. It also tells you some things you should
not do with safety belts.
{CAUTION:
Do not let anyone ride where he or she cannot
wear a safety belt properly. If you are in a
crash and you are not wearing a safety belt,
your injuries can be much worse. You can hit
things inside the vehicle or be ejected from it.
You can be seriously injured or killed. In the
same crash, you might not be, if you are
buckled up. Always fasten your safety belt,
and check that your passengers’ belts are
fastened properly too.
1-12
Page 24 of 382
How to Wear Safety Belts Properly
This part is only for people of adult size.
Be aware that there are special things to know about
safety belts and children. And there are different rules for
smaller children and babies. If a child will be riding in your
vehicle, seeOlder Children on page 1-30orInfants and
Young Children on page 1-33. Follow those rules for
everyone’s protection.
First, you will want to know which restraint systems your
vehicle has.
We will start with the driver position.
Driver Position
Lap-Shoulder Belt
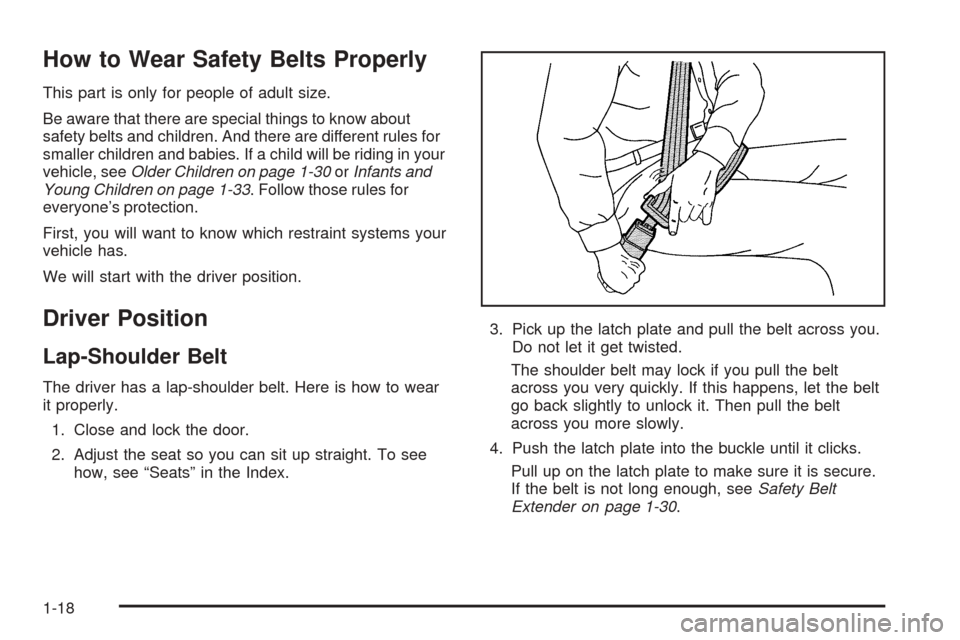
The driver has a lap-shoulder belt. Here is how to wear
it properly.
1. Close and lock the door.
2. Adjust the seat so you can sit up straight. To see
how, see “Seats” in the Index.3. Pick up the latch plate and pull the belt across you.
Do not let it get twisted.
The shoulder belt may lock if you pull the belt
across you very quickly. If this happens, let the belt
go back slightly to unlock it. Then pull the belt
across you more slowly.
4. Push the latch plate into the buckle until it clicks.
Pull up on the latch plate to make sure it is secure.
If the belt is not long enough, seeSafety Belt
Extender on page 1-30.
1-18
Page 25 of 382
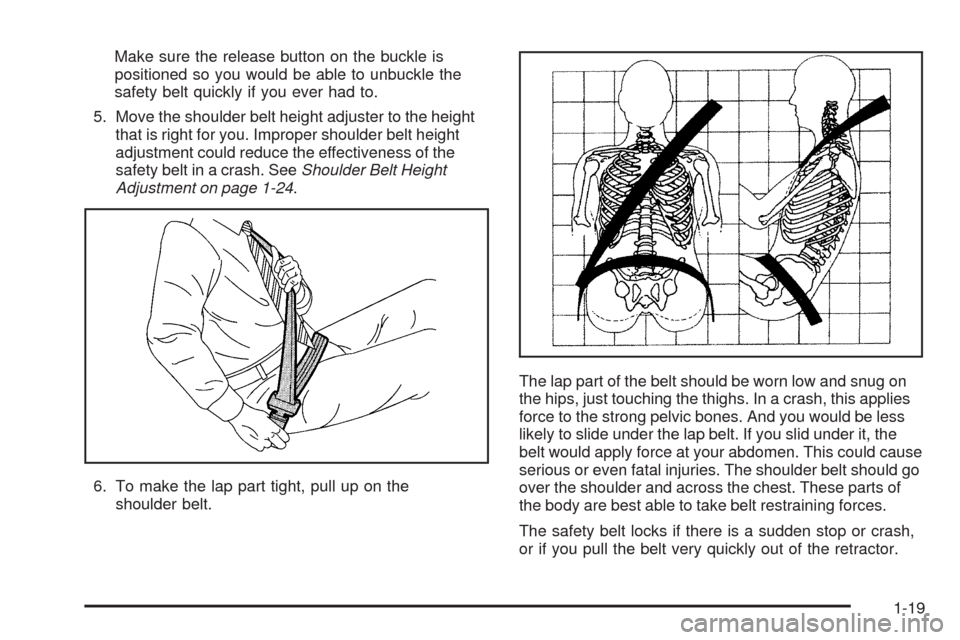
Make sure the release button on the buckle is
positioned so you would be able to unbuckle the
safety belt quickly if you ever had to.
5. Move the shoulder belt height adjuster to the height
that is right for you. Improper shoulder belt height
adjustment could reduce the effectiveness of the
safety belt in a crash. SeeShoulder Belt Height
Adjustment on page 1-24.
6. To make the lap part tight, pull up on the
shoulder belt.The lap part of the belt should be worn low and snug on
the hips, just touching the thighs. In a crash, this applies
force to the strong pelvic bones. And you would be less
likely to slide under the lap belt. If you slid under it, the
belt would apply force at your abdomen. This could cause
serious or even fatal injuries. The shoulder belt should go
over the shoulder and across the chest. These parts of
the body are best able to take belt restraining forces.
The safety belt locks if there is a sudden stop or crash,
or if you pull the belt very quickly out of the retractor.
1-19