air condition CHEVROLET EQUINOX 2007 1.G Owners Manual
[x] Cancel search | Manufacturer: CHEVROLET, Model Year: 2007, Model line: EQUINOX, Model: CHEVROLET EQUINOX 2007 1.GPages: 492, PDF Size: 2.62 MB
Page 82 of 492
Passenger Sensing System
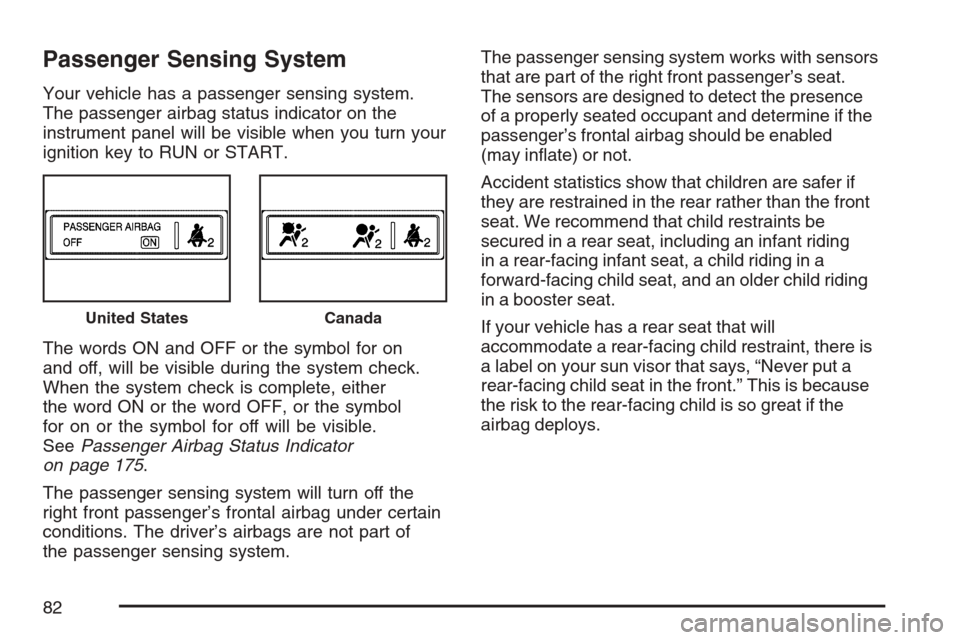
Your vehicle has a passenger sensing system.
The passenger airbag status indicator on the
instrument panel will be visible when you turn your
ignition key to RUN or START.
The words ON and OFF or the symbol for on
and off, will be visible during the system check.
When the system check is complete, either
the word ON or the word OFF, or the symbol
for on or the symbol for off will be visible.
SeePassenger Airbag Status Indicator
on page 175.
The passenger sensing system will turn off the
right front passenger’s frontal airbag under certain
conditions. The driver’s airbags are not part of
the passenger sensing system.The passenger sensing system works with sensors
that are part of the right front passenger’s seat.
The sensors are designed to detect the presence
of a properly seated occupant and determine if the
passenger’s frontal airbag should be enabled
(may in�ate) or not.
Accident statistics show that children are safer if
they are restrained in the rear rather than the front
seat. We recommend that child restraints be
secured in a rear seat, including an infant riding
in a rear-facing infant seat, a child riding in a
forward-facing child seat, and an older child riding
in a booster seat.
If your vehicle has a rear seat that will
accommodate a rear-facing child restraint, there is
a label on your sun visor that says, “Never put a
rear-facing child seat in the front.” This is because
the risk to the rear-facing child is so great if the
airbag deploys.
United StatesCanada
82
Page 121 of 492
Notice:Shifting out of PARK (P) or
NEUTRAL (N) while the engine is running at
high speed may damage the transaxle.
The repairs would not be covered by your
warranty. Be sure the engine is not running
at high speeds when shifting your vehicle.
Notice:Shifting to a drive gear from
NEUTRAL (N) while the vehicle is moving
could damage the transaxle. Make sure
the vehicle is stopped before shifting from
NEUTRAL (N) into a drive gear.
DRIVE (D):This position is for normal driving with
the automatic transaxle. It provides the best fuel
economy for your vehicle. If you need more power
for passing, and you are:
Going less than about 35 mph (55 km/h), push
your accelerator pedal about halfway down.
Going about 35 mph (55 km/h), push
your accelerator all the way down.
Downshifting the transaxle in slippery road
conditions could result in skidding, see “Skidding”
underLoss of Control on page 299.INTERMEDIATE (I):This position is also used
for normal driving. However, it reduces vehicle
speed without using your brakes for slight
downgrades where the vehicle would otherwise
accelerate due to steepness of grade. If constant
upshifting or downshifting occurs while driving
up steep hills, this position can be used to prevent
repetitive types of shifts. You might choose
INTERMEDIATE (I) instead of DRIVE (D) when
driving on hilly, winding roads and when towing
a trailer, so that there is less shifting between
gears.
LOW (L):This position reduces vehicle speed
more than INTERMEDIATE (I) without actually
using your brakes. You can use it on very steep
hills, or in deep snow or mud. If the shift lever
is put in LOW (L), the transaxle will not shift into
LOW (L) until the vehicle is going slowly enough.
Notice:Spinning the tires or holding the
vehicle in one place on a hill using only the
accelerator pedal may damage the transaxle.
If you are stuck, do not spin the tires. When
stopping on a hill, use the brakes to hold
the vehicle in place.
121
Page 133 of 492
OnStar®System
OnStar®uses several innovative technologies and
live advisors to provide you with a wide range
of safety, security, information, and convenience
services. If your airbags deploy, the system is
designed to make an automatic call to OnStar
®
Emergency advisors who can request emergency
services be sent to your location. If you lock
your keys in the vehicle, call OnStar
®at
1-888-4-ONSTAR and they can send a signal to
unlock your doors. If you need roadside
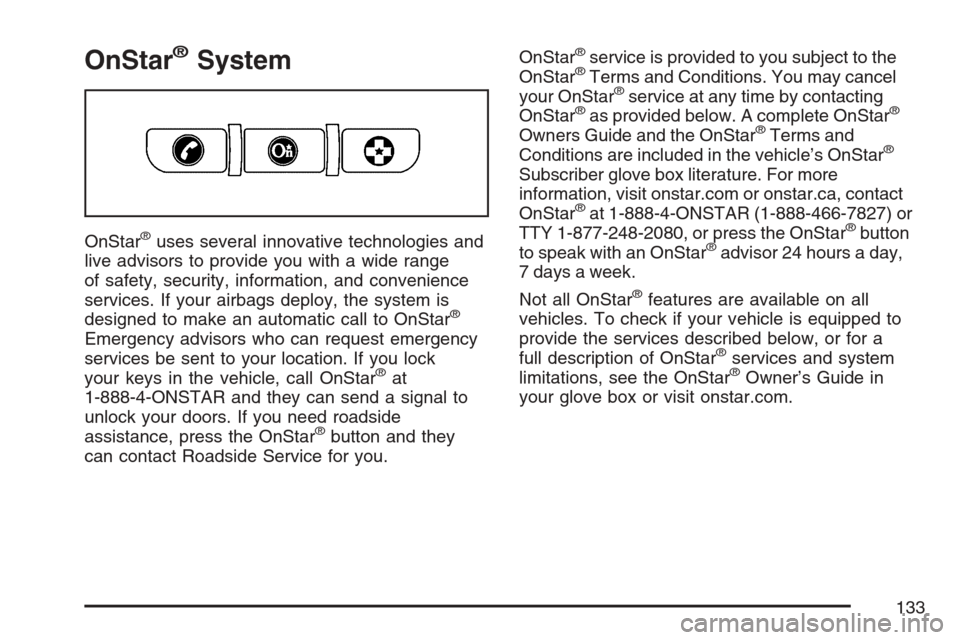
assistance, press the OnStar
®button and they
can contact Roadside Service for you.OnStar
®service is provided to you subject to the
OnStar®Terms and Conditions. You may cancel
your OnStar®service at any time by contacting
OnStar®as provided below. A complete OnStar®
Owners Guide and the OnStar®Terms and
Conditions are included in the vehicle’s OnStar®
Subscriber glove box literature. For more
information, visit onstar.com or onstar.ca, contact
OnStar
®at 1-888-4-ONSTAR (1-888-466-7827) or
TTY 1-877-248-2080, or press the OnStar®button
to speak with an OnStar®advisor 24 hours a day,
7 days a week.
Not all OnStar
®features are available on all
vehicles. To check if your vehicle is equipped to
provide the services described below, or for a
full description of OnStar
®services and system
limitations, see the OnStar®Owner’s Guide in
your glove box or visit onstar.com.
133
Page 167 of 492
#(Air Conditioning):Press this button to turn
the air conditioning system on or off. When
this button is pressed, an indicator light on the
button will come on to let you know the air
conditioning is activated. The air conditioning can
be selected in any mode as long as the fan
switch is on.
On hot days, open the windows to let hot inside
air escape; then close them. This helps to reduce
the time it takes for the vehicle to cool down. It
also helps the system to operate more efficiently.
For quick cool down on hot days, do the
following:
1. Select the vent mode.
2. Select the outside air.
3. Select air conditioning.
4. Select the coolest temperature.
5. Select the highest fan speed.
6. Once the vehicle’s interior temperature is
below the outside temperature, select
recirculation mode for enhanced cooling.Using these settings together for long periods
of time may cause the air inside of the vehicle to
become too dry. To prevent this from happening,
after the air inside of the vehicle has cooled,
turn the recirculation mode off.
The air conditioning system removes moisture
from the air, so you may sometimes notice a small
amount of water dripping underneath the vehicle
while idling or after turning off the engine. This
is normal.
((Heated Seats):If your vehicle has heated
seats, seeHeated Seats on page 10.
167
Page 168 of 492
Defogging and Defrosting
Fog or frost on the inside of windows is a result of
high humidity (moisture) condensing on the cool
window glass. This can be minimized if the climate
control system is used properly. To avoid fogging
windows on rainy and humid days at temperatures
above freezing, turn on the air conditioning
system. Also, it is best to avoid the use of the
recirculation mode, except when maximum
A/C performance is needed or for short times to
avoid exterior odors.
Use the defog mode to clear the windows of fog or
moisture and warm the passengers. Use the defrost
mode to remove fog or frost from the windshield
more quickly. When you select either of these
modes, or the �oor mode which also helps defog
the windows slightly, the system runs the air
conditioning compressor and cancels recirculation
mode to dry the air; however, the recirculation light
will stay on. For best results, clear all snow and ice
from the windshield before defrosting.Turn the right knob to select the defog or
defrost mode.-(Defog):This mode directs half of the air to
the windshield and the side window outlets,
and half to the �oor outlets.
0(Defrost):This mode directs most of the air to
the windshield and the side window outlets, with
some air directed to the �oor outlets.
Rear Window Defogger
The rear window defogger uses a warming grid to
remove fog from the rear window.
The rear window defogger will only work when the
ignition is in RUN.
<(Rear):Press this button to turn the rear
window defogger on or off. An indicator light on
the button will come on to let you know that
the rear window defogger is activated.
The rear window defogger will only work when
the ignition is in RUN. The rear window defogger
will stay on for about 10 minutes after the
button is pressed, unless the ignition is turned to
168
Page 184 of 492
This light should come on, as a check to show
you it is working, when the ignition is on and the
engine is not running. If the light does not
come on, have it repaired. This light will also
come on during a malfunction in one of two ways:
Light Flashing— A mis�re condition has
been detected. A mis�re increases vehicle
emissions and may damage the emission
control system on your vehicle. Diagnosis
and service may be required.
Light On Steady— An emission control
system malfunction has been detected on
your vehicle. Diagnosis and service may
be required.
If the Light is Flashing
The following may prevent more serious damage
to your vehicle:
Reducing vehicle speed
Avoiding hard accelerations
Avoiding steep uphill grades
If you are towing a trailer, reduce the
amount of cargo being hauled as soon
as it is possible
If the light stops �ashing and remains on steady,
see “If the Light Is On Steady” following.
If the light continues to �ash, when it is safe to
do so, stop the vehicle. Find a safe place to park
your vehicle. Turn the key off, wait at least
10 seconds and restart the engine. If the light
remains on steady, see “If the Light Is On Steady”
following. If the light is still �ashing, follow the
previous steps, and see your dealer for service
as soon as possible.
184
Page 189 of 492
This light, along with the service vehicle soon
light, will be displayed when a noticeable reduction
in the vehicle’s performance may occur. Stop
the vehicle and turn off the ignition. Wait for
10 seconds and restart your vehicle. This may
correct the condition. SeeService Vehicle
Soon Light on page 191for more information.
The vehicle may be driven at a reduced speed
when the reduced engine power light is on,
but acceleration and speed may be reduced.
The performance may be reduced until the next
time you drive your vehicle. If this light stays
on, see your dealer as soon as possible for
diagnosis and repair.
Highbeam On Light
This light comes on
when the high-beam
headlamps are in use.
SeeHeadlamp High/Low-Beam Changer
on page 152.
Service All-Wheel Drive Light
This light is located in
the center of your
instrument panel cluster.
This light and the SERVICE ALL WHEEL DRIVE
message in the Driver Information Center (DIC)
will come on and stay on to indicate that there may
be a problem with the drive system and service
is required. SeeAll-Wheel Drive (AWD) System
on page 293andDIC Warnings and Messages
on page 198for more information.
189
Page 194 of 492
TRIP
Press the trip/fuel button until TRIP displays. This
display shows the current distance traveled in
either miles (mi) or kilometers (km) since the last
reset for each trip odometer. Both trip odometers
can be used at the same time. This display
will also show the outside air temperature in either
degrees Fahrenheit (°F) or degrees Celsius (°C).
Each trip odometer can be reset to zero separately
by pressing the set/reset button while the desired
trip odometer is displayed.
AVERAGE SPEED
Press the trip/fuel button until AVERAGE SPEED
displays. This display shows the average speed
of the vehicle in miles per hour (mph) or kilometers
per hour (km/h). This average is calculated
based on the various vehicle speeds recorded
since the last reset of this value. To reset
the value, press and hold the set/reset button.
The display will return to zero.
AVG (Average) ECONOMY
Press the trip/fuel button until AVG ECONOMY
displays. This display shows the approximate
average miles per gallon (mpg) or liters per
100 kilometers (L/100 km). This number is
calculated based on the number of mpg (L/100 km)
recorded since the last time this menu item was
reset. To reset this display, press and hold the
set/reset button. The display will return to zero.
RANGE
Press the trip/fuel button until RANGE displays.
This display shows the approximate number
of remaining miles (mi) or kilometers (km) the
vehicle can be driven without refueling.
The fuel range estimate is based on an average of
the vehicle’s fuel economy over recent driving
history and the amount of fuel remaining in the fuel
tank. This estimate will change if driving conditions
change. For example, if driving in traffic and making
frequent stops, this display may read one number,
but if the vehicle is driven on a freeway, the number
may change even though the same amount of fuel
is in the fuel tank.
194
Page 200 of 492
CHECK TIRE PRESSURE
This message displays when the tire pressure
in one of the tires needs to be checked. This
message also displays LEFT FRONT, RIGHT
FRONT, LEFT REAR, or RIGHT REAR to indicate
which tire needs to be checked. You can receive
more than one tire pressure message at a time.
To read the other messages that may have
been sent at the same time, press the set/reset
button. If a tire pressure message appears on
the DIC, stop as soon as you can. Have the tire
pressures checked and set to those shown on
the Tire Loading Information label. SeeTires on
page 382,Loading Your Vehicle on page 315, and
In�ation - Tire Pressure on page 390. The DIC
display also shows the tire pressure values for
the front and rear tires by pressing the vehicle
information button. SeeDIC Operation and
Displays on page 193. If the tire pressure is low,
the low tire pressure warning light comes on.
SeeTire Pressure Light on page 182.
DRIVER DOOR OPEN
This message displays when the driver’s door is
not closed properly. When this message appears,
make sure that the driver’s door is closed
completely.
ENGINE HOT A/C
(Air Conditioning) OFF
This message displays when the engine coolant
becomes hotter than the normal operating
temperature. To avoid added strain on a hot
engine, the air conditioning compressor is
automatically turned off. When the coolant
temperature returns to normal, the A/C operation
automatically resumes. You can continue to
drive your vehicle.
200
Page 202 of 492
HOOD OPEN
This message displays on some vehicles when
the hood is not closed properly. When this
message appears, make sure that the hood
is closed completely. SeeHood Release
on page 340.
ICE POSSIBLE DRIVE WITH CARE
This message displays when the outside air
temperature is cold enough to create icy road
conditions. Adjust your driving accordingly.
LIFTGATE OPEN
This message displays when the liftgate is not
closed completely. Make sure that the liftgate is
closed completely. SeeLiftgate on page 107.
OIL PRSSURE (Pressure) LOW STOP
ENGINE
Notice:If you drive your vehicle while the
engine oil pressure is low, severe engine
damage may occur. If a low oil pressure
warning appears on the Driver Information
Center (DIC), stop the vehicle as soon as
possible. Do not drive the vehicle until the
cause of the low oil pressure is corrected. See
Engine Oil on page 344for more information.
This message displays when the vehicle’s
engine oil pressure is low. The oil pressure light
also appears on the instrument panel cluster.
SeeOil Pressure Light on page 186.
Stop the vehicle immediately, as engine damage
can result from driving a vehicle with low oil
pressure. Have the vehicle serviced by your dealer
as soon as possible when this message is
displayed.
202