automatic CHEVROLET EQUINOX 2008 1.G User Guide
[x] Cancel search | Manufacturer: CHEVROLET, Model Year: 2008, Model line: EQUINOX, Model: CHEVROLET EQUINOX 2008 1.GPages: 436, PDF Size: 2.42 MB
Page 104 of 436
DRIVE (D):This position is for normal driving with
the automatic transmission. It provides the best
fuel economy for your vehicle. If you need more
power for passing, and you are:
Going less than about 35 mph (55 km/h),
push your accelerator pedal about halfway down.
Going about 35 mph (55 km/h), push your
accelerator all the way down.
Downshifting the transmission in slippery road conditions
could result in skidding, see “Skidding” underLoss of
Control on page 4-13.
INTERMEDIATE (I):This position is also used for
normal driving. However, it reduces vehicle speed without
using your brakes for slight downgrades where the
vehicle would otherwise accelerate due to steepness
of grade. If constant upshifting or downshifting occurs
while driving up steep hills, this position can be used to
prevent repetitive types of shifts. You might choose
INTERMEDIATE (I) instead of DRIVE (D) when driving
on hilly, winding roads and when towing a trailer, so that
there is less shifting between gears.
LOW (L):This position reduces vehicle speed more
than INTERMEDIATE (I) without actually using
your brakes. You can use it on very steep hills, or in
deep snow or mud. If the shift lever is put in LOW (L),
the transmission will not shift into LOW (L) until the
vehicle is going slowly enough.Notice:Spinning the tires or holding the vehicle
in one place on a hill using only the accelerator
pedal may damage the transmission. The repair will
not be covered by your warranty. If you are stuck,
do not spin the tires. When stopping on a hill,
use the brakes to hold the vehicle in place.Transmission Overheating
If the transmission uid temperature rises above 284°F
(140°C) or rises rapidly, the Engine Coolant
Temperature Warning Light will ash. SeeEngine
Coolant Temperature Warning Light on page 3-33for
more information. When the transmission overheats
it will go into a protection mode and will default shift into
fth gear if in the DRIVE (D) position, or second gear
if in the LOW (L) position. Continue driving the vehicle in
either position depending on the required vehicle
speed and load. Once the uid temperature lowers to
the normal temperature range, the transmission will
return to the normal shift patterns. Towing or driving on
long hills can cause the transmission uid temperature
to be higher than normal. If the transmission uid
temperature will not cool, you may need to pull over and
check the transmission uid level. You should also
check the engine coolant temperature. If it is hot, see
Engine Overheating on page 5-24.
2-26
Page 105 of 436
Automatic Transmission Operation
(3.6L V6 with 6-Speed)
The shift lever for the automatic transmission is located
on the console between the seats.
Maximum engine speed is limited when the vehicle is in
PARK (P) or NEUTRAL (N) to protect driveline
components from improper operation.
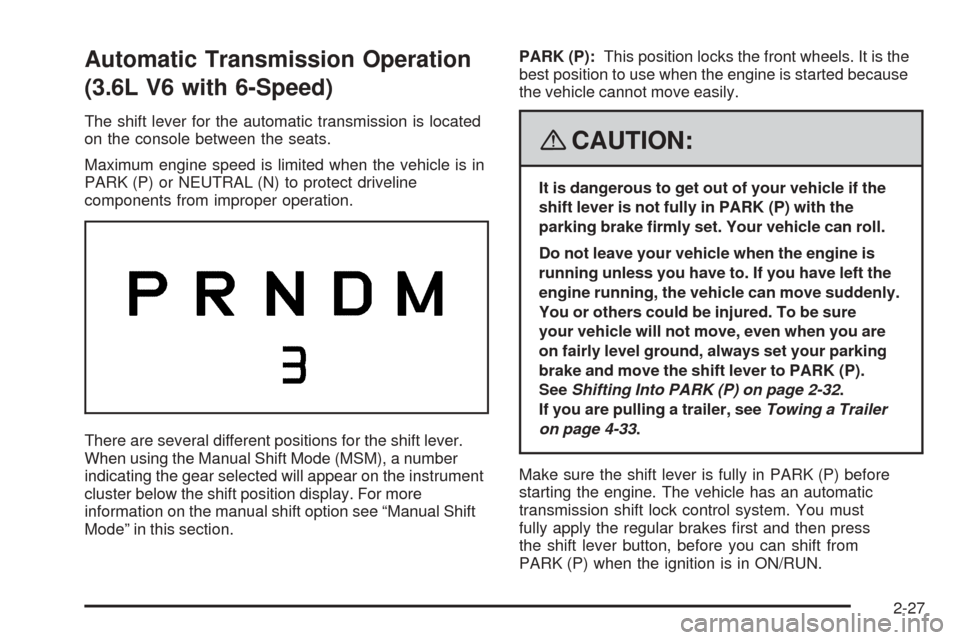
There are several different positions for the shift lever.
When using the Manual Shift Mode (MSM), a number
indicating the gear selected will appear on the instrument
cluster below the shift position display. For more
information on the manual shift option see “Manual Shift
Mode” in this section.PARK (P):This position locks the front wheels. It is the
best position to use when the engine is started because
the vehicle cannot move easily.
{CAUTION:
It is dangerous to get out of your vehicle if the
shift lever is not fully in PARK (P) with the
parking brake rmly set. Your vehicle can roll.
Do not leave your vehicle when the engine is
running unless you have to. If you have left the
engine running, the vehicle can move suddenly.
You or others could be injured. To be sure
your vehicle will not move, even when you are
on fairly level ground, always set your parking
brake and move the shift lever to PARK (P).
SeeShifting Into PARK (P) on page 2-32.
If you are pulling a trailer, seeTowing a Trailer
on page 4-33.
Make sure the shift lever is fully in PARK (P) before
starting the engine. The vehicle has an automatic
transmission shift lock control system. You must
fully apply the regular brakes rst and then press
the shift lever button, before you can shift from
PARK (P) when the ignition is in ON/RUN.
2-27
Page 107 of 436
DRIVE (D):This position is for normal driving.
It provides the best fuel economy for your vehicle.
If the vehicle needs more power for passing, and it is:
Going less than 35 mph (55 km/h), push the
accelerator pedal about halfway down.
Going about 35 mph (55 km/h) or more,
push the accelerator pedal all the way down.
The vehicle will shift down to the next gear
and have more power.
Downshifting the transmission in slippery road conditions
could result in skidding, see Skidding underLoss of
Control on page 4-13.
Notice:Spinning the tires or holding the vehicle
in one place on a hill using only the accelerator
pedal may damage the transmission. The repair
will not be covered by your warranty. If you
are stuck, do not spin the tires. When stopping on
a hill, use the brakes to hold the vehicle in place.
MANUAL SHIFT MODE (M):This position, available
on the models with the Manual Shift Mode (MSM),
allows you to change gears similar to a manual
transmission. If your vehicle has this feature, see
“Manual Shift Mode (MSM)”.
Manual Shift Mode (MSM)
(Automatic Transmission)
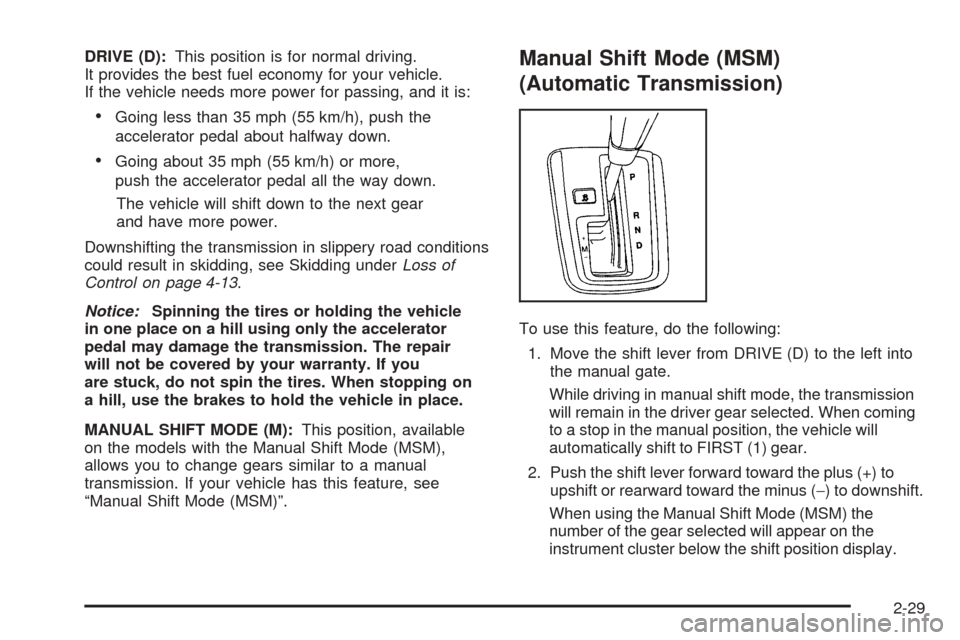
To use this feature, do the following:
1. Move the shift lever from DRIVE (D) to the left into
the manual gate.
While driving in manual shift mode, the transmission
will remain in the driver gear selected. When coming
to a stop in the manual position, the vehicle will
automatically shift to FIRST (1) gear.
2. Push the shift lever forward toward the plus (+) to
upshift or rearward toward the minus (−) to downshift.
When using the Manual Shift Mode (MSM) the
number of the gear selected will appear on the
instrument cluster below the shift position display.
2-29
Page 108 of 436
In manual shift mode all six forward gears can be
selected.
While using the MSM feature the vehicle will have
operation similar to a manual transmission. You can
use this for sport driving or when driving hilly roads to
stay in gear longer or to downshift for more power
or engine braking.
The transmission will only allow you to shift into gears
appropriate for the vehicle speed:
The transmission will not automatically shift to the
next higher gear without moving the shift lever.
The transmission will not allow shifting to the next
lower gear if the vehicle speed is too high.
If the vehicle does not respond to a gear change,
or detects a problem with the transmission, the range
of gears may be reduced and the Malfunction Indicator
Lamp will come on. SeeMalfunction Indicator Lamp
on page 3-34.
Transmission Overheating
If the transmission uid temperature rises above
270°F (132°C) or rises rapidly, the Engine Coolant
Temperature Warning Light will ash. SeeEngine
Coolant Temperature Warning Light on page 3-33for
more information. When the transmission overheats
it will go into a protection mode and will default into a
different shift sequence to help cool the transmission
uid. This shift sequence is the same for both DRIVE (D)
position and manual mode. Continue driving the
vehicle in either position depending on the required
vehicle speed and load. Once the uid temperature
lowers to the normal temperature range, the
transmission will return to the normal shift patterns.
Towing or driving on long hills can cause the
transmission uid temperature to be higher than
normal. If the transmission uid temperature will
not cool, you may need to pull over and check the
transmission uid level. You should also check
the engine coolant temperature. If it is hot, see
Engine Overheating on page 5-24.
2-30
Page 115 of 436

Mirrors
Manual Rearview Mirror
When you are sitting in a comfortable driving position,
adjust the mirror so you can see clearly behind your
vehicle. Hold the mirror in the center to move it up or
down and side to side. The day/night adjustment allows
you to adjust the mirror to avoid glare from the lamps
behind you. Push the tab forward for daytime use
and pull it for nighttime use.
Manual Rearview Mirror with
OnStar
®
To adjust the angle of the mirror, move the mirror
to a position that allows you see to out of the back
window. To adjust the height of the mirror, adjust
the arm that connects the mirror to the windshield.
To reduce glare from lights behind you, move the
lever toward you to the night position.
There are also OnStar
®buttons located at the bottom
of the mirror face. See your dealer for more information
on the system and how to subscribe to OnStar
®. See
OnStar®System on page 2-39for more information
about the services OnStar®provides.
Automatic Dimming Rearview Mirror
with OnStar
®
The vehicle may have an automatic dimming inside
rearview mirror with OnStar®controls. For more
information about OnStar®, seeOnStar®System
on page 2-39.
O(On/Off):The on/off button, located on the lower
left side of the mirror, is used for the automatic dimming
functions of the rearview mirror.
Mirror Operation
The automatic dimming feature comes on each time
the vehicle is started. Automatic dimming reduces
the glare of lights from behind the vehicle.
To turn the automatic dimming feature on or off,
press and release the AUTO/
((off) button. The
indicator light will come on when this feature is on.
2-37
Page 117 of 436

OnStar®System
OnStar uses several innovative technologies and live
advisors to provide you with a wide range of safety,
security, information, and convenience services. If your
airbags deploy, the system is designed to make an
automatic call to OnStar Emergency advisors who can
request emergency services be sent to your location.
If you lock your keys in the vehicle, call OnStar at
1-888-4-ONSTAR and they can send a signal to unlock
your doors. If you need roadside assistance, press
the OnStar button and they can contact Roadside
Service for you.
OnStar service is provided to you subject to the
OnStar Terms and Conditions. You may cancel your
OnStar service at any time by contacting OnStar.A complete OnStar Owner’s Guide and the OnStar
Terms and Conditions are included in the vehicle’s
OnStar Subscriber glove box literature. For more
information, visit onstar.com or onstar.ca, contact
OnStar at 1-888-4-ONSTAR (1-888-466-7827) or
TTY 1-877-248-2080, or press the OnStar button
to speak with an OnStar advisor 24 hours a day,
7 days a week.
Not all OnStar features are available on all vehicles.
To check if your vehicle is equipped to provide the
services described below, or for a full description of
OnStar services and system limitations, see the OnStar
Owner’s Guide in your glove box or visit onstar.com.
OnStar Services
For new vehicles with OnStar, the Safe & Sound Plan,
or the Directions & Connections Plan is included for
one year from the date of purchase. You can extend
this plan beyond the rst year, or upgrade to the
Directions & Connections Plan. For more information,
press the OnStar button to speak with an advisor.
Some OnStar services (such as Remote Door Unlock
or Stolen Vehicle Location Assistance) may not be
available until you register with OnStar.
2-39
Page 118 of 436
Available Services with Safe & Sound Plan
Automatic Notication of Airbag Deployment
Advanced Automatic Crash Notication (AACN)
(If equipped)
Link to Emergency Services
Roadside Assistance
Stolen Vehicle Location Assistance
AccidentAssist
Remote Door Unlock/Vehicle Alert
OnStar Vehicle Diagnostics
GM Goodwrench®On Demand Diagnostics
OnStar Hands-Free Calling with
30 complimentary minutes
OnStar Virtual Advisor (U.S. Only)
Available Services included with
Directions & Connections Plan
All Safe and Sound Plan Services
Driving Directions - Advisor delivered or OnStar
Turn-by-Turn Navigation (If equipped)
RideAssist
Information and Convenience Services
OnStar Hands-Free Calling
OnStar Hands-Free Calling allows eligible OnStar
subscribers to make and receive calls using voice
commands. Hands-Free Calling is fully integrated into
the vehicle, and can be used with OnStar Pre-Paid
Minute Packages. Hands-Free Calling may also
be linked to a Verizon Wireless service plan in the
U.S. or a Bell Mobility service plan in Canada,
depending on eligibility. To nd out more, refer to
the OnStar Owner’s Guide in the vehicle’s glove box,
visit www.onstar.com or www.onstar.ca, or speak
with an OnStar advisor by pressing the OnStar button
or calling 1-888-4-ONSTAR (1-888-466-7827).
OnStar Virtual Advisor
OnStar Virtual Advisor is a feature of OnStar
Hands-Free Calling that uses your minutes to access
location-based weather, local traffic reports, and
stock quotes. By pressing the phone button and giving
a few simple voice commands, you can browse
through the various topics. See the OnStar Owner’s
Guide for more information (Only available in the
continental U.S.).
2-40
Page 119 of 436
OnStar Steering Wheel Controls
Your vehicle may have a Talk/Mute button that can
be used to interact with OnStar Hands-Free Calling.
SeeAudio Steering Wheel Controls on page 3-108for
more information.
On some vehicles, you may have to hold the button
for a few seconds and give the command “ONSTAR” to
activate the OnStar Hands-Free Calling.
On some vehicles, the mute button can be used to
dial numbers into voicemail systems, or to dial phone
extensions. See the OnStar Owner’s Guide for
more information.
How OnStar Service Works
Your vehicle’s OnStar system has the capability of
recording and transmitting vehicle information. This
information is automatically sent to an OnStar Call
Center at the time of an OnStar button press, Emergency
button press or if your airbags or AACN system deploys.The vehicle information usually includes your GPS
location and, in the event of a crash, additional
information regarding the accident that your vehicle has
been involved in (e.g. the direction from which your
vehicle was hit). When you use the Virtual Advisor feature
of OnStar Hands-Free Calling, your vehicle also sends
OnStar your GPS location so that we can provide you
with location-based services.
OnStar service cannot work unless your vehicle is in a
place where OnStar has an agreement with a wireless
service provider for service in that area. OnStar
service also cannot work unless you are in a place
where the wireless service provider OnStar has hired for
that area has coverage, network capacity and reception
when the service is needed, and technology that is
compatible with the OnStar service. Not all services are
available everywhere, particularly in remote or
enclosed areas, or at all times.
Location information about your vehicle is only available
if the GPS satellite signals are unobstructed and
available.
2-41
Page 129 of 436
Instrument Panel Overview...............................3-4
Hazard Warning Flashers................................3-6
Other Warning Devices...................................3-6
Horn.............................................................3-6
Tilt Wheel.....................................................3-6
Turn Signal/Multifunction Lever.........................3-7
Turn and Lane-Change Signals........................3-8
Headlamp High/Low-Beam Changer..................3-8
Flash-to-Pass.................................................3-8
Windshield Wipers..........................................3-9
Windshield Washer.......................................3-10
Rear Window Wiper/Washer...........................3-10
Cruise Control..............................................3-10
Headlamps..................................................3-13
Headlamps on Reminder................................3-13
Daytime Running Lamps (DRL).......................3-14
Automatic Headlamp System..........................3-14
Fog Lamps..................................................3-15
Instrument Panel Brightness...........................3-15
Dome Lamp.................................................3-16
Entry Lighting...............................................3-16
Map Lamps.................................................3-16
Cargo Lamp.................................................3-16
Electric Power Management...........................3-17
Battery Run-Down Protection..........................3-17
Accessory Power Outlet(s).............................3-18Ashtray(s) and Cigarette Lighter......................3-18
Climate Controls............................................3-19
Climate Control System.................................3-19
Outlet Adjustment.........................................3-22
Passenger Compartment Air Filter...................3-22
Warning Lights, Gages, and Indicators............3-24
Instrument Panel Cluster................................3-25
Speedometer and Odometer...........................3-26
Trip Odometer..............................................3-26
Tachometer.................................................3-26
Safety Belt Reminders...................................3-27
Airbag Readiness Light..................................3-27
Passenger Airbag Status Indicator...................3-28
Charging System Light..................................3-30
Brake System Warning Light..........................3-31
Antilock Brake System Warning Light...............3-32
Traction Control System (TCS) Warning Light . . .3-32
Engine Coolant Temperature Warning Light......3-33
Engine Coolant Temperature Gage..................3-33
Tire Pressure Light.......................................3-34
Malfunction Indicator Lamp.............................3-34
Oil Pressure Light.........................................3-37
Change Engine Oil Light................................3-38
Security Light...............................................3-38
Fog Lamp Light............................................3-38
Cruise Control Light......................................3-38
Section 3 Instrument Panel
3-1
Page 136 of 436
Turn and Lane-Change Signals
The turn signal has two upward (for right) and
two downward (for left) positions. These positions
allow you to signal a turn or a lane change.
To signal a turn, move the lever all the way up or
down. When the turn is nished, the lever will return
automatically.
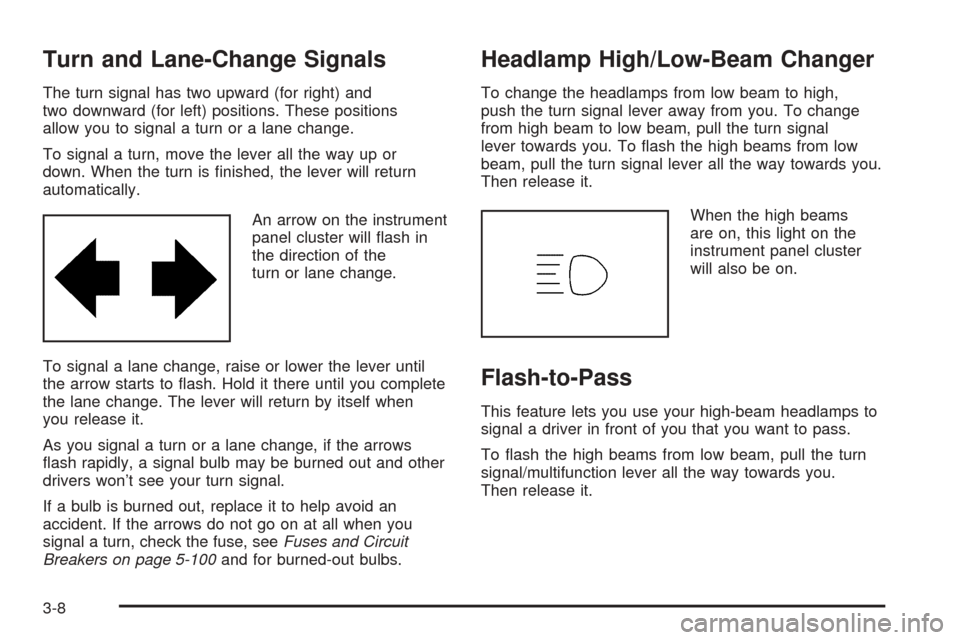
An arrow on the instrument
panel cluster will ash in
the direction of the
turn or lane change.
To signal a lane change, raise or lower the lever until
the arrow starts to ash. Hold it there until you complete
the lane change. The lever will return by itself when
you release it.
As you signal a turn or a lane change, if the arrows
ash rapidly, a signal bulb may be burned out and other
drivers won’t see your turn signal.
If a bulb is burned out, replace it to help avoid an
accident. If the arrows do not go on at all when you
signal a turn, check the fuse, seeFuses and Circuit
Breakers on page 5-100and for burned-out bulbs.
Headlamp High/Low-Beam Changer
To change the headlamps from low beam to high,
push the turn signal lever away from you. To change
from high beam to low beam, pull the turn signal
lever towards you. To ash the high beams from low
beam, pull the turn signal lever all the way towards you.
Then release it.
When the high beams
are on, this light on the
instrument panel cluster
will also be on.
Flash-to-Pass
This feature lets you use your high-beam headlamps to
signal a driver in front of you that you want to pass.
To ash the high beams from low beam, pull the turn
signal/multifunction lever all the way towards you.
Then release it.
3-8