steering CHEVROLET EQUINOX 2010 2.G Owner's Guide
[x] Cancel search | Manufacturer: CHEVROLET, Model Year: 2010, Model line: EQUINOX, Model: CHEVROLET EQUINOX 2010 2.GPages: 394, PDF Size: 5.7 MB
Page 227 of 394
Driving and Operating 8-23
To save fuel, run the engine for only
short periods as needed to warm
the vehicle and then shut the engine
off and close the window most of
the way to save heat. Repeat this
until help arrives but only when you
feel really uncomfortable from the
cold. Moving about to keep warm
also helps.
If it takes some time for help to
arrive, now and then when you run
the engine, push the accelerator
pedal slightly so the engine runs
faster than the idle speed. This
keeps the battery charged to restart
the vehicle and to signal for help
with the headlamps. Do this as little
as possible to save fuel.If the Vehicle is Stuck
Slowly and cautiously spin the
wheels to free the vehicle when
stuck in sand, mud, ice, or snow.
If stuck too severely for the traction
system to free the vehicle, turn the
traction system off and use the
rocking method.
{WARNING
If the vehicle's tires spin at high
speed, they can explode, and you
or others could be injured. The
vehicle can overheat, causing an
engine compartment fire or other
damage. Spin the wheels as little
as possible and avoid going
above 55 km/h (35 mph) as
shown on the speedometer.
For information about using tire
chains on the vehicle, see Tire
Chains on page 9‑58.
Rocking the Vehicle to Get
it Out
Turn the steering wheel left and
right to clear the area around the
front wheels. Turn off any traction
system. Shift back and forth
between R (Reverse) and a forward
gear, spinning the wheels as little as
possible. To prevent transmission
wear, wait until the wheels stop
spinning before shifting gears.
Release the accelerator pedal while
shifting, and press lightly on the
accelerator pedal when the
transmission is in gear. Slowly
spinning the wheels in the forward
and reverse directions causes a
rocking motion that could free the
vehicle. If that does not get the
vehicle out after a few tries, it might
need to be towed out. If the vehicle
does need to be towed out, see
Towing the Vehicle on page 9‑72.
Page 233 of 394
Driving and Operating 8-29
A (LOCK/OFF):This is the only
position from which the key can be
removed. This locks the steering
wheel, ignition and automatic
transmission.
On vehicles with an automatic
transmission, the shift lever must be
in P (Park) to turn the ignition switch
to the LOCK/OFF position.
The ignition switch can bind in the
LOCK/OFF position with the wheels
turned off center. If this happens,
move the steering wheel from right
to left while turning the key to ACC/
ACCESSORY. If this does not work,
then the vehicle needs service.
B (ACC/ACCESSORY): This
position provides power to some of
the electrical accessories. It unlocks
the steering wheel and ignition. The
transmission is also unlocked in this
position on automatic transmission
vehicles. To move the key from
ACC/ACCESSORY to LOCK/OFF,
push in the key and then turn it to
LOCK/OFF. C (ON/RUN):
The ignition switch
stays in this position when the
engine is running. This position can
be used to operate the electrical
accessories, including the
ventilation fan and 12 volt power
outlet, as well as to display some
warning and indicator lights.
The battery could be drained if the
key is left in the ACC/ACCESSORY
or ON/RUN position with the engine
off. The vehicle might not start if the
battery is allowed to drain for an
extended period of time.
D (START): This position starts the
engine. When the engine starts,
release the key. The ignition switch
will return to ON/RUN for normal
driving.
A warning tone sounds when the
driver door is opened if the ignition
is still in ACC/ACCESSORY and the
key is in the ignition.Retained Accessory
Power (RAP)
These vehicle accessories can be
used for up to 10 minutes after the
engine is turned off:
.Audio System
.Power Windows
.Sunroof (if equipped)
Power to the audio system will
continue to operate for up to
10 minutes or until the driver door is
opened.
Power to the power windows and
sunroof will continue to operate for
up to 10 minutes or until any door is
opened.
All these features will work when
the key is in ON/RUN or ACC/
ACCESSORY.
Page 243 of 394
Driving and Operating 8-39
If there is a problem with ABS, this
warning light stays on. SeeAntilock
Brake System (ABS) Warning Light
on page 4‑20.
If driving safely on a wet road and it
becomes necessary to slam on the
brakes and continue braking to
avoid a sudden obstacle, a
computer senses that the wheels
are slowing down. If one of the
wheels is about to stop rolling, the
computer will separately work the
brakes at each wheel.
ABS can change the brake pressure
to each wheel, as required, faster
than any driver could. This can help
the driver steer around the obstacle
while braking hard. As the brakes are applied, the
computer keeps receiving updates
on wheel speed and controls
braking pressure accordingly.
Remember: ABS does not change
the time needed to get a foot up to
the brake pedal or always decrease
stopping distance. If you get too
close to the vehicle in front of you,
there will not be enough time to
apply the brakes if that vehicle
suddenly slows or stops. Always
leave enough room up ahead to
stop, even with ABS.
Using ABS
Do not pump the brakes. Just hold
the brake pedal down firmly and let
ABS work. The ABS pump or motor
might be heard operating, and the
brake pedal might be felt to pulsate,
but this is normal.
Braking in Emergencies
ABS allows the driver to steer and
brake at the same time. In many
emergencies, steering can help
more than even the very best
braking.
Page 248 of 394
8-44 Driving and Operating
Cruise Control
With cruise control, the vehicle can
maintain a speed of about 40 km/h
(25 mph) or more without keeping
your foot on the accelerator. Cruise
control does not work at speeds
below 40 km/h (25 mph).
If the brakes are applied, the cruise
control is turned off.
If the vehicle has a StabiliTrak
®or
traction control system and begins
to limit wheel spin while using
cruise control, the cruise control
automatically disengages. See
StabiliTrak System
on page 8‑43or
Traction Control System (TCS)on
page 8‑41. When road conditions
allow you to safely use it again, the
cruise control can be turned
back on.
{WARNING
Cruise control can be dangerous
where you cannot drive safely at
a steady speed. So, do not use
the cruise control on winding
roads or in heavy traffic.
Cruise control can be dangerous
on slippery roads. On such roads,
fast changes in tire traction can
cause excessive wheel slip, and
you could lose control. Do not use
cruise control on slippery roads.
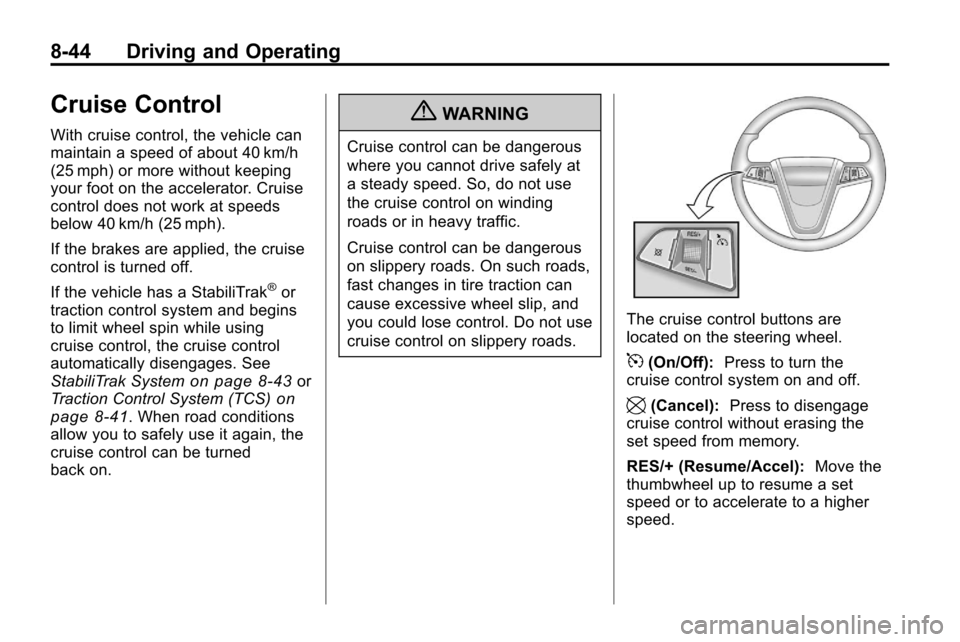
The cruise control buttons are
located on the steering wheel.
5(On/Off): Press to turn the
cruise control system on and off.
\(Cancel): Press to disengage
cruise control without erasing the
set speed from memory.
RES/+ (Resume/Accel): Move the
thumbwheel up to resume a set
speed or to accelerate to a higher
speed.
Page 263 of 394

Driving and Operating 8-59
.Do not use the Fuel Saver Mode
when towing.
.Obey speed limit restrictions.
Do not drive faster than the
maximum posted speed for
trailers, or no more than 90 km/h
(55 mph), to reduce wear on the
vehicle.
.For vehicles with the Ultra Rear
Parking Assist (URPA) system,
turn the system off when towing
a trailer. If the tow bar is
installed while not towing a
trailer, change the URPA system
to the“Tow Bar” setting. See
Ultrasonic Parking Assist
on
page 8‑46for more information.
Driving with a Trailer
Towing a trailer requires experience.
Get familiar with handling and
braking with the added trailer
weight. The vehicle is now longer
and not as responsive as the
vehicle is by itself. Check all trailer hitch parts and
attachments, safety chains,
electrical connectors, lamps, tires
and mirror adjustments. If the trailer
has electric brakes, start the vehicle
and trailer moving and then apply
the trailer brake controller by hand
to be sure the brakes are working.
During the trip, check regularly to be
sure that the load is secure, and the
lamps and trailer brakes are working
properly.
Towing with a Stability Control
System
When towing, the sound of the
stability control system might be
heard. The system is reacting to the
vehicle movement caused by the
trailer, which mainly occurs during
cornering. This is normal when
towing heavier trailers.
Following Distance
Stay at least twice as far behind the
vehicle ahead as you would when
driving the vehicle without a trailer.
This can help to avoid situations
that require heavy braking and
sudden turns.
Passing
More passing distance is needed
when towing a trailer. Because the
rig is longer, it is necessary to go
farther beyond the passed vehicle
before returning to the lane.
Backing Up
Hold the bottom of the steering
wheel with one hand. To move the
trailer to the left, move that hand to
the left. To move the trailer to the
right, move your hand to the right.
Always back up slowly and,
if possible, have someone
guide you.
Page 269 of 394
Vehicle Care 9-1
Vehicle Care
General Information
General Information . . . . . . . . . . . 9-3
California Proposition65 Warning . . . . . . . . . . . . . . . . . . 9-3
California Perchlorate Materials Requirements . . . . . . . . . . . . . . . 9-3
Accessories and Modifications . . . . . . . . . . . . . . . . 9-4
Vehicle Checks
Doing Your OwnService Work . . . . . . . . . . . . . . . . 9-4
Hood . . . . . . . . . . . . . . . . . . . . . . . . . . 9-5
Engine Compartment Overview . . . . . . . . . . . . . . . . . . . . 9-6
Engine Cover . . . . . . . . . . . . . . . . . 9-9
Engine Oil . . . . . . . . . . . . . . . . . . . 9-10
Engine Oil Life System . . . . . . . 9-11
Automatic Transmission Fluid . . . . . . . . . . . . . . . . . . . . . . . 9-12 Engine Air Cleaner/Filter . . . . . 9-13
Cooling System . . . . . . . . . . . . . . 9-14
Engine Coolant . . . . . . . . . . . . . . 9-15
Engine Overheating . . . . . . . . . 9-18
Power Steering Fluid (2.4L
L4 Engine) . . . . . . . . . . . . . . . . . 9-20
Power Steering Fluid (3.0L V6 Engine) . . . . . . . . . . . . . . . . . 9-20
Washer Fluid . . . . . . . . . . . . . . . . 9-21
Brakes . . . . . . . . . . . . . . . . . . . . . . . 9-21
Brake Fluid . . . . . . . . . . . . . . . . . . 9-22
Battery . . . . . . . . . . . . . . . . . . . . . . . 9-24
All-Wheel Drive . . . . . . . . . . . . . . 9-24
Starter Switch Check . . . . . . . . 9-25
Automatic Transmission Shift Lock Control System
Check . . . . . . . . . . . . . . . . . . . . . . 9-25
Ignition Transmission Lock Check . . . . . . . . . . . . . . . . . . . . . . 9-25
Park Brake and P (Park) Mechanism Check . . . . . . . . . 9-26
Wiper Blade Replacement . . . 9-26
Headlamp Aiming
Headlamp Aiming . . . . . . . . . . . . 9-27
Bulb Replacement
Bulb Replacement . . . . . . . . . . . 9-30
Headlamps, Front Turn Signal, Sidemarker, and Parking
Lamps . . . . . . . . . . . . . . . . . . . . . . 9-30
Fog Lamps . . . . . . . . . . . . . . . . . . 9-31
Taillamps, Turn Signal, Sidemarker, Stoplamps,
and Back-Up Lamps . . . . . . . 9-32
License Plate Lamp . . . . . . . . . . 9-33
Replacement Bulbs . . . . . . . . . . 9-34
Electrical System
Fuses . . . . . . . . . . . . . . . . . . . . . . . . 9-34
Engine Compartment Fuse Block . . . . . . . . . . . . . . . . . . . . . . . 9-34
Instrument Panel Fuse Block . . . . . . . . . . . . . . . . . . . . . . . 9-37
Page 273 of 394

Vehicle Care 9-5
If doing some of your own service
work, use the proper service
manual. It tells you much more
about how to service the vehicle
than this manual can. To order the
proper service manual, seeService
Publications Ordering Information
on
page 12‑12.
This vehicle has an airbag system.
Before attempting to do your own
service work, see Servicing the
Airbag-Equipped Vehicle
on
page 2‑34.
Keep a record with all parts receipts
and list the mileage and the date of
any service work performed. See
Maintenance Records
on
page 10‑10.
Hood
To open the hood:
1. Pull the release handle with the symbol on it. It is below the
instrument panel, to the left of
the steering wheel.
2. Move the secondary hoodrelease lever to the right to
release the striker. The lever is
near the middle of the hood.
3. Lift the hood.
Before closing the hood, check all
filler caps are properly installed.
Page 277 of 394
Vehicle Care 9-9
A.Engine Air Cleaner/Filteron
page 9‑13.
B. Power Steering Fluid (2.4L L4
Engine)
on page 9‑20or
Power Steering Fluid (3.0L
V6 Engine) on page 9‑20.
C. Engine Oil Fill Cap. See Engine
Oil on page 9‑10.
D. Engine Cover on page 9‑9.
E. Engine Oil Dipstick (out of view). See Engine Oil
on
page 9‑10.
F. Brake Fluid Reservoir. See Brakes on page 9‑21. G.
Engine Compartment Fuse
Block on page 9‑34.
H. Remote Positive (+) Terminal. See Jump Starting
on
page 9‑69.
I. Remote Negative (−) Terminal. See Jump Starting
on
page 9‑69.
J. Battery on page 9‑24.
K. Engine Coolant Surge Tank and Pressure Cap. See Engine
Coolant on page 9‑15.
L. Windshield Washer Fluid Reservoir. See Washer Fluid
on
page 9‑21.
Engine Cover
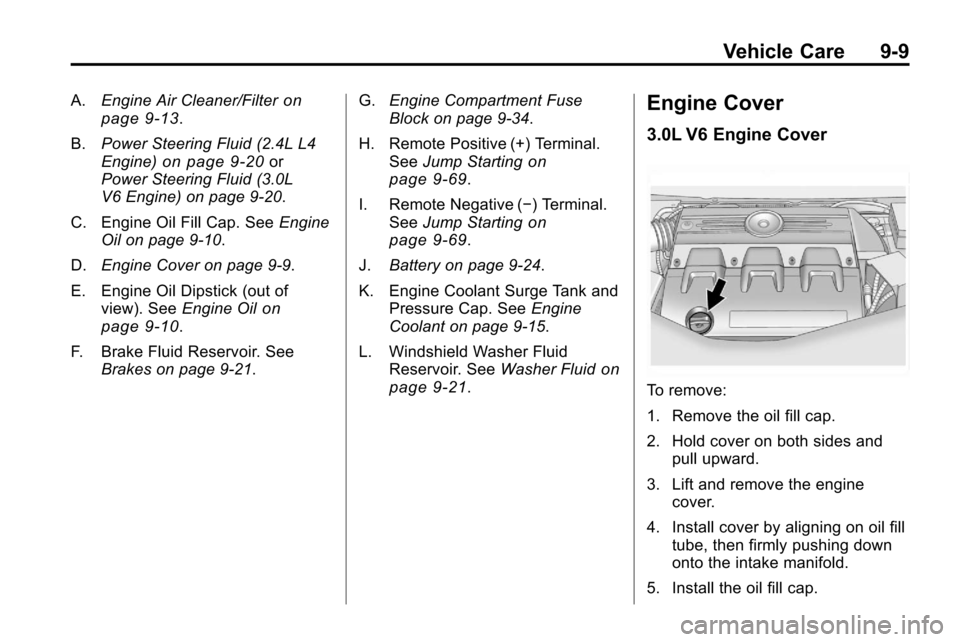
3.0L V6 Engine Cover
To remove:
1. Remove the oil fill cap.
2. Hold cover on both sides and pull upward.
3. Lift and remove the engine cover.
4. Install cover by aligning on oil fill tube, then firmly pushing down
onto the intake manifold.
5. Install the oil fill cap.
Page 288 of 394

9-20 Vehicle Care
Power Steering Fluid
(2.4L L4 Engine)
The vehicle has electric power
steering and does not use power
steering fluid.
Power Steering Fluid
(3.0L V6 Engine)
The power steering fluid reservoir is
to the rear of the engine
compartment on the passenger side
of the vehicle. SeeEngine
Compartment Overview
on
page 9‑6.
When to Check Power Steering
Fluid
The power steering fluid does not
need to be checked unless there is
a leak in the system. Have the
system inspected and repaired if
there is a fluid loss.
How to Check Power Steering
Fluid
To check:
1. Turn the engine off and let it cool down.
2. Remove the engine cover. Refer toEngine Cover on page 9‑9.
3. Wipe the cap and the top of the reservoir clean. 4. Unscrew the cap and wipe the
dipstick with a clean rag.
5. Replace the cap and completely tighten it.
6. Remove the cap again and look at the fluid level on the dipstick.
The fluid level should be between
MAX and MIN line at room
temperature. If the fluid is on or
below MIN line, add fluid.
What to Use
For the proper fluid, see
Recommended Fluids and
Lubricants on page 10‑7.
Page 305 of 394
Vehicle Care 9-37
Midi Fuse Usage53 Electric Power
Steering
Micro
Relays Usage
54 Rear Defogger
55 Cooling Fan Low
56 Head Lamp
High Beam
57 Cooling Fan Control
58 Wiper On/Off
Control
59 Air Conditioning
Compressor
60 Wiper Speed
61 Fog Lamp
62 Engine Control
63 Starter
64 Run/Crank Mini Relays Usage
65 Cooling Fan High
66 Brake Booster
Instrument Panel Fuse
Block
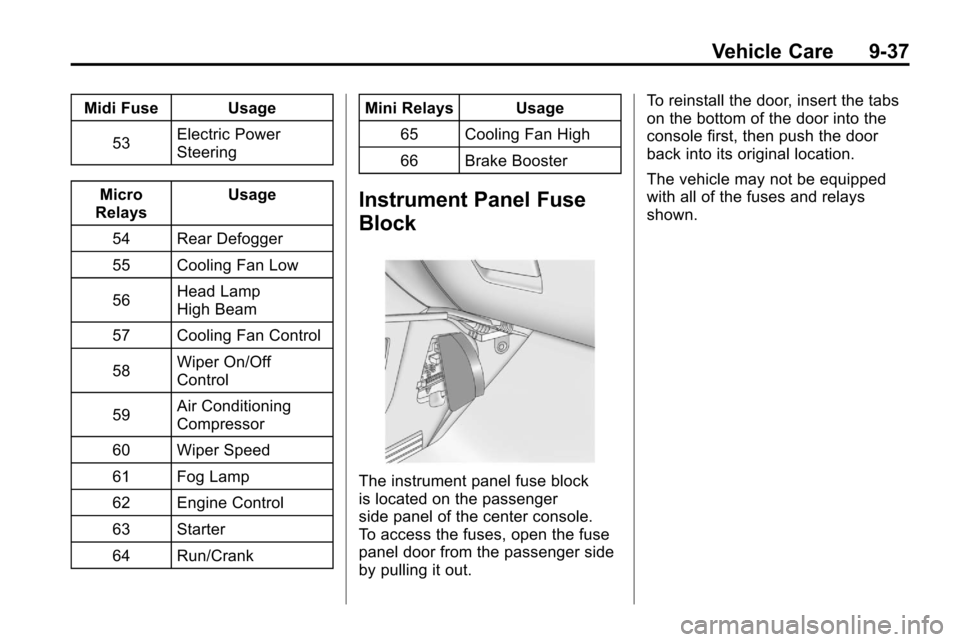
The instrument panel fuse block
is located on the passenger
side panel of the center console.
To access the fuses, open the fuse
panel door from the passenger side
by pulling it out. To reinstall the door, insert the tabs
on the bottom of the door into the
console first, then push the door
back into its original location.
The vehicle may not be equipped
with all of the fuses and relays
shown.