ignition CHEVROLET EQUINOX 2011 2.G Workshop Manual
[x] Cancel search | Manufacturer: CHEVROLET, Model Year: 2011, Model line: EQUINOX, Model: CHEVROLET EQUINOX 2011 2.GPages: 446, PDF Size: 6.68 MB
Page 284 of 446
Black plate (46,1)Chevrolet Equinox Owner Manual - 2011
9-46 Driving and Operating
Reducing Speed While Using
Cruise Control
If the cruise control system is
already activated,
.Move the thumbwheel toward
SET/−and hold until the desired
lower speed is reached, then
release it.
.To slow down in small amounts,
move the thumbwheel toward
SET/− briefly. Each time this is
done, the vehicle goes about
1.6 km/h (1 mph) slower.
Passing Another Vehicle While
Using Cruise Control
Use the accelerator pedal to
increase the vehicle speed. When
you take your foot off the pedal, the
vehicle will slow down to the
previous set cruise speed.
Using Cruise Control on Hills
How well the cruise control works
on hills depends upon the vehicle
speed, load, and the steepness of
the hills. When going up steep hills, you might have to step on the
accelerator pedal to maintain the
vehicle speed. When going
downhill, you might have to brake or
shift to a lower gear to maintain the
vehicle's speed. When the brakes
are applied the cruise control is
disengaged.
Ending Cruise Control
There are three ways to end cruise
control:
.To disengage cruise control;
step lightly on the brake pedal.
The indicator light will go off.
.Press\.
.To turn off the cruise control,
press
1. The cruise control
cannot be resumed.
Erasing Speed Memory
The cruise control set speed is
erased from memory by pressing
the
1button or if the ignition is
turned off.
Object Detection
Systems
Ultrasonic Parking Assist
For vehicles with the Ultrasonic
Rear Parking Assist (URPA) system,
it assists the driver with parking
and avoiding objects while in
R (Reverse). URPA operates at
speeds less than 8 km/h (5 mph),
and the sensors on the rear bumper
detect objects up to 2.5 m (8 ft)
behind the vehicle, and at least
20 cm (8 in) off the ground.
Page 307 of 446
Black plate (1,1)Chevrolet Equinox Owner Manual - 2011
Vehicle Care 10-1
Vehicle Care
General Information
General Information . . . . . . . . . . 10-2
California Proposition65 Warning . . . . . . . . . . . . . . . . . 10-3
California Perchlorate Materials Requirements . . . . 10-3
Accessories and Modifications . . . . . . . . . . . . . . . 10-3
Vehicle Checks
Doing Your OwnService Work . . . . . . . . . . . . . . . 10-4
Hood . . . . . . . . . . . . . . . . . . . . . . . . 10-4
Engine Compartment Overview . . . . . . . . . . . . . . . . . . . 10-6
Engine Cover . . . . . . . . . . . . . . . 10-10
Engine Oil . . . . . . . . . . . . . . . . . . 10-10
Engine Oil Life System . . . . . 10-14
Automatic Transmission Fluid . . . . . . . . . . . . . . . . . . . . . . 10-15
Engine Air Cleaner/Filter . . . . 10-15 Cooling System . . . . . . . . . . . . 10-17
Engine Coolant . . . . . . . . . . . . . 10-18
Engine Overheating . . . . . . . . 10-22
Power Steering Fluid
(2.4L L4 Engine) . . . . . . . . . . 10-23
Power Steering Fluid (3.0L V6 Engine) . . . . . . . . . . 10-23
Washer Fluid . . . . . . . . . . . . . . . 10-24
Brakes . . . . . . . . . . . . . . . . . . . . . 10-25
Brake Fluid . . . . . . . . . . . . . . . . . 10-26
Battery . . . . . . . . . . . . . . . . . . . . . 10-27
All-Wheel Drive . . . . . . . . . . . . . 10-28
Starter Switch Check . . . . . . . 10-29
Automatic Transmission Shift Lock Control Function
Check . . . . . . . . . . . . . . . . . . . . . 10-29
Ignition Transmission Lock Check . . . . . . . . . . . . . . . . . . . . . 10-30
Park Brake and P (Park) Mechanism Check . . . . . . . . 10-30
Wiper Blade Replacement . . . . . . . . . . . . . . 10-31
Headlamp Aiming
Headlamp Aiming . . . . . . . . . . 10-33
Bulb Replacement
Bulb Replacement . . . . . . . . . . 10-35
Headlamps, Front TurnSignal, Sidemarker, and
Parking Lamps . . . . . . . . . . . . 10-35
Fog Lamps . . . . . . . . . . . . . . . . . 10-36
Taillamps, Turn Signal, Sidemarker, Stoplamps,
and Back-Up Lamps . . . . . . 10-36
License Plate Lamp . . . . . . . . 10-38
Replacement Bulbs . . . . . . . . . 10-39
Electrical System
Fuses . . . . . . . . . . . . . . . . . . . . . . 10-39
Engine Compartment Fuse Block . . . . . . . . . . . . . . . . 10-40
Instrument Panel Fuse Block . . . . . . . . . . . . . . . . 10-43
Page 320 of 446
Black plate (14,1)Chevrolet Equinox Owner Manual - 2011
10-14 Vehicle Care
Engine Oil Life System
When to Change Engine Oil
This vehicle has a computer system
that indicates when to change the
engine oil and filter. This is based
on engine revolutions and engine
temperature, and not on mileage.
Based on driving conditions, the
mileage at which an oil change is
indicated can vary considerably. For
the oil life system to work properly,
the system must be reset every time
the oil is changed.
When the system has calculated
that oil life has been diminished, it
indicates that an oil change is
necessary. A CHANGE ENGINE
OIL SOON message comes on. See
Engine Oil Messages on page 5‑28.
Change the oil as soon as possible
within the next 1 000 km (600 miles).
It is possible that, if driving under
the best conditions, the oil life
system might indicate that anoil change is not necessary for up to
a year. The engine oil and filter must
be changed at least once a year
and, at this time, the system must
be reset. Your dealer has trained
service people who will perform this
work and reset the system. It is also
important to check the oil regularly
over the course of an oil drain
interval and keep it at the proper
level.
If the system is ever reset
accidentally, the oil must be
changed at 5 000 km (3,000 miles)
since the last oil change.
Remember to reset the oil life
system whenever the oil is changed.
How to Reset the Engine Oil
Life System
Reset the system whenever the
engine oil is changed so that the
system can calculate the next
engine oil change.
To reset the system:
1. Turn the ignition to ON/RUN,
with the engine off.
2. Press the DIC menu button to display the Vehicle
Information menu.
3. Press either the up or down arrows to view REMAINING
OIL LIFE.
4. Press the SET/CLEAR button until 100% is displayed.
5. Turn the key to LOCK/OFF.
Or:
1. Turn the ignition to ON/RUN with the engine off.
2. Fully press and release the accelerator pedal three times
within five seconds.
The system is reset when the
CHANGE ENGINE OIL SOON
message goes off.
Page 335 of 446

Black plate (29,1)Chevrolet Equinox Owner Manual - 2011
Vehicle Care 10-29
Starter Switch Check
{WARNING
When you are doing this
inspection, the vehicle could
move suddenly. If the vehicle
moves, you or others could
be injured.
1. Before starting this check, be sure there is enough room
around the vehicle.
2. Firmly apply both the parking brake and the regular brake.
See Parking Brake on
page 9‑40.
Do not use the accelerator
pedal, and be ready to turn off
the engine immediately if it
starts. 3. Try to start the engine in each
gear. The vehicle should start
only in P (Park) or N (Neutral).
If the vehicle starts in any other
position, contact your dealer for
service.
Automatic Transmission
Shift Lock Control
Function Check
{WARNING
When you are doing this
inspection, the vehicle could
move suddenly. If the vehicle
moves, you or others could
be injured.
1. Before starting this check, be sure there is enough room
around the vehicle. It should be
parked on a level surface. 2. Firmly apply the parking brake.
See Parking Brake on
page 9‑40.
Be ready to apply the regular
brake immediately if the vehicle
begins to move.
3. With the engine off, turn the ignition on, but do not start the
engine. Without applying the
regular brake, try to move the
shift lever out of P (Park) with
normal effort. If the shift lever
moves out of P (Park), contact
your dealer for service.
Page 336 of 446

Black plate (30,1)Chevrolet Equinox Owner Manual - 2011
10-30 Vehicle Care
Ignition Transmission
Lock Check
While parked, and with the parking
brake set, try to turn the ignition to
LOCK/OFF in each shift lever
position.
.The ignition should turn to
LOCK/OFF only when the shift
lever is in P (Park).
.The ignition key should come
out only in LOCK/OFF.
Contact your dealer if service is
required.
Park Brake and P (Park)
Mechanism Check
{WARNING
When you are doing this check,
the vehicle could begin to move.
You or others could be injured
and property could be damaged.
Make sure there is room in front
of the vehicle in case it begins to
roll. Be ready to apply the regular
brake at once should the vehicle
begin to move. Park on a fairly steep hill, with the
vehicle facing downhill. Keeping
your foot on the regular brake, set
the parking brake.
.To check the parking brake's
holding ability: With the engine
running and the transmission in
N (Neutral), slowly remove foot
pressure from the regular brake
pedal. Do this until the vehicle is
held by the parking brake only.
.To check the P (Park)
mechanism's holding ability:
With the engine running, shift to
P (Park). Then release the
parking brake followed by the
regular brake.
Contact your dealer if service is
required.
Page 348 of 446
Black plate (42,1)Chevrolet Equinox Owner Manual - 2011
10-42 Vehicle Care
Mini Fuses Usage32 Rear Latch
33 Heated Mirrors
34 Horn
35 Right High‐Beam
Headlamp
36 Left High‐Beam
Headlamp
37 Ignition Even Coil
38 Ignition Odd Coil
39 Windshield Washer
40 Front Fog Lamps
41 Post Catalytic
Converter Oxygen
Sensor Mini Fuses Usage
42 Engine Control
Module
43 Pre–Catalytic
Converter Oxygen
Sensor
44 Transmission
Control Module
45 Mirror
46 Chassis Control
Module Ignition
47 Spare
48 Rear Drive Module
49 Lift Gate Module
Logic Mini Fuses Usage
50 Instrument Panel
Fuse Block Ignition
51 Heated Seat –Front
52 Chassis Control
Module
53 Engine Control
Module
54 Rear Vision Camera
Midi Fuse Usage 55 Electric Power
Steering
Page 351 of 446

Black plate (45,1)Chevrolet Equinox Owner Manual - 2011
Vehicle Care 10-45
Mini Fuses Usage13 Auxiliary Power
Front
14 Heater, Ventilation
and Air Conditioning
Ignition
15 Display
16 Body Control
Module 5
17 Auxiliary
Power Rear
18 Instrument Panel
Cluster Ignition
19 Personal Device
Interface Module
20 Body Control
Module 6
21 Special Equipment
Order Retained
Accessory Power
22 Sensing and
Diagnostic Module
Ignition Mini Fuses Usage
23 Spare
24 Spare
25 Transmission Gear
Shift Position
Indicator
26 Spare
27 Spare
28 Spare
30 Body Control
Module 3
31 Amplifier
32 Discrete Logic
Ignition Switch
33 Communications
Integration Module
34 Body Control
Module 2
35 Sensing and
Diagnostic Module
Battery Mini Fuses Usage
36 Data Link
Connection
37 Instrument Panel
Cluster Battery
38 Passenger Sensing
System Module
39 Spare
J‐Case Fuses Usage
29 Front Blower Motor
40 Body Control
Module 8
Relays Usage 41 LOG Relay
42 Retained Accessory
Power Relay
Page 362 of 446
Black plate (56,1)Chevrolet Equinox Owner Manual - 2011
10-56 Vehicle Care
Tire Pressure Monitor
Operation
This vehicle may have a Tire
Pressure Monitor System (TPMS).
The TPMS is designed to warn the
driver when a low tire pressure
condition exists. TPMS sensors are
mounted onto each tire and wheel
assembly, excluding the spare tire
and wheel assembly. The TPMS
sensors monitor the air pressure in
the vehicle's tires and transmits the
tire pressure readings to a receiver
located in the vehicle.
When a low tire pressure condition
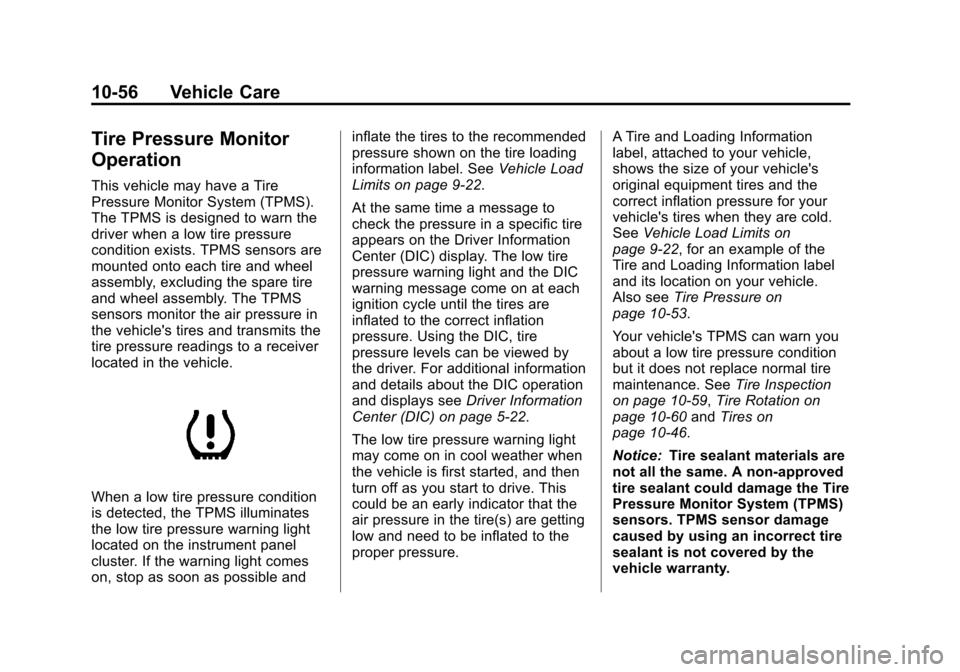
is detected, the TPMS illuminates
the low tire pressure warning light
located on the instrument panel
cluster. If the warning light comes
on, stop as soon as possible andinflate the tires to the recommended
pressure shown on the tire loading
information label. See
Vehicle Load
Limits on page 9‑22.
At the same time a message to
check the pressure in a specific tire
appears on the Driver Information
Center (DIC) display. The low tire
pressure warning light and the DIC
warning message come on at each
ignition cycle until the tires are
inflated to the correct inflation
pressure. Using the DIC, tire
pressure levels can be viewed by
the driver. For additional information
and details about the DIC operation
and displays see Driver Information
Center (DIC) on page 5‑22.
The low tire pressure warning light
may come on in cool weather when
the vehicle is first started, and then
turn off as you start to drive. This
could be an early indicator that the
air pressure in the tire(s) are getting
low and need to be inflated to the
proper pressure. A Tire and Loading Information
label, attached to your vehicle,
shows the size of your vehicle's
original equipment tires and the
correct inflation pressure for your
vehicle's tires when they are cold.
See
Vehicle Load Limits on
page 9‑22, for an example of the
Tire and Loading Information label
and its location on your vehicle.
Also see Tire Pressure on
page 10‑53.
Your vehicle's TPMS can warn you
about a low tire pressure condition
but it does not replace normal tire
maintenance. See Tire Inspection
on page 10‑59, Tire Rotation on
page 10‑60 andTires on
page 10‑46.
Notice: Tire sealant materials are
not all the same. A non-approved
tire sealant could damage the Tire
Pressure Monitor System (TPMS)
sensors. TPMS sensor damage
caused by using an incorrect tire
sealant is not covered by the
vehicle warranty.
Page 363 of 446
Black plate (57,1)Chevrolet Equinox Owner Manual - 2011
Vehicle Care 10-57
Always use only the GM approved
tire sealant available through
your dealer or included in the
vehicle.
TPMS Malfunction Light and
Message
The TPMS will not function properly
if one or more of the TPMS sensors
are missing or inoperable. When the
system detects a malfunction, the
low tire pressure warning light
flashes for about one minute and
then stays on for the remainder of
the ignition cycle. A DIC warning
message is also displayed. The low
tire pressure warning light and DIC
warning message come on at each
ignition cycle until the problem is
corrected. Some of the conditions
that can cause the malfunction light
and DIC message to come on are:
.One of the road tires has been
replaced with the spare tire.
The spare tire does not have a
TPMS sensor. The TPMS
malfunction light and DICmessage should go off once you
re‐install the road tire containing
the TPMS sensor.
.The TPMS sensor matching
process was started but not
completed or not completed
successfully after rotating the
vehicle's tires. The DIC message
and TPMS malfunction light
should go off once the TPMS
sensor matching process is
performed successfully. See
“TPMS Sensor Matching
Process”
later in this section.
.One or more TPMS sensors are
missing or damaged. The DIC
message and the TPMS
malfunction light should go off
when the TPMS sensors are
installed and the sensor
matching process is performed
successfully. See your dealer
for service.
.Replacement tires or wheels do
not match your vehicle's original
equipment tires or wheels. Tires
and wheels other than those
recommended for your vehicle
could prevent the TPMS from
functioning properly. See Buying
New Tires on page 10‑62.
.Operating electronic devices or
being near facilities using radio
wave frequencies similar to the
TPMS could cause the TPMS
sensors to malfunction.
If the TPMS is not functioning it
cannot detect or signal a low tire
condition. See your dealer for
service if the TPMS malfunction
light and DIC message comes on
and stays on.
Page 364 of 446
Black plate (58,1)Chevrolet Equinox Owner Manual - 2011
10-58 Vehicle Care
TPMS Sensor Matching
Process
Each TPMS sensor has a unique
identification code. Any time you
rotate your vehicle's tires or replace
one or more of the TPMS sensors,
the identification codes will need to
be matched to the new tire/wheel
position. The sensors are matched
to the tire/wheel positions in the
following order: driver side front tire,
passenger side front tire, passenger
side rear tire, and driver side rear
tire using a TPMS diagnostic tool.
See your dealer for service.
The TPMS sensors can also be
matched to each tire/wheel position
by increasing or decreasing the
tire's air pressure. If increasing the
tire's air pressure, do not exceed
the maximum inflation pressure
indicated on the tire's sidewall.To decrease air-pressure out of a
tire you can use the pointed end of
the valve cap, a pencil-style air
pressure gage, or a key.
You have two minutes to match the
first tire/wheel position, and
five minutes overall to match all four
tire/wheel positions. If it takes longer
than two minutes, to match the first
tire and wheel, or more than
five minutes to match all four tire
and wheel positions the matching
process stops and you need to
start over.
The TPMS sensor matching process
is outlined below:
1. Set the parking brake.
2. Turn the ignition to ON/RUN with
the engine off.
3. Use the MENU button to select the Vehicle Information Menu in
the Driver Information Center
(DIC). Use the arrow keys to
scroll to the Tire Pressure
screen. 4. Press the SET/CLR button to
begin the sensor matching
process.
A message asking if you are
sure you want to begin this
process should appear.
5. Press the SET/CLR button again to confirm the selection.
The horn sounds twice to signal
the receiver is in relearn mode
and the TIRE LEARNING
ACTIVE message displays on
the DIC screen.
6. Start with the driver side front tire.
7. Remove the valve cap from the valve cap stem. Activate the
TPMS sensor by increasing or
decreasing the tire's air pressure
for five seconds, or until a horn
chirp sounds. The horn chirp,
which may take up to
30 seconds to sound, confirms
that the sensor identification
code has been matched to this
tire and wheel position.