radio controls CHEVROLET EQUINOX 2013 2.G Owners Manual
[x] Cancel search | Manufacturer: CHEVROLET, Model Year: 2013, Model line: EQUINOX, Model: CHEVROLET EQUINOX 2013 2.GPages: 388, PDF Size: 6.53 MB
Page 1 of 388

Black plate (1,1)Chevrolet Equinox Owner Manual - 2013 - CRC - 5/21/12
2013 Chevrolet Equinox Owner ManualM
In Brief. . . . . . . . . . . . . . . . . . . . . . . . 1-1
Instrument Panel . . . . . . . . . . . . . . 1-2
Initial Drive Information . . . . . . . . 1-4
Vehicle Features . . . . . . . . . . . . . 1-15
Performance and Maintenance . . . . . . . . . . . . . . . . 1-21
Keys, Doors, and Windows . . . . . . . . . . . . . . . . . . . . 2-1
Keys and Locks . . . . . . . . . . . . . . . 2-1
Doors . . . . . . . . . . . . . . . . . . . . . . . . . . 2-8
Vehicle Security . . . . . . . . . . . . . . 2-12
Exterior Mirrors . . . . . . . . . . . . . . . 2-14
Interior Mirrors . . . . . . . . . . . . . . . . 2-16
Windows . . . . . . . . . . . . . . . . . . . . . 2-17
Roof . . . . . . . . . . . . . . . . . . . . . . . . . . 2-18 Seats and Restraints
. . . . . . . . . 3-1
Head Restraints . . . . . . . . . . . . . . . 3-2
Front Seats . . . . . . . . . . . . . . . . . . . . 3-3
Rear Seats . . . . . . . . . . . . . . . . . . . . 3-9
Safety Belts . . . . . . . . . . . . . . . . . . 3-10
Airbag System . . . . . . . . . . . . . . . . 3-18
Child Restraints . . . . . . . . . . . . . . 3-32
Storage . . . . . . . . . . . . . . . . . . . . . . . 4-1
Storage Compartments . . . . . . . . 4-1
Additional Storage Features . . . 4-2
Roof Rack System . . . . . . . . . . . . . 4-2
Instruments and Controls . . . . 5-1
Controls . . . . . . . . . . . . . . . . . . . . . . . 5-2
Warning Lights, Gauges, and
Indicators . . . . . . . . . . . . . . . . . . . . 5-7
Information Displays . . . . . . . . . . 5-22
Vehicle Messages . . . . . . . . . . . . 5-25
Vehicle Personalization . . . . . . . 5-32
Universal Remote System . . . . 5-37 Lighting
. . . . . . . . . . . . . . . . . . . . . . . 6-1
Exterior Lighting . . . . . . . . . . . . . . . 6-1
Interior Lighting . . . . . . . . . . . . . . . . 6-4
Lighting Features . . . . . . . . . . . . . . 6-5
Infotainment System . . . . . . . . . 7-1
Introduction . . . . . . . . . . . . . . . . . . . . 7-1
Radio . . . . . . . . . . . . . . . . . . . . . . . . . . 7-7
Audio Players . . . . . . . . . . . . . . . . 7-13
Phone . . . . . . . . . . . . . . . . . . . . . . . . 7-21
Trademarks and License
Agreements . . . . . . . . . . . . . . . . . 7-33
Climate Controls . . . . . . . . . . . . . 8-1
Climate Control Systems . . . . . . 8-1
Air Vents . . . . . . . . . . . . . . . . . . . . . . . 8-6
Maintenance . . . . . . . . . . . . . . . . . . . 8-6
Page 7 of 388
Black plate (1,1)Chevrolet Equinox Owner Manual - 2013 - CRC - 5/21/12
In Brief 1-1
In Brief
Instrument Panel
Instrument Panel . . . . . . . . . . . . . . 1-2
Initial Drive Information
Initial Drive Information . . . . . . . . 1-4
Remote Keyless Entry (RKE)System . . . . . . . . . . . . . . . . . . . . . . 1-4
Remote Vehicle Start . . . . . . . . . 1-4
Door Locks . . . . . . . . . . . . . . . . . . . 1-5
Liftgate . . . . . . . . . . . . . . . . . . . . . . . . 1-6
Windows . . . . . . . . . . . . . . . . . . . . . . 1-6
Seat Adjustment . . . . . . . . . . . . . . 1-7
Memory Features . . . . . . . . . . . . . 1-9
Heated Seats . . . . . . . . . . . . . . . . . 1-9
Head Restraint Adjustment . . . . 1-9
Safety Belts . . . . . . . . . . . . . . . . . . 1-10
Passenger Sensing System . . . . . . . . . . . . . . . . . . . . . 1-10
Mirror Adjustment . . . . . . . . . . . . 1-10 Steering Wheel
Adjustment . . . . . . . . . . . . . . . . . 1-11
Interior Lighting . . . . . . . . . . . . . . 1-11
Exterior Lighting . . . . . . . . . . . . . 1-12
Windshield Wiper/Washer . . . . 1-12
Climate Controls . . . . . . . . . . . . . 1-13
Parking Brake . . . . . . . . . . . . . . . 1-14
Transmission . . . . . . . . . . . . . . . . 1-15
Vehicle Features
Radio(s) . . . . . . . . . . . . . . . . . . . . . 1-15
Satellite Radio . . . . . . . . . . . . . . . 1-16
Portable Audio Devices . . . . . . 1-16
Bluetooth
®. . . . . . . . . . . . . . . . . . . 1-17
Steering Wheel Controls . . . . . 1-17
Cruise Control . . . . . . . . . . . . . . . 1-18
Infotainment System . . . . . . . . . 1-18
Driver Information Center (DIC) . . . . . . . . . . . . . . . 1-18
Forward Collision Alert (FCA) System . . . . . . . . . . . . . . . . . . . . . 1-19 Lane Departure
Warning (LDW) . . . . . . . . . . . . . 1-19
Rear Vision Camera (RVC) . . . . . . . . . . . . . 1-20
Ultrasonic Parking Assist . . . . 1-20
Roof Rack System . . . . . . . . . . . 1-20
Power Outlets . . . . . . . . . . . . . . . 1-20
Universal Remote System . . . 1-21
Performance and Maintenance
Traction Control
System (TCS) . . . . . . . . . . . . . . 1-21
StabiliTrak
®System . . . . . . . . . 1-21
Tire Pressure Monitor . . . . . . . . 1-22
Engine Oil Life System . . . . . . 1-22
Fuel E85 (85% Ethanol) . . . . . 1-22
Driving for Better Fuel Economy . . . . . . . . . . . . . . . . . . . 1-23
Roadside Assistance Program . . . . . . . . . . . . . . . . . . . . 1-23
OnStar
®. . . . . . . . . . . . . . . . . . . . . 1-23
Page 23 of 388

Black plate (17,1)Chevrolet Equinox Owner Manual - 2013 - CRC - 5/21/12
In Brief 1-17
Bluetooth®
The Bluetooth® system allows
users with a Bluetooth-enabled
mobile phone to make and receive
hands-free calls using the vehicle
audio system and controls.
The Bluetooth-enabled mobile
phone must be paired with the
in-vehicle Bluetooth system before it
can be used in the vehicle. Not all
phones will support all functions.
SeeBluetooth (Overview) on
page 7‑21 orBluetooth
(Infotainment Controls) on
page 7‑23 orBluetooth (Voice
Recognition) on page 7‑27.
Steering Wheel Controls
Some audio steering wheel controls
can be adjusted at the steering
wheel.
b/g: Press to interact with the
available Bluetooth or OnStar
systems.
>/i: Press to silence the
vehicle speakers only. Press again
to turn the sound on. For vehicles
with OnStar or Bluetooth systems,
press to reject an incoming call,
or end a current call.
_SRC^: Press to select an audio
source.
Toggle up or down to select the next
or previous favorite radio station,
CD, or MP3 track.
+ VOL −:Press + to increase the
volume; press −to decrease the
volume.
For more information, see Steering
Wheel Controls on page 5‑2.
Page 109 of 388
Black plate (3,1)Chevrolet Equinox Owner Manual - 2013 - CRC - 5/21/12
Instruments and Controls 5-3
with OnStar or Bluetooth systems,
press to reject an incoming call,
or end a current call.
_SRC^:Press to select an audio
source.
Toggle up or down to select the next
or previous favorite radio station,
CD, or MP3 track.
+ VOL −:Press + to increase the
volume; press −to decrease the
volume.
Horn
Pressaon the steering wheel pad
to sound the horn.
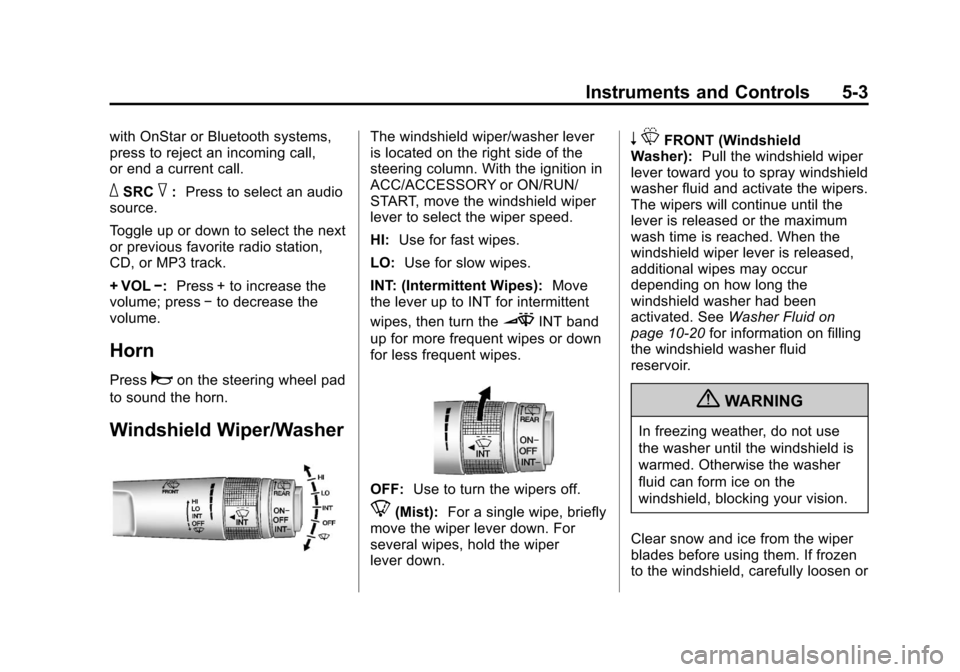
Windshield Wiper/Washer
The windshield wiper/washer lever
is located on the right side of the
steering column. With the ignition in
ACC/ACCESSORY or ON/RUN/
START, move the windshield wiper
lever to select the wiper speed.
HI: Use for fast wipes.
LO: Use for slow wipes.
INT: (Intermittent Wipes): Move
the lever up to INT for intermittent
wipes, then turn the
3INT band
up for more frequent wipes or down
for less frequent wipes.
OFF: Use to turn the wipers off.
8(Mist): For a single wipe, briefly
move the wiper lever down. For
several wipes, hold the wiper
lever down.
n LFRONT (Windshield
Washer): Pull the windshield wiper
lever toward you to spray windshield
washer fluid and activate the wipers.
The wipers will continue until the
lever is released or the maximum
wash time is reached. When the
windshield wiper lever is released,
additional wipes may occur
depending on how long the
windshield washer had been
activated. See Washer Fluid on
page 10‑20 for information on filling
the windshield washer fluid
reservoir.
{WARNING
In freezing weather, do not use
the washer until the windshield is
warmed. Otherwise the washer
fluid can form ice on the
windshield, blocking your vision.
Clear snow and ice from the wiper
blades before using them. If frozen
to the windshield, carefully loosen or
Page 112 of 388
Black plate (6,1)Chevrolet Equinox Owner Manual - 2013 - CRC - 5/21/12
5-6 Instruments and Controls
6. To save the time and return tothe Time Settings menu, press
the
EBACK button at any
time or press the MENU/SEL
knob after adjusting the minutes.
To set the 12/24 hour format:
1. Turn the infotainment system on.
2. Press the CONFIG button and select Time Settings, or press
the
Hbutton.
3. Highlight 12/24 Hour Format.
4. Press the MENU/SEL knob to select the 12 hour or 24 hour
display format.
Setting the Clock (Radio with
CD and Touchscreen)
To set the time:
1. Press the CONFIG button toenter the menu options. Turn the
TUNE/MENU knob to scroll
through the available setup
features. Press the TUNE/MENU knob or press the Time screen
button to display other options
within that feature.
2. Press + or −to decrease or
increase the Hours and Minutes
displayed on the clock.
12/24 HR Format: Press the 12 HR
screen button for standard time;
press the 24 HR screen button for
military time.
Day + or Day −:Press the Day +
or Day −display buttons to increase
or decrease the day.
Display: Press Display to turn the
display of the time on the screen on
or off.
Power Outlets
The accessory power outlets can be
used to connect electrical
equipment, such as a cell phone or
MP3 player. There are four accessory power
outlets in the following locations:
below the CD slot, inside the center
console storage, on the rear of the
center console storage, and in the
rear cargo compartment.
To use the outlets, remove the cover
and close when not in use.
Notice:
Leaving electrical
equipment plugged in for an
extended period of time while the
vehicle is off will drain the
battery. Always unplug electrical
equipment when not in use and
do not plug in equipment that
exceeds the maximum 20 ampere
rating.
Certain accessory plugs may not be
compatible with the accessory
power outlets and could overload
vehicle and adapter fuses. If a
problem is experienced, see your
dealer.
Page 119 of 388
Black plate (13,1)Chevrolet Equinox Owner Manual - 2013 - CRC - 5/21/12
Instruments and Controls 5-13
{WARNING
If the airbag readiness light ever
comes on and stays on, it means
that something may be wrong
with the airbag system. To help
avoid injury to yourself or others,
have the vehicle serviced right
away. SeeAirbag Readiness
Light on page 5‑11 for more
information, including important
safety information.
Charging System Light
The charging system light comes on
briefly when the ignition is turned
on, but the engine is not running, as
a check to show the light is working. The light turns off when the engine
is started. If it does not, have the
vehicle serviced by your dealer.
If the light stays on, or comes on
while driving, there may be a
problem with the electrical charging
system. Have it checked by your
dealer. Driving while this light is on
could drain the battery.
When this light comes on, the Driver
Information Center (DIC) also
displays a message.
See
Battery Voltage and Charging
Messages on page 5‑25.
If a short distance must be driven
with the light on, be sure to turn off
all accessories, such as the radio
and air conditioner.
Malfunction
Indicator Lamp
A computer system called OBD II
(On-Board Diagnostics-Second
Generation) monitors the operation
of the vehicle to ensure emissions
are at acceptable levels, helping to maintain a clean environment. The
malfunction indicator lamp comes
on when the vehicle is placed in
ON/RUN, as a check to show it is
working. If it does not, have the
vehicle serviced by your dealer. See
Ignition Positions on page 9‑19.
If the malfunction indicator lamp
comes on while the engine is
running, this indicates that the OBD
II system has detected a problem
and diagnosis and service might be
required.
Malfunctions often are indicated by
the system before any problem is
apparent. Being aware of the light
can prevent more serious damage
to the vehicle. This system also
assists the service technician in
correctly diagnosing any
malfunction.
Page 128 of 388
Black plate (22,1)Chevrolet Equinox Owner Manual - 2013 - CRC - 5/21/12
5-22 Instruments and Controls
Information Displays
Driver Information
Center (DIC)
The vehicle may have a Driver
Information Center (DIC). It displays
information about the vehicle and
warning messages if there is a
system problem detected. DIC
messages display in the center of
the instrument panel cluster. See
Vehicle Messages on page 5‑25for
more information.
The vehicle may also have features
that can be customized through the
controls on the radio. See Vehicle
Personalization on page 5‑32 for
more information.
DIC Operation and Displays
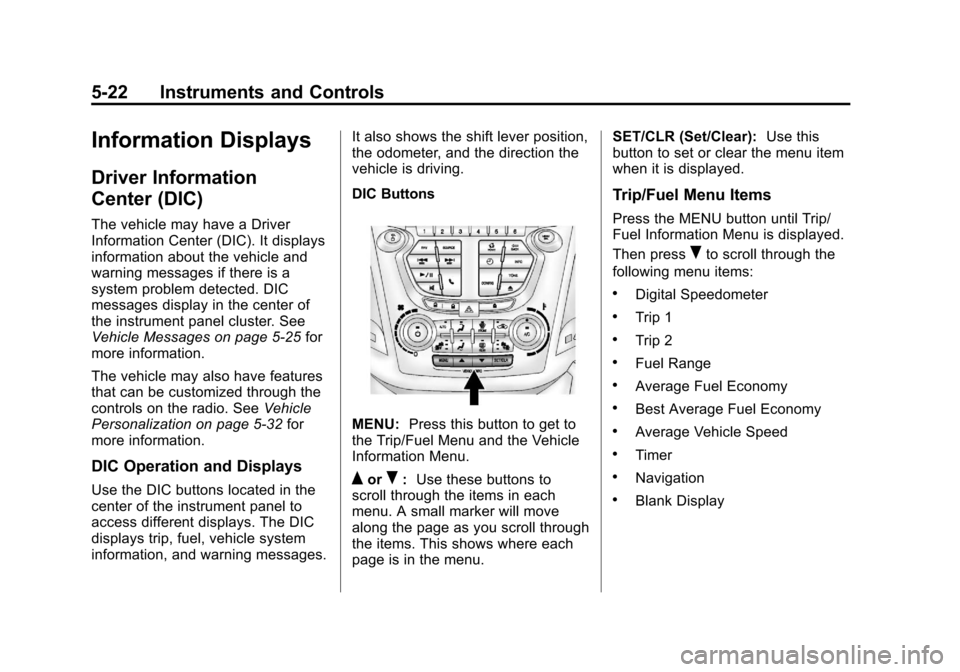
Use the DIC buttons located in the
center of the instrument panel to
access different displays. The DIC
displays trip, fuel, vehicle system
information, and warning messages. It also shows the shift lever position,
the odometer, and the direction the
vehicle is driving.
DIC Buttons
MENU:
Press this button to get to
the Trip/Fuel Menu and the Vehicle
Information Menu.
QorR: Use these buttons to
scroll through the items in each
menu. A small marker will move
along the page as you scroll through
the items. This shows where each
page is in the menu. SET/CLR (Set/Clear):
Use this
button to set or clear the menu item
when it is displayed.
Trip/Fuel Menu Items
Press the MENU button until Trip/
Fuel Information Menu is displayed.
Then press
Rto scroll through the
following menu items:
.Digital Speedometer
.Trip 1
.Trip 2
.Fuel Range
.Average Fuel Economy
.Best Average Fuel Economy
.Average Vehicle Speed
.Timer
.Navigation
.Blank Display
Page 143 of 388
Black plate (37,1)Chevrolet Equinox Owner Manual - 2013 - CRC - 5/21/12
Instruments and Controls 5-37
Memory Remote Recall is when the
memorized settings will be recalled
as you unlock the vehicle.
Press the MENU/SEL knob when
“Memory Remote Recall”is
highlighted to toggle between “On”
or “Off.” Press
EBACK to confirm
the selection and go back to the
last menu.
Return to Factory Settings
Select “Return to Factory Settings”
to return all of the vehicle
personalization to the default
settings. Turn the knob to select
“Yes” or“No.” Press the knob to
confirm and go back to the
last menu.
Universal Remote
System
See Radio Frequency Statement on
page 13‑15 for information
regarding Part 15 of the Federal
Communications Commission (FCC)
rules and Industry Canada
Standards RSS-GEN/210/220/310.
Universal Remote System
Programming
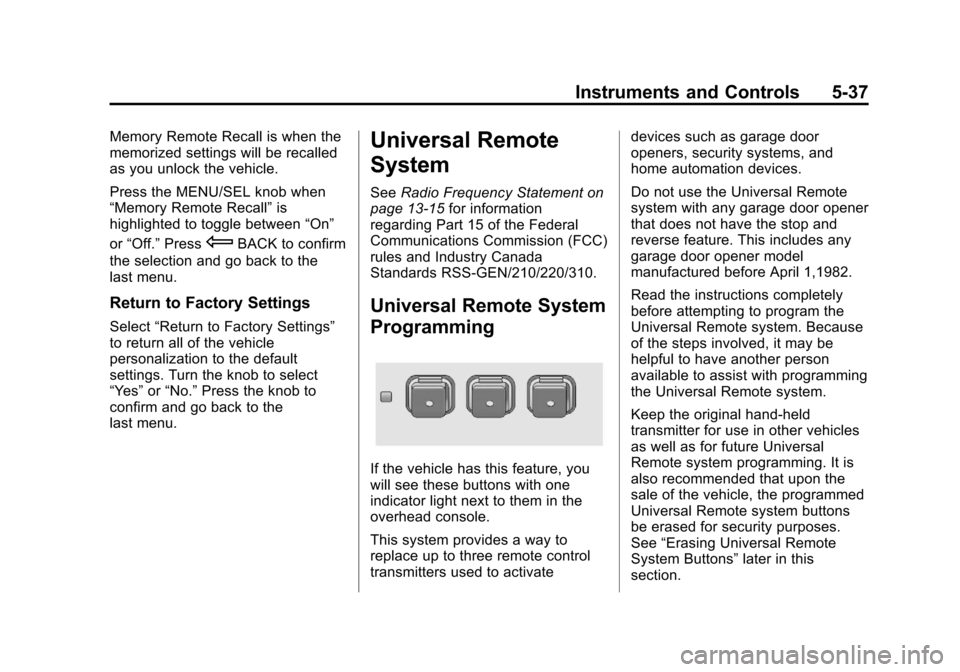
If the vehicle has this feature, you
will see these buttons with one
indicator light next to them in the
overhead console.
This system provides a way to
replace up to three remote control
transmitters used to activate devices such as garage door
openers, security systems, and
home automation devices.
Do not use the Universal Remote
system with any garage door opener
that does not have the stop and
reverse feature. This includes any
garage door opener model
manufactured before April 1,1982.
Read the instructions completely
before attempting to program the
Universal Remote system. Because
of the steps involved, it may be
helpful to have another person
available to assist with programming
the Universal Remote system.
Keep the original hand-held
transmitter for use in other vehicles
as well as for future Universal
Remote system programming. It is
also recommended that upon the
sale of the vehicle, the programmed
Universal Remote system buttons
be erased for security purposes.
See
“Erasing Universal Remote
System Buttons” later in this
section.
Page 144 of 388
Black plate (38,1)Chevrolet Equinox Owner Manual - 2013 - CRC - 5/21/12
5-38 Instruments and Controls
When programming a garage door,
park outside of the garage. Park
directly in line with and facing the
garage door opener motor-head or
gate motor-head. Be sure that
people and objects are clear of the
garage door or gate being
programmed.
It is recommended that a new
battery be installed in the hand-held
transmitter for quicker and more
accurate transmission of the
radio-frequency signal.
Programming the Universal
Remote System
For questions or help programming
the Universal Remote system, call
1-800-355-3515 or go to
www.homelink.com.
Programming a garage door opener
involves time-sensitive actions, so
read the entire procedure before
starting. Otherwise, the device will
time out and the procedure will have
to be repeated.To program up to three devices:
1. Hold the end of the hand-held
transmitter about 3 to 8 cm (1 to
3 in) away from the Universal
Remote system buttons while
keeping the indicator light in
view. The hand-held transmitter
was supplied by the
manufacturer of the garage door
opener receiver
(motor-head unit).
2. At the same time, press and hold both the hand-held
transmitter button and one of the
three Universal Remote system
buttons to be used to operate
the garage door. Do not release
the Universal Remote system
button or the hand-held
transmitter button until the
indicator light changes from a
slowly to a rapidly flashing light.
You now may release both
buttons. Some entry gates and garage
door openers may require
substitution of Step 2 with the
procedure noted in
“Gate
Operator and Canadian
Programming” later in this
section.
3. Press and hold for five seconds the newly trained Universal
Remote system button (the
button selected in Step 2) while
observing the indicator light and
garage door activation.
.If the indicator light stays on
continuously or the garage
door starts to move when
the Universal Remote
system button is pressed
and released, then the
programming is complete.
There is no need to
continue programming
Steps 4–6.
Page 145 of 388
Black plate (39,1)Chevrolet Equinox Owner Manual - 2013 - CRC - 5/21/12
Instruments and Controls 5-39
.If the Universal Remote
system indicator light blinks
rapidly for two seconds,
then turns to a constant
light and the garage door
does not move, continue
with programming
Steps 4–6.
It may be helpful to have
another person assist with
the remaining Steps 4–6.
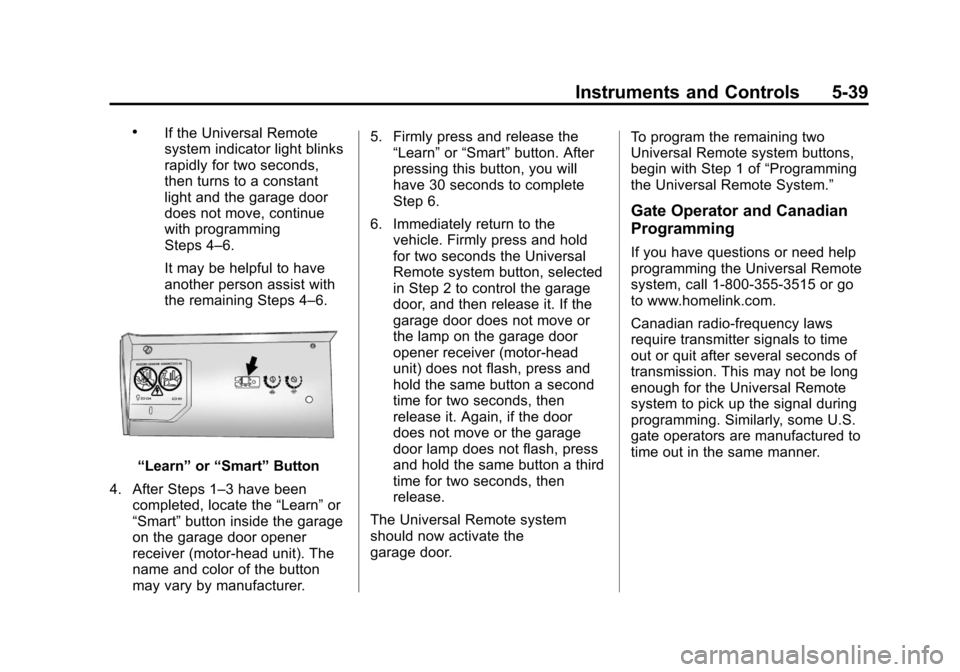
“Learn”or“Smart” Button
4. After Steps 1–3 have been completed, locate the “Learn”or
“Smart” button inside the garage
on the garage door opener
receiver (motor-head unit). The
name and color of the button
may vary by manufacturer. 5. Firmly press and release the
“Learn” or“Smart” button. After
pressing this button, you will
have 30 seconds to complete
Step 6.
6. Immediately return to the vehicle. Firmly press and hold
for two seconds the Universal
Remote system button, selected
in Step 2 to control the garage
door, and then release it. If the
garage door does not move or
the lamp on the garage door
opener receiver (motor-head
unit) does not flash, press and
hold the same button a second
time for two seconds, then
release it. Again, if the door
does not move or the garage
door lamp does not flash, press
and hold the same button a third
time for two seconds, then
release.
The Universal Remote system
should now activate the
garage door. To program the remaining two
Universal Remote system buttons,
begin with Step 1 of
“Programming
the Universal Remote System.”
Gate Operator and Canadian
Programming
If you have questions or need help
programming the Universal Remote
system, call 1-800-355-3515 or go
to www.homelink.com.
Canadian radio-frequency laws
require transmitter signals to time
out or quit after several seconds of
transmission. This may not be long
enough for the Universal Remote
system to pick up the signal during
programming. Similarly, some U.S.
gate operators are manufactured to
time out in the same manner.