display CHEVROLET EQUINOX 2021 Get To Know Guide
[x] Cancel search | Manufacturer: CHEVROLET, Model Year: 2021, Model line: EQUINOX, Model: CHEVROLET EQUINOX 2021Pages: 20, PDF Size: 3.41 MB
Page 7 of 20
7F Optional equipment
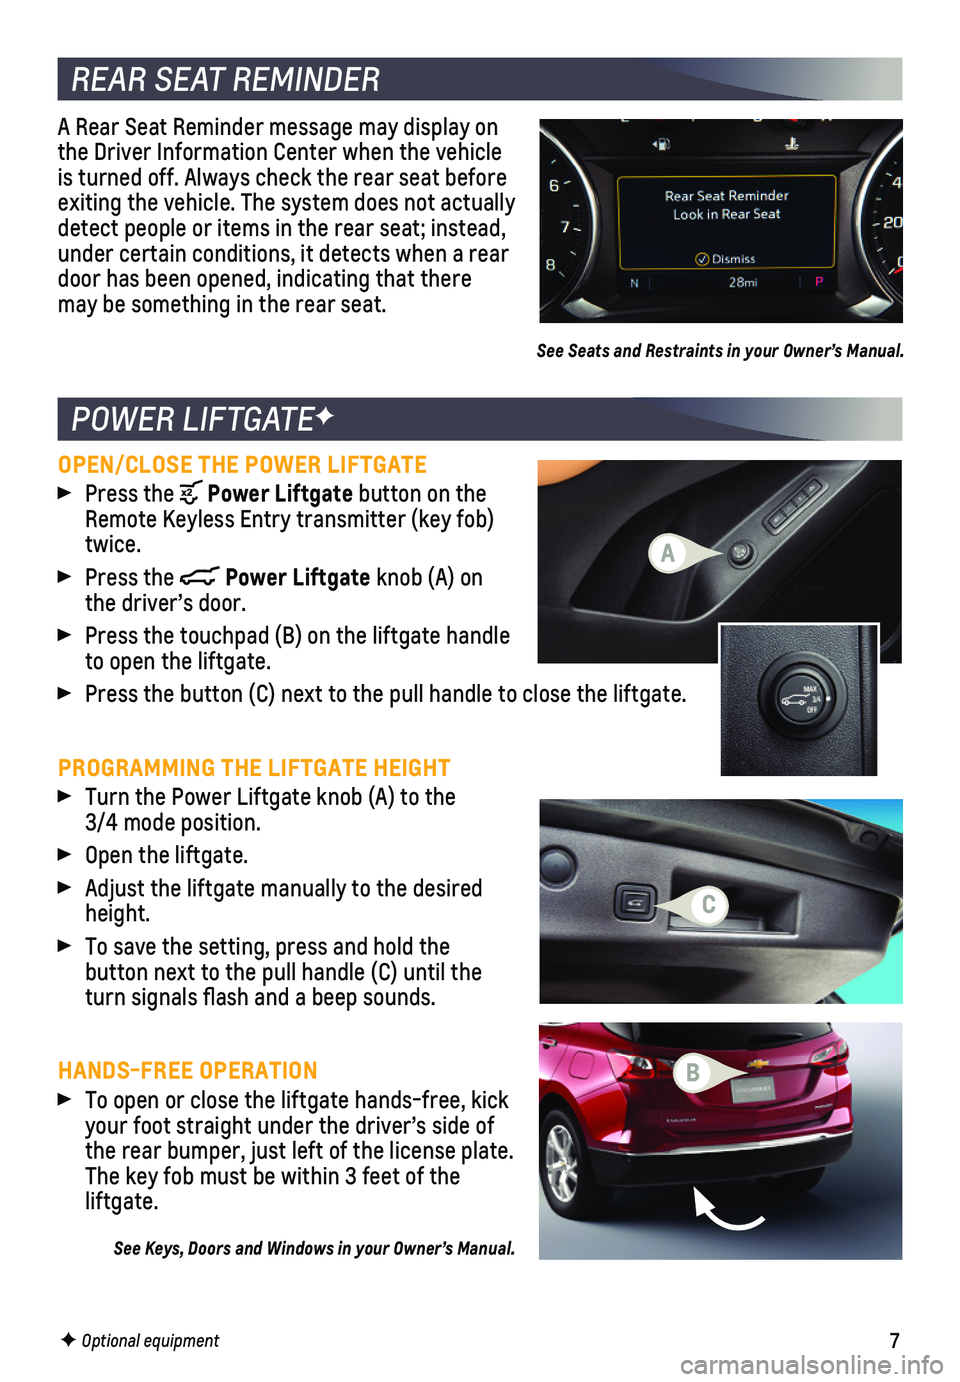
POWER LIFTGATEF
REAR SEAT REMINDER
OPEN/CLOSE THE POWER LIFTGATE Press the Power Liftgate button on the Remote Keyless Entry transmitter (key fob) twice.
Press the Power Liftgate knob (A) on the driver’s door.
Press the touchpad (B) on the liftgate handle to open the liftgate.
Press the button (C) next to the pull handle to close the liftgate.
PROGRAMMING THE LIFTGATE HEIGHT Turn the Power Liftgate knob (A) to the 3/4 mode position.
Open the liftgate.
Adjust the liftgate manually to the desired height.
To save the setting, press and hold the
button next to the pull handle (C) until the turn signals flash and a beep sounds.
HANDS-FREE OPERATION To open or close the liftgate hands-free, kick your foot straight under the driver’s side of the rear bumper, just left of the license plate. The key fob must be within 3 feet of the liftgate.
See Keys, Doors and Windows in your Owner’s Manual.
A
B
C
A Rear Seat Reminder message may display on the Driver Information Center when the vehicle is turned off. Always check the rear seat before exiting the vehicle. The system does not actually detect people or items in the rear seat; instead, under certain conditions, it detects when a rear door has been opened, indicating that there may be something in the rear seat.
See Seats and Restraints in your Owner’s Manual.
Page 8 of 20
8
DRIVER INFORMATION CENTER
AUDIO STEERING WHEEL CONTROLS
F Optional equipment
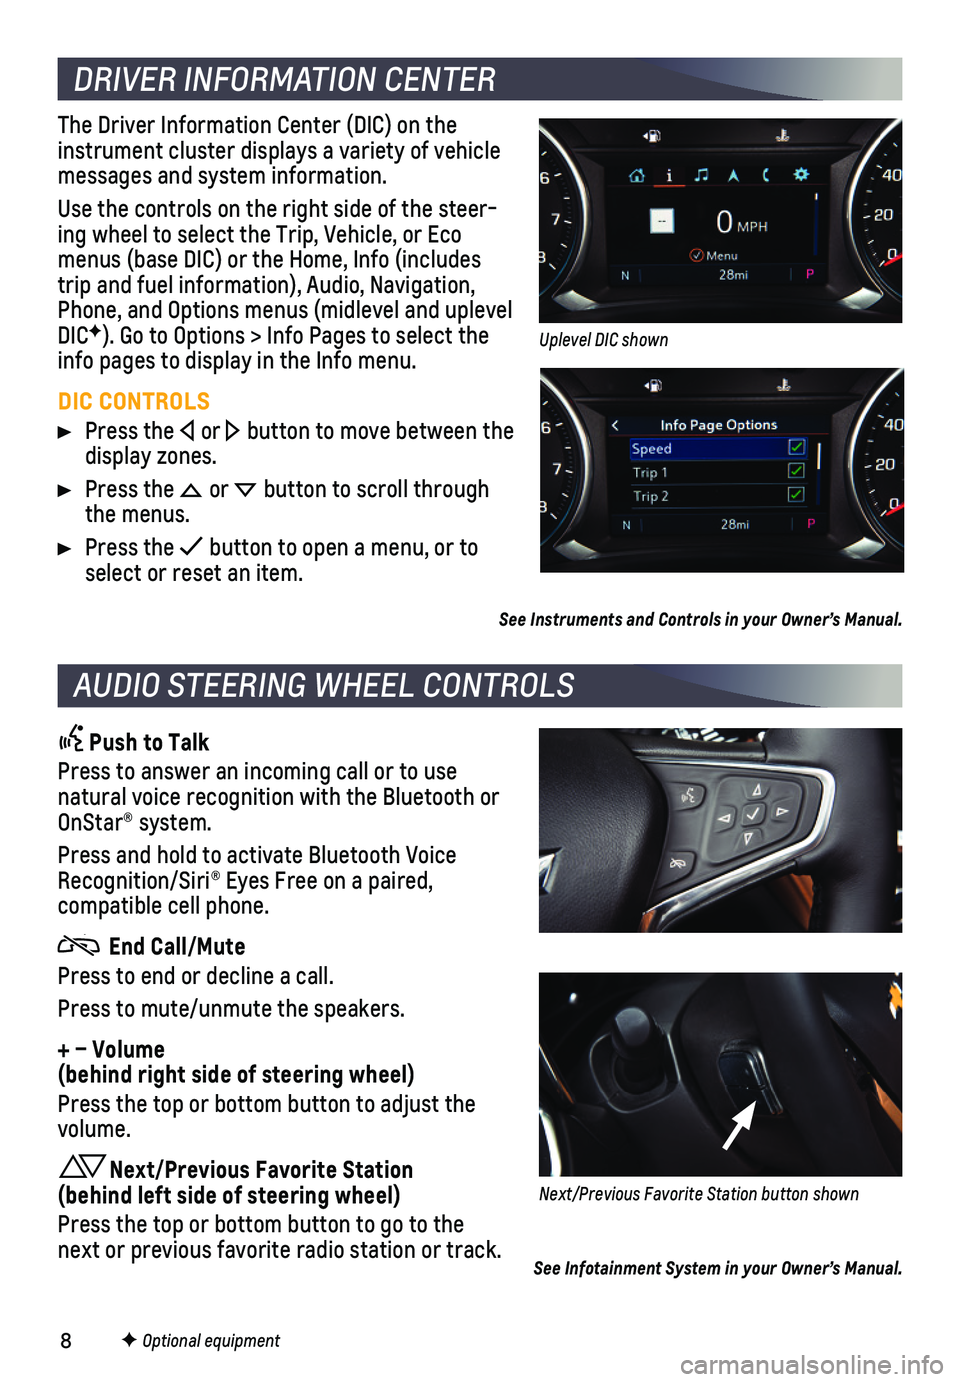
The Driver Information Center (DIC) on the instrument cluster displays a variety of vehicle messages and system information.
Use the controls on the right side of the steer-ing wheel to select the Trip, Vehicle, or Eco menus (base DIC) or the Home, Info (includes trip and fuel information), Audio, Navigation, Phone, and Options menus (midlevel and uplevel DICF). Go to Options > Info Pages to select the info pages to display in the Info menu.
DIC CONTROLS
Press the or button to move between the display zones.
Press the or button to scroll through the menus.
Press the button to open a menu, or to select or reset an item.
See Instruments and Controls in your Owner’s Manual.
Push to Talk
Press to answer an incoming call or to use natural voice recognition with the Bluetooth or OnStar® system.
Press and hold to activate Bluetooth Voice Recognition/Siri® Eyes Free on a paired,
compatible cell phone.
End Call/Mute
Press to end or decline a call.
Press to mute/unmute the speakers.
+ – Volume (behind right side of steering wheel)
Press the top or bottom button to adjust the volume.
Next/Previous Favorite Station (behind left side of steering wheel)
Press the top or bottom button to go to the next or previous favorite radio station or track.
Uplevel DIC shown
Next/Previous Favorite Station button shown
See Infotainment System in your Owner’s Manual.
Page 11 of 20
11
INFOTAINMENT SYSTEM
BLUETOOTH® SYSTEM
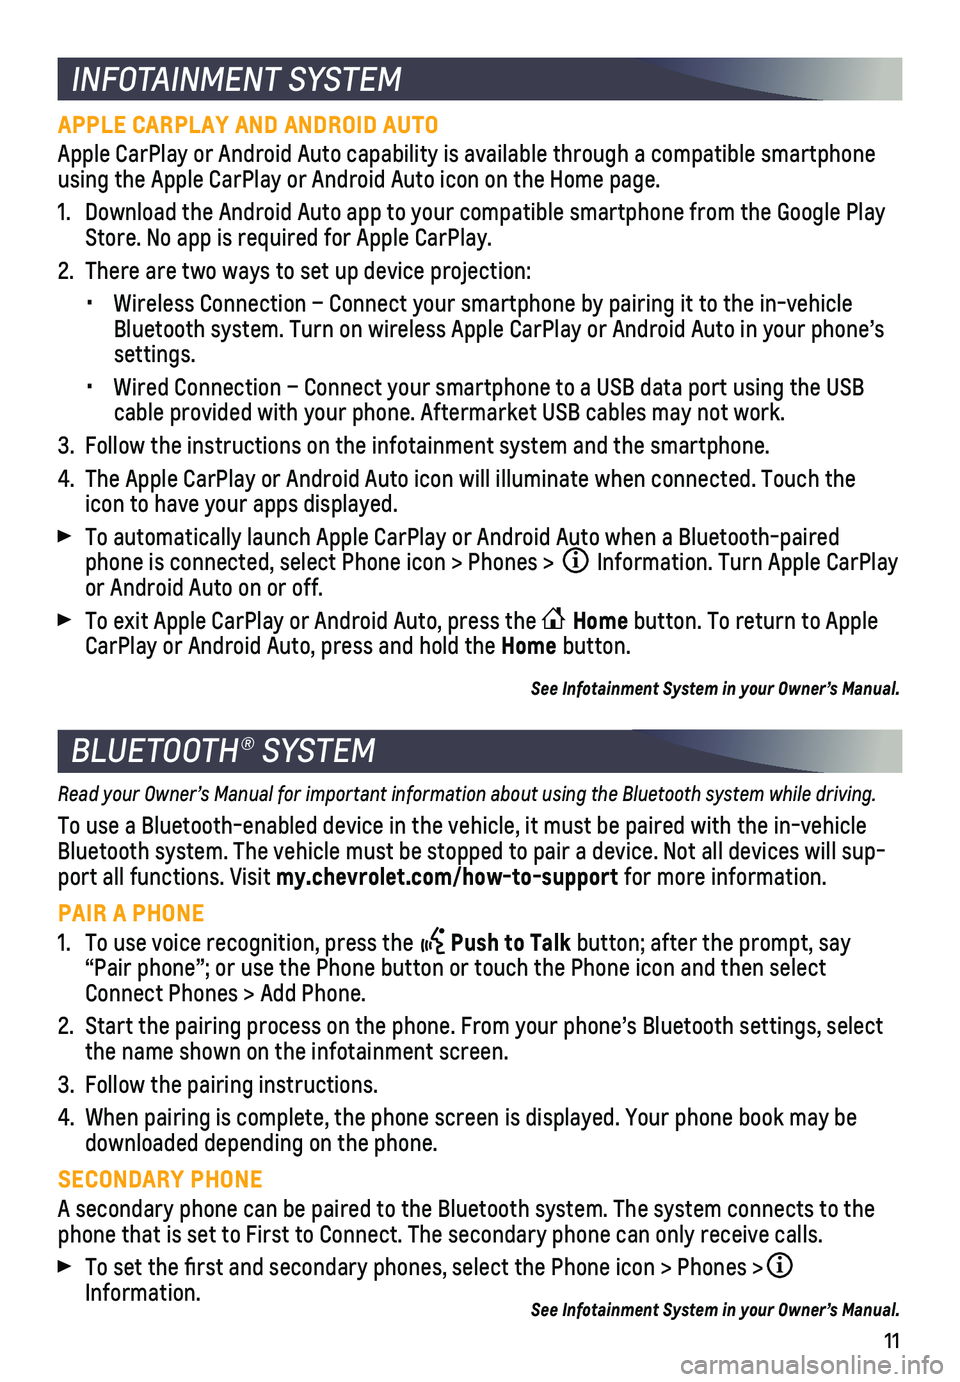
APPLE CARPLAY AND ANDROID AUTO
Apple CarPlay or Android Auto capability is available through a compatib\
le smartphone using the Apple CarPlay or Android Auto icon on the Home page.
1. Download the Android Auto app to your compatible smartphone from the Goo\
gle Play Store. No app is required for Apple CarPlay.
2. There are two ways to set up device projection:
• Wireless Connection – Connect your smartphone by pairing it to the in\
-vehicle Bluetooth system. Turn on wireless Apple CarPlay or Android Auto in your\
phone’s settings.
• Wired Connection – Connect your smartphone to a USB data port using t\
he USB cable provided with your phone. Aftermarket USB cables may not work.
3. Follow the instructions on the infotainment system and the smartphone.
4. The Apple CarPlay or Android Auto icon will illuminate when connected. T\
ouch the icon to have your apps displayed.
To automatically launch Apple CarPlay or Android Auto when a Bluetooth-p\
aired phone is connected, select Phone icon > Phones > Information. Turn Apple CarPlay or Android Auto on or off.
To exit Apple CarPlay or Android Auto, press the Home button. To return to Apple CarPlay or Android Auto, press and hold the Home button.
See Infotainment System in your Owner’s Manual.
Read your Owner’s Manual for important information about using the Bluetooth system while driving.
To use a Bluetooth-enabled device in the vehicle, it must be paired with\
the in-vehicle Bluetooth system. The vehicle must be stopped to pair a device. Not all \
devices will sup-port all functions. Visit my.chevrolet.com/how-to-support for more information.
PAIR A PHONE
1. To use voice recognition, press the Push to Talk button; after the prompt, say “Pair phone”; or use the Phone button or touch the Phone icon and then sele\
ct Connect Phones > Add Phone.
2. Start the pairing process on the phone. From your phone’s Bluetooth s\
ettings, select the name shown on the infotainment screen.
3. Follow the pairing instructions.
4. When pairing is complete, the phone screen is displayed. Your phone book\
may be downloaded depending on the phone.
SECONDARY PHONE
A secondary phone can be paired to the Bluetooth system. The system conn\
ects to the phone that is set to First to Connect. The secondary phone can only rece\
ive calls.
To set the first and secondary phones, select the Phone icon > Phones \
> Information. See Infotainment System in your Owner’s Manual.
Page 12 of 20
12F Optional equipment
4G LTE WI-FI® HOTSPOTF
WIRELESS CHARGINGF
TEEN DRIVER
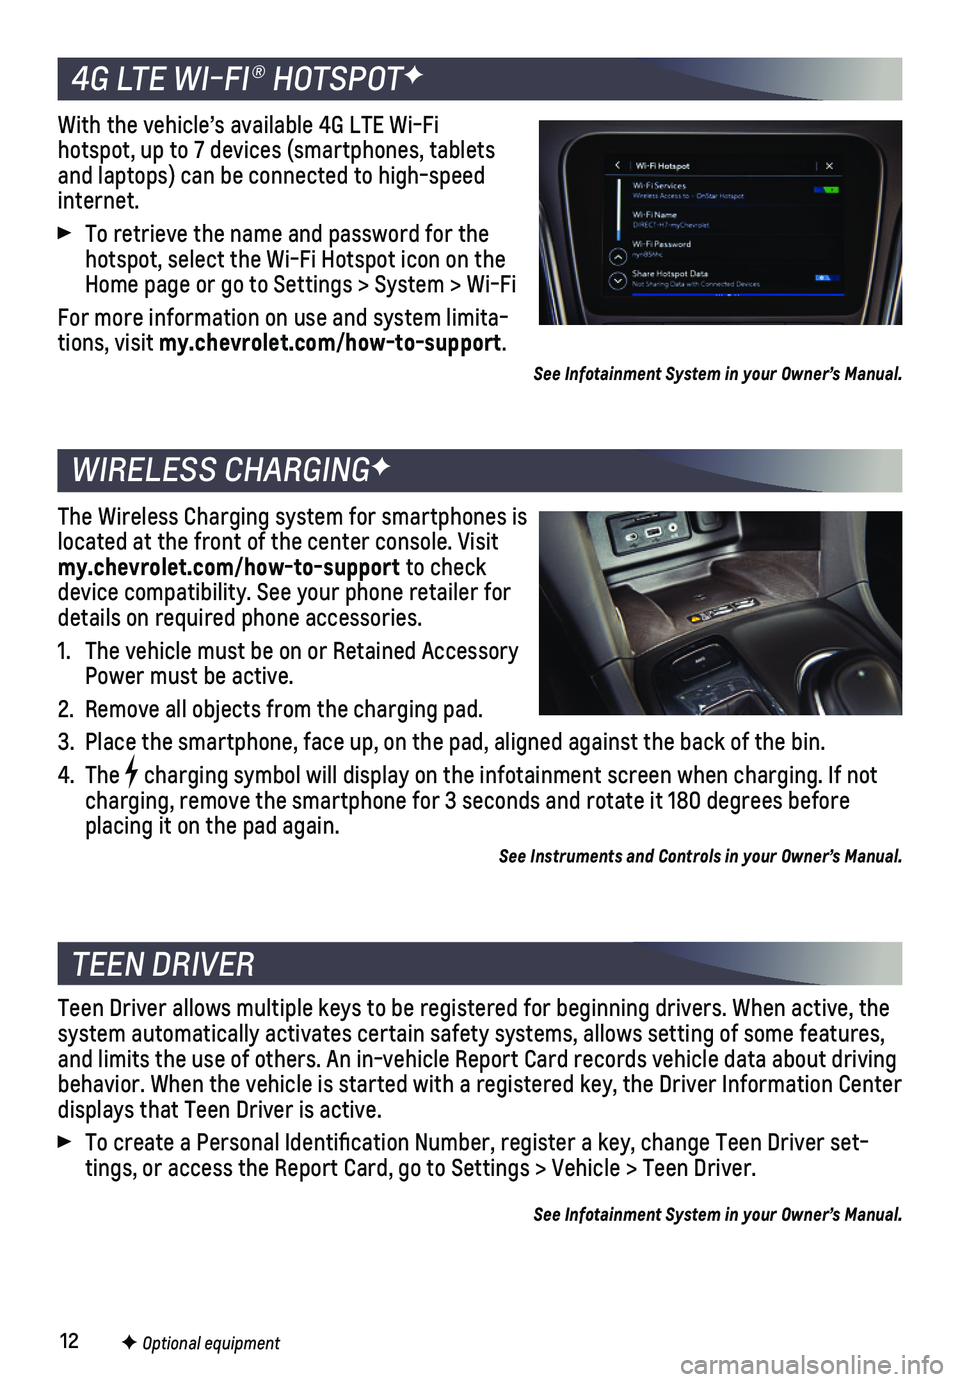
With the vehicle’s available 4G LTE Wi-Fi hotspot, up to 7 devices (smartphones, tablets and laptops) can be connected to high-speed internet.
To retrieve the name and password for the hotspot, select the Wi-Fi Hotspot icon on the Home page or go to Settings > System > Wi-Fi
For more information on use and system limita-tions, visit my.chevrolet.com/how-to-support.
See Infotainment System in your Owner’s Manual.
The Wireless Charging system for smartphones is located at the front of the center console. Visit my.chevrolet.com/how-to-support to check device compatibility. See your phone retailer for details on required phone accessories.
1. The vehicle must be on or Retained Accessory Power must be active.
2. Remove all objects from the charging pad.
3. Place the smartphone, face up, on the pad, aligned against the back of t\
he bin.
4. The charging symbol will display on the infotainment screen when charging. I\
f not charging, remove the smartphone for 3 seconds and rotate it 180 degrees \
before placing it on the pad again.
See Instruments and Controls in your Owner’s Manual.
Teen Driver allows multiple keys to be registered for beginning drivers.\
When active, the system automatically activates certain safety systems, allows setting of\
some features, and limits the use of others. An in-vehicle Report Card records vehicle \
data about driving behavior. When the vehicle is started with a registered key, the Driver \
Information Center displays that Teen Driver is active.
To create a Personal Identification Number, register a key, change Tee\
n Driver set-tings, or access the Report Card, go to Settings > Vehicle > Teen Driver\
.
See Infotainment System in your Owner’s Manual.
Page 14 of 20
14
Safety or driver assistance features are not a substitute for the driver\
’s responsibility to operate the vehicle in a safe manner. The driver should remain attentive to traffic, surroundings and road conditions at all times. Read your Owner’s Manual for important feature limitations and information.
SAFETY ALERT SEATF – The driver’s seat may pulse on the left side, right side, or
simultaneously, to alert the driver of the direction of potential hazard\
s.
Audible alerts or seat pulsing alerts may be selected. To change the ale\
rt settings, go to Settings > Vehicle > Collision/Detection Systems > Alert Type.
TRACTION CONTROL AND STABILITRAK® – The full-time Traction Control system limits wheelspin and the StabiliTrak electronic stability control system assist\
s with directional control of the vehicle in difficult driving conditions. Both systems t\
urn on automatically every time the vehicle is started. Traction Control should be turned off\
if the vehicle is stuck and rocking the vehicle is required.
To turn Traction Control off or on, use the DIC controls to display the \
Vehicle menu > TCS (base DIC) or Options menu > Traction & Stability (midlevel and u\
plevel DICF).
LANE KEEP ASSIST WITH LANE DEPARTURE WARNING – The system may help you avoid
collisions due to unintentional lane departures. The Lane Keep Assist Indicator is green if the system is available to assist. If the vehicle approaches\
a detected lane
marking without using a turn signal in that direction, the system may as\
sist by gently turning the steering wheel and displaying an amber .
If active driver steering is not detected, the amber may flash and beeps may sound or the Safety Alert SeatF may pulse (if selected) on the side of the departure direction as the lane marking is crossed. The Lane Keep Assist system does not con\
tinuously steer the vehicle; the driver needs to steer and be in complete control of the\
vehicle.
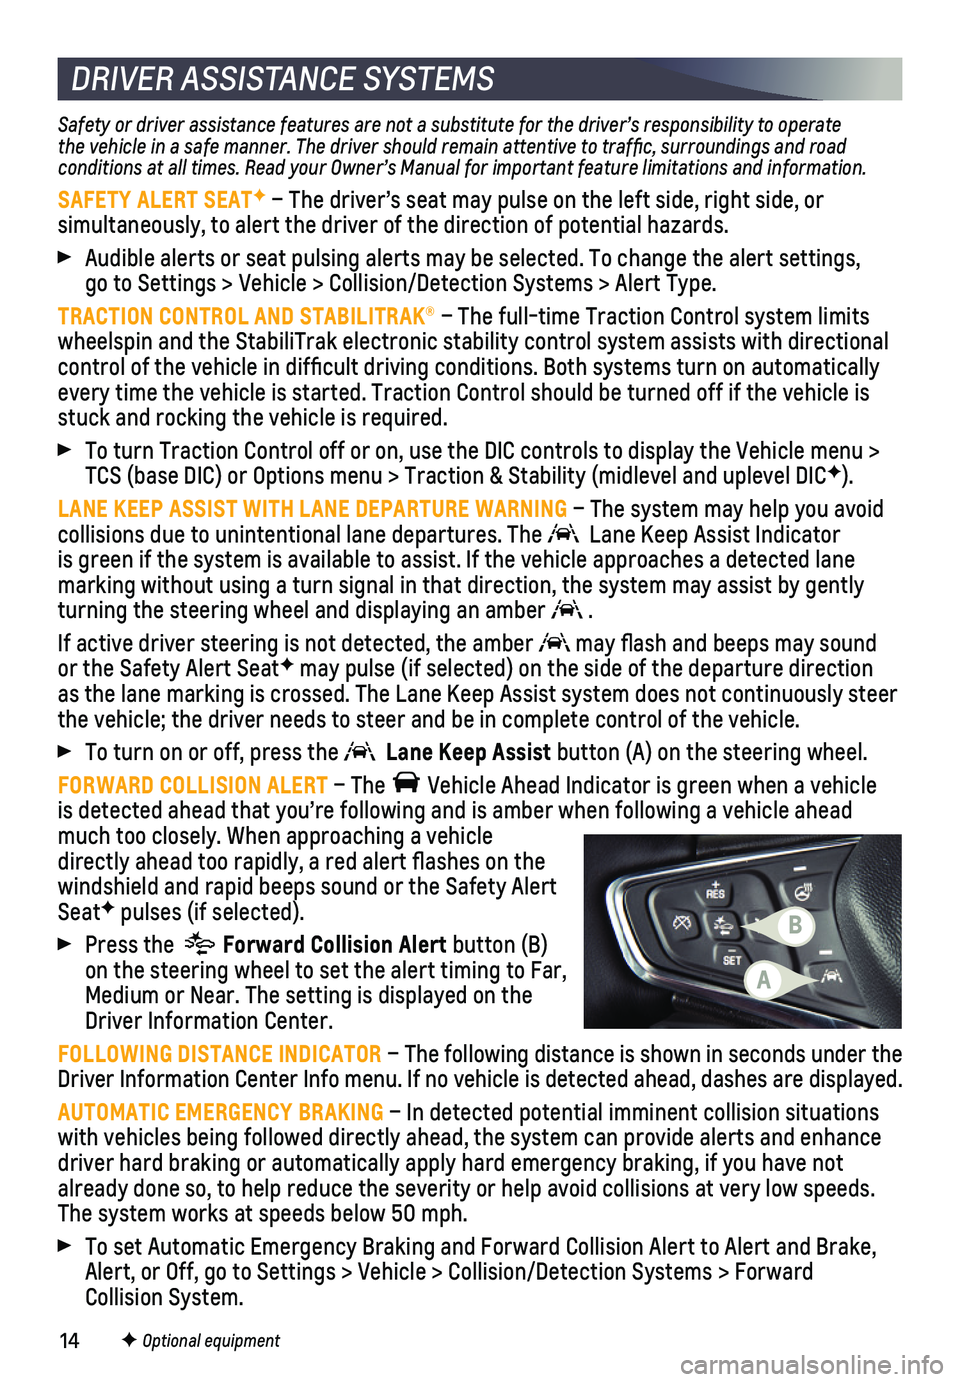
To turn on or off, press the Lane Keep Assist button (A) on the steering wheel.
FORWARD COLLISION ALERT – The Vehicle Ahead Indicator is green when a vehicle is detected ahead that you’re following and is amber when following a vehicle ahead much too closely. When approaching a vehicle directly ahead too rapidly, a red alert flashes on the windshield and rapid beeps sound or the Safety Alert SeatF pulses (if selected).
Press the Forward Collision Alert button (B) on the steering wheel to set the alert timing to Far, Medium or Near. The setting is displayed on the Driver Information Center.
FOLLOWING DISTANCE INDICATOR – The following distance is shown in seconds under the Driver Information Center Info menu. If no vehicle is detected ahead, da\
shes are displayed.
AUTOMATIC EMERGENCY BRAKING – In detected potential imminent collision situations with vehicles being followed directly ahead, the system can provide aler\
ts and enhance driver hard braking or automatically apply hard emergency braking, if yo\
u have not already done so, to help reduce the severity or help avoid collisions at\
very low speeds. The system works at speeds below 50 mph.
To set Automatic Emergency Braking and Forward Collision Alert to Alert \
and Brake, Alert, or Off, go to Settings > Vehicle > Collision/Detection Systems > \
Forward Collision System.
F Optional equipment
DRIVER ASSISTANCE SYSTEMS
A
B
Page 15 of 20
15
DRIVER ASSISTANCE SYSTEMS
FRONT PEDESTRIAN BRAKING – During daytime driving, the system can detect pedes-trians directly ahead and displays an amber indicator. When approaching a detected pedestrian too quickly, a red alert flashes on the windshield and rapi\
d beeps sound or the Safety Alert SeatF pulses (if selected). The system may automatically provide hard emergency braking or enhance the driver’s hard braking. The system wo\
rks at speeds below 50 mph. Nighttime and low visibility performance is limited.
To set to Alert and Brake, Alert, or Off, go to Settings > Vehicle > Col\
lision/Detection Systems > Front Pedestrian Detection.
LANE CHANGE ALERT WITH SIDE BLIND ZONE ALERTF – While driving, the system displays a warning symbol on the left or right side mirror when a vehicle is detect\
ed in that side blind zone area or rapidly approaching that area. The warni\
ng symbol flash-es if a turn signal is activated when a vehicle has been detected on the\
same side.
To turn on or off, go to Settings > Vehicle > Collision/Detection System\
s > Lane Change Alert.
REAR VISION CAMERA – When the vehicle is in Reverse, a view directly behind the
vehicle is displayed on the infotainment screen.
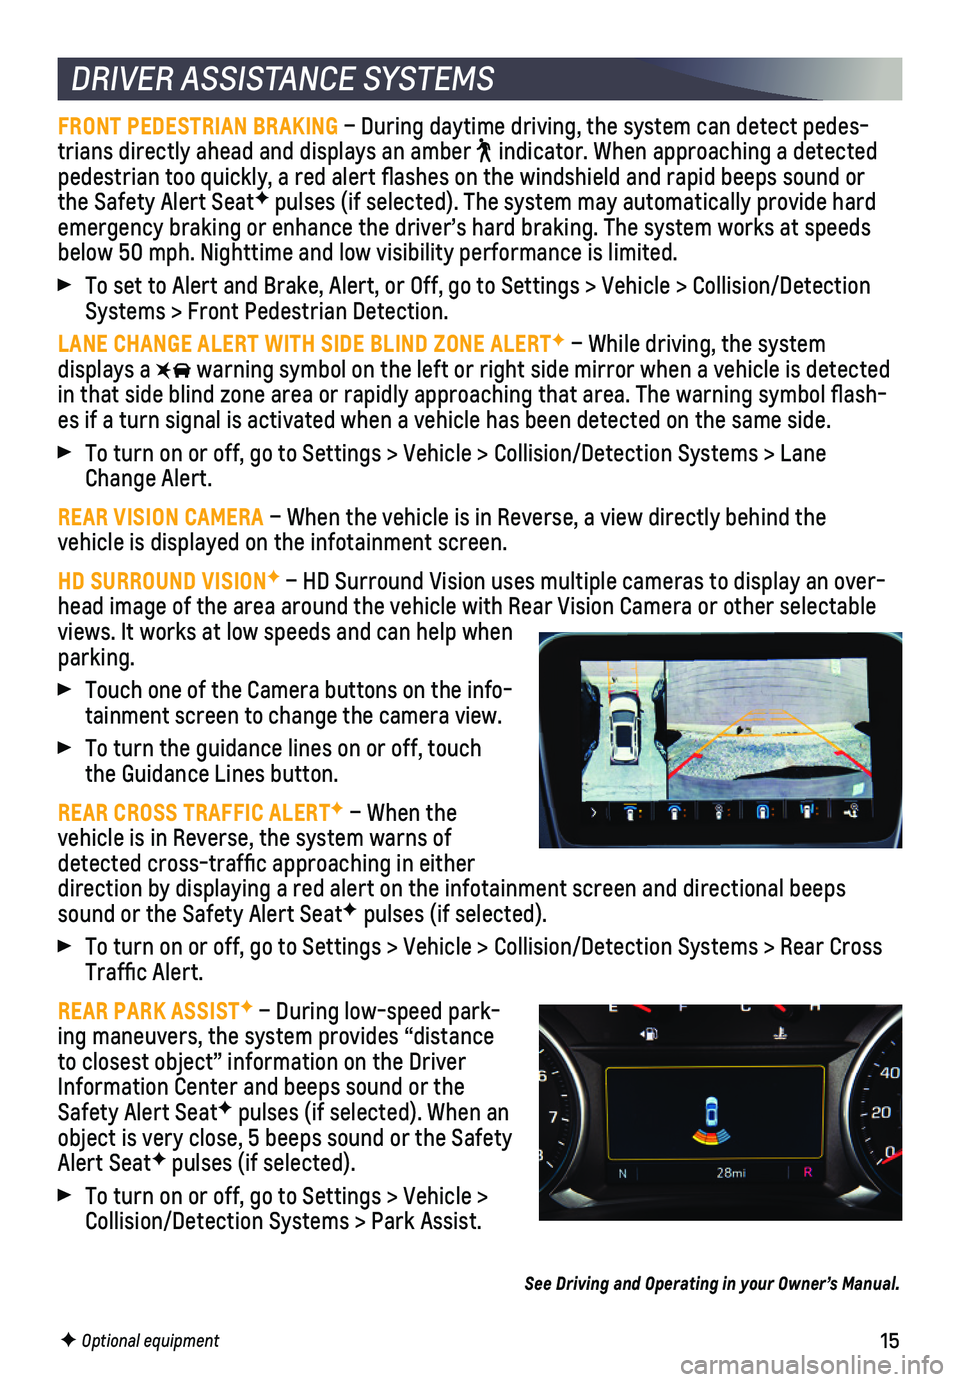
HD SURROUND VISIONF – HD Surround Vision uses multiple cameras to display an over-head image of the area around the vehicle with Rear Vision Camera or oth\
er selectable views. It works at low speeds and can help when parking.
Touch one of the Camera buttons on the info-tainment screen to change the camera view.
To turn the guidance lines on or off, touch the Guidance Lines button.
REAR CROSS TRAFFIC ALERTF – When the
vehicle is in Reverse, the system warns of detected cross-traffic approaching in either direction by displaying a red alert on the infotainment screen and direc\
tional beeps sound or the Safety Alert SeatF pulses (if selected).
To turn on or off, go to Settings > Vehicle > Collision/Detection System\
s > Rear Cross Traffic Alert.
REAR PARK ASSISTF – During low-speed park-ing maneuvers, the system provides “distance to closest object” information on the Driver Information Center and beeps sound or the Safety Alert SeatF pulses (if selected). When an object is very close, 5 beeps sound or the Safety Alert SeatF pulses (if selected).
To turn on or off, go to Settings > Vehicle > Collision/Detection Systems > Park Assist.
F Optional equipment
See Driving and Operating in your Owner’s Manual.
Page 17 of 20
17
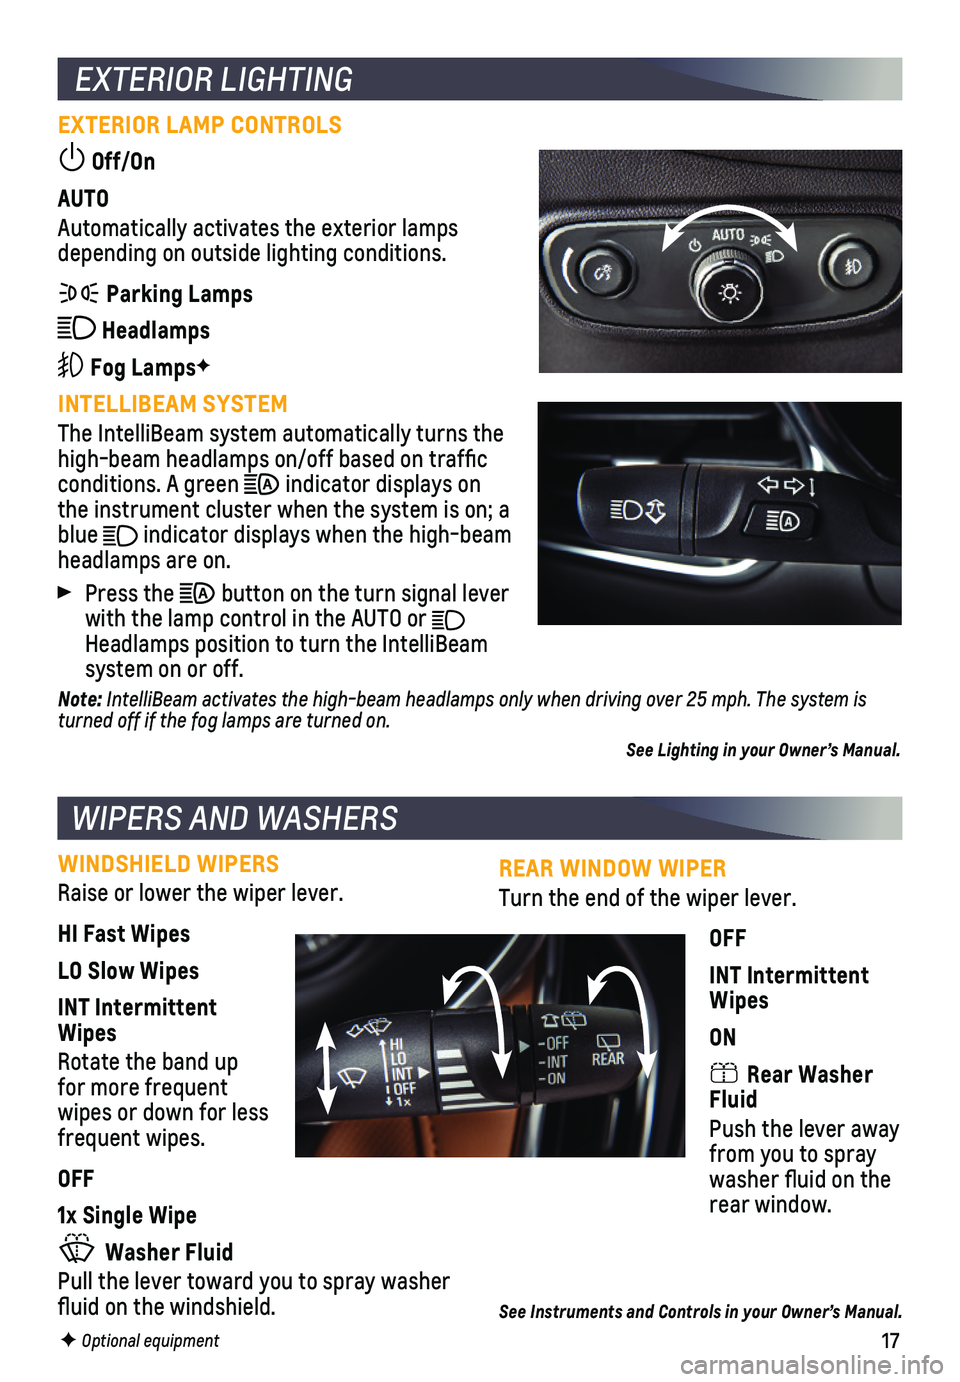
REAR WINDOW WIPER
Turn the end of the wiper lever.
OFF
INT Intermittent Wipes
ON
Rear Washer Fluid
Push the lever away from you to spray washer fluid on the rear window.
See Instruments and Controls in your Owner’s Manual.
EXTERIOR LIGHTING
EXTERIOR LAMP CONTROLS
Off/On
AUTO
Automatically activates the exterior lamps depending on outside lighting conditions.
Parking Lamps
Headlamps
Fog LampsF
INTELLIBEAM SYSTEM
The IntelliBeam system automatically turns the high-beam headlamps on/off based on traffic conditions. A green indicator displays on the instrument cluster when the system is on; a blue indicator displays when the high-beam
headlamps are on.
Press the button on the turn signal lever with the lamp control in the AUTO or Headlamps position to turn the IntelliBeam system on or off.
Note: IntelliBeam activates the high-beam headlamps only when driving over 25 mph. The system is turned off if the fog lamps are turned on.
See Lighting in your Owner’s Manual.
WIPERS AND WASHERS
WINDSHIELD WIPERS
Raise or lower the wiper lever.
HI Fast Wipes
LO Slow Wipes
INT Intermittent Wipes
Rotate the band up for more frequent wipes or down for less frequent wipes.
OFF
1x Single Wipe
Washer Fluid
Pull the lever toward you to spray washer fluid on the windshield.
F Optional equipment