ECU CHEVROLET EQUINOX 2021 Service Manual
[x] Cancel search | Manufacturer: CHEVROLET, Model Year: 2021, Model line: EQUINOX, Model: CHEVROLET EQUINOX 2021Pages: 369, PDF Size: 8.71 MB
Page 191 of 369
Chevrolet Equinox Owner Manual (GMNA-Localizing-U.S./Canada/Mexico-
14420010) - 2021 - CRC - 11/12/20
190 Driving and Operating
Loading the Vehicle for Off-Road Driving
{Warning
.Unsecured cargo on the load floor can
be tossed about when driving over
rough terrain. You or your passengers
can be struck by flying objects. Secure
the cargo properly.
.Keep cargo in the cargo area as far
forward and as low as possible. The
heaviest things should be on the floor,
forward of the rear axle.
.Heavy loads on the roof raise the
vehicle's center of gravity, making it
more likely to roll over. You can be
seriously or fatally injured if the
vehicle rolls over. Put heavy loads
inside the cargo area, not on the roof.
For more information about loading the
vehicle, see Vehicle Load Limits 0195.
Environmental Concerns
.Always use established trails, roads, and
areas that have been set aside for public
off-road recreational driving and obey all
posted regulations.
.Do not damage shrubs, flowers, trees,
or grasses or disturb wildlife.
.Do not park over things that burn. See
Parking over Things That Burn 0205.
Driving on Hills
Driving safely on hills requires good
judgment and an understanding of what the
vehicle can and cannot do.
{Warning
Many hills are simply too steep for any
vehicle. Driving up hills can cause the
vehicle to stall. Driving down hills can
cause loss of control. Driving across hills
can cause a rollover. You could be injured
or killed. Do not drive on steep hills.
Before driving on a hill, assess the
steepness, traction, and obstructions. If the
terrain ahead cannot be seen, get out of the
vehicle and walk the hill before driving
further.
When driving on hills:
.Use a low gear and keep a firm grip on
the steering wheel.
.Maintain a slow speed.
.When possible, drive straight up or down
the hill.
.Slow down when approaching the top of
the hill.
.Use headlamps even during the day to
make the vehicle more visible.
{Warning
Driving to the top of a hill at high speed
can cause a crash. There could be a
drop-off, embankment, cliff, or even
another vehicle. You could be seriously
injured or killed. As you near the top of a
hill, slow down and stay alert.
.Never go downhill forward or backward
with the transmission in N (Neutral). The
brakes could overheat and you could lose
control.
.When driving down a hill, keep the
vehicle headed straight down. Use a low
gear because the engine will work with
the brakes to slow the vehicle and help
keep the vehicle under control.
{Warning
Heavy braking when going down a hill
can cause your brakes to overheat and
fade. This could cause loss of control and (Continued)
Page 199 of 369
Chevrolet Equinox Owner Manual (GMNA-Localizing-U.S./Canada/Mexico-
14420010) - 2021 - CRC - 11/12/20
198 Driving and Operating
The Certification/Tire label may also
show the maximum weights for the
front and rear axles, called the Gross
Axle Weight Rating (GAWR). To find out
the actual loads on the front and rear
axles, weigh the vehicle at a weigh
station. Your dealer can help with this.
Be sure to spread the load equally on
both sides of the centerline.Caution
Overloading the vehicle may cause
damage. Repairs would not be covered by
the vehicle warranty. Do not overload the
vehicle.
{Warning
Things inside the vehicle can strike
and injure people in a sudden stop or
turn, or in a crash.
.Put things in the cargo area of the
vehicle. In the cargo area, put
them as far forward as possible.
Try to spread the weight evenly.
(Continued)
Warning (Continued)
.Never stack heavier things, like
suitcases, inside the vehicle so
that some of them are above the
tops of the seats.
.Do not leave an unsecured child
restraint in the vehicle.
.Secure loose items in the vehicle.
.Do not leave a seat folded down
unless needed.
Starting and Operating
New Vehicle Break-In
Caution
The vehicle does not need an elaborate
break-in. But it will perform better in the
long run if you follow these guidelines:
.Do not drive at any one constant
speed, fast or slow, for the first
800 km (500 mi). Do not make
full-throttle starts. Avoid downshifting
to brake or slow the vehicle.
(Continued)
Caution (Continued)
.Avoid making hard stops for the first
300 km (200 mi) or so. During this
time the new brake linings are not yet
broken in. Hard stops with new linings
can mean premature wear and earlier
replacement. Follow this breaking-in
guideline every time you get new
brake linings.
Following break-in, engine speed and load
can be gradually increased.
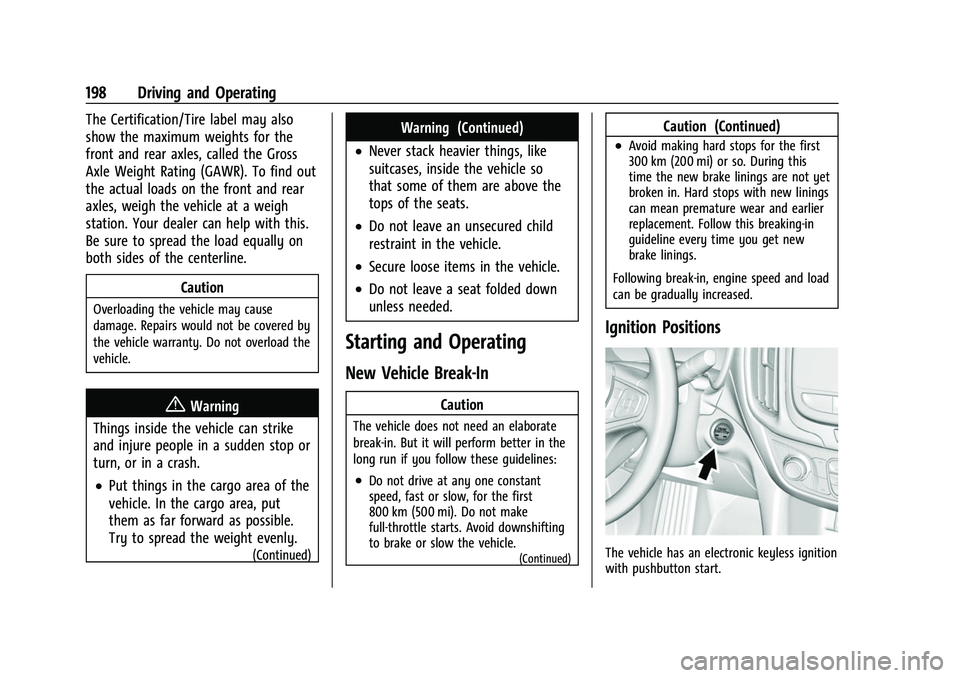
Ignition Positions
The vehicle has an electronic keyless ignition
with pushbutton start.
Page 205 of 369
Chevrolet Equinox Owner Manual (GMNA-Localizing-U.S./Canada/Mexico-
14420010) - 2021 - CRC - 11/12/20
204 Driving and Operating
Warning (Continued)
.While in use, do not let the heater
cord touch vehicle parts or sharp
edges. Never close the hood on the
heater cord.
.Before starting the vehicle, unplug the
cord, reattach the cover to the plug,
and securely fasten the cord. Keep the
cord away from any moving parts.
The length of time the heater should remain
plugged in depends on several factors. Ask a
dealer in the area where you will be parking
the vehicle for the best advice on this.
Retained Accessory Power (RAP)
When the ignition is turned from on to off,
the following features (if equipped) will
continue to function for up to 10 minutes,
or until the driver door is opened. These
features will also work when the ignition is
in RUN or ACC/ACCESSORY:
.Infotainment System
.Power Windows (during RAP this
functionality will be lost when any door
is opened)
.Sunroof (during RAP this functionality will
be lost when any door is opened)
.Auxiliary Power Outlet
.Audio System
.OnStar System
Shifting Into Park
{Warning
It can be dangerous to get out of the
vehicle if the shift lever is not fully in
P (Park) with the parking brake firmly set.
The vehicle can roll. If you have left the
engine running, the vehicle can move
suddenly. You or others could be injured.
To be sure the vehicle will not move,
even when you are on fairly level ground,
use the steps that follow. If you are
pulling a trailer, see Driving
Characteristics and Towing Tips 0242.
To shift into P (Park): 1. Hold the brake pedal down and set the parking brake. See Electric Parking Brake
0 210 for more information.
2. Hold the button on the shift lever and push the lever toward the front of the
vehicle into P (Park).
3. Turn the ignition off.
Leaving the Vehicle with the Engine
Running
{Warning
It can be dangerous to leave the vehicle
with the engine running. It could
overheat and catch fire.
It is dangerous to get out of the vehicle
if the shift lever is not fully in P (Park)
with the parking brake firmly set. The
vehicle can roll.
Do not leave the vehicle when the engine
is running. If you have left the engine
running, the vehicle can move suddenly.
You or others could be injured. To be
sure the vehicle will not move, even
when you are on fairly level ground,
always set the parking brake and move
the shift lever to P (Park). See Shifting
Into Park 0204. If you are towing a
trailer, see Driving Characteristics and
Towing Tips 0242.
If you have to leave the vehicle with the
engine running, the vehicle must be in
P (Park) and the parking brake set.
Page 244 of 369
Chevrolet Equinox Owner Manual (GMNA-Localizing-U.S./Canada/Mexico-
14420010) - 2021 - CRC - 11/12/20
Driving and Operating 243
If equipped, the following driver assistance
features should be turned to alert or off
when towing a trailer:
.Automatic Emergency Braking (AEB)
.Intelligent Brake Assist (IBA)
.Front Pedestrian Braking (FPB)
If equipped with Lane Change Alert (LCA),
the LCA detection zones that extend back
from the side of the vehicle do not move
further back when a trailer is towed. Use
caution while changing lanes when towing a
trailer.
If equipped with Rear Cross Traffic Alert
(RCTA), use caution while backing up when
towing a trailer, as the RCTA detection zones
that extend out from the back of the vehicle
do not move further back when a trailer is
towed.
{Warning
To prevent serious injury or death from
carbon monoxide (CO), when towing a
trailer:
.Do not drive with the liftgate, trunk/
hatch, or rear-most window open. (Continued)
Warning (Continued)
.Fully open the air outlets on or under
the instrument panel.
.Adjust the climate control system to a
setting that brings in only outside air.
See“Climate Control Systems” in the
Index.
For more information about carbon
monoxide, see Engine Exhaust 0205.
Towing a trailer requires experience. The
combination of the vehicle and trailer is
longer and not as responsive as the vehicle
itself. Get used to the handling and braking
of the combination by driving on a level
road surface before driving on public roads.
The trailer structure, the tires, and the
brakes must be all be rated to carry the
intended cargo. Inadequate trailer
equipment can cause the combination to
operate in an unexpected or unsafe manner.
Before driving, inspect all trailer hitch parts
and attachments, safety chains, electrical
connectors, lamps, tires, and mirrors. See
Towing Equipment 0247. If the trailer has
electric brakes, start the combination
moving and then manually apply the trailer
brake controller to check that the trailer brakes work. During the trip, occasionally
check that the cargo and trailer are secure
and that the lamps and any trailer brakes
are working.Towing with a Stability Control System
When towing, the stability control system
might be heard. The system reacts to
vehicle movement caused by the trailer,
which mainly occurs during cornering. This is
normal when towing heavier trailers.
Following Distance
Stay at least twice as far behind the vehicle
ahead as you would when driving without a
trailer. This can help to avoid heavy braking
and sudden turns.
Passing
More passing distance is needed when
towing a trailer. The combination of the
vehicle and trailer will not accelerate as
quickly and is much longer than the vehicle
alone. It is necessary to go much farther
beyond the passed vehicle before returning
to the lane. Pass on level roadways. Avoid
passing on hills if possible.
Page 254 of 369
Chevrolet Equinox Owner Manual (GMNA-Localizing-U.S./Canada/Mexico-
14420010) - 2021 - CRC - 11/10/20
Vehicle Care 253
{Warning
Components under the hood can get hot
from running the engine. To help avoid
the risk of burning unprotected skin,
never touch these components until they
have cooled, and always use a glove or
towel to avoid direct skin contact.
Clear any snow from the hood before
opening.
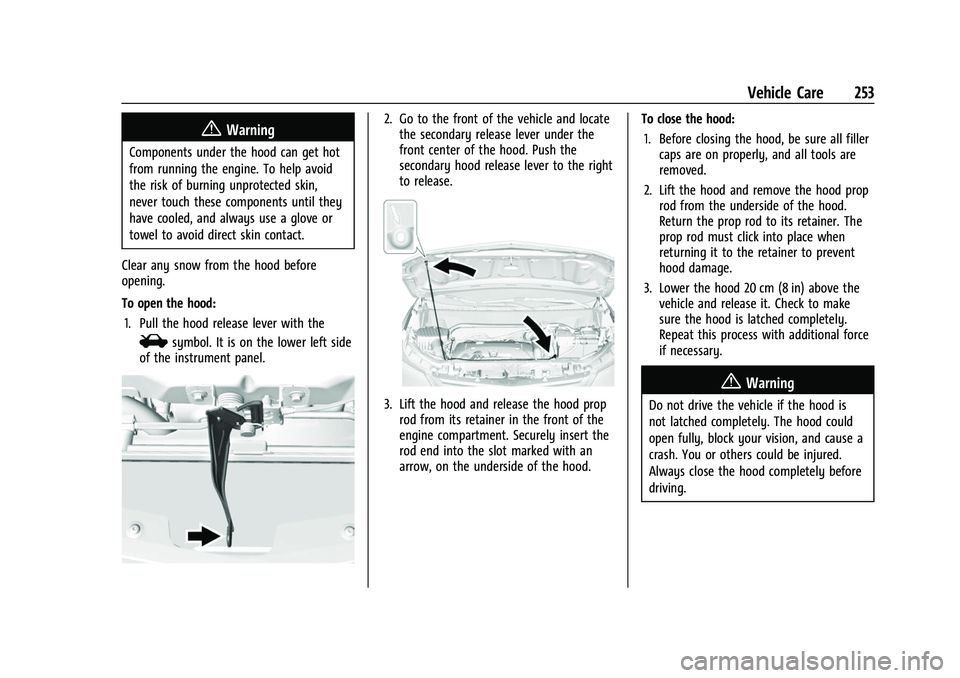
To open the hood: 1. Pull the hood release lever with the
isymbol. It is on the lower left side
of the instrument panel.
2. Go to the front of the vehicle and locate the secondary release lever under the
front center of the hood. Push the
secondary hood release lever to the right
to release.
3. Lift the hood and release the hood proprod from its retainer in the front of the
engine compartment. Securely insert the
rod end into the slot marked with an
arrow, on the underside of the hood. To close the hood:
1. Before closing the hood, be sure all filler caps are on properly, and all tools are
removed.
2. Lift the hood and remove the hood prop rod from the underside of the hood.
Return the prop rod to its retainer. The
prop rod must click into place when
returning it to the retainer to prevent
hood damage.
3. Lower the hood 20 cm (8 in) above the vehicle and release it. Check to make
sure the hood is latched completely.
Repeat this process with additional force
if necessary.
{Warning
Do not drive the vehicle if the hood is
not latched completely. The hood could
open fully, block your vision, and cause a
crash. You or others could be injured.
Always close the hood completely before
driving.
Page 263 of 369
Chevrolet Equinox Owner Manual (GMNA-Localizing-U.S./Canada/Mexico-
14420010) - 2021 - CRC - 11/10/20
262 Vehicle Care
How to Add Coolant to the Surge Tank
{Warning
Spilling coolant on hot engine parts can
burn you. Coolant contains ethylene
glycol and it will burn if the engine parts
are hot enough.
{Warning
Steam and scalding liquids from a hot
cooling system are under pressure.
Turning the pressure cap, even a little,
can cause them to come out at high
speed and you could be burned. Never
turn the cap when the cooling system,
including the pressure cap, is hot. Wait
for the cooling system and pressure cap
to cool.
Caution
Failure to follow the specific coolant fill
procedure could cause the engine to
overheat and could cause system
damage. If coolant is not visible in the
surge tank, contact your dealer.
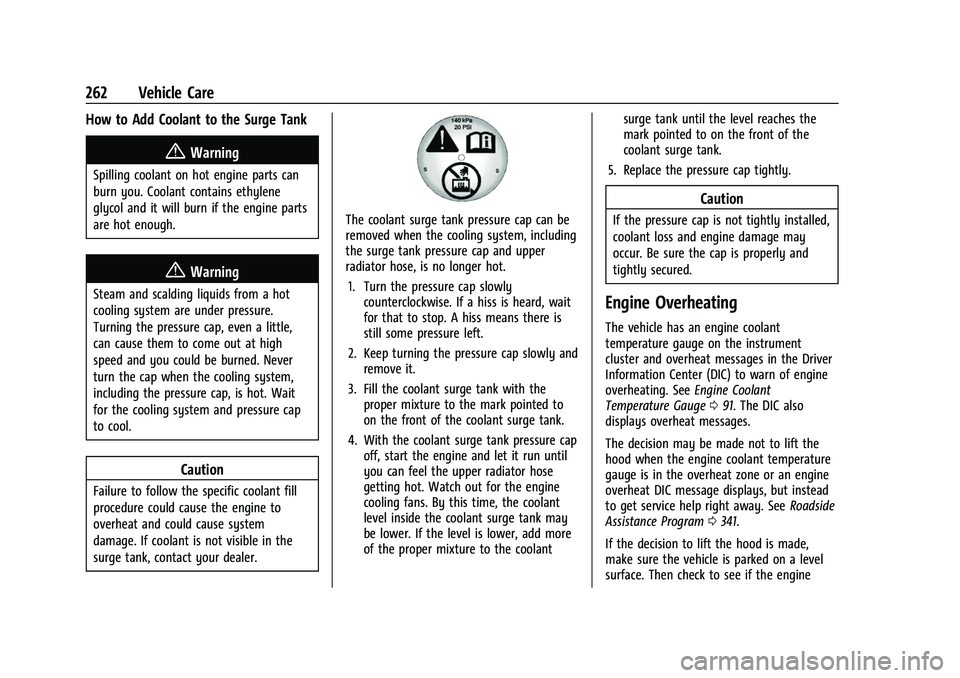
The coolant surge tank pressure cap can be
removed when the cooling system, including
the surge tank pressure cap and upper
radiator hose, is no longer hot.1. Turn the pressure cap slowly counterclockwise. If a hiss is heard, wait
for that to stop. A hiss means there is
still some pressure left.
2. Keep turning the pressure cap slowly and remove it.
3. Fill the coolant surge tank with the proper mixture to the mark pointed to
on the front of the coolant surge tank.
4. With the coolant surge tank pressure cap off, start the engine and let it run until
you can feel the upper radiator hose
getting hot. Watch out for the engine
cooling fans. By this time, the coolant
level inside the coolant surge tank may
be lower. If the level is lower, add more
of the proper mixture to the coolant surge tank until the level reaches the
mark pointed to on the front of the
coolant surge tank.
5. Replace the pressure cap tightly.
Caution
If the pressure cap is not tightly installed,
coolant loss and engine damage may
occur. Be sure the cap is properly and
tightly secured.
Engine Overheating
The vehicle has an engine coolant
temperature gauge on the instrument
cluster and overheat messages in the Driver
Information Center (DIC) to warn of engine
overheating. See Engine Coolant
Temperature Gauge 091. The DIC also
displays overheat messages.
The decision may be made not to lift the
hood when the engine coolant temperature
gauge is in the overheat zone or an engine
overheat DIC message displays, but instead
to get service help right away. See Roadside
Assistance Program 0341.
If the decision to lift the hood is made,
make sure the vehicle is parked on a level
surface. Then check to see if the engine
Page 269 of 369

Chevrolet Equinox Owner Manual (GMNA-Localizing-U.S./Canada/Mexico-
14420010) - 2021 - CRC - 11/10/20
268 Vehicle Care
Front Wiper Blade Replacement
To replace the wiper blade:1. Pull the wiper assembly away from the windshield.
2. Lift up on the latch in the middle of thewiper blade where the wiper arm
attaches.
3. With the latch open, pull the wiper blade down toward the windshield far enough
to release it from the J-hooked end of
the wiper arm.
4. Remove the wiper blade.
5. Reverse Steps 1–3 for wiper blade replacement.
Rear Wiper Blade Replacement
The rear wiper blade and wiper arm have a
cover for protection.
To remove the cover:
1. Slide a plastic tool under the cover andpush upward to unsnap.
2. Slide the cover toward the wiper blade tip to unhook it from the blade
assembly.
3. Remove the cover.
4. After wiper blade replacement, ensure that the cover hook slides into the slot
in the blade assembly.
5. Snap the cover down to secure.
To replace the wiper blade: 1. Lift the wiper arm away from the windshield.
2. Push the release lever (2) to disengagethe hook and push the wiper arm (1) out
of the blade assembly (3).
3. Push the new blade assembly securely on the wiper arm until the release lever
clicks into place.
Windshield Replacement
Driver Assistance Systems
If the windshield needs to be replaced and
the vehicle is equipped with a front camera
sensor for the Driver Assistance Systems, a
GM replacement windshield is
recommended. The replacement windshield
must be installed according to GM
specifications for proper alignment. If it is
not, these systems may not work properly,
they may display messages, or they may
not work at all. See your dealer for proper
windshield replacement.
Page 272 of 369
Chevrolet Equinox Owner Manual (GMNA-Localizing-U.S./Canada/Mexico-
14420010) - 2021 - CRC - 11/10/20
Vehicle Care 271
To replace one of the headlamp bulbs:1. Open the hood. See Hood0252.
2. For the driver side bulb, remove the battery cover. Remove the windshield
washer bottle filler neck by firmly pulling
it straight up and out of the bottle.
For the passenger side, remove the air
cleaner cover.
3. Remove the cover from the back of the headlamp assembly by turning it
counterclockwise.
4. Disconnect the electrical connector.
5. Remove the bulb from the lamp assembly by turning counterclockwise.
6. Install a new bulb in the lamp assembly.
7. Connect the electrical connector.
8. Replace the cover from the back of the headlamp assembly by turning it
clockwise.
9. For the driver side, reinstall the battery cover. Reinstall the windshield washer
bottle filler neck by firmly pushing it
straight into the bottle. Make sure that
the filler neck clip engages into the
bracket on the upper tie-bar.
For the passenger side, reinstall the air
cleaner cover.Front Turn Signal and Fog Lamps
Driver Side Shown, Passenger Side Similar
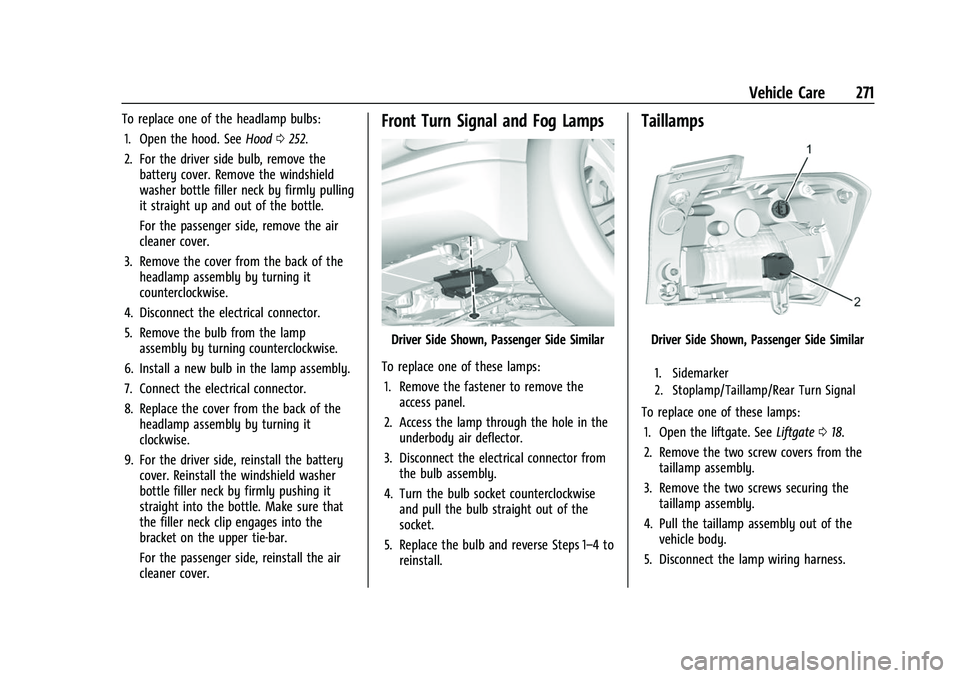
To replace one of these lamps: 1. Remove the fastener to remove the access panel.
2. Access the lamp through the hole in the underbody air deflector.
3. Disconnect the electrical connector from the bulb assembly.
4. Turn the bulb socket counterclockwise and pull the bulb straight out of the
socket.
5. Replace the bulb and reverse Steps 1–4 to reinstall.
Taillamps
Driver Side Shown, Passenger Side Similar
1. Sidemarker
2. Stoplamp/Taillamp/Rear Turn Signal
To replace one of these lamps:
1. Open the liftgate. See Liftgate018.
2. Remove the two screw covers from the taillamp assembly.
3. Remove the two screws securing the taillamp assembly.
4. Pull the taillamp assembly out of the vehicle body.
5. Disconnect the lamp wiring harness.
Page 311 of 369
Chevrolet Equinox Owner Manual (GMNA-Localizing-U.S./Canada/Mexico-
14420010) - 2021 - CRC - 11/10/20
310 Vehicle Care
{Warning
Fans or other moving engine parts can
injure you badly. Keep your hands away
from moving parts once the engine is
running.
5. Connect one end of the red positive (+) cable to the positive (+) terminal on the
discharged battery.
6. Connect the other end of the red positive (+) cable to the positive (+)
terminal of the good battery.
7. Connect one end of the black negative (–) cable to the negative (–)
terminal of the good battery.
8. Connect the other end of the black negative (–) cable to the negative (–)
grounding stud for the discharged
battery.
9. Start the engine in the vehicle with the good battery and run the engine at idle
speed for at least four minutes.
10. Try to start the vehicle that had the dead battery. If it will not start after a
few tries, it probably needs service.
Caution
If the jumper cables are connected or
removed in the wrong order, electrical
shorting may occur and damage the
vehicle. The repairs would not be covered
by the vehicle warranty. Always connect
and remove the jumper cables in the
correct order, making sure that the cables
do not touch each other or other metal.
Jumper Cable Removal
Reverse the sequence exactly when
removing the jumper cables.
After starting the disabled vehicle and
removing the jumper cables, allow it to idle
for several minutes.
Towing the Vehicle
Caution
Incorrectly towing a disabled vehicle may
cause damage. The damage would not be
covered by the vehicle warranty. Do not
lash or hook to suspension components.
Use the proper straps around the tires to
secure the vehicle. Do not drag a locked
(Continued)
Caution (Continued)
wheel/tire. Use tire skates or dollies
under any locked wheel/tire while
loading the vehicle. Do not use a sling
type lift to tow the vehicle. This could
damage the vehicle.
Caution
Improper use of the tow eye can damage
the vehicle. If equipped, use the tow eye
to load a disabled vehicle onto a flatbed
tow truck from a flat road surface, or to
move the vehicle a short distance. Use
caution and low speeds. The transmission
must be in (N) Neutral when moving the
vehicle.
GM recommends a flatbed tow truck to
transport a disabled vehicle. Use ramps to
help reduce approach angles, if necessary.
A towed vehicle should have its drive wheels
off the ground. Contact Roadside Assistance
or a professional towing service if the
disabled vehicle must be towed.
Page 313 of 369
Chevrolet Equinox Owner Manual (GMNA-Localizing-U.S./Canada/Mexico-
14420010) - 2021 - CRC - 11/10/20
312 Vehicle Care
Install the tow eye into the socket and turn
it until it is fully tightened.
When the tow eye is removed, reinstall the
cover with the notch in the original position.
To tow the vehicle behind another vehicle
for recreational purposes, such as behind a
motor home, seeRecreational Vehicle
Towing 0312.
Recreational Vehicle Towing
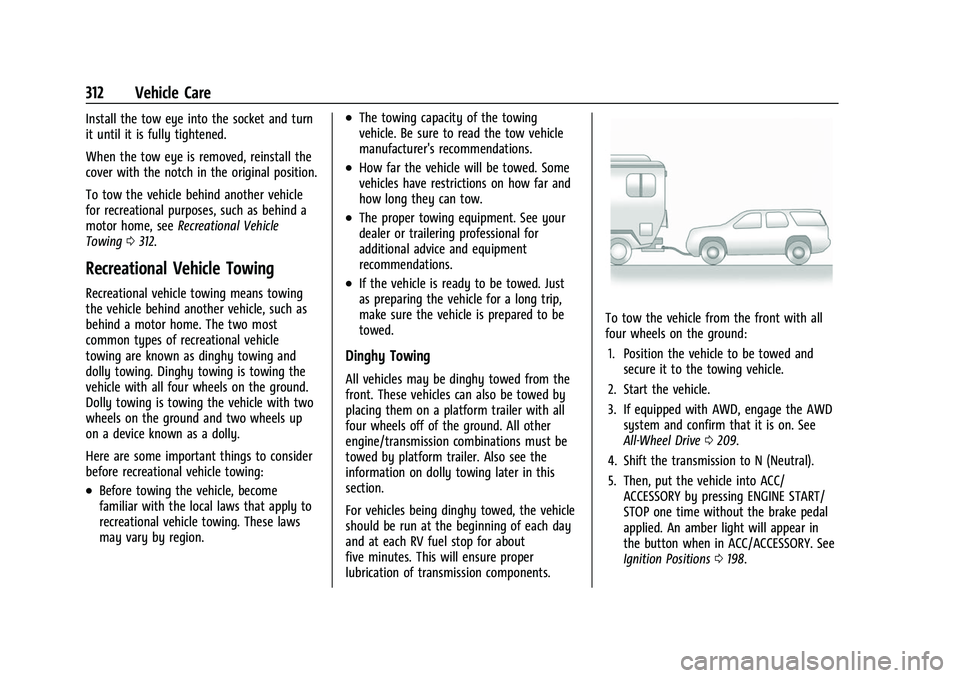
Recreational vehicle towing means towing
the vehicle behind another vehicle, such as
behind a motor home. The two most
common types of recreational vehicle
towing are known as dinghy towing and
dolly towing. Dinghy towing is towing the
vehicle with all four wheels on the ground.
Dolly towing is towing the vehicle with two
wheels on the ground and two wheels up
on a device known as a dolly.
Here are some important things to consider
before recreational vehicle towing:
.Before towing the vehicle, become
familiar with the local laws that apply to
recreational vehicle towing. These laws
may vary by region.
.The towing capacity of the towing
vehicle. Be sure to read the tow vehicle
manufacturer's recommendations.
.How far the vehicle will be towed. Some
vehicles have restrictions on how far and
how long they can tow.
.The proper towing equipment. See your
dealer or trailering professional for
additional advice and equipment
recommendations.
.If the vehicle is ready to be towed. Just
as preparing the vehicle for a long trip,
make sure the vehicle is prepared to be
towed.
Dinghy Towing
All vehicles may be dinghy towed from the
front. These vehicles can also be towed by
placing them on a platform trailer with all
four wheels off of the ground. All other
engine/transmission combinations must be
towed by platform trailer. Also see the
information on dolly towing later in this
section.
For vehicles being dinghy towed, the vehicle
should be run at the beginning of each day
and at each RV fuel stop for about
five minutes. This will ensure proper
lubrication of transmission components.
To tow the vehicle from the front with all
four wheels on the ground:
1. Position the vehicle to be towed and secure it to the towing vehicle.
2. Start the vehicle.
3. If equipped with AWD, engage the AWD system and confirm that it is on. See
All-Wheel Drive 0209.
4. Shift the transmission to N (Neutral).
5. Then, put the vehicle into ACC/ ACCESSORY by pressing ENGINE START/
STOP one time without the brake pedal
applied. An amber light will appear in
the button when in ACC/ACCESSORY. See
Ignition Positions 0198.