Passenger CHEVROLET EQUINOX 2021 Owner's Manual
[x] Cancel search | Manufacturer: CHEVROLET, Model Year: 2021, Model line: EQUINOX, Model: CHEVROLET EQUINOX 2021Pages: 369, PDF Size: 8.71 MB
Page 9 of 369
Chevrolet Equinox Owner Manual (GMNA-Localizing-U.S./Canada/Mexico-
14420010) - 2021 - CRC - 11/10/20
8 Keys, Doors, and Windows
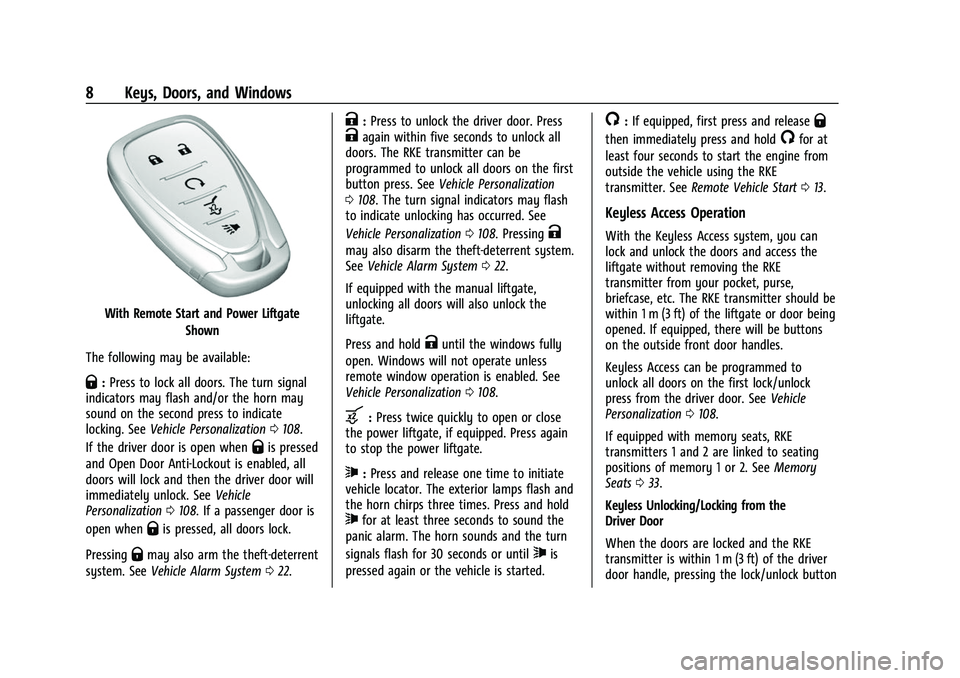
With Remote Start and Power LiftgateShown
The following may be available:
Q: Press to lock all doors. The turn signal
indicators may flash and/or the horn may
sound on the second press to indicate
locking. See Vehicle Personalization 0108.
If the driver door is open when
Qis pressed
and Open Door Anti-Lockout is enabled, all
doors will lock and then the driver door will
immediately unlock. See Vehicle
Personalization 0108. If a passenger door is
open when
Qis pressed, all doors lock.
Pressing
Qmay also arm the theft-deterrent
system. See Vehicle Alarm System 022.
K:Press to unlock the driver door. PressKagain within five seconds to unlock all
doors. The RKE transmitter can be
programmed to unlock all doors on the first
button press. See Vehicle Personalization
0 108. The turn signal indicators may flash
to indicate unlocking has occurred. See
Vehicle Personalization 0108. Pressing
K
may also disarm the theft-deterrent system.
See Vehicle Alarm System 022.
If equipped with the manual liftgate,
unlocking all doors will also unlock the
liftgate.
Press and hold
Kuntil the windows fully
open. Windows will not operate unless
remote window operation is enabled. See
Vehicle Personalization 0108.
b:Press twice quickly to open or close
the power liftgate, if equipped. Press again
to stop the power liftgate.
7: Press and release one time to initiate
vehicle locator. The exterior lamps flash and
the horn chirps three times. Press and hold
7for at least three seconds to sound the
panic alarm. The horn sounds and the turn
signals flash for 30 seconds or until
7is
pressed again or the vehicle is started.
/: If equipped, first press and releaseQ
then immediately press and hold/for at
least four seconds to start the engine from
outside the vehicle using the RKE
transmitter. See Remote Vehicle Start 013.
Keyless Access Operation
With the Keyless Access system, you can
lock and unlock the doors and access the
liftgate without removing the RKE
transmitter from your pocket, purse,
briefcase, etc. The RKE transmitter should be
within 1 m (3 ft) of the liftgate or door being
opened. If equipped, there will be buttons
on the outside front door handles.
Keyless Access can be programmed to
unlock all doors on the first lock/unlock
press from the driver door. See Vehicle
Personalization 0108.
If equipped with memory seats, RKE
transmitters 1 and 2 are linked to seating
positions of memory 1 or 2. See Memory
Seats 033.
Keyless Unlocking/Locking from the
Driver Door
When the doors are locked and the RKE
transmitter is within 1 m (3 ft) of the driver
door handle, pressing the lock/unlock button
Page 10 of 369
Chevrolet Equinox Owner Manual (GMNA-Localizing-U.S./Canada/Mexico-
14420010) - 2021 - CRC - 11/10/20
Keys, Doors, and Windows 9
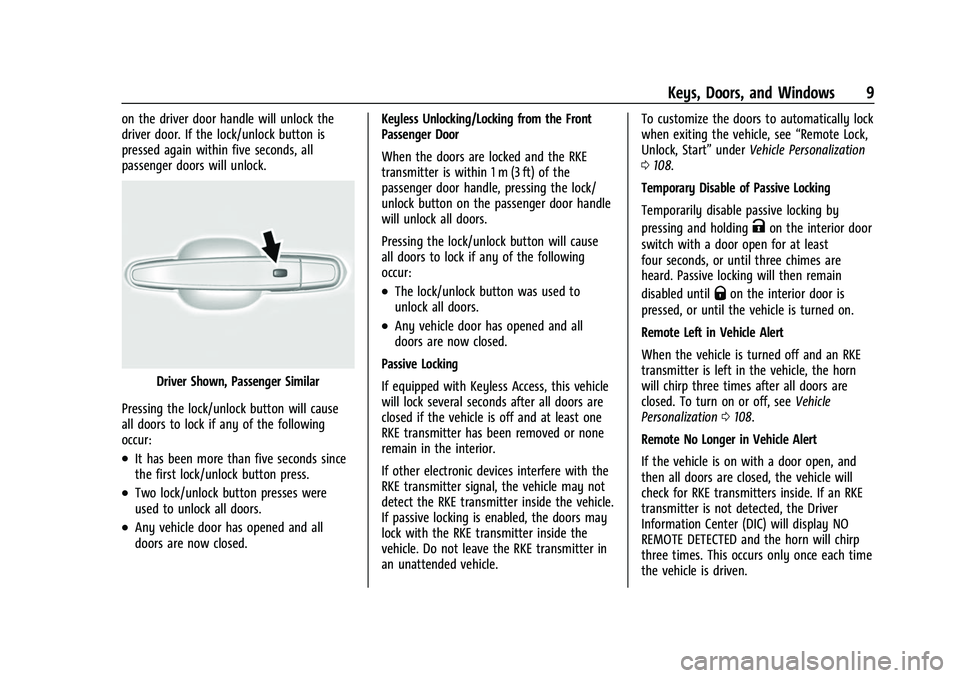
on the driver door handle will unlock the
driver door. If the lock/unlock button is
pressed again within five seconds, all
passenger doors will unlock.
Driver Shown, Passenger Similar
Pressing the lock/unlock button will cause
all doors to lock if any of the following
occur:
.It has been more than five seconds since
the first lock/unlock button press.
.Two lock/unlock button presses were
used to unlock all doors.
.Any vehicle door has opened and all
doors are now closed. Keyless Unlocking/Locking from the Front
Passenger Door
When the doors are locked and the RKE
transmitter is within 1 m (3 ft) of the
passenger door handle, pressing the lock/
unlock button on the passenger door handle
will unlock all doors.
Pressing the lock/unlock button will cause
all doors to lock if any of the following
occur:
.The lock/unlock button was used to
unlock all doors.
.Any vehicle door has opened and all
doors are now closed.
Passive Locking
If equipped with Keyless Access, this vehicle
will lock several seconds after all doors are
closed if the vehicle is off and at least one
RKE transmitter has been removed or none
remain in the interior.
If other electronic devices interfere with the
RKE transmitter signal, the vehicle may not
detect the RKE transmitter inside the vehicle.
If passive locking is enabled, the doors may
lock with the RKE transmitter inside the
vehicle. Do not leave the RKE transmitter in
an unattended vehicle. To customize the doors to automatically lock
when exiting the vehicle, see
“Remote Lock,
Unlock, Start” underVehicle Personalization
0 108.
Temporary Disable of Passive Locking
Temporarily disable passive locking by
pressing and holding
Kon the interior door
switch with a door open for at least
four seconds, or until three chimes are
heard. Passive locking will then remain
disabled until
Qon the interior door is
pressed, or until the vehicle is turned on.
Remote Left in Vehicle Alert
When the vehicle is turned off and an RKE
transmitter is left in the vehicle, the horn
will chirp three times after all doors are
closed. To turn on or off, see Vehicle
Personalization 0108.
Remote No Longer in Vehicle Alert
If the vehicle is on with a door open, and
then all doors are closed, the vehicle will
check for RKE transmitters inside. If an RKE
transmitter is not detected, the Driver
Information Center (DIC) will display NO
REMOTE DETECTED and the horn will chirp
three times. This occurs only once each time
the vehicle is driven.
Page 15 of 369
Chevrolet Equinox Owner Manual (GMNA-Localizing-U.S./Canada/Mexico-
14420010) - 2021 - CRC - 11/10/20
14 Keys, Doors, and Windows
Extending Engine Run Time
For a 15-minute extension, after 30 seconds
repeat Steps 1 and 2 while the engine is still
running. The remote start can be
extended once.
When the remote start is extended, the
second 15 minutes will be added for a total
of 30 minutes.
A maximum of two remote starts or a start
with an extension are allowed between
ignition cycles.
The ignition must be turned on and then
back off to use remote start again.
Canceling a Remote Start
To shut off the engine:
.Press and hold/until the parking lamps
turn off.
.Turn on the hazard warning flashers.
.Turn the ignition on and then off.
Conditions in Which Remote Start Will
Not Work
The remote vehicle start feature will not
operate if:
.A transmitter is in the vehicle.
.The vehicle is on.
.The hood is not closed.
.The hazard warning flashers are on.
.There is an emission control system
malfunction.
.The engine coolant temperature is
too high.
.The oil pressure is low.
.Two remote vehicle starts or a start with
an extension have already been used.
.The vehicle is not in P (Park).
Remote Start Ready
If the vehicle does not have the remote
vehicle start feature, it may have the
remote start ready feature. This feature
allows your dealer to add the
manufacturer's remote vehicle start feature.
See your dealer to add the manufacturer's
remote vehicle start feature to the vehicle.
Door Locks
{Warning
Unlocked doors can be dangerous.
.Passengers, especially children, can
easily open the doors and fall out of a
moving vehicle. The doors can be (Continued)
Warning (Continued)
unlocked and opened while the vehicle
is moving. The chance of being thrown
out of the vehicle in a crash is
increased if the doors are not locked.
So, all passengers should wear seat
belts properly and the doors should be
locked whenever the vehicle is driven.
.Young children who get into unlocked
vehicles may be unable to get out.
A child can be overcome by extreme
heat and can suffer permanent injuries
or even death from heat stroke.
Always lock the vehicle whenever
leaving it.
.Outsiders can easily enter through an
unlocked door when you slow down
or stop the vehicle. Locking the doors
can help prevent this from happening.
To lock or unlock the doors from the
outside:
.PressQorKon the Remote Keyless
Entry (RKE) transmitter. See Remote
Keyless Entry (RKE) System Operation 07.
.Use the key in the driver door. The key
lock cylinder is covered with a cap.
Page 18 of 369
Chevrolet Equinox Owner Manual (GMNA-Localizing-U.S./Canada/Mexico-
14420010) - 2021 - CRC - 11/10/20
Keys, Doors, and Windows 17
To unlock the doors:
.PressKon the power door lock switch.
.Shift into P (Park).
Automatic door locking cannot be disabled.
Automatic door unlocking can be
programmed. See Vehicle Personalization
0 108.
Lockout Protection
If the ignition is on or in ACC/ACCESSORY
and the power door lock switch is pressed
with the driver door open, all the doors will
lock and only the driver door will unlock.
If the vehicle is off and locking is requested
while a door is open, when all doors are
closed the vehicle will check for RKE
transmitters inside. If an RKE transmitter is
detected and the number of RKE
transmitters inside has not reduced, the
driver door will unlock and the horn will
chirp three times.
Lockout Protection can be manually
overridden by pressing and holding
Qon
the power door lock switch. This does not
apply to Open Door Anti-Lockout. Open Door Anti-Lockout
If Open Door Anti-Lockout is turned on, the
driver door is open, and locking is requested,
all the doors will lock and only the driver
door will unlock. The Open Door
Anti-Lockout feature can be turned on or off.
See
Vehicle Personalization 0108.
Safety Locks
The rear door safety locks prevent
passengers from opening the rear doors
from inside the vehicle.
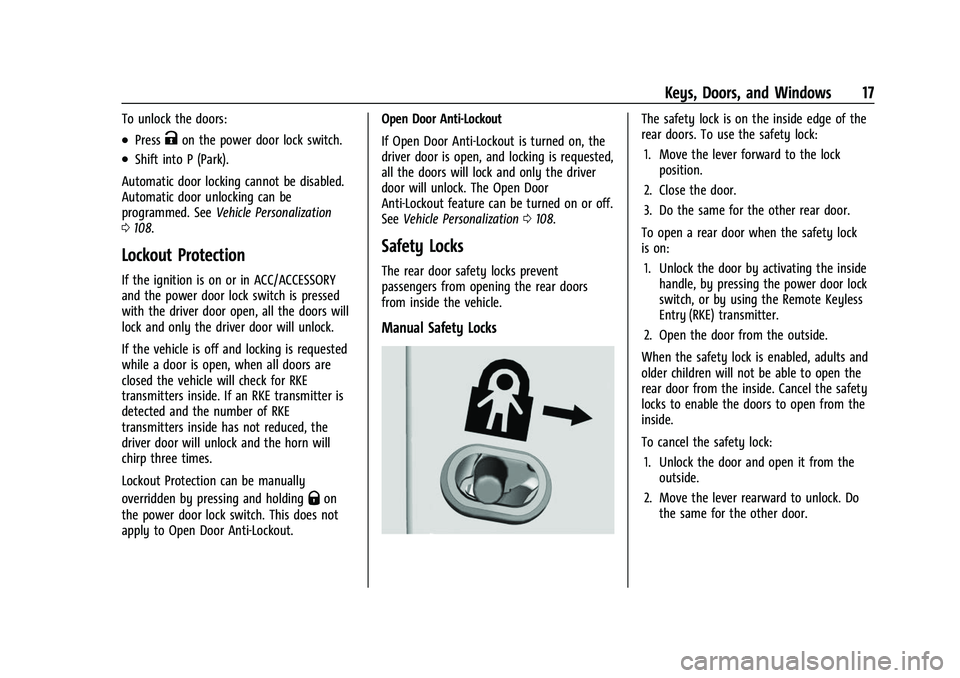
Manual Safety Locks
The safety lock is on the inside edge of the
rear doors. To use the safety lock:
1. Move the lever forward to the lock position.
2. Close the door.
3. Do the same for the other rear door.
To open a rear door when the safety lock
is on: 1. Unlock the door by activating the inside handle, by pressing the power door lock
switch, or by using the Remote Keyless
Entry (RKE) transmitter.
2. Open the door from the outside.
When the safety lock is enabled, adults and
older children will not be able to open the
rear door from the inside. Cancel the safety
locks to enable the doors to open from the
inside.
To cancel the safety lock: 1. Unlock the door and open it from the outside.
2. Move the lever rearward to unlock. Do the same for the other door.
Page 25 of 369
Chevrolet Equinox Owner Manual (GMNA-Localizing-U.S./Canada/Mexico-
14420010) - 2021 - CRC - 11/10/20
24 Keys, Doors, and Windows
Do not leave the transmitter or device that
disarms or deactivates the theft-deterrent
system in the vehicle.
Exterior Mirrors
Convex Mirrors
{Warning
A convex mirror can make things, like
other vehicles, look farther away than
they really are. If you cut too sharply
into the right lane, you could hit a
vehicle on the right. Check the inside
mirror or glance over your shoulder
before changing lanes.
The passenger side mirror is convex shaped.
A convex mirror's surface is curved so more
can be seen from the driver seat.
Power Mirrors
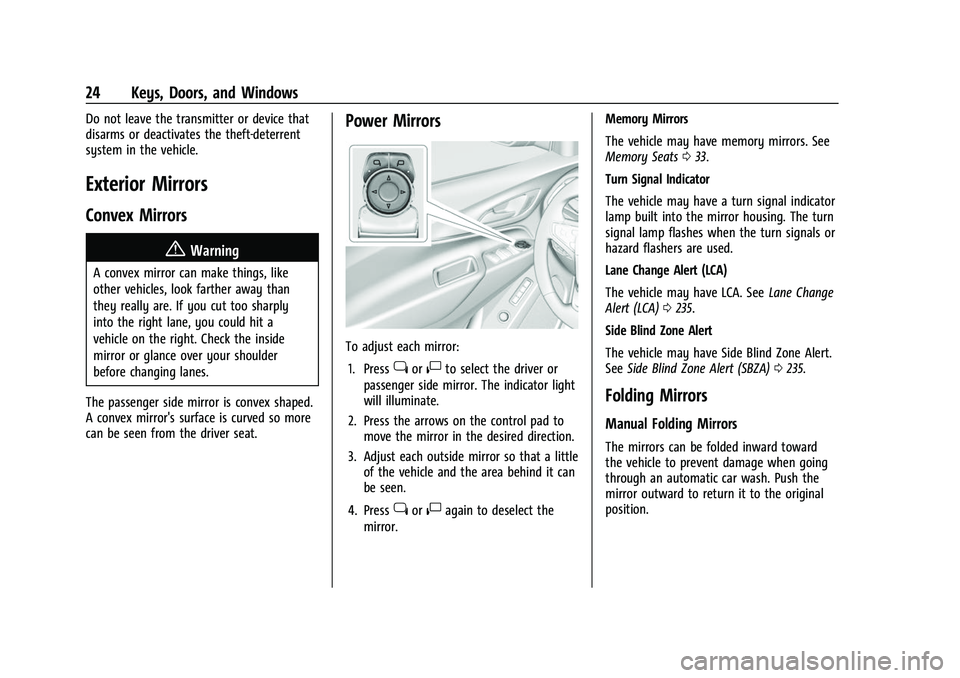
To adjust each mirror: 1. Press
jor|to select the driver or
passenger side mirror. The indicator light
will illuminate.
2. Press the arrows on the control pad to move the mirror in the desired direction.
3. Adjust each outside mirror so that a little of the vehicle and the area behind it can
be seen.
4. Press
jor|again to deselect the
mirror. Memory Mirrors
The vehicle may have memory mirrors. See
Memory Seats
033.
Turn Signal Indicator
The vehicle may have a turn signal indicator
lamp built into the mirror housing. The turn
signal lamp flashes when the turn signals or
hazard flashers are used.
Lane Change Alert (LCA)
The vehicle may have LCA. See Lane Change
Alert (LCA) 0235.
Side Blind Zone Alert
The vehicle may have Side Blind Zone Alert.
See Side Blind Zone Alert (SBZA) 0235.
Folding Mirrors
Manual Folding Mirrors
The mirrors can be folded inward toward
the vehicle to prevent damage when going
through an automatic car wash. Push the
mirror outward to return it to the original
position.
Page 26 of 369
Chevrolet Equinox Owner Manual (GMNA-Localizing-U.S./Canada/Mexico-
14420010) - 2021 - CRC - 11/10/20
Keys, Doors, and Windows 25
Heated Mirrors
If equipped, the heated outside mirrors turn
on when the rear window defogger is on
and help to clear fog or frost from the
surface of the mirrors.
K:This button is on the climate control
panel.
See “Rear Window Defogger” underDual
Automatic Climate Control System 0179.
Automatic Dimming Mirror
If the vehicle has the automatic dimming
mirror, the driver outside mirror
automatically adjusts for the glare of
headlamps behind you.
Reverse Tilt Mirrors
If equipped with reverse tilt mirrors and
memory seats, the passenger and/or driver
mirror tilts to a preselected position when
the vehicle is in R (Reverse). This allows the
curb to be seen when parallel parking.
The mirror(s) may move from their tilted
position when:
.The vehicle is shifted out of R (Reverse),
or remains in R (Reverse) for about
30 seconds.
.The vehicle is turned off.
.The vehicle is driven in R (Reverse) above
a set speed.
To turn this feature on or off, see Vehicle
Personalization 0108.
Interior Mirrors
Interior Rearview Mirrors
Adjust the rearview mirror for a clear view
of the area behind your vehicle.
Do not spray glass cleaner directly on the
mirror. Use a soft towel dampened with
water.
Manual Rearview Mirror
If equipped, push the tab forward for
daytime use and pull it rearward for
nighttime use to avoid glare of the
headlamps from behind.
Automatic Dimming Rearview
Mirror
If equipped, automatic dimming reduces the
glare of headlamps from behind. The
dimming feature comes on when the vehicle
is started.
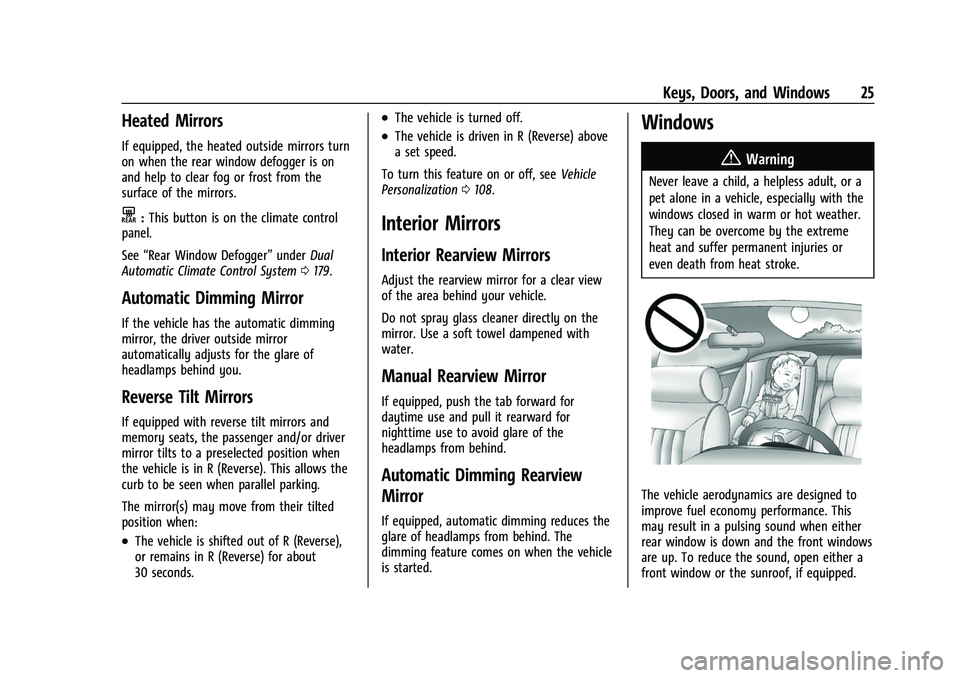
Windows
{
Warning
Never leave a child, a helpless adult, or a
pet alone in a vehicle, especially with the
windows closed in warm or hot weather.
They can be overcome by the extreme
heat and suffer permanent injuries or
even death from heat stroke.
The vehicle aerodynamics are designed to
improve fuel economy performance. This
may result in a pulsing sound when either
rear window is down and the front windows
are up. To reduce the sound, open either a
front window or the sunroof, if equipped.
Page 27 of 369
Chevrolet Equinox Owner Manual (GMNA-Localizing-U.S./Canada/Mexico-
14420010) - 2021 - CRC - 11/10/20
26 Keys, Doors, and Windows
Power Windows
{Warning
Children could be seriously injured or
killed if caught in the path of a closing
window. Never leave the Remote Keyless
Entry (RKE) transmitter in a vehicle with
children. When there are children in the
rear seat, use the window lockout switch
to prevent operation of the windows. See
Keys06.
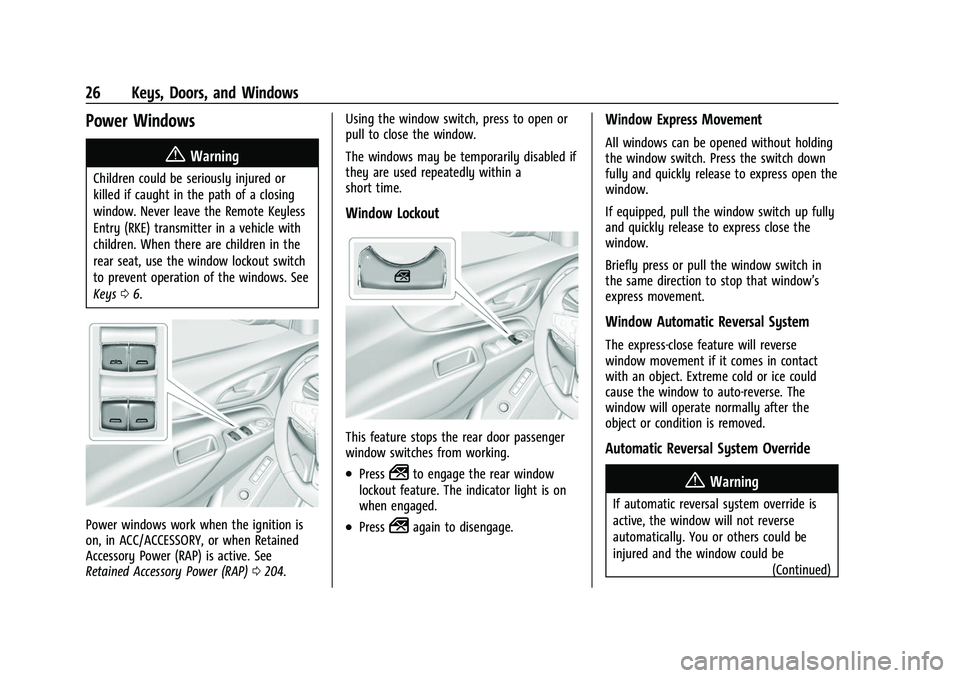
Power windows work when the ignition is
on, in ACC/ACCESSORY, or when Retained
Accessory Power (RAP) is active. See
Retained Accessory Power (RAP) 0204. Using the window switch, press to open or
pull to close the window.
The windows may be temporarily disabled if
they are used repeatedly within a
short time.
Window Lockout
This feature stops the rear door passenger
window switches from working.
.Press2to engage the rear window
lockout feature. The indicator light is on
when engaged.
.Press2again to disengage.
Window Express Movement
All windows can be opened without holding
the window switch. Press the switch down
fully and quickly release to express open the
window.
If equipped, pull the window switch up fully
and quickly release to express close the
window.
Briefly press or pull the window switch in
the same direction to stop that window’s
express movement.
Window Automatic Reversal System
The express-close feature will reverse
window movement if it comes in contact
with an object. Extreme cold or ice could
cause the window to auto-reverse. The
window will operate normally after the
object or condition is removed.
Automatic Reversal System Override
{Warning
If automatic reversal system override is
active, the window will not reverse
automatically. You or others could be
injured and the window could be
(Continued)
Page 30 of 369
Chevrolet Equinox Owner Manual (GMNA-Localizing-U.S./Canada/Mexico-
14420010) - 2021 - CRC - 11/10/20
Seats and Restraints 29
Seats and Restraints
Head Restraints
Head Restraints . . . . . . . . . . . . . . . . . . . . . . . . 29
Front Seats
Seat Adjustment . . . . . . . . . . . . . . . . . . . . . . . 30
Power Seat Adjustment . . . . . . . . . . . . . . . . . 31
Lumbar Adjustment . . . . . . . . . . . . . . . . . . . . . 32
Reclining Seatbacks . . . . . . . . . . . . . . . . . . . . . 32
Memory Seats . . . . . . . . . . . . . . . . . . . . . . . . . . 33
Heated and Ventilated Front Seats . . . . . 35
Rear Seats
Rear Seats . . . . . . . . . . . . . . . . . . . . . . . . . . . . . . 36
Heated Rear Seats . . . . . . . . . . . . . . . . . . . . . . 38
Seat Belts
Seat Belts . . . . . . . . . . . . . . . . . . . . . . . . . . . . . . 39
How to Wear Seat Belts Properly . . . . . . 40
Lap-Shoulder Belt . . . . . . . . . . . . . . . . . . . . . . . 42
Seat Belt Use During Pregnancy . . . . . . . . 45
Seat Belt Extender . . . . . . . . . . . . . . . . . . . . . . 45
Safety System Check . . . . . . . . . . . . . . . . . . . 45
Seat Belt Care . . . . . . . . . . . . . . . . . . . . . . . . . . 46
Replacing Seat Belt System Parts after aCrash . . . . . . . . . . . . . . . . . . . . . . . . . . . . . . . . . 46
Airbag System
Airbag System . . . . . . . . . . . . . . . . . . . . . . . . . 46
Where Are the Airbags? . . . . . . . . . . . . . . . . 48
When Should an Airbag Inflate? . . . . . . . . 49
What Makes an Airbag Inflate? . . . . . . . . . 50
How Does an Airbag Restrain? . . . . . . . . . 50
What Will You See after an AirbagInflates? . . . . . . . . . . . . . . . . . . . . . . . . . . . . . . 50
Passenger Sensing System . . . . . . . . . . . . . . 51
Servicing the Airbag-Equipped Vehicle . . . . . . . . . . . . . . . . . . . . . . . . . . . . . . . . 55
Adding Equipment to the Airbag-Equipped Vehicle . . . . . . . . . . . . . . 55
Airbag System Check . . . . . . . . . . . . . . . . . . . 56
Replacing Airbag System Parts after a Crash . . . . . . . . . . . . . . . . . . . . . . . . . . . . . . . . . 56
Child Restraints
Older Children . . . . . . . . . . . . . . . . . . . . . . . . . . 56
Infants and Young Children . . . . . . . . . . . . . 58
Child Restraint Systems . . . . . . . . . . . . . . . . 60
Where to Put the Restraint . . . . . . . . . . . . . 61
Lower Anchors and Tethers for Children(LATCH System) . . . . . . . . . . . . . . . . . . . . . . 62
Replacing LATCH System Parts After a Crash . . . . . . . . . . . . . . . . . . . . . . . . . . . . . . . . . 68
Securing Child Restraints (With the Seat Belt in the Rear Seat) . . . . . . . . . . . . . . . . 69
Securing Child Restraints (With the Seat Belt in the Front Seat) . . . . . . . . . . . . . . . . 70
Head Restraints
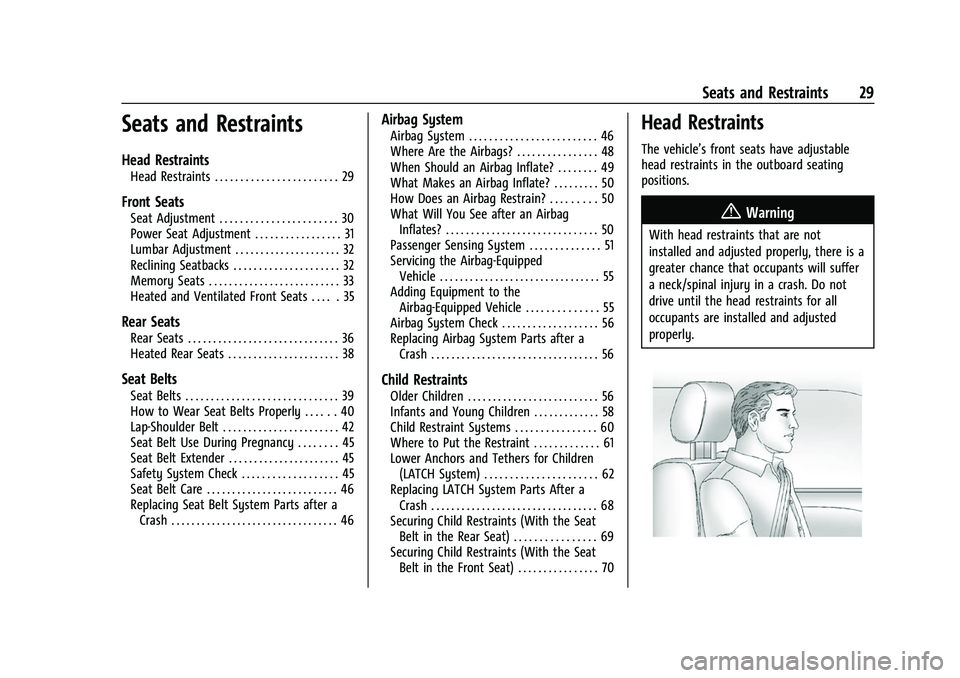
The vehicle’s front seats have adjustable
head restraints in the outboard seating
positions.
{Warning
With head restraints that are not
installed and adjusted properly, there is a
greater chance that occupants will suffer
a neck/spinal injury in a crash. Do not
drive until the head restraints for all
occupants are installed and adjusted
properly.
Page 35 of 369
Chevrolet Equinox Owner Manual (GMNA-Localizing-U.S./Canada/Mexico-
14420010) - 2021 - CRC - 11/10/20
34 Seats and Restraints
then Seating Position, and then Seat
Entry Memory. Select On or Off. See
“Seat Entry Memory”later in this section.
.To begin Seat Exit Memory movement
when the vehicle is turned off and the
driver door is opened, or when the vehicle
is turned off with the driver door already
opened, select the Settings menu, then
Vehicle, then Seating Position, and then
Seat Exit Memory. Select On or Off. See
“Seat Exit Memory”later in this section.
.SeeVehicle Personalization 0108 for
additional setting information.
Identifying Driver Number
To identify the driver number: 1. Move your RKE transmitter away from the vehicle.
2. Start the vehicle with another key or RKE transmitter. The DIC should display the
driver number for the other RKE
transmitter. Turn the vehicle off and
remove the key or RKE transmitter from
the vehicle.
3. Start the vehicle with the initial key or RKE transmitter. The DIC should display
the driver number of your RKE
transmitter. Saving Memory Positions
Read these instructions completely before
saving memory positions.
To save preferred driving positions 1 and 2:
1. Turn the vehicle on or to ACC/ ACCESSORY.
A DIC welcome message may indicate
driver number 1 or 2.
2. Adjust all available memory features to the desired driving position.
3. Press and release SET; a beep will sound.
4. Immediately press and hold the 1 or 2 memory button matching the above
DIC welcome message until two beeps
sound.
If too much time passes between
releasing SET and pressing 1, the
memory position will not be saved and
two beeps will not sound. Repeat
Steps 3 and 4.
1 or 2 corresponds to the driver number.
See “Identifying Driver Number”
previously in this section.
5. Repeat Steps 1–4 for a second driver using 1 or 2. To save the position for
Band Seat Exit
Memory features, repeat Steps 1–4 using
B. This saves the position for getting out
of the vehicle.
Save preferred memory feature positions to
both 1 and 2 if you are the only driver.
Manually Recalling Memory Positions
Press and hold 1, 2, or
Bto recall the
previously saved memory positions if you
are driver 1 or 2 identified in the DIC
welcome message. RKE transmitters 3–8 will
not recall memory positions.
To stop Manual Memory recall movement,
release 1, 2, or
Bor press any of the
following controls:
.Power seat
.Memory SET
.Power mirror, with the driver or
passenger side mirror selected
Manual Memory recall movement for 1, 2,
or
Bbuttons may be initiated and may
complete to the saved memory position if
the vehicle is in or out of P (Park).
Page 36 of 369
Chevrolet Equinox Owner Manual (GMNA-Localizing-U.S./Canada/Mexico-
14420010) - 2021 - CRC - 11/10/20
Seats and Restraints 35
Seat Entry Memory
The vehicle identifies the number of the
current driver’s RKE transmitter (1–8). See
Remote Keyless Entry (RKE) System
Operation07. If the RKE transmitter is 1 or
2, and Seat Entry Memory is enabled in
vehicle personalization, the positions saved
to the same memory button number 1 or 2
are automatically recalled when the vehicle
is turned on, or turned from off to ACC/
ACCESSORY. RKE transmitters 3–8 will not
provide automatic memory recalls.
To turn Seat Entry Memory on or off, see
“Vehicle Personalization Settings” previously
in this section and Vehicle Personalization
0 108.
The shift lever must be in P (Park) to start
Seat Entry Memory. Seat Entry Memory
recall will complete if the vehicle is shifted
out of P (Park) prior to reaching the saved
memory position.
To stop Seat Entry Memory recall
movement, turn the vehicle off or press any
of the following controls:
.Power seat
.Memory SET, 1, 2, orB
.Power mirror, with the driver or
passenger side mirror selected If the saved memory seat position does not
automatically recall or recalls to the wrong
positions, the driver’s RKE transmitter
number (1 or 2) may not match the memory
button number that positions were saved to.
Try storing the position to the other
memory button or try the other RKE
transmitter.
Seat Exit Memory
Seat Exit Memory is not linked to an RKE
transmitter. The position saved to
Bis
used for all drivers. To turn Seat Exit
Memory on or off, see "Vehicle
Personalization Settings" previously in this
section and Vehicle Personalization 0108.
If turned on, the position saved to
Bis
automatically recalled when one of the
following occurs:
.The vehicle is turned off and the driver
door is opened within a short time.
.The vehicle is turned off with the driver
door open.
To stop Seat Exit Memory movement, press
any of the following memory controls:
.Power seat
.Memory SET, 1, 2, orB
.Power mirror, with the driver or
passenger side mirror selected
Obstructions
If something has blocked the driver seat
while recalling a memory position, the recall
may stop. Remove the obstruction and try
the recall again. If the memory position still
does not recall, see your dealer.
Heated and Ventilated Front
Seats
{Warning
If temperature change or pain to the skin
cannot be felt, the seat heater may cause
burns. To reduce the risk of burns, use
care when using the seat heater,
especially for long periods of time. Do
not place anything on the seat that
insulates against heat, such as a blanket,
cushion, cover, or similar item. This may
cause the seat heater to overheat. An
overheated seat heater may cause a burn
or may damage the seat.