clock CHEVROLET EXPRESS 1997 1.G Owner's Manual
[x] Cancel search | Manufacturer: CHEVROLET, Model Year: 1997, Model line: EXPRESS, Model: CHEVROLET EXPRESS 1997 1.GPages: 386, PDF Size: 20.32 MB
Page 225 of 386
Downloaded from www.Manualslib.com manuals search engine A CAUTION:
r
Raising your vehicle with the jack improperly
positioned can damage the vehicle and even make the vehicle fall.
To avoid personal injury and
vehicle damage, be sure
to fit the jack lift head into
the proper location before raising your vehicle.
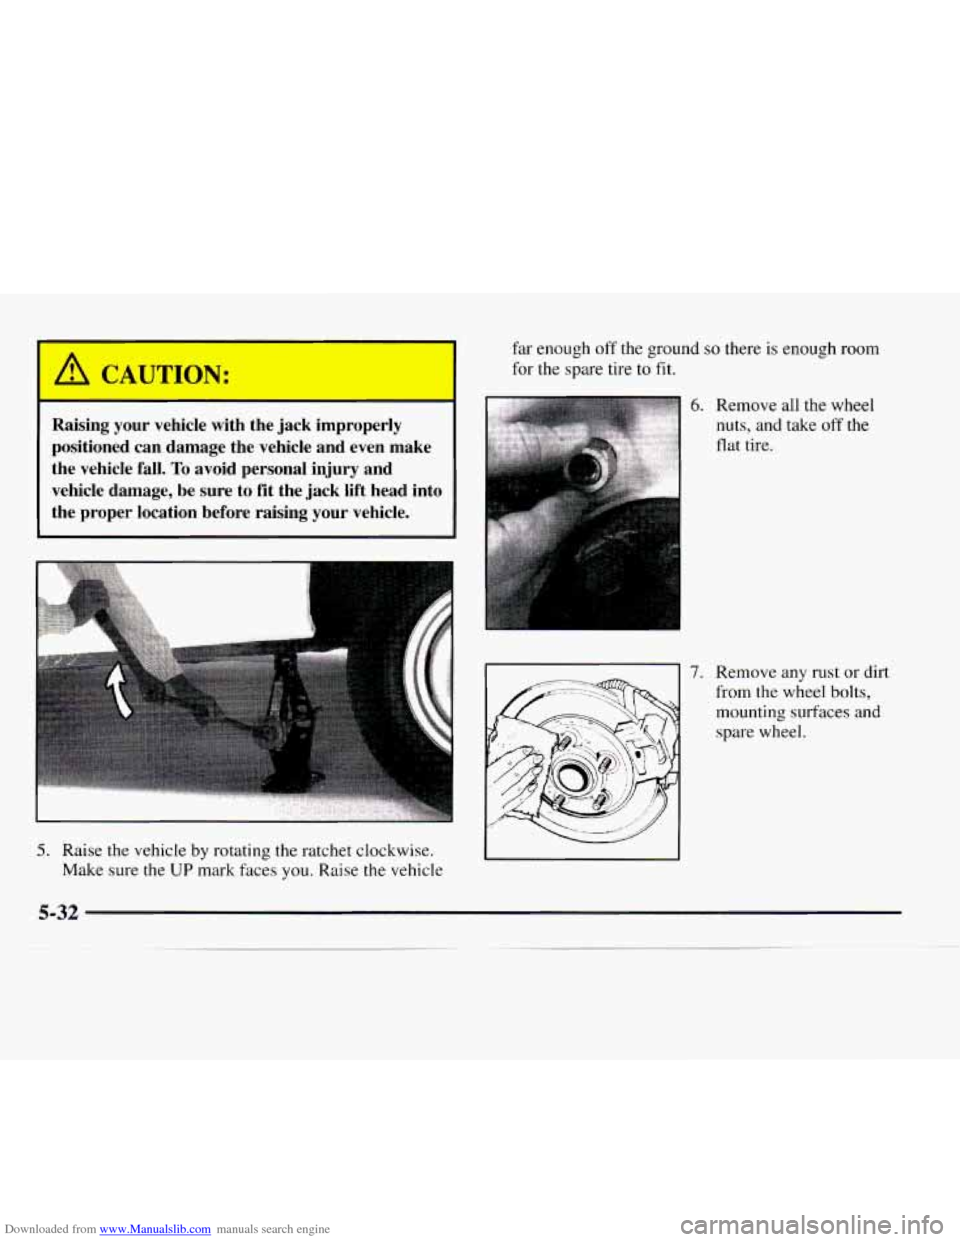
5. Raise the vehicle by rotating the ratchet clockwise.
Make
sure the UP mark faces you. Raise the vehicle far
enough off the ground
so there is enough room
for the spare tire to fit.
6. Remove all the wheel
nuts, and take
off the
flat tire.
7. Remove any rust or dirt
from the wheel
bolts,
mounting surfaces and
spare wheel.
5-32
Page 226 of 386
Downloaded from www.Manualslib.com manuals search engine A CAUTION:
Rust or dirt on the wheel, or on the parts to
which it is fastened, can make the wheel nuts
become loose after
a time. The wheel could come
off and cause an accident. When you change
a
wheel, remove any rust or dirt from the places
where the wheel attaches to the vehicle. In an
emergency, you can use a cloth or
a paper towel
to do this; but be sure to use
a scraper or wire
brush later, if you need to, to get all the rust or
dirt off.
A CAUTION:
Never use oil or grease on studs or nuts. If you
do, the nuts might come loose. Your wheel could
fall off, causing a serious accident.
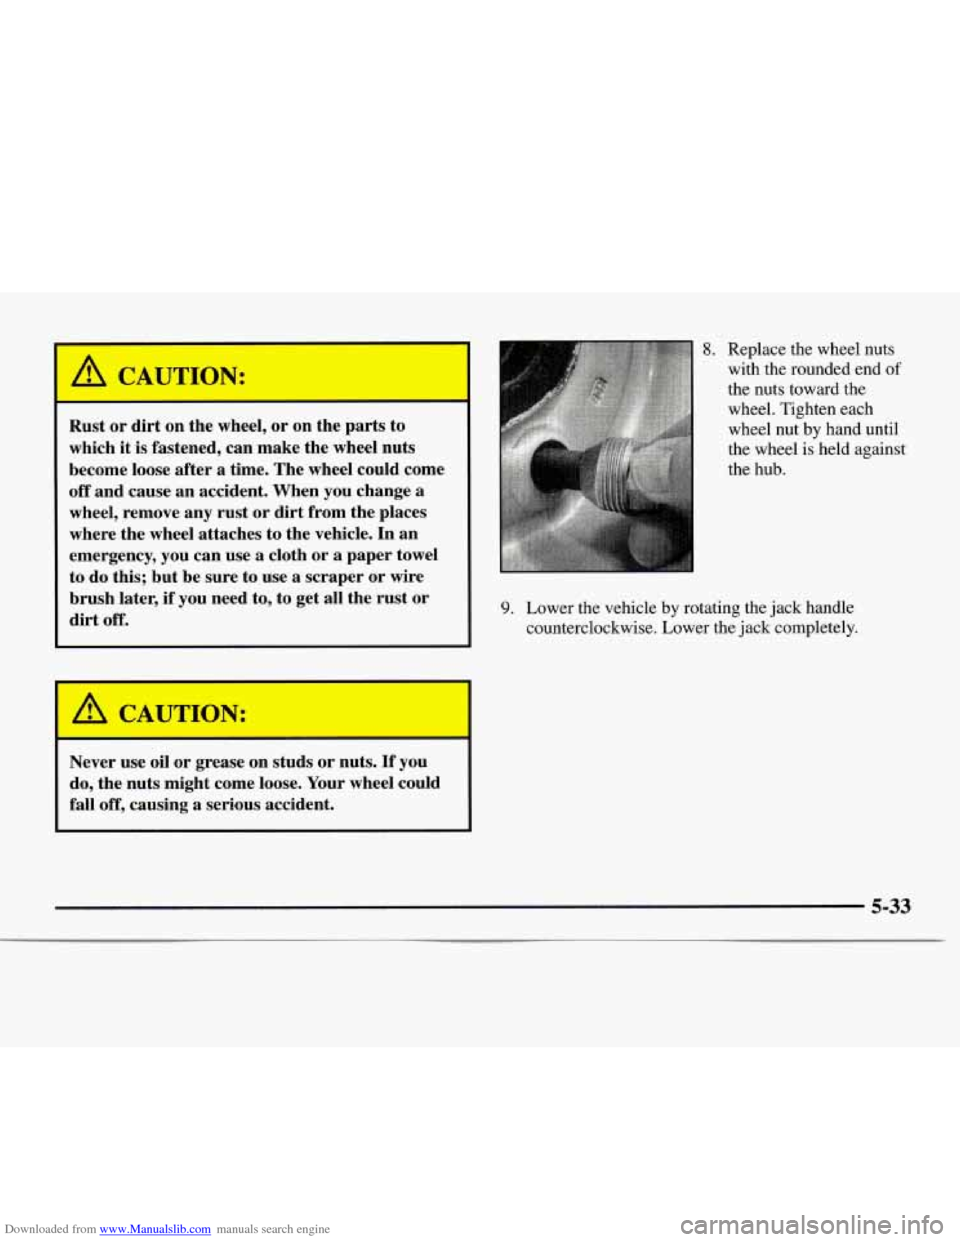
8. Replace the wheel nuts
with the rounded end
of
the nuts toward the
wheel. Tighten each
wheel nut by hand until
the wheel is held against
the hub.
9. Lower the vehicle by rotating the jack handle
counterclockwise. Lower the jack completely.
5-33
Page 227 of 386
Downloaded from www.Manualslib.com manuals search engine I
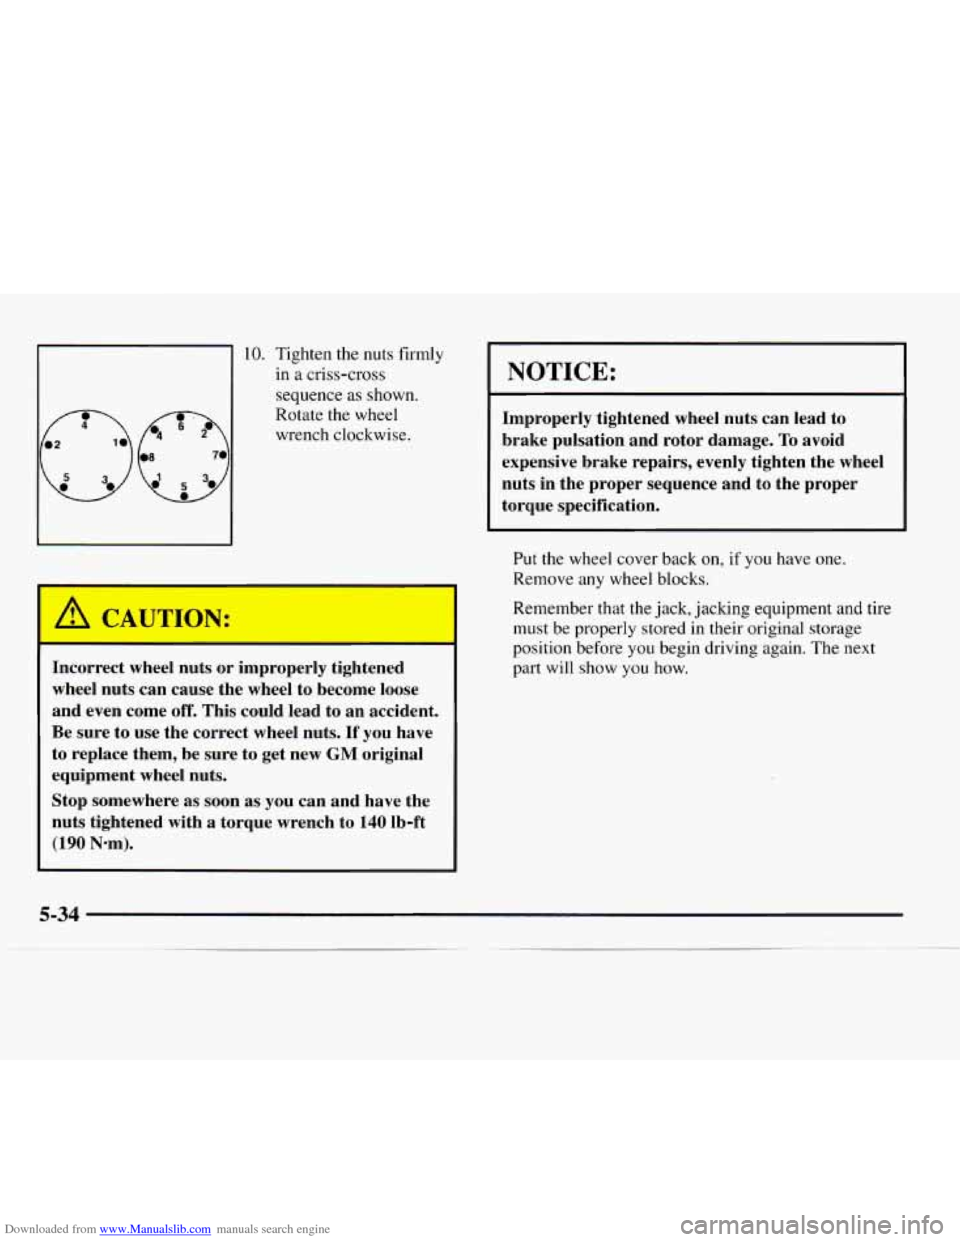
10. Tighten the nuts firmly in
a criss-cross
sequence
as shown.
(f3, e
Rotate the wheel
wrench clockwise.
A CA "TION:
I
Incorrect wheel nuts or improperly tightened
wheel nuts can cause the wheel to become loose
and even come
off. This could lead to an accident.
Be sure to use the correct wheel nuts.
If you have
to replace them, be sure to get new
GM original
equipment wheel nuts.
Stop somewhere as soon as you can and have the
nuts tightened with
a torque wrench to 140 Ib-ft
(190 N*m).
NOTICE:
Improperly tightened wheel nuts can lead to
brake pulsation and rotor damage.
To avoid
expensive brake repairs, evenly tighten the wheel
nuts in the proper sequence and to the proper
torque specification.
Put the wheel cover back on, if you have one.
Remove
any wheel blocks.
Remember that the jack, jacking equipment and tire
must be properly stored in their original storage
position before you begin driving again. The next
part will show you how.
5-34
Page 230 of 386
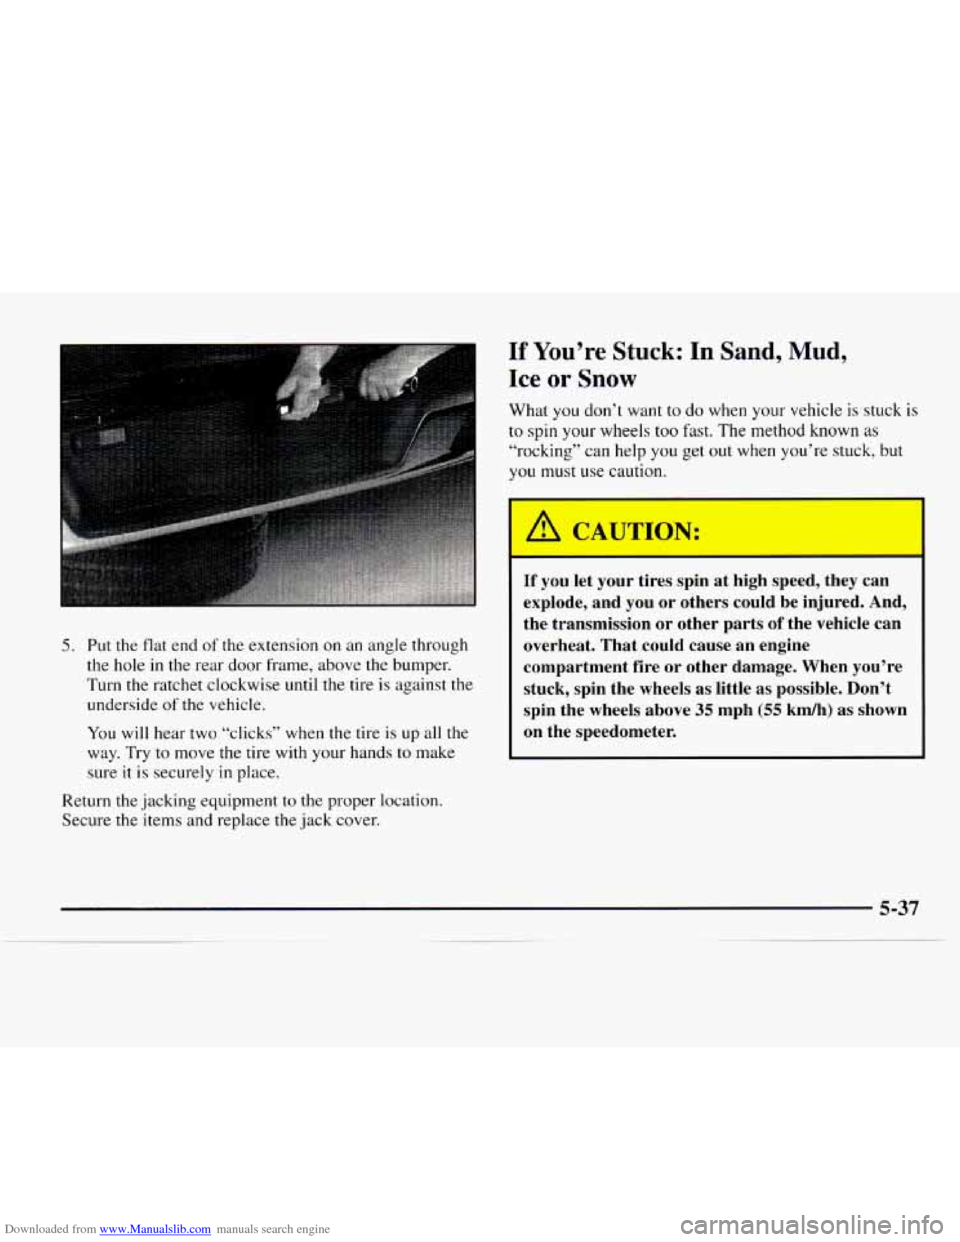
Downloaded from www.Manualslib.com manuals search engine 5. Put the flat end of the extension on an angle through
the hole in the rear door frame, above the bumper.
Turn the ratchet clockwise until the tire is against the
underside
of the vehicle.
You will hear two “clicks” when the tire is up all the
way. Try to move the tire with your hands to make
sure
it is securely in place.
Return the jacking equipment to the proper location.
Secure the items and replace the jack cover.
If You’re Stuck: In Sand, Mud,
Ice or Snow
What you don’t want to do when your vehicle is stuck is
to spin your wheels too fast. The method known as
“rocking” can help you get out when you’re stuck, but
you
must use caution.
I
A CAUTION:
If you let your tires spin at high speed, they can
explode, and you or others could be injured. And,
the transmission
or other parts of the vehicle can
overheat. That could cause an engine
compartment fire or other damage. When you’re
stuck, spin the wheels
as little as possible. Don’t
spin the wheels above
35 mph (55 kmk) as shown
on the speedometer.
Page 239 of 386
Downloaded from www.Manualslib.com manuals search engine A CAUTION:
If you get gasoline on yourself and then
something ignites it, you could be badly burned.
Gasoline can spray out on you if you open the
fuel filler cap too quickly. This spray can happen
if your tank is nearly full, and
is more likely in
hot weather. Open the fuel filler cap slowly and
wait for any “hiss” noise to stop. Then unscrew
the cap all the
way.
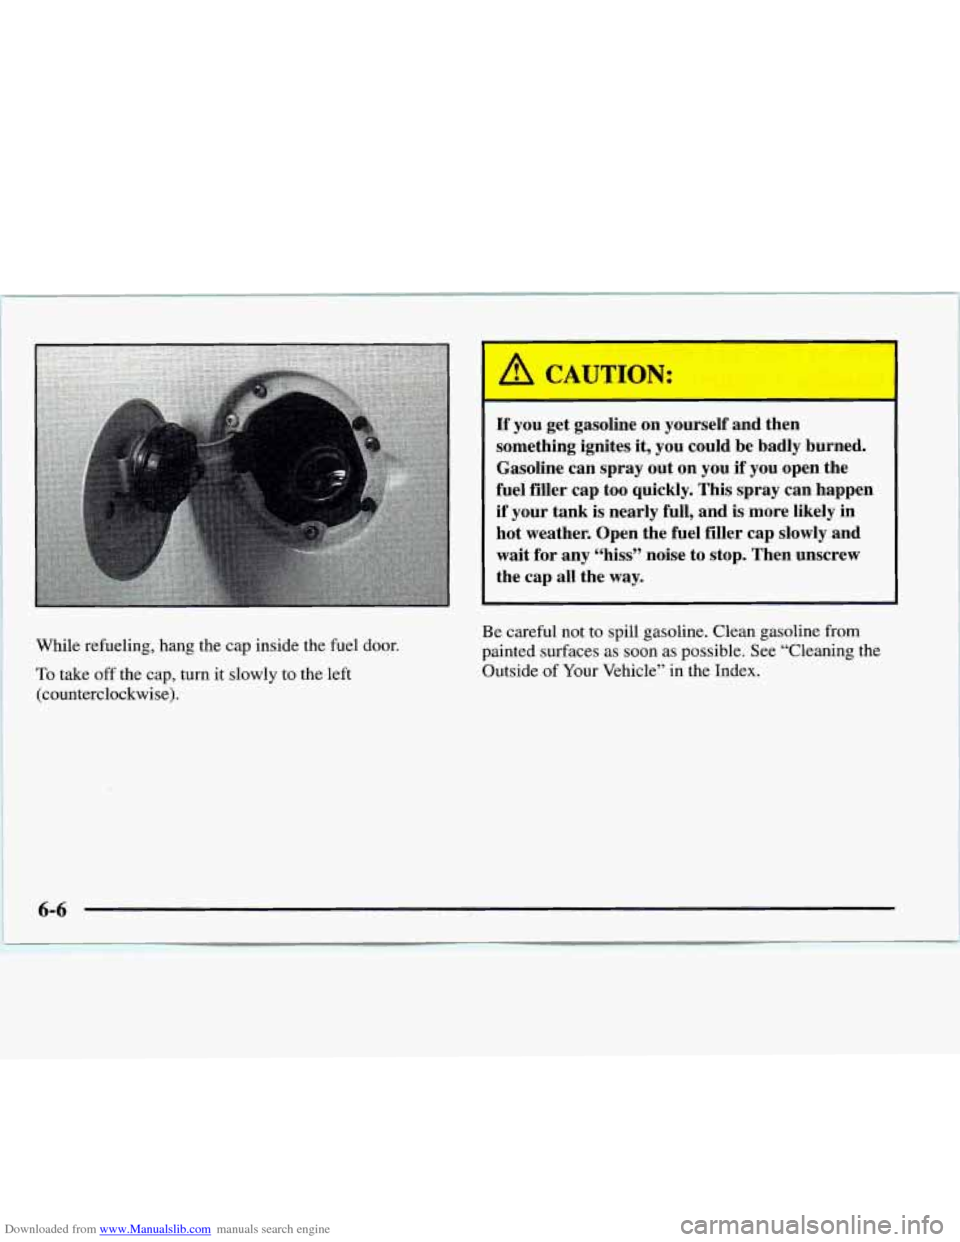
While refueling, hang the cap inside the fuel door.
To take off the cap, turn it slowly to the left
(counterclockwise). Be careful
not to spill gasoline. Clean gasoline
from
painted surfaces as soon as possible. See “Cleaning the
Outside of Your Vehicle”
in the Index.
Page 240 of 386
Downloaded from www.Manualslib.com manuals search engine When you put the cap back on, turn it to the right
(clockwise) until you hear
a clicking sound. Make sure
you fully install the cap.
NOTICE:
If you need a new cap, be sure to get the right
type. Your dealer can get one for you. If you get
the wrong type, it may not fit
or have proper
venting, and your fuel tank and emissions system
might be damaged.
Checking Things Under the Hood
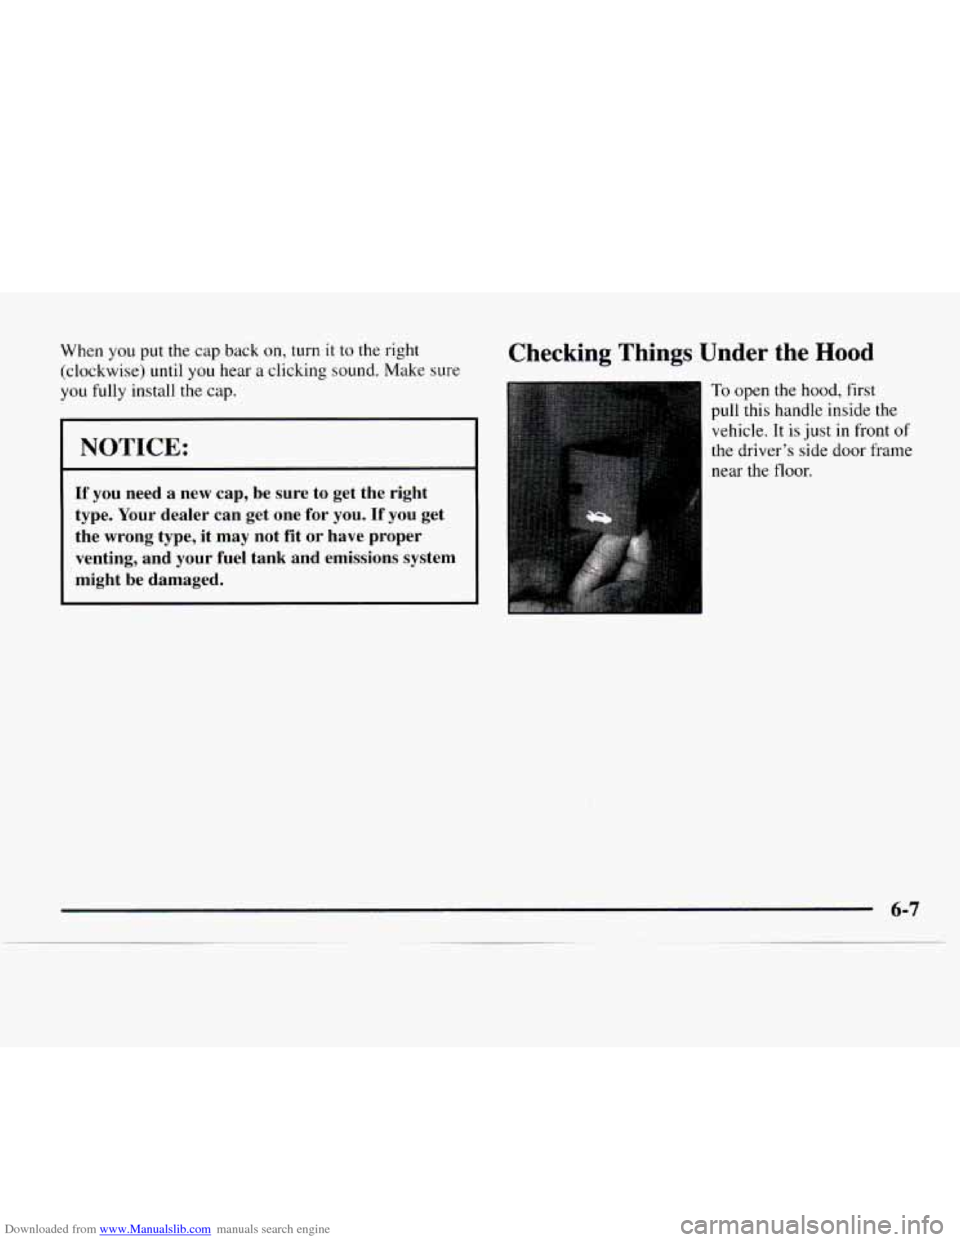
To open the hood, first
pull this handle inside the
vehicle.
It is just in front of
the driver’s side door frame
near the floor.
Page 267 of 386
Downloaded from www.Manualslib.com manuals search engine Composite Headlamps
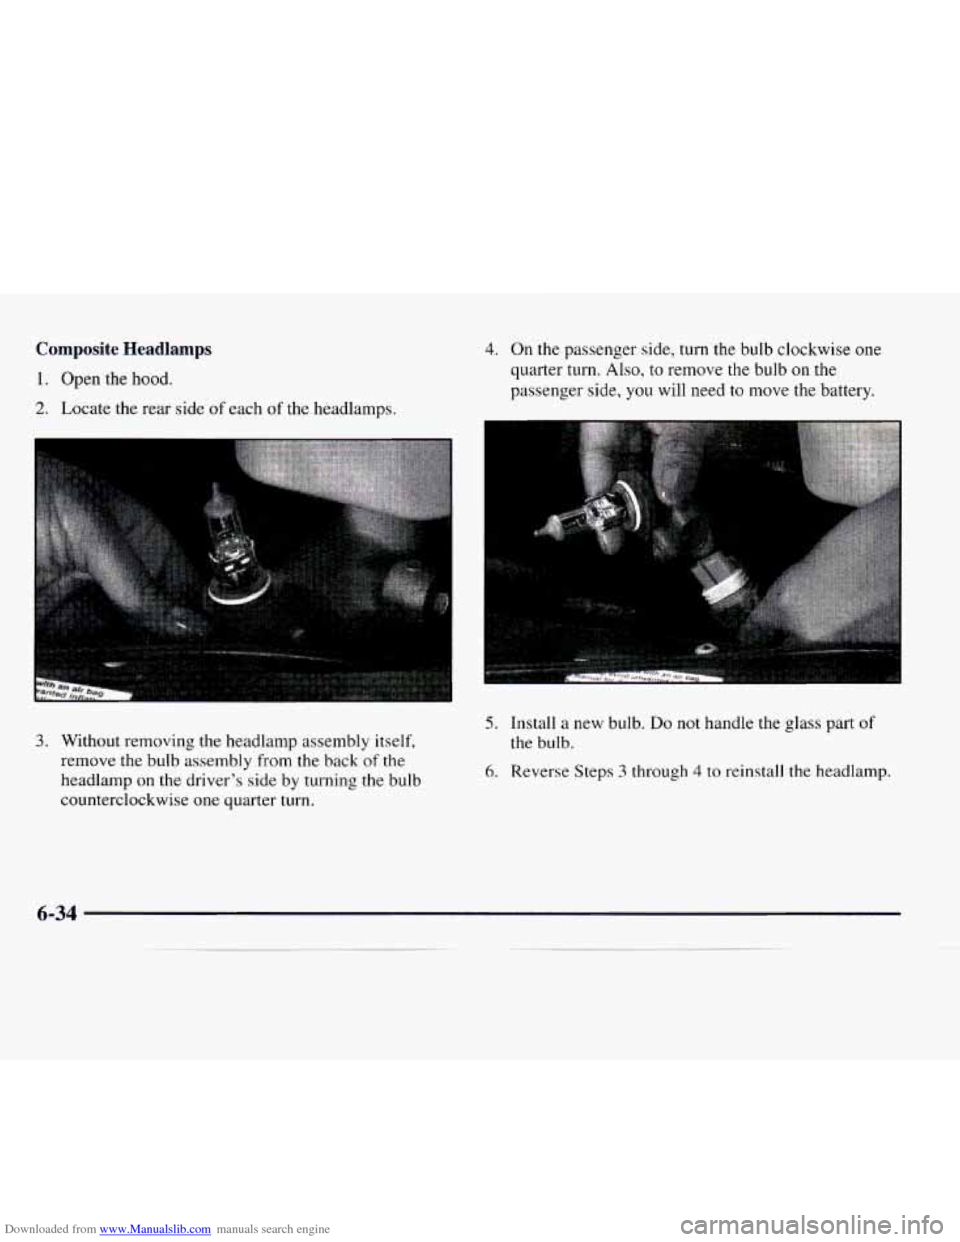
1. Open the hood.
2. Locate the rear side of each of the headlamps.
4. On the passenger side, turn the bulb clockwise one
quarter turn. Also, to remove the bulb on the
passenger side,
you will need to move the battery.
3. Without removing the headlamp assembly itself,
remove the bulb assembly from the back
of the
headlamp
on the driver’s side by turning the bulb
counterclockwise
one quarter turn.
5. Install a new bulb. Do not handle the glass part of
the bulb.
6. Reverse Steps 3 through 4 to reinstall the headlamp.
6-34
Page 269 of 386
Downloaded from www.Manualslib.com manuals search engine I P I
Sidemarker Lamps
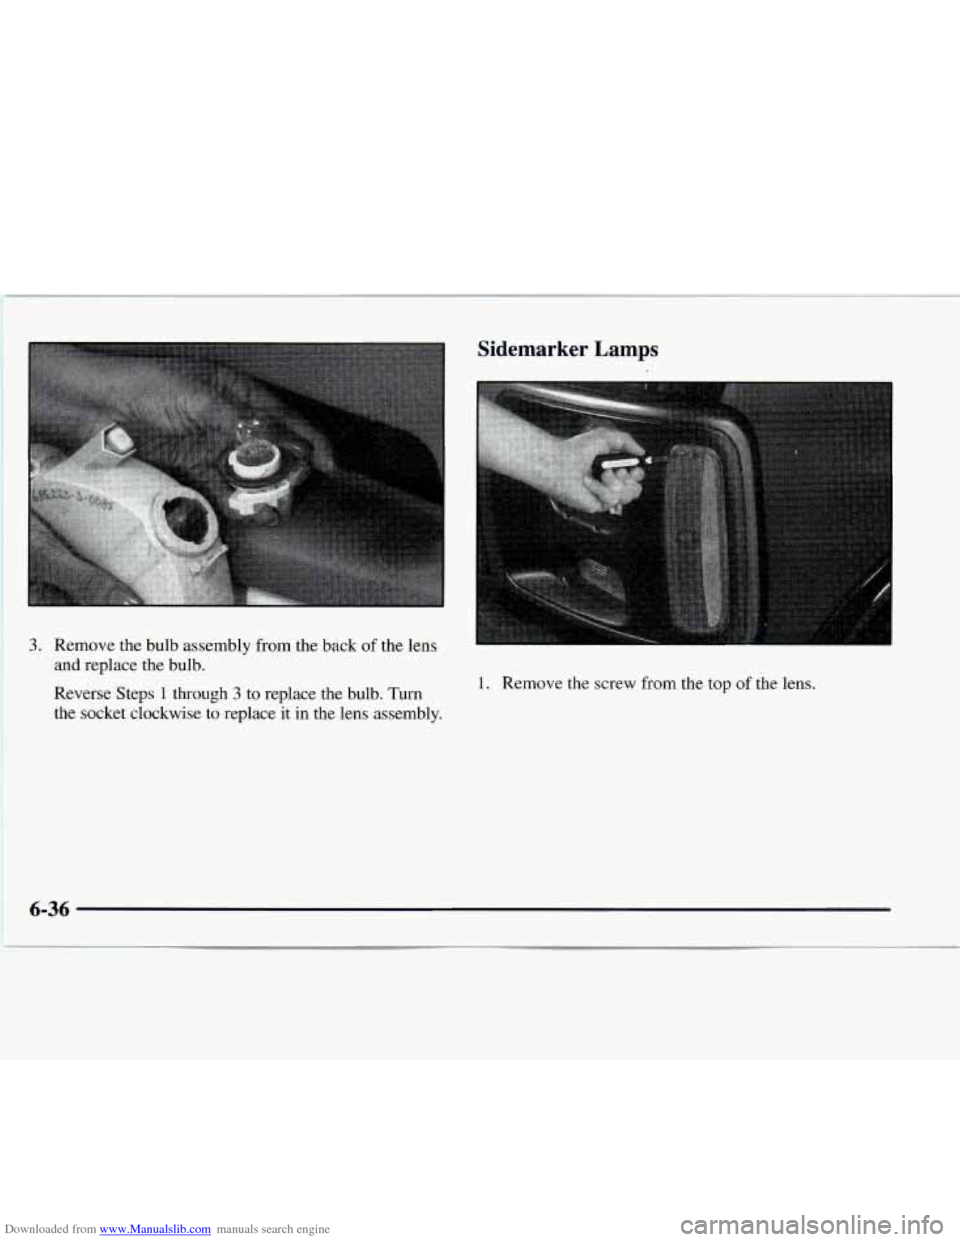
3. Remove the bulb assembly from the back of the lens
and replace the bulb.
Reverse Steps
1 through 3 to replace the bulb. Turn
the socket clockwise to replace it in the lens assembly. 1. Remove the screw from the top of the lens.
Page 272 of 386
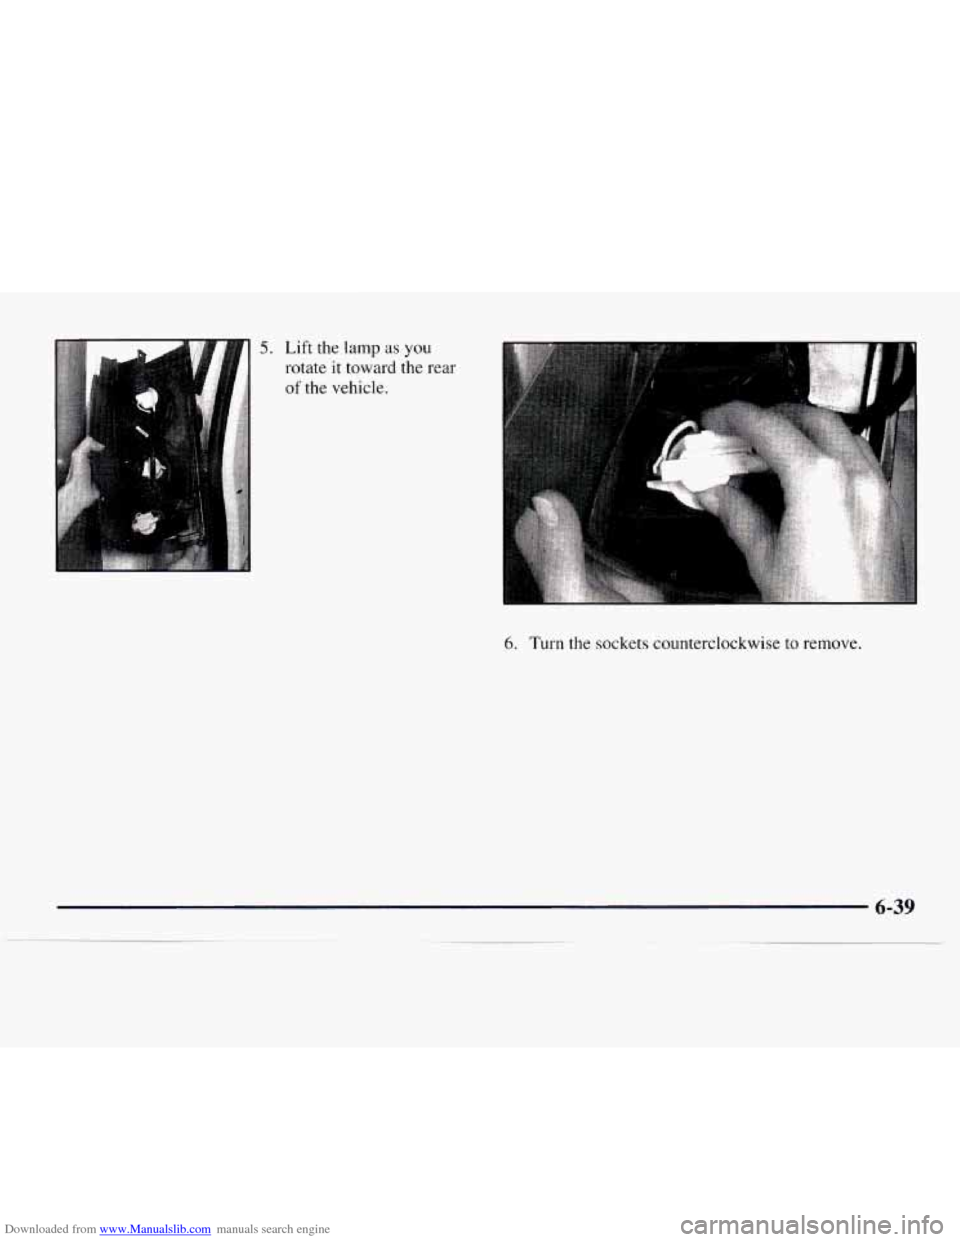
Downloaded from www.Manualslib.com manuals search engine 5. Lift the lamp as
rotate it toward
of the vehicle.
YOU
the rear
6. Turn the sockets counterclockwise to remove.
Page 273 of 386
Downloaded from www.Manualslib.com manuals search engine Windshield Wiper Blade Replacement
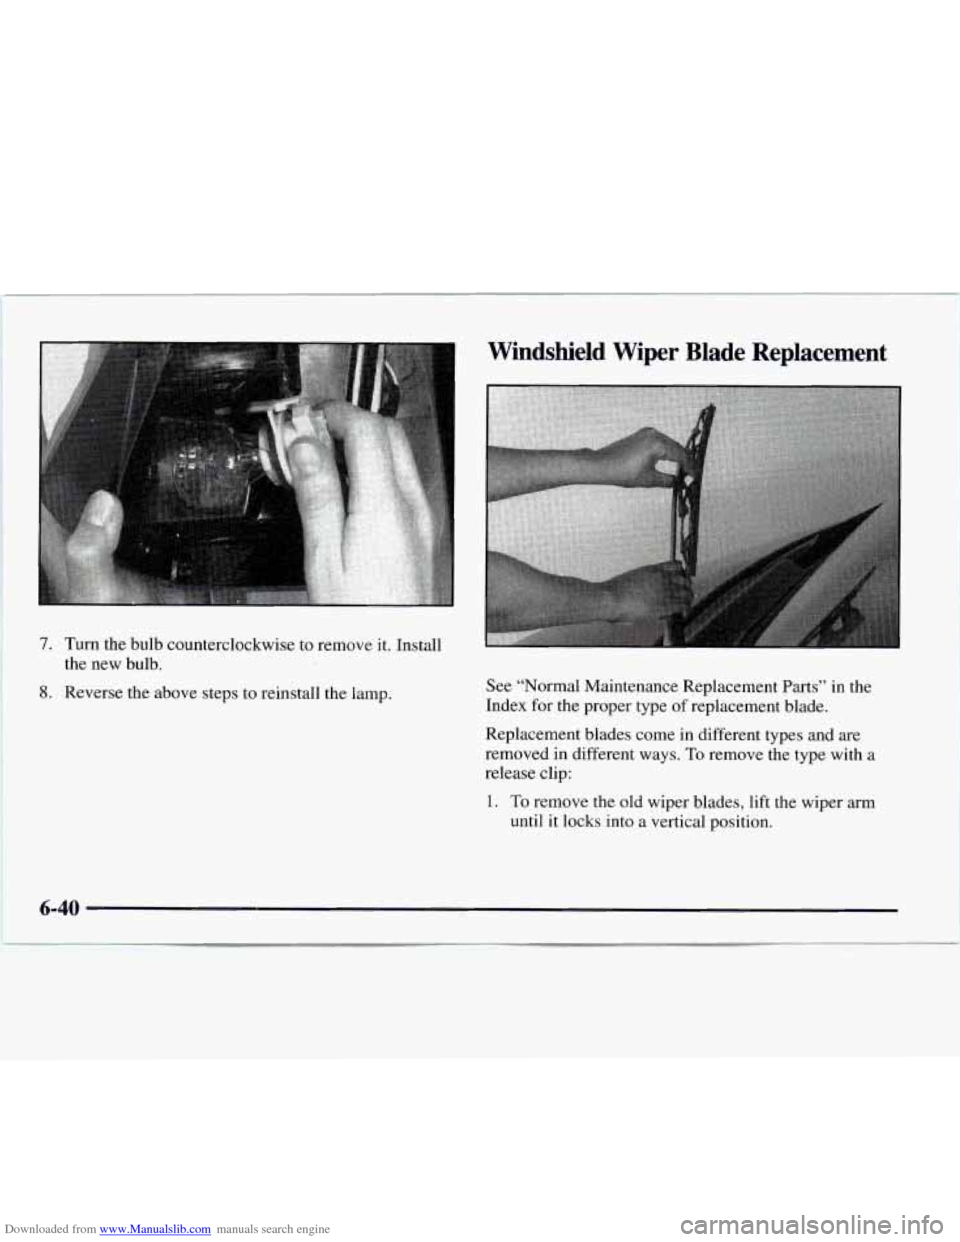
7. Turn the bulb counterclockwise to remove it. Install
the new bulb.
8. Reverse the above steps to reinstall the lamp. See “Normal Maintenance Replacement Parts” in
the
Index for the proper type
of replacement blade.
Replacement blades come in different types and are
removed in different ways.
To remove the type with a
release clip:
1. To remove the old wiper blades, lift the wiper arm
until it locks into a vertical position.