recommended fluids CHEVROLET EXPRESS 2008 Owners Manual
[x] Cancel search | Manufacturer: CHEVROLET, Model Year: 2008, Model line: EXPRESS, Model: CHEVROLET EXPRESS 2008Pages: 440, PDF Size: 2.42 MB
Page 242 of 440
Before Leaving on a Long Trip
To prepare your vehicle for a long trip, consider having
it serviced by your dealer/retailer before departing.
Things to check on your own include:
•Windshield Washer Fluid:Reservoir full? Windows
clean — inside and outside?
•Wiper Blades:In good shape?
•Fuel, Engine Oil, Other Fluids:All levels checked?
•Lamps:Do they all work and are lenses clean?
•Tires:Are treads good? Are tires inflated to
recommended pressure?
•Weather and Maps:Safe to travel? Have
up-to-date maps?
Highway Hypnosis
Always be alert and pay attention to your surroundings
while driving. If you become tired or sleepy, find a
safe place to park your vehicle and rest.
Other driving tips include:
•Keep the vehicle well ventilated.
•Keep interior temperature cool.
•Keep your eyes moving — scan the road ahead
and to the sides.
•Check the rearview mirror and vehicle instruments
often.
5-14
Page 291 of 440
To inspect or replace the engine air cleaner/filter, do the
following:
1. Unhook the retainer clips and remove the cover.
2. Lift the filter out of the engine air cleaner/filter
housing. Care should be taken to dislodge as
little dirt as possible.
3. Clean the engine air cleaner/filter housing.
4. Inspect or replace the engine air cleaner/filter.
Make sure that the filter fits properly into the
housing.
5. Reinstall the cover and fasten the retaining clips.
{WARNING:
Operating the engine with the air cleaner/filter off
can cause you or others to be burned. The air
cleaner not only cleans the air; it helps to stop
flames if the engine backfires. If it is not there and
the engine backfires, you could be burned. Do not
drive with it off, and be careful working on the
engine with the air cleaner/filter off.Notice:If the air cleaner/lter is off, a backre
can cause a damaging engine re. And, dirt
can easily get into the engine, which will damage it.
Always have the air cleaner/lter in place when
you are driving.
Automatic Transmission Fluid
(4-Speed Transmission)
If your vehicle has the DURAMAX Diesel engine, see
the DURAMAX Diesel manual for more information.
When to Check and Change Automatic
Transmission Fluid
A good time to check your automatic transmission fluid
level is when the engine oil is changed.
Change the fluid and filter at the intervals listed in
Scheduled Maintenance on page 7-3, and be sure to
use the transmission fluid listed inRecommended Fluids
and Lubricants on page 7-12.
6-21
Page 294 of 440
How to Add Automatic Transmission
Fluid
Refer to the Maintenance Schedule to determine what
kind of transmission fluid to use. SeeRecommended
Fluids and Lubricants on page 7-12.
Using a funnel, add fluid down the transmission dipstick
tube only after checking the transmission fluid while it is
hot. A cold check is used only as a reference. If the fluid
level is low, add only enough of the proper fluid to bring
the level up to the HOT area for a hot check. It does not
take much fluid, generally less than one pint (0.5 L).
Do not overfill.
Notice:Use of the incorrect automatic transmission
uid may damage the vehicle, and the damages may
not be covered by the vehicle’s warranty. Always
use the automatic transmission uid listed in
Recommended Fluids and Lubricants on page 7-12.
•After adding fluid, recheck the fluid level as described
under “How to Check Automatic Transmission Fluid,”
earlier in this section.
•When the correct fluid level is obtained, push the
dipstick back in all the way; then flip the handle down
to lock the dipstick in place.
Automatic Transmission Fluid
(6-Speed Transmission)
When to Check and Change Automatic
Transmission Fluid
It is usually not necessary to check the transmission fluid
level. The only reason for fluid loss is a transmission
leak or overheating the transmission. If a small leak is
suspected, use the following procedures to check the
fluid level. However, if there is a large leak, then it may be
necessary to have the vehicle towed to a dealer/retailer
service department and have it repaired before driving
the vehicle further.
Change the fluid and filter at the intervals listed in
Scheduled Maintenance on page 7-3, and be sure
to use the transmission fluid listed inRecommended
Fluids and Lubricants on page 7-12.
6-24
Page 297 of 440
How to Add Automatic Transmission
Fluid
Refer to the Maintenance Schedule to determine what
kind of transmission fluid to use. SeeRecommended
Fluids and Lubricants on page 7-12.
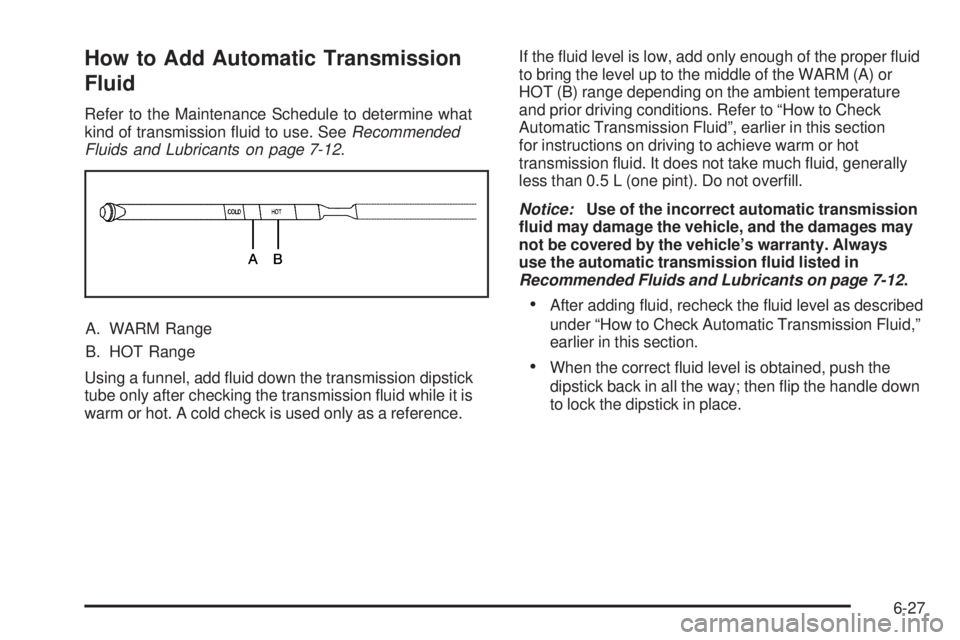
A. WARM Range
B. HOT Range
Using a funnel, add fluid down the transmission dipstick
tube only after checking the transmission fluid while it is
warm or hot. A cold check is used only as a reference.If the fluid level is low, add only enough of the proper fluid
to bring the level up to the middle of the WARM (A) or
HOT (B) range depending on the ambient temperature
and prior driving conditions. Refer to “How to Check
Automatic Transmission Fluid”, earlier in this section
for instructions on driving to achieve warm or hot
transmission fluid. It does not take much fluid, generally
less than 0.5 L (one pint). Do not overfill.
Notice:Use of the incorrect automatic transmission
uid may damage the vehicle, and the damages may
not be covered by the vehicle’s warranty. Always
use the automatic transmission uid listed in
Recommended Fluids and Lubricants on page 7-12.
•After adding fluid, recheck the fluid level as described
under “How to Check Automatic Transmission Fluid,”
earlier in this section.
•When the correct fluid level is obtained, push the
dipstick back in all the way; then flip the handle down
to lock the dipstick in place.
6-27
Page 300 of 440
What to Use
{WARNING:
Adding only plain water to the cooling system can
be dangerous. Plain water, or some other liquid
such as alcohol, can boil before the proper coolant
mixture will. The vehicle’s coolant warning system
is set for the proper coolant mixture. With plain
water or the wrong mixture, the engine could get
too hot but you would not get the overheat
warning. The engine could catch fire and you or
others could be burned. Use a 50/50 mixture of
clean, drinkable water and DEX-COOL
®coolant.
Use a 50/50 mixture of clean, drinkable water and
DEX-COOL
®coolant. If using this mixture, nothing else
needs to be added. This mixture:
•Gives freezing protection down to−34°F (−37°C),
outside temperature.
•Gives boiling protection up to 265°F (129°C),
engine temperature.
•Protects against rust and corrosion.
•Will not damage aluminum parts.
•Helps keep the proper engine temperature.
Notice:If an improper coolant mixture is used,
the engine could overheat and be badly damaged.
The repair cost would not be covered by the vehicle
warranty. Too much water in the mixture can freeze
and crack the engine, radiator, heater core, and
other parts.
Notice:If extra inhibitors and/or additives are used
in the vehicle’s cooling system, the vehicle could
be damaged. Use only the proper mixture of
the engine coolant listed in this manual for the
cooling system. SeeRecommended Fluids and
Lubricants on page 7-12for more information.
6-30
Page 308 of 440
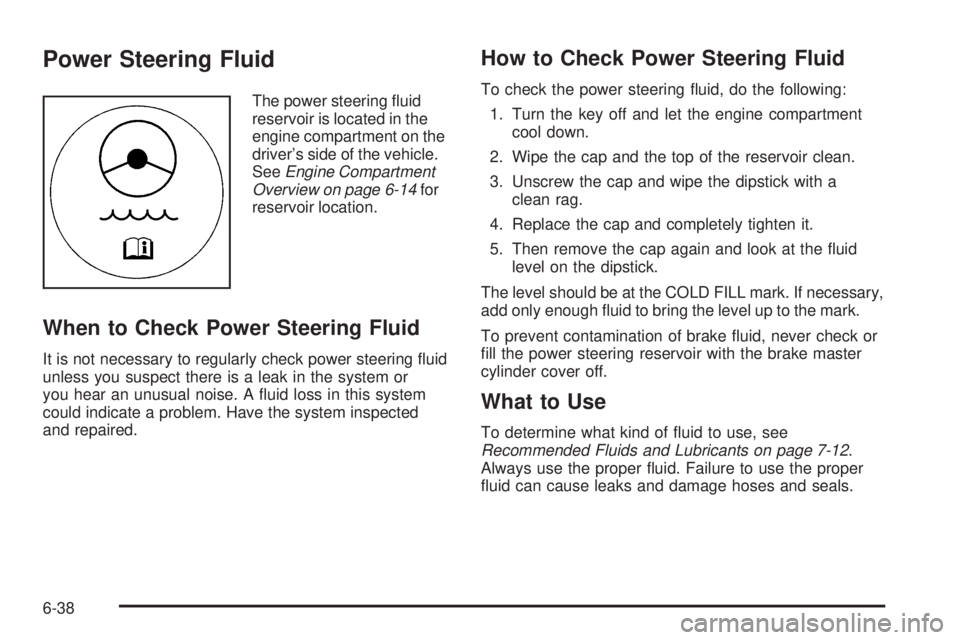
Power Steering Fluid
The power steering fluid
reservoir is located in the
engine compartment on the
driver’s side of the vehicle.
SeeEngine Compartment
Overview on page 6-14for
reservoir location.
When to Check Power Steering Fluid
It is not necessary to regularly check power steering fluid
unless you suspect there is a leak in the system or
you hear an unusual noise. A fluid loss in this system
could indicate a problem. Have the system inspected
and repaired.
How to Check Power Steering Fluid
To check the power steering fluid, do the following:
1. Turn the key off and let the engine compartment
cool down.
2. Wipe the cap and the top of the reservoir clean.
3. Unscrew the cap and wipe the dipstick with a
clean rag.
4. Replace the cap and completely tighten it.
5. Then remove the cap again and look at the fluid
level on the dipstick.
The level should be at the COLD FILL mark. If necessary,
add only enough fluid to bring the level up to the mark.
To prevent contamination of brake fluid, never check or
fill the power steering reservoir with the brake master
cylinder cover off.
What to Use
To determine what kind of fluid to use, see
Recommended Fluids and Lubricants on page 7-12.
Always use the proper fluid. Failure to use the proper
fluid can cause leaks and damage hoses and seals.
6-38
Page 311 of 440
Checking Brake Fluid
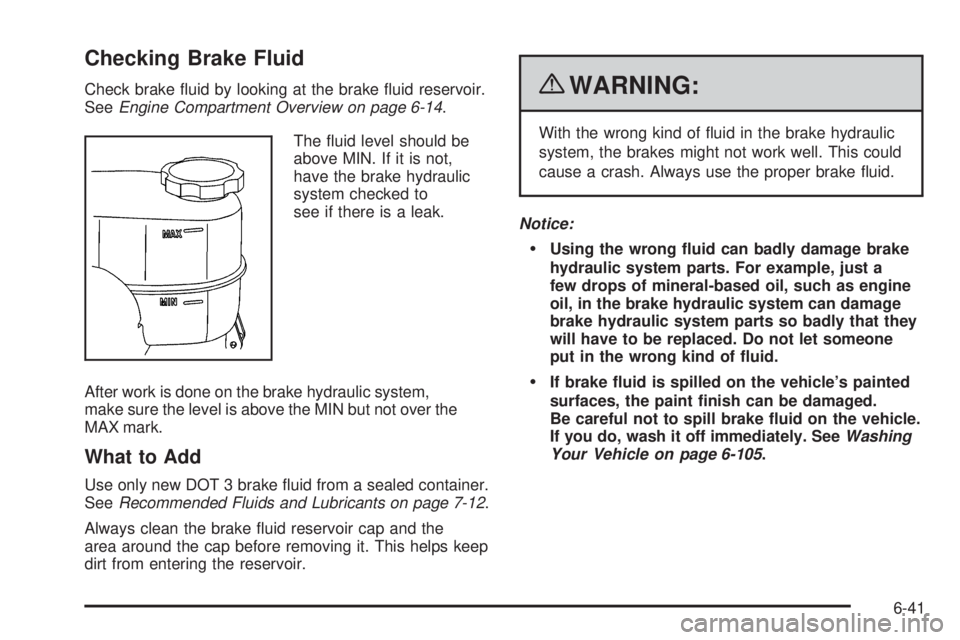
Check brake fluid by looking at the brake fluid reservoir.
SeeEngine Compartment Overview on page 6-14.
The fluid level should be
above MIN. If it is not,
have the brake hydraulic
system checked to
see if there is a leak.
After work is done on the brake hydraulic system,
make sure the level is above the MIN but not over the
MAX mark.
What to Add
Use only new DOT 3 brake fluid from a sealed container.
SeeRecommended Fluids and Lubricants on page 7-12.
Always clean the brake fluid reservoir cap and the
area around the cap before removing it. This helps keep
dirt from entering the reservoir.
{WARNING:
With the wrong kind of fluid in the brake hydraulic
system, the brakes might not work well. This could
cause a crash. Always use the proper brake fluid.
Notice:
Using the wrong uid can badly damage brake
hydraulic system parts. For example, just a
few drops of mineral-based oil, such as engine
oil, in the brake hydraulic system can damage
brake hydraulic system parts so badly that they
will have to be replaced. Do not let someone
put in the wrong kind of uid.
If brake uid is spilled on the vehicle’s painted
surfaces, the paint nish can be damaged.
Be careful not to spill brake uid on the vehicle.
If you do, wash it off immediately. SeeWashing
Your Vehicle on page 6-105.
6-41
Page 319 of 440
To disconnect the jumper cables from both vehicles, do
the following:
1. Disconnect the black negative (−) cable from the
vehicle that had the dead battery.
2. Disconnect the black negative (−) cable from the
vehicle with the good battery.
3. Disconnect the red positive (+) cable from the
vehicle with the good battery.
4. Disconnect the red positive (+) cable from the other
vehicle.
5. Return the remote positive (+) terminal cover to its
original position.
All-Wheel Drive
Lubricant checks in this section also apply to these
vehicles. However, there are two additional systems
that need lubrication.
Transfer Case
When to Check Lubricant
Refer to the Maintenance Schedule to determine
how often to check the lubricant. SeeScheduled
Maintenance on page 7-3.
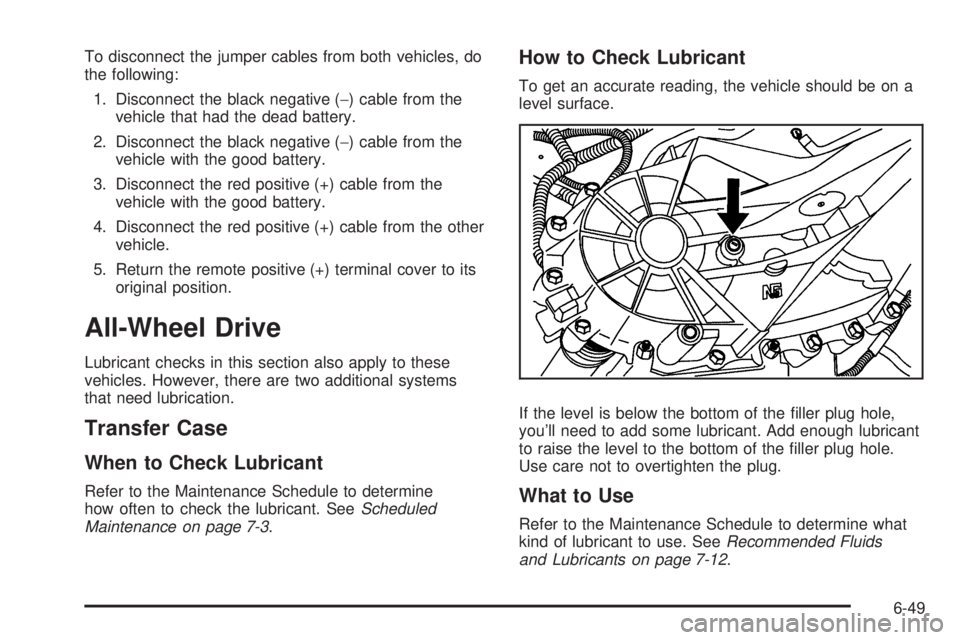
How to Check Lubricant
To get an accurate reading, the vehicle should be on a
level surface.
If the level is below the bottom of the filler plug hole,
you’ll need to add some lubricant. Add enough lubricant
to raise the level to the bottom of the filler plug hole.
Use care not to overtighten the plug.
What to Use
Refer to the Maintenance Schedule to determine what
kind of lubricant to use. SeeRecommended Fluids
and Lubricants on page 7-12.
6-49
Page 320 of 440
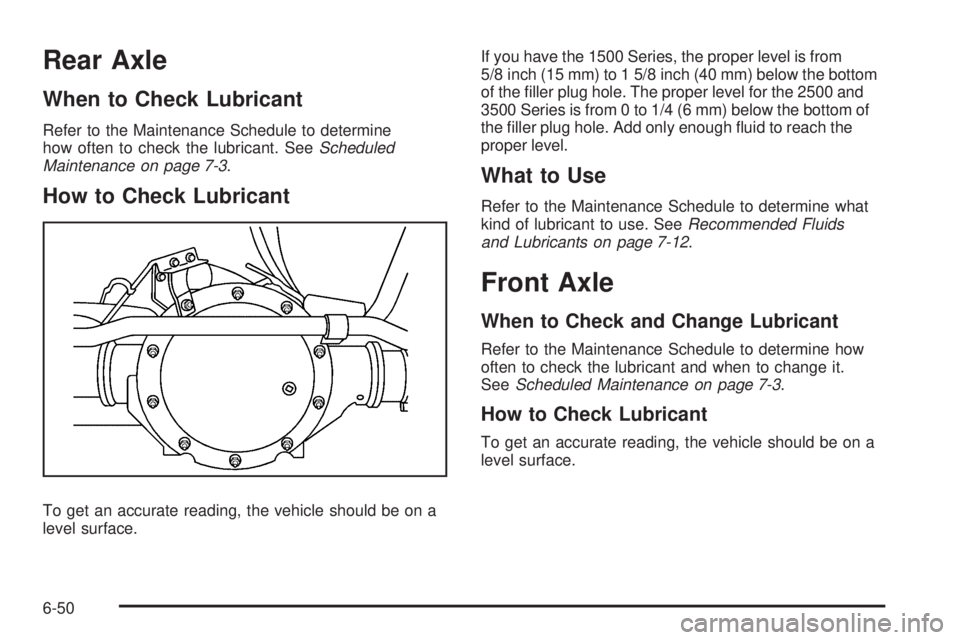
Rear Axle
When to Check Lubricant
Refer to the Maintenance Schedule to determine
how often to check the lubricant. SeeScheduled
Maintenance on page 7-3.
How to Check Lubricant
To get an accurate reading, the vehicle should be on a
level surface.If you have the 1500 Series, the proper level is from
5/8 inch (15 mm) to 1 5/8 inch (40 mm) below the bottom
of the filler plug hole. The proper level for the 2500 and
3500 Series is from 0 to 1/4 (6 mm) below the bottom of
the filler plug hole. Add only enough fluid to reach the
proper level.
What to Use
Refer to the Maintenance Schedule to determine what
kind of lubricant to use. SeeRecommended Fluids
and Lubricants on page 7-12.
Front Axle
When to Check and Change Lubricant
Refer to the Maintenance Schedule to determine how
often to check the lubricant and when to change it.
SeeScheduled Maintenance on page 7-3.
How to Check Lubricant
To get an accurate reading, the vehicle should be on a
level surface.
6-50
Page 321 of 440
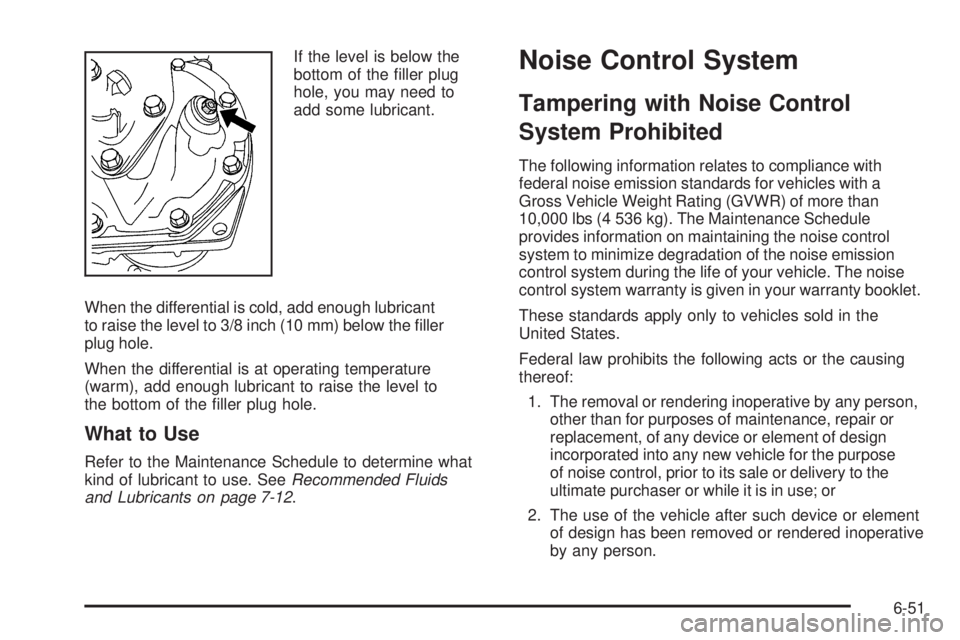
If the level is below the
bottom of the filler plug
hole, you may need to
add some lubricant.
When the differential is cold, add enough lubricant
to raise the level to 3/8 inch (10 mm) below the filler
plug hole.
When the differential is at operating temperature
(warm), add enough lubricant to raise the level to
the bottom of the filler plug hole.
What to Use
Refer to the Maintenance Schedule to determine what
kind of lubricant to use. SeeRecommended Fluids
and Lubricants on page 7-12.
Noise Control System
Tampering with Noise Control
System Prohibited
The following information relates to compliance with
federal noise emission standards for vehicles with a
Gross Vehicle Weight Rating (GVWR) of more than
10,000 lbs (4 536 kg). The Maintenance Schedule
provides information on maintaining the noise control
system to minimize degradation of the noise emission
control system during the life of your vehicle. The noise
control system warranty is given in your warranty booklet.
These standards apply only to vehicles sold in the
United States.
Federal law prohibits the following acts or the causing
thereof:
1. The removal or rendering inoperative by any person,
other than for purposes of maintenance, repair or
replacement, of any device or element of design
incorporated into any new vehicle for the purpose
of noise control, prior to its sale or delivery to the
ultimate purchaser or while it is in use; or
2. The use of the vehicle after such device or element
of design has been removed or rendered inoperative
by any person.
6-51