power steering CHEVROLET EXPRESS 2009 Owners Manual
[x] Cancel search | Manufacturer: CHEVROLET, Model Year: 2009, Model line: EXPRESS, Model: CHEVROLET EXPRESS 2009Pages: 440, PDF Size: 2.42 MB
Page 5 of 440
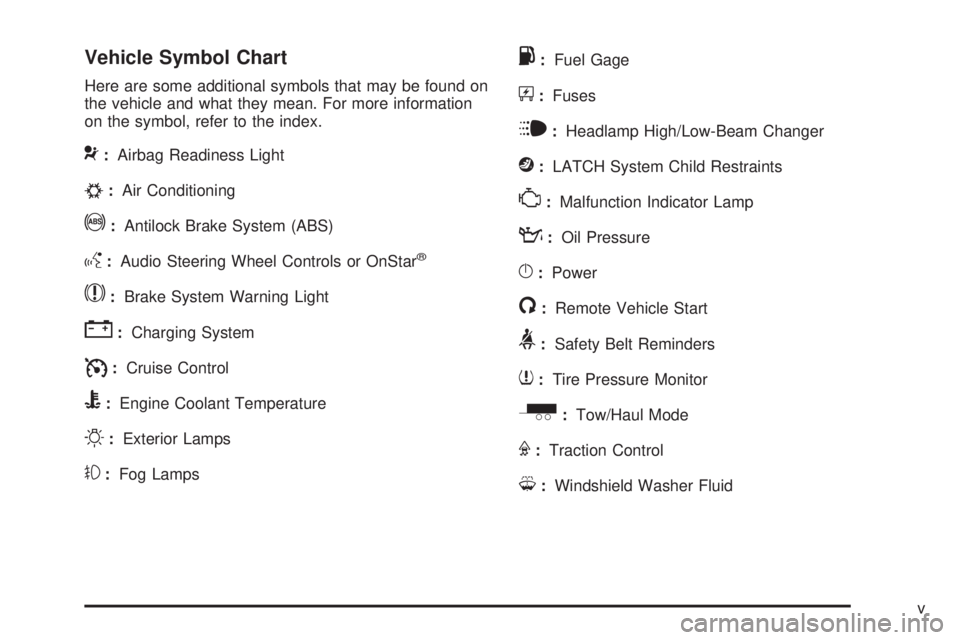
Vehicle Symbol Chart
Here are some additional symbols that may be found on
the vehicle and what they mean. For more information
on the symbol, refer to the index.
9:Airbag Readiness Light
#:Air Conditioning
!:Antilock Brake System (ABS)
g:Audio Steering Wheel Controls or OnStar®
$:Brake System Warning Light
":Charging System
I:Cruise Control
B:Engine Coolant Temperature
O:Exterior Lamps
#:Fog Lamps
.:Fuel Gage
+:Fuses
i:Headlamp High/Low-Beam Changer
j:LATCH System Child Restraints
*:Malfunction Indicator Lamp
::Oil Pressure
}:Power
/:Remote Vehicle Start
>:Safety Belt Reminders
7:Tire Pressure Monitor
_:Tow/Haul Mode
F:Traction Control
M:Windshield Washer Fluid
v
Page 7 of 440
Instrument Panel..............................................1-2
Initial Drive Information....................................1-4
Remote Keyless Entry (RKE) System................1-4
Remote Vehicle Start......................................1-4
Door Locks....................................................1-5
Windows.......................................................1-6
Seat Adjustment.............................................1-6
Safety Belt....................................................1-8
Airbag On-Off Switch......................................1-8
Sensing System for Passenger Airbag...............1-9
Mirror Adjustment...........................................1-9
Steering Wheel Adjustment............................1-10
Interior Lighting............................................1-11
Exterior Lighting...........................................1-11
Windshield Wiper/Washer...............................1-12
Climate Controls...........................................1-13Vehicle Features.............................................1-14
Radio(s)......................................................1-14
Portable Audio Devices..................................1-15
Steering Wheel Controls................................1-15
Cruise Control..............................................1-16
Power Outlets..............................................1-16
Performance and Maintenance.........................1-16
StabiliTrak
®..................................................1-16
Tire Pressure Monitor....................................1-17
Engine Oil Life System..................................1-17
Fuel E85 (85% Ethanol)................................1-18
Driving for Better Fuel Economy.....................1-18
Roadside Assistance Program........................1-18
Section 1 In Brief
1-1
Page 9 of 440
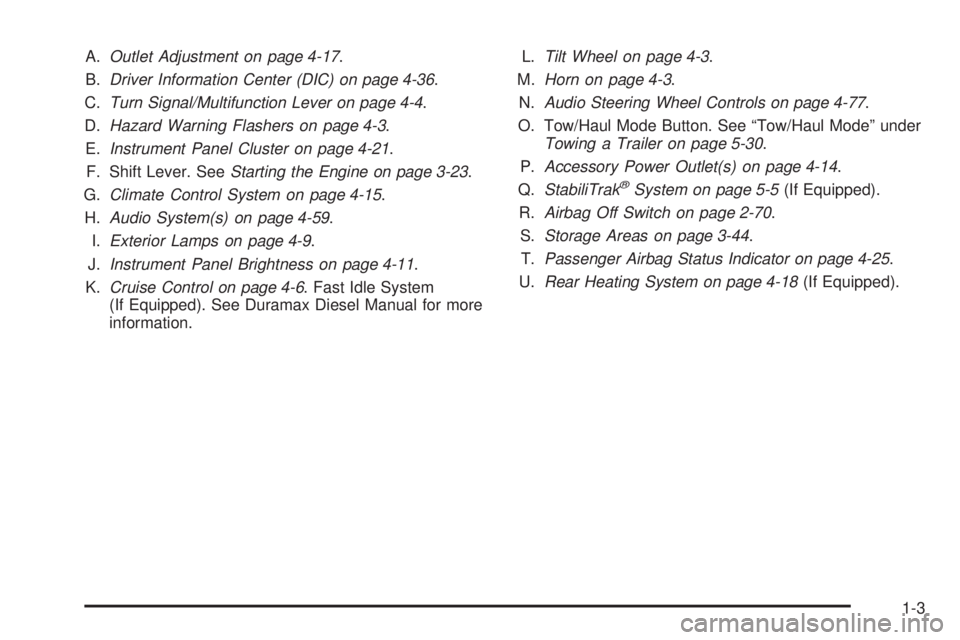
A.Outlet Adjustment on page 4-17.
B.Driver Information Center (DIC) on page 4-36.
C.Turn Signal/Multifunction Lever on page 4-4.
D.Hazard Warning Flashers on page 4-3.
E.Instrument Panel Cluster on page 4-21.
F. Shift Lever. SeeStarting the Engine on page 3-23.
G.Climate Control System on page 4-15.
H.Audio System(s) on page 4-59.
I.Exterior Lamps on page 4-9.
J.Instrument Panel Brightness on page 4-11.
K.Cruise Control on page 4-6. Fast Idle System
(If Equipped). See Duramax Diesel Manual for more
information.L.Tilt Wheel on page 4-3.
M.Horn on page 4-3.
N.Audio Steering Wheel Controls on page 4-77.
O. Tow/Haul Mode Button. See “Tow/Haul Mode” under
Towing a Trailer on page 5-30.
P.Accessory Power Outlet(s) on page 4-14.
Q.StabiliTrak
®System on page 5-5(If Equipped).
R.Airbag Off Switch on page 2-70.
S.Storage Areas on page 3-44.
T.Passenger Airbag Status Indicator on page 4-25.
U.Rear Heating System on page 4-18(If Equipped).
1-3
Page 22 of 440
Cruise Control
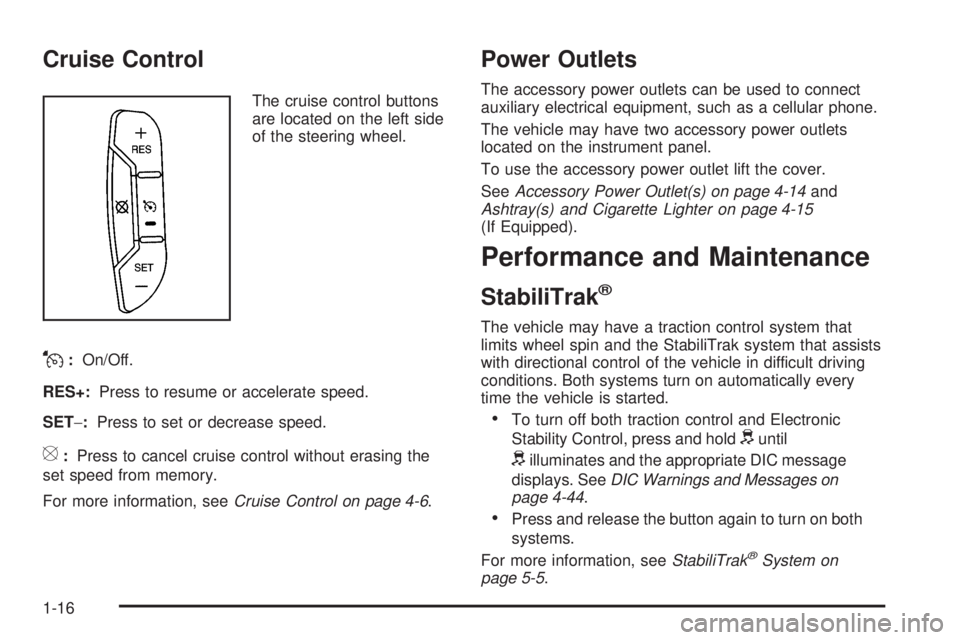
The cruise control buttons
are located on the left side
of the steering wheel.
J:On/Off.
RES+:Press to resume or accelerate speed.
SET−:Press to set or decrease speed.
[:Press to cancel cruise control without erasing the
set speed from memory.
For more information, seeCruise Control on page 4-6.
Power Outlets
The accessory power outlets can be used to connect
auxiliary electrical equipment, such as a cellular phone.
The vehicle may have two accessory power outlets
located on the instrument panel.
To use the accessory power outlet lift the cover.
SeeAccessory Power Outlet(s) on page 4-14and
Ashtray(s) and Cigarette Lighter on page 4-15
(If Equipped).
Performance and Maintenance
StabiliTrak®
The vehicle may have a traction control system that
limits wheel spin and the StabiliTrak system that assists
with directional control of the vehicle in difficult driving
conditions. Both systems turn on automatically every
time the vehicle is started.
•To turn off both traction control and Electronic
Stability Control, press and hold
duntil
dilluminates and the appropriate DIC message
displays. SeeDIC Warnings and Messages on
page 4-44.
•Press and release the button again to turn on both
systems.
For more information, seeStabiliTrak
®System on
page 5-5.
1-16
Page 132 of 440
To Use the Engine Coolant Heater
1. Turn off the engine.
2. Open the hood and unwrap the electrical cord.
The cord for the engine coolant heater is located
on the driver side of the engine compartment and is
attached to the hose for the power steering
reservoir.
3. Plug it into a normal, grounded 110-volt AC outlet.{WARNING:
Plugging the cord into an ungrounded outlet could
cause an electrical shock. Also, the wrong kind of
extension cord could overheat and cause a fire.
You could be seriously injured. Plug the cord into
a properly grounded three-prong 110-volt AC
outlet. If the cord will not reach, use a heavy-duty
three-prong extension cord rated for at least
15 amps.
4. Before starting the engine, be sure to unplug and
store the cord as it was before to keep it away
from moving engine parts and prevent damage.
The length of time the heater should remain plugged in
depends on several factors. Ask a dealer/retailer in
the area where you will be parking the vehicle for the
best advice on this.
3-26
Page 236 of 440
Locking Rear Axle
Vehicles with a locking rear axle can give more traction
on snow, mud, ice, sand or gravel. It works like a
standard axle most of the time, but when traction is low,
this feature will allow the rear wheel with the most
traction to move the vehicle.
All-Wheel Drive (AWD) System
If the vehicle has this feature, engine power is sent to
all four wheels when extra traction is needed. This is like
four-wheel drive, but there is no separate lever or
switch to engage or disengage the front axle. It is fully
automatic, and adjusts itself as needed for road
conditions.
Steering
Power Steering
If power steering assist is lost because the engine stops
or the system is not functioning, the vehicle can be
steered but it will take more effort.
Steering Tips
It is important to take curves at a reasonable speed.
Traction in a curve depends on the condition of the tires
and the road surface, the angle at which the curve is
banked, and vehicle speed. While in a curve, speed is
the one factor that can be controlled.
If there is a need to reduce speed, do it before entering
the curve, while the front wheels are straight.
Try to adjust the speed so you can drive through the
curve. Maintain a reasonable, steady speed. Wait
to accelerate until out of the curve, and then accelerate
gently into the straightaway.
5-8
Page 271 of 440
Service............................................................6-3
Accessories and Modifications..........................6-3
California Proposition 65 Warning.....................6-4
California Perchlorate Materials Requirements.....6-4
Doing Your Own Service Work.........................6-4
Adding Equipment to the Outside of
the Vehicle.................................................6-5
Fuel................................................................6-5
Gasoline Octane............................................6-6
Gasoline Specifications....................................6-6
California Fuel...............................................6-6
Additives.......................................................6-7
Fuel E85 (85% Ethanol)..................................6-8
Fuels in Foreign Countries...............................6-9
Filling the Tank............................................6-10
Filling a Portable Fuel Container.....................6-12
Checking Things Under the Hood....................6-12
Hood Release..............................................6-13
Engine Compartment Overview.......................6-14
Engine Oil...................................................6-15
Engine Oil Life System..................................6-18
Engine Air Cleaner/Filter................................6-20
Automatic Transmission Fluid
(4-Speed Transmission)..............................6-21
Automatic Transmission Fluid
(6-Speed Transmission)..............................6-24Cooling System............................................6-28
Engine Coolant.............................................6-29
Engine Overheating.......................................6-35
Engine Fan Noise.........................................6-37
Power Steering Fluid.....................................6-38
Windshield Washer Fluid................................6-39
Brakes........................................................6-40
Battery........................................................6-43
Jump Starting...............................................6-44
All-Wheel Drive.............................................
.6-49
Rear Axle.......................................................6-50
Front Axle......................................................6-50
Noise Control System.....................................6-51
Tampering with Noise Control System
Prohibited.................................................6-51
Bulb Replacement..........................................6-53
Halogen Bulbs..............................................6-53
Headlamps..................................................6-53
Front Turn Signal, Sidemarker and
Parking Lamps..........................................6-55
Center High-Mounted Stoplamp (CHMSL).........6-56
Taillamps.....................................................6-56
License Plate Lamp......................................6-58
Replacement Bulbs.......................................6-58
Windshield Wiper Blade Replacement..............6-59
Section 6 Service and Appearance Care
6-1
Page 285 of 440
A. Battery. SeeBattery on page 6-43.
B. Radiator Pressure Cap. SeeCooling System on
page 6-28.
C. Coolant Recovery Tank. SeeCooling System on
page 6-28.
D. Automatic Transmission Fluid Dipstick. See
“Checking the Fluid Level” underAutomatic
Transmission Fluid (4-Speed Transmission)
on page 6-21orAutomatic Transmission Fluid
(6-Speed Transmission) on page 6-24.
E. Engine Oil Fill Cap. See “When to Add Engine Oil”
underEngine Oil on page 6-15.
F. Engine Oil Dipstick. See “Checking Engine Oil”
underEngine Oil on page 6-15.
G. Engine Air Cleaner/Filter. SeeEngine Air
Cleaner/Filter on page 6-20.
H. Power Steering Fluid Reservoir. SeePower Steering
Fluid on page 6-38.
I. Brake Master Cylinder Reservoir. See “Brake Fluid”
underBrakes on page 6-40.
J. Windshield Washer Fluid Reservoir. See “Adding
Washer Fluid” underWindshield Washer Fluid
on page 6-39.Engine Oil
For diesel engine vehicles, see “Engine Oil” in the
DURAMAX®Diesel manual.
Checking Engine Oil
It is a good idea to check the engine oil level at each
fuel fill. In order to get an accurate reading, the oil must
be warm and the vehicle must be on level ground.
The engine oil dipstick handle is a yellow loop.
SeeEngine Compartment Overview on page 6-14
for the location of the engine oil dipstick.
1. Turn off the engine and give the oil several minutes
to drain back into the oil pan. If this is not done, the
oil dipstick might not show the actual level.
2. Pull out the dipstick and clean it with a paper towel
or cloth, then push it back in all the way. Remove it
again, keeping the tip down, and check the level.
6-15
Page 308 of 440
Power Steering Fluid
The power steering fluid
reservoir is located in the
engine compartment on the
driver’s side of the vehicle.
SeeEngine Compartment
Overview on page 6-14for
reservoir location.
When to Check Power Steering Fluid
It is not necessary to regularly check power steering fluid
unless you suspect there is a leak in the system or
you hear an unusual noise. A fluid loss in this system
could indicate a problem. Have the system inspected
and repaired.
How to Check Power Steering Fluid
To check the power steering fluid, do the following:
1. Turn the key off and let the engine compartment
cool down.
2. Wipe the cap and the top of the reservoir clean.
3. Unscrew the cap and wipe the dipstick with a
clean rag.
4. Replace the cap and completely tighten it.
5. Then remove the cap again and look at the fluid
level on the dipstick.
The level should be at the COLD FILL mark. If necessary,
add only enough fluid to bring the level up to the mark.
To prevent contamination of brake fluid, never check or
fill the power steering reservoir with the brake master
cylinder cover off.
What to Use
To determine what kind of fluid to use, see
Recommended Fluids and Lubricants on page 7-12.
Always use the proper fluid. Failure to use the proper
fluid can cause leaks and damage hoses and seals.
6-38
Page 335 of 440
(D) Construction Code:A letter code is used to
indicate the type of ply construction in the tire. The
letter R means radial ply construction; the letter D
means diagonal or bias ply construction; and the
letter B means belted-bias ply construction.
(E) Rim Diameter
:Diameter of the wheel in
inches.
(F) Load Range
:Load Range.
(G) Service Description
:The service description
indicates the load index and speed rating of a tire.
If two numbers are given as in the example,
120/116, then this represents the load index for
single versus dual wheel usage (single/dual).
The speed rating is the maximum speed a tire is
certified to carry a load. This does not apply to
Goodyear LT225/75R16 G949 RSA and Goodyear
LT225/75R16 G933 RSD commercial truck tires;
see the dual tire and single tire maximum load and
load range letter designations on the tire sidewall.
Tire Terminology and De�nitions
Air Pressure:The amount of air inside the
tire pressing outward on each square inch of
the tire. Air pressure is expressed in pounds
per square inch (psi) or kilopascal (kPa).
Accessory Weight
:This means the combined
weight of optional accessories. Some examples of
optional accessories are, automatic transmission,
power steering, power brakes, power windows,
power seats, and air conditioning.
Aspect Ratio
:The relationship of a tire’s height
to its width.
Belt
:A rubber coated layer of cords that is
located between the plies and the tread. Cords
may be made from steel or other reinforcing
materials.
Bead
:The tire bead contains steel wires wrapped
by steel cords that hold the tire onto the rim.
Bias Ply Tire
:A pneumatic tire in which the plies
are laid at alternate angles less than 90 degrees
to the centerline of the tread.
6-65