brake light CHEVROLET EXPRESS 2011 User Guide
[x] Cancel search | Manufacturer: CHEVROLET, Model Year: 2011, Model line: EXPRESS, Model: CHEVROLET EXPRESS 2011Pages: 379, PDF Size: 5.15 MB
Page 207 of 379
Black plate (28,1)Chevrolet Express Owner Manual (GMNA-Localizing-U.S./Canada/Mexico-
7707481) - 2015 - CRC - 4/30/14
9-28 Driving and Operating
Brakes
Antilock Brake
System (ABS)
This vehicle has ABS, an advanced
electronic braking system that helps
prevent a braking skid.
When the vehicle begins to drive
away, ABS checks itself.
A momentary motor or clicking noise
might be heard while this test is
going on, and it might even be
noticed that the brake pedal moves
a little. This is normal.
If there is a problem with ABS, this
warning light stays on. SeeAntilock
Brake System (ABS) Warning Light
on page 5-20. If driving safely on a wet road and it
becomes necessary to slam on the
brakes and continue braking to
avoid a sudden obstacle, a
computer senses the wheels are
slowing down. If one of the wheels
is about to stop rolling, the computer
will separately work the brakes at
each wheel.
ABS can change the brake pressure
to each wheel, as required, faster
than any driver could. This can help
you steer around the obstacle while
braking hard.
As the brakes are applied, the
computer keeps receiving updates
on wheel speed and controls
braking pressure accordingly.
Remember: ABS does not change
the time needed to get a foot up to
the brake pedal or always decrease
stopping distance. If you get too
close to the vehicle in front of you,
there will not be enough time to
apply the brakes if that vehicle
suddenly slows or stops. Always
leave enough room up ahead to
stop, even with ABS.
Using ABS
Do not pump the brakes. Just hold
the brake pedal down firmly and let
ABS work. You may hear the ABS
pump or motor operating and feel
the brake pedal pulsate. This is
normal.
Braking in Emergencies
ABS allows you to steer and brake
at the same time. In many
emergencies, steering can help
more than even the very best
braking.
Page 208 of 379
Black plate (29,1)Chevrolet Express Owner Manual (GMNA-Localizing-U.S./Canada/Mexico-
7707481) - 2015 - CRC - 4/30/14
Driving and Operating 9-29
Parking Brake
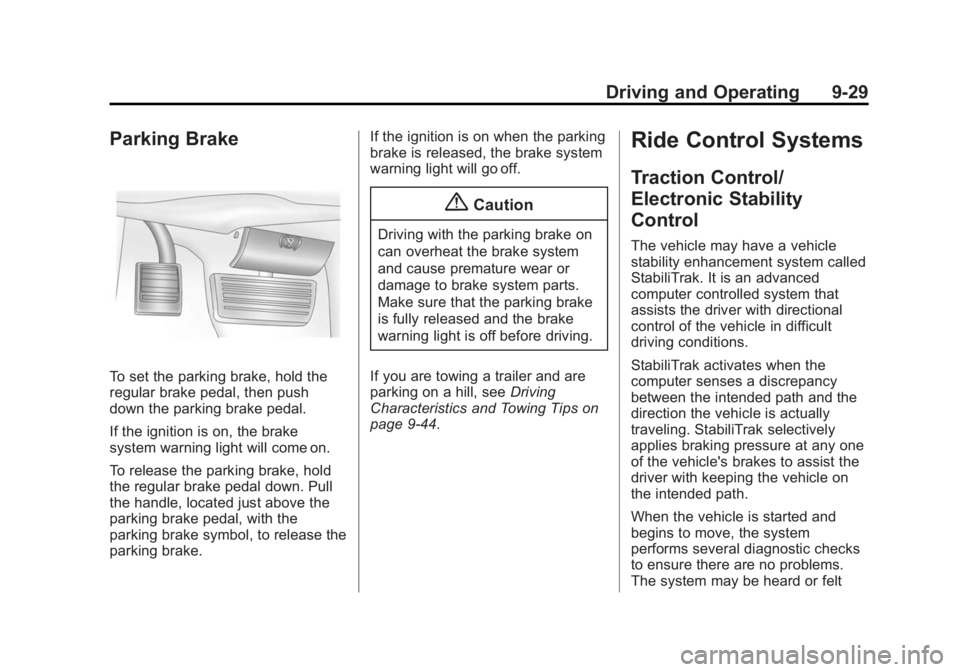
To set the parking brake, hold the
regular brake pedal, then push
down the parking brake pedal.
If the ignition is on, the brake
system warning light will come on.
To release the parking brake, hold
the regular brake pedal down. Pull
the handle, located just above the
parking brake pedal, with the
parking brake symbol, to release the
parking brake.If the ignition is on when the parking
brake is released, the brake system
warning light will go off.
{Caution
Driving with the parking brake on
can overheat the brake system
and cause premature wear or
damage to brake system parts.
Make sure that the parking brake
is fully released and the brake
warning light is off before driving.
If you are towing a trailer and are
parking on a hill, see Driving
Characteristics and Towing Tips on
page 9-44.
Ride Control Systems
Traction Control/
Electronic Stability
Control
The vehicle may have a vehicle
stability enhancement system called
StabiliTrak. It is an advanced
computer controlled system that
assists the driver with directional
control of the vehicle in difficult
driving conditions.
StabiliTrak activates when the
computer senses a discrepancy
between the intended path and the
direction the vehicle is actually
traveling. StabiliTrak selectively
applies braking pressure at any one
of the vehicle's brakes to assist the
driver with keeping the vehicle on
the intended path.
When the vehicle is started and
begins to move, the system
performs several diagnostic checks
to ensure there are no problems.
The system may be heard or felt
Page 209 of 379
Black plate (30,1)Chevrolet Express Owner Manual (GMNA-Localizing-U.S./Canada/Mexico-
7707481) - 2015 - CRC - 4/30/14
9-30 Driving and Operating
while it is working. This is normal
and does not mean there is a
problem with the vehicle. The
system should initialize before the
vehicle reaches 40 km/h (25 mph).
In some cases, it may take
approximately 3.2 km (2 mi) of
driving before the system initializes.
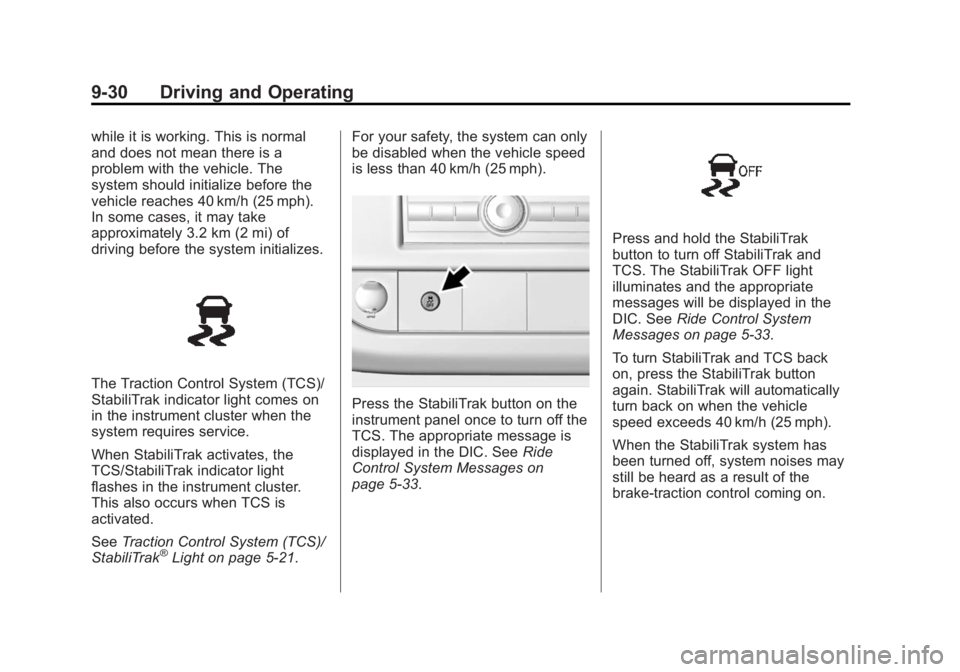
The Traction Control System (TCS)/
StabiliTrak indicator light comes on
in the instrument cluster when the
system requires service.
When StabiliTrak activates, the
TCS/StabiliTrak indicator light
flashes in the instrument cluster.
This also occurs when TCS is
activated.
SeeTraction Control System (TCS)/
StabiliTrak
®Light on page 5-21. For your safety, the system can only
be disabled when the vehicle speed
is less than 40 km/h (25 mph).
Press the StabiliTrak button on the
instrument panel once to turn off the
TCS. The appropriate message is
displayed in the DIC. See
Ride
Control System Messages on
page 5-33.
Press and hold the StabiliTrak
button to turn off StabiliTrak and
TCS. The StabiliTrak OFF light
illuminates and the appropriate
messages will be displayed in the
DIC. See Ride Control System
Messages on page 5-33.
To turn StabiliTrak and TCS back
on, press the StabiliTrak button
again. StabiliTrak will automatically
turn back on when the vehicle
speed exceeds 40 km/h (25 mph).
When the StabiliTrak system has
been turned off, system noises may
still be heard as a result of the
brake-traction control coming on.
Page 213 of 379
Black plate (34,1)Chevrolet Express Owner Manual (GMNA-Localizing-U.S./Canada/Mexico-
7707481) - 2015 - CRC - 4/30/14
9-34 Driving and Operating
Using Cruise Control on Hills
How well cruise control works on
hills depends on the vehicle speed,
load, and the steepness of the hills.
When going up steep hills, you
might have to step on the
accelerator pedal to maintain your
speed.
While going downhill:
.Vehicles with a 4-speed
automatic transmission may
need to have the brakes applied
or the transmission shifted to a
lower gear to help maintain
driver selected speed.
.Vehicles with a 6-speed
automatic transmission have
Cruise Grade Braking to help
maintain driver selected speed.Cruise Grade Braking is enabled
when the vehicle is started and
cruise control is active. It is not
enabled in Range Selection Mode.
It assists in maintaining driver
selected speed when driving on
downhill grades by using the engine
and transmission to slow the
vehicle.
To disable and enable Cruise Grade
Braking for the current ignition key
cycle, press and hold the Tow/Haul
button for three seconds. A DIC
message displays. See
Transmission Messages on
page 5-36.
When the brakes are manually
applied the cruise control is
disengaged.
Ending Cruise Control
There are four ways to end cruise
control:
.Step lightly on the brake pedal.
.Press[.
.Shift the transmission to
N (Neutral).
.To turn off cruise control,
press
I.
Erasing Speed Memory
The cruise control set speed is
erased from memory if
Iis
pressed or if the vehicle is
turned off.
Page 231 of 379
Black plate (52,1)Chevrolet Express Owner Manual (GMNA-Localizing-U.S./Canada/Mexico-
7707481) - 2015 - CRC - 4/30/14
9-52 Driving and Operating
Weight-Distributing Hitches
and Weight Carrying Hitches
A weight distributing hitch may be
useful with some trailers. Use the
following guidelines to determine if a
weight distributing hitch should
be used.
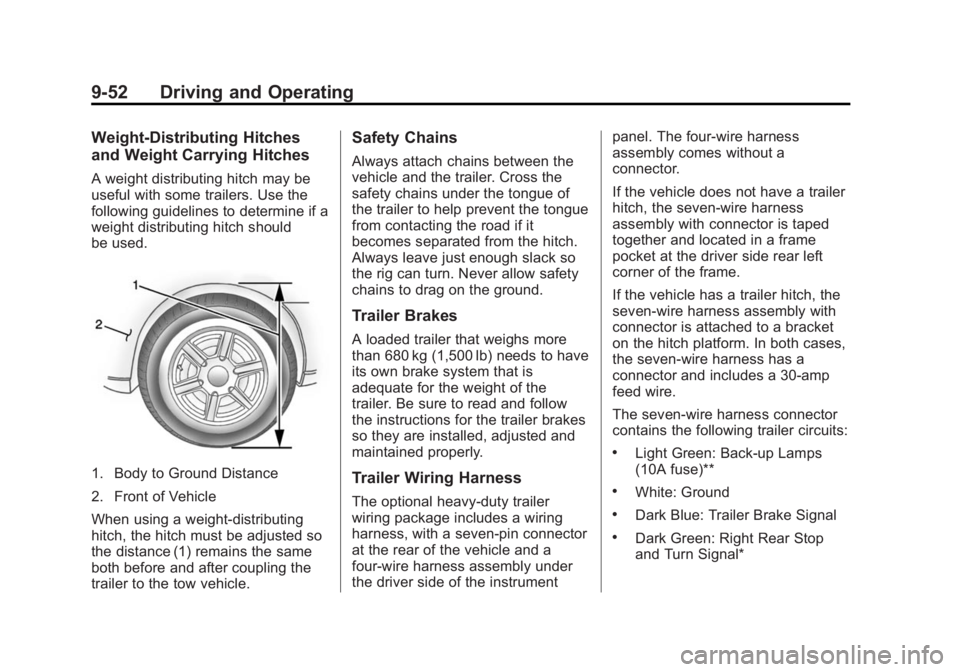
1. Body to Ground Distance
2. Front of Vehicle
When using a weight-distributing
hitch, the hitch must be adjusted so
the distance (1) remains the same
both before and after coupling the
trailer to the tow vehicle.
Safety Chains
Always attach chains between the
vehicle and the trailer. Cross the
safety chains under the tongue of
the trailer to help prevent the tongue
from contacting the road if it
becomes separated from the hitch.
Always leave just enough slack so
the rig can turn. Never allow safety
chains to drag on the ground.
Trailer Brakes
A loaded trailer that weighs more
than 680 kg (1,500 lb) needs to have
its own brake system that is
adequate for the weight of the
trailer. Be sure to read and follow
the instructions for the trailer brakes
so they are installed, adjusted and
maintained properly.
Trailer Wiring Harness
The optional heavy-duty trailer
wiring package includes a wiring
harness, with a seven-pin connector
at the rear of the vehicle and a
four-wire harness assembly under
the driver side of the instrumentpanel. The four-wire harness
assembly comes without a
connector.
If the vehicle does not have a trailer
hitch, the seven-wire harness
assembly with connector is taped
together and located in a frame
pocket at the driver side rear left
corner of the frame.
If the vehicle has a trailer hitch, the
seven-wire harness assembly with
connector is attached to a bracket
on the hitch platform. In both cases,
the seven-wire harness has a
connector and includes a 30-amp
feed wire.
The seven-wire harness connector
contains the following trailer circuits:
.Light Green: Back-up Lamps
(10A fuse)**
.White: Ground
.Dark Blue: Trailer Brake Signal
.Dark Green: Right Rear Stop
and Turn Signal*
Page 232 of 379
Black plate (53,1)Chevrolet Express Owner Manual (GMNA-Localizing-U.S./Canada/Mexico-
7707481) - 2015 - CRC - 4/30/14
Driving and Operating 9-53
.Red/Black Stripe: Battery Feed
(30A Fuse)
.Brown: Trailer Park Lamp
Supply Voltage (15A fuse)**
.Yellow: Left Rear Stop and Turn
Signal *
The four-wire harness (without
connector) contains the following
circuits:
.Black: Ground
.Red/White: Battery Feed
.Dark Blue: Trailer Brake Signal
.Light Blue: CHMSL/Stoplamp
Supply Voltage
* If the vehicle is a cutaway with
trailer provisions, a 15 amp fuse will
be shared for both left/stop trailer
turn and right/stop trailer turn
signals. However, the cutaway
lighting connector will have a
10 amp fuse for each signal. ** If the vehicle is a cutaway with
trailer provisions, a 15 amp fuse will
be shared for trailer park lamps and
cutaway rear lighting connector park
lamps. Also, a 10 amp fuse will be
shared for trailer back-up lamps and
cutaway rear lighting connector
back-up lamps.
Tow/Haul Mode
This button is on the instrument
panel, to the right of the steering
wheel.
Pressing this button turns on and off
the Tow/Haul Mode.
This indicator light on the instrument
cluster comes on when the Tow/
Haul Mode is on.Tow/Haul is a feature that assists
when pulling a heavy trailer or a
large or heavy load. See
Tow/Haul
Mode on page 9-27.
Tow/Haul is designed to be most
effective when the vehicle and
trailer combined weight is at least
75 percent of the vehicle Gross
Combined Weight Rating (GCWR).
See “Weight of the Trailer” inTrailer
Towing on page 9-47. Tow/Haul is
most useful under the following
driving conditions:
.When pulling a heavy trailer or a
large or heavy load through
rolling terrain.
.When pulling a heavy trailer or a
large or heavy load in
stop-and-go traffic.
.When pulling a heavy trailer or a
large or heavy load in busy
parking lots where improved low
speed control of the vehicle is
desired.
Page 244 of 379
Black plate (11,1)Chevrolet Express Owner Manual (GMNA-Localizing-U.S./Canada/Mexico-
7707481) - 2015 - CRC - 4/30/14
Vehicle Care 10-11
Because the vehicle is equipped
with a high-efficiency air-to-oil
cooler, the transmission fluid
temperature may not reach the
required hot fluid level checking
temperature under normal lightly
loaded driving vehicle conditions.
Checking the Fluid Level
Prepare the vehicle:
1. Park the vehicle on a levelplace. Keep the engine running.
2. With the parking brake applied, place the shift lever in P (Park).
3. With a foot on the brake pedal, move the shift lever through
each gear range, pausing for
about three seconds in each
range. When M is reached,
move the selector from M1
through M3. Then, position the
shift lever in P (Park).
4. Let the engine run at idle for two minutes or more.
Then, without shutting off the
engine, use the steps that follow.
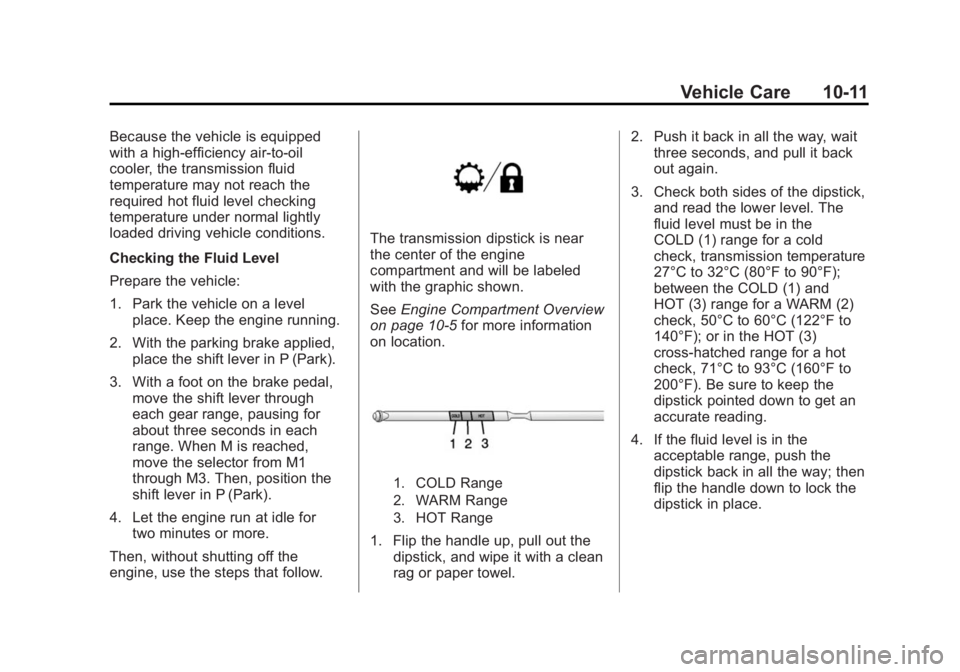
The transmission dipstick is near
the center of the engine
compartment and will be labeled
with the graphic shown.
See Engine Compartment Overview
on page 10-5 for more information
on location.
1. COLD Range
2. WARM Range
3. HOT Range
1. Flip the handle up, pull out the dipstick, and wipe it with a clean
rag or paper towel. 2. Push it back in all the way, wait
three seconds, and pull it back
out again.
3. Check both sides of the dipstick, and read the lower level. The
fluid level must be in the
COLD (1) range for a cold
check, transmission temperature
27°C to 32°C (80°F to 90°F);
between the COLD (1) and
HOT (3) range for a WARM (2)
check, 50°C to 60°C (122°F to
140°F); or in the HOT (3)
cross-hatched range for a hot
check, 71°C to 93°C (160°F to
200°F). Be sure to keep the
dipstick pointed down to get an
accurate reading.
4. If the fluid level is in the acceptable range, push the
dipstick back in all the way; then
flip the handle down to lock the
dipstick in place.
Page 255 of 379
Black plate (22,1)Chevrolet Express Owner Manual (GMNA-Localizing-U.S./Canada/Mexico-
7707481) - 2015 - CRC - 4/30/14
10-22 Vehicle Care
Brakes
This vehicle has disc brakes. Disc
brake pads have built-in wear
indicators that make a high-pitched
warning sound when the brake pads
are worn and new pads are needed.
The sound can come and go or be
heard all the time when the vehicle
is moving, except when applying the
brake pedal firmly.
{Warning
The brake wear warning sound
means that soon the brakes will
not work well. That could lead to
a crash. When the brake wear
warning sound is heard, have the
vehicle serviced.
{Caution
Continuing to drive with worn-out
brake pads could result in costly
brake repair.Some driving conditions or climates
can cause a brake squeal when the
brakes are first applied or lightly
applied. This does not mean
something is wrong with the brakes.
Properly torqued wheel nuts are
necessary to help prevent brake
pulsation. When tires are rotated,
inspect brake pads for wear and
evenly tighten wheel nuts in the
proper sequence to torque
specifications. See
Capacities and
Specifications on page 12-2.
Brake pads should be replaced as
complete sets.
Brake Pedal Travel
See your dealer if the brake pedal
does not return to normal height,
or if there is a rapid increase in
pedal travel. This could be a sign
that brake service might be
required.
Brake Adjustment
Every time the brakes are applied,
with or without the vehicle moving,
the brakes adjust for wear.
Replacing Brake System Parts
The braking system on a vehicle is
complex. Its many parts have to be
of top quality and work well together
if the vehicle is to have really good
braking. The vehicle was designed
and tested with top-quality brake
parts. When parts of the braking
system are replaced, be sure to get
new, approved replacement parts.
If this is not done, the brakes might
not work properly. For example,
installing disc brake pads that are
wrong for the vehicle, can change
the balance between the front and
rear brakes —for the worse. The
braking performance expected can
change in many other ways if the
wrong replacement brake parts are
installed.
Page 308 of 379
Black plate (75,1)Chevrolet Express Owner Manual (GMNA-Localizing-U.S./Canada/Mexico-
7707481) - 2015 - CRC - 4/30/14
Vehicle Care 10-75
{Caution
Ignoring these steps could result
in costly damage to the vehicle
that would not be covered by the
vehicle warranty. Trying to start
the vehicle by pushing or pulling it
will not work, and it could damage
the vehicle.
1. Check the other vehicle. It must have a 12-volt battery with a
negative ground system.
{Caution
If the other vehicle does not have
a 12-volt system with a negative
ground, both vehicles can be
damaged. Only use a vehicle that
has a 12-volt system with a
negative ground for jump starting. 2. Get the vehicles close enough
so the jumper cables can reach,
but be sure the vehicles are not
touching each other. If they are,
it could cause a ground
connection you do not want. You
would not be able to start your
vehicle, and the bad grounding
could damage the electrical
systems.
To avoid the possibility of the
vehicles rolling, set the parking
brake firmly on both vehicles
involved in the jump start
procedure. Put an automatic
transmission in P (Park) or a
manual transmission in Neutral
before setting the parking brake.
{Caution
If any accessories are left on or
plugged in during the jump
starting procedure, they could be
damaged. The repairs would not
be covered by the vehicle
(Continued)
Caution (Continued)
warranty. Whenever possible, turn
off or unplug all accessories on
either vehicle when jump starting.
3. Turn off the ignition on both vehicles. Unplug unnecessary
accessories plugged into the
cigarette lighter or the accessory
power outlet. Turn off the radio
and all lamps that are not
needed. This will avoid sparks
and help save both batteries.
And it could save the radio!
4. Open the hoods and locate the positive (+) and negative (−)
terminal locations of the other
vehicle.
On your van, use the unpainted
radio antenna bracket as a
remote negative (−) terminal.
Page 329 of 379
Black plate (8,1)Chevrolet Express Owner Manual (GMNA-Localizing-U.S./Canada/Mexico-
7707481) - 2015 - CRC - 4/30/14
11-8 Service and Maintenance
Battery
The battery supplies power to start
the engine and operate any
additional electrical accessories.
.To avoid break-down or failure to
start the vehicle, maintain a
battery with full cranking power.
.Trained dealer technicians have
the diagnostic equipment to test
the battery and ensure that the
connections and cables are
corrosion-free.
Belts
.Belts may need replacing if they
squeak or show signs of
cracking or splitting.
.Trained dealer technicians have
access to tools and equipment
to inspect the belts and
recommend adjustment or
replacement when necessary. Brakes
Brakes stop the vehicle and are
crucial to safe driving.
.Signs of brake wear may include
chirping, grinding, or squealing
noises, or difficulty stopping.
.Trained dealer technicians have
access to tools and equipment
to inspect the brakes and
recommend quality parts
engineered for the vehicle.
Fluids
Proper fluid levels and approved
fluids protect the vehicle’s systems
and components. See
Recommended Fluids and
Lubricants on page 11-11 for GM
approved fluids.
.Engine oil and windshield
washer fluid levels should be
checked at every fuel fill.
.Instrument cluster lights may
come on to indicate that fluids
may be low and need to be
filled.
Hoses
Hoses transport fluids and should
be regularly inspected to ensure
that there are no cracks or leaks.
With a multi-point inspection, your
dealer can inspect the hoses and
advise if replacement is needed.
Lamps
Properly working headlamps,
taillamps, and brake lamps are
important to see and be seen on
the road.
.Signs that the headlamps need
attention include dimming, failure
to light, cracking, or damage.
The brake lamps need to be
checked periodically to ensure
that they light when braking.
.With a multi-point inspection,
your dealer can check the lamps
and note any concerns.