display CHEVROLET EXPRESS 2012 Owners Manual
[x] Cancel search | Manufacturer: CHEVROLET, Model Year: 2012, Model line: EXPRESS, Model: CHEVROLET EXPRESS 2012Pages: 379, PDF Size: 5.15 MB
Page 2 of 379
Black plate (1,1)Chevrolet Express Owner Manual (GMNA-Localizing-U.S./Canada/Mexico-
7707481) - 2015 - CRC - 4/30/14
2015 Chevrolet Express Owner ManualM
In Brief. . . . . . . . . . . . . . . . . . . . . . . . 1-1
Instrument Panel . . . . . . . . . . . . . . 1-2
Initial Drive Information . . . . . . . . 1-4
Vehicle Features . . . . . . . . . . . . . 1-14
Performance and Maintenance . . . . . . . . . . . . . . . . 1-18
Keys, Doors, and Windows . . . . . . . . . . . . . . . . . . . . 2-1
Keys and Locks . . . . . . . . . . . . . . . 2-1
Doors . . . . . . . . . . . . . . . . . . . . . . . . . . 2-8
Vehicle Security . . . . . . . . . . . . . . 2-11
Exterior Mirrors . . . . . . . . . . . . . . . 2-12
Interior Mirrors . . . . . . . . . . . . . . . . 2-13
Windows . . . . . . . . . . . . . . . . . . . . . 2-14
Seats and Restraints . . . . . . . . . 3-1
Head Restraints . . . . . . . . . . . . . . . 3-2
Front Seats . . . . . . . . . . . . . . . . . . . . 3-2
Rear Seats . . . . . . . . . . . . . . . . . . . . 3-4
Safety Belts . . . . . . . . . . . . . . . . . . . . 3-8
Airbag System . . . . . . . . . . . . . . . . 3-17
Child Restraints . . . . . . . . . . . . . . 3-28 Storage
. . . . . . . . . . . . . . . . . . . . . . . 4-1
Storage Compartments . . . . . . . . 4-1
Instruments and Controls . . . . 5-1
Controls . . . . . . . . . . . . . . . . . . . . . . . 5-2
Warning Lights, Gauges, and Indicators . . . . . . . . . . . . . . . . . . . . 5-9
Information Displays . . . . . . . . . . 5-24
Vehicle Messages . . . . . . . . . . . . 5-29
Vehicle Personalization . . . . . . . 5-38
Lighting . . . . . . . . . . . . . . . . . . . . . . . 6-1
Exterior Lighting . . . . . . . . . . . . . . . 6-1
Interior Lighting . . . . . . . . . . . . . . . . 6-4
Lighting Features . . . . . . . . . . . . . . 6-6
Infotainment System . . . . . . . . . 7-1
Introduction . . . . . . . . . . . . . . . . . . . . 7-1
Radio . . . . . . . . . . . . . . . . . . . . . . . . . . 7-7
Audio Players . . . . . . . . . . . . . . . . 7-11
Phone . . . . . . . . . . . . . . . . . . . . . . . . 7-20 Climate Controls
. . . . . . . . . . . . . 8-1
Climate Control Systems . . . . . . 8-1
Air Vents . . . . . . . . . . . . . . . . . . . . . . . 8-7
Driving and Operating . . . . . . . . 9-1
Driving Information . . . . . . . . . . . . . 9-2
Starting and Operating . . . . . . . 9-14
Engine Exhaust . . . . . . . . . . . . . . 9-21
Automatic Transmission . . . . . . 9-22
Brakes . . . . . . . . . . . . . . . . . . . . . . . 9-28
Ride Control Systems . . . . . . . . 9-29
Cruise Control . . . . . . . . . . . . . . . . 9-32
Driver Assistance Systems . . . 9-35
Fuel . . . . . . . . . . . . . . . . . . . . . . . . . . 9-39
Trailer Towing . . . . . . . . . . . . . . . . 9-44
Conversions and Add-Ons . . . 9-54
Vehicle Care . . . . . . . . . . . . . . . . . 10-1
General Information . . . . . . . . . . 10-2
Vehicle Checks . . . . . . . . . . . . . . . 10-3
Headlamp Aiming . . . . . . . . . . . 10-28
Bulb Replacement . . . . . . . . . . 10-29
Electrical System . . . . . . . . . . . . 10-34
Wheels and Tires . . . . . . . . . . . 10-41
Page 21 of 379
Black plate (14,1)Chevrolet Express Owner Manual (GMNA-Localizing-U.S./Canada/Mexico-
7707481) - 2015 - CRC - 4/30/14
1-14 In Brief
When M (Manual Mode) is selected,
a number displays in the DIC next to
the M indicating the current gear.
Grade Braking is not available when
Range Selection Mode is active.
SeeTow/Haul Mode on page 9-27.
While using Range Selection Mode,
Cruise Control and the Tow/Haul
Mode can be used. See Manual
Mode on page 9-26.Vehicle Features
Radio(s)
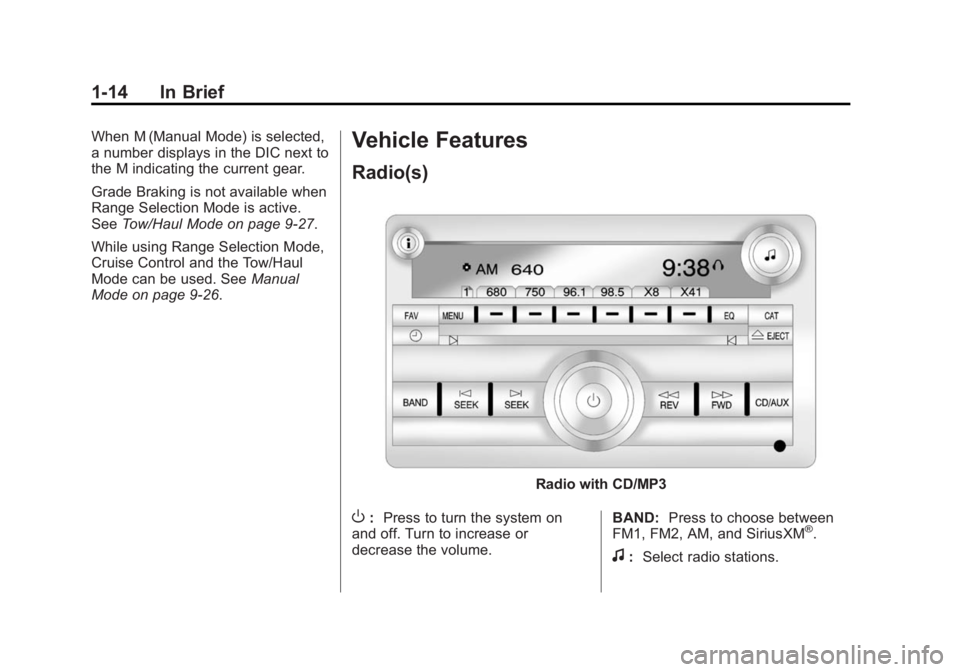
Radio with CD/MP3
O: Press to turn the system on
and off. Turn to increase or
decrease the volume. BAND:
Press to choose between
FM1, FM2, AM, and SiriusXM®.
f: Select radio stations.
Page 22 of 379
Black plate (15,1)Chevrolet Express Owner Manual (GMNA-Localizing-U.S./Canada/Mexico-
7707481) - 2015 - CRC - 4/30/14
In Brief 1-15
©SEEK or¨SEEK:Seek or scan
stations.
4: Press to switch the display
between the radio station frequency
and the time. While the ignition is
off, press this button to display the
time. Press to display additional text
information related to the current
FM-RDS station or MP3 song.
A choice of additional information
such as Channel, Song, Artist, and
CAT (category) can display.
Continue pressing to highlight the
desired tab, or press the softkey
located under any one of the tabs
and the information about that tab
displays.
For more information about these
and other radio features, see
Infotainment on page 7-1.
Storing a Favorite Station
Depending on which radio the
vehicle has, radio stations are
stored as either favorites or presets. For vehicles with a FAV button, a
maximum of 36 stations can be
stored as favorites using the six
softkeys below the radio station
frequency tabs and by using the
radio FAV button. Press FAV to go
through up to six pages of favorites,
each having six favorite stations
available per page. Each page of
favorites can contain any
combination of AM and FM stations.
If the radio does not have a FAV
button, up to 18 stations (six FM1,
six FM2, and six AM), can be
programmed on the six numbered
buttons.
For more information on storing a
favorite station, see
Operation on
page 7-5.
Setting the Clock
To set the time and date for the
Radio with CD (MP3):
1. Press
Hand the HR, MIN, MM,
DD, and YYYY (hour, minute,
month, day, and year) display. 2. Press the softkey located below
any one of the tabs to be
changed.
3. Press the
©SEEK or¨SEEK
buttons,
sREV or\FWD
buttons, or by turning
f
clockwise or counterclockwise to
increase or decrease the time
or date.
For detailed instructions on setting
the clock for your specific audio
system, see Clock on page 5-6.
Satellite Radio
SiriusXM®is a satellite radio service
based in the 48 contiguous United
States and 10 Canadian provinces.
SiriusXM satellite radio has a wide
variety of programming and
commercial-free music, coast to
coast, and in digital-quality sound.
A fee is required to receive the
SiriusXM service.
Page 25 of 379
Black plate (18,1)Chevrolet Express Owner Manual (GMNA-Localizing-U.S./Canada/Mexico-
7707481) - 2015 - CRC - 4/30/14
1-18 In Brief
Rear Vision
Camera (RVC)
If equipped, the RVC displays a
view of the area behind the vehicle
when the vehicle is shifted into
R (Reverse). The display will appear
on either the inside rearview mirror
or navigation screen, if equipped.
To clean the camera lens, located
above the license plate, rinse it with
water and wipe it with a soft cloth.
SeeRear Vision Camera (RVC) on
page 9-36.
Parking Assist
If equipped, this system uses
sensors on the rear bumper to
assist with parking and avoiding
objects while in R (Reverse).
It operates at speeds less than
8 km/h (5 mph). Rear Parking Assist
(RPA) uses audible beeps to
provide distance and system
information. Keep the sensors on the vehicle's
rear bumper clean to ensure proper
operation.
See
Parking Assist on page 9-35.
Power Outlets
The accessory power outlets can be
used to plug in electrical equipment,
such as a cell phone or an MP3
player.
The vehicle may have two
accessory power outlets on the
instrument panel.
Remove the cover to access and
replace when not in use.
SeePower Outlets on page 5-7.
Performance and
Maintenance
Traction Control/
Electronic Stability
Control
The vehicle may have a traction
control system that limits wheel spin
and the StabiliTrak system that
assists with directional control of the
vehicle in difficult driving conditions.
Both systems turn on automatically
every time the vehicle is started.
Page 26 of 379
Black plate (19,1)Chevrolet Express Owner Manual (GMNA-Localizing-U.S./Canada/Mexico-
7707481) - 2015 - CRC - 4/30/14
In Brief 1-19
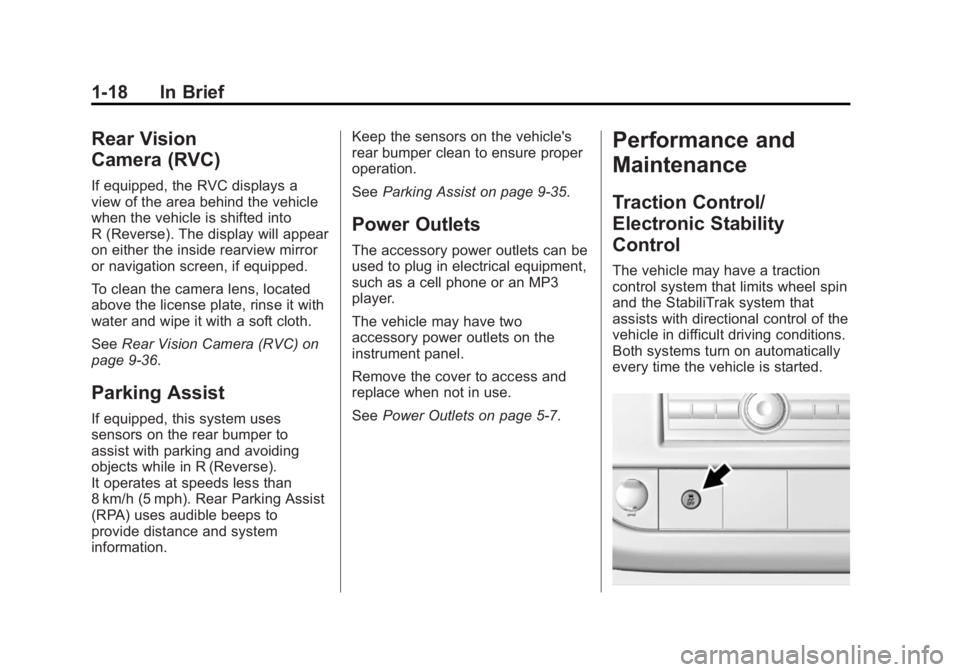
.To turn off traction control, press
and release the StabiliTrak
button
g. The appropriate DIC
message will display. See Ride
Control System Messages on
page 5-33.
.To turn off both traction control
and StabiliTrak, press and hold
the StabiliTrak button
guntil the
StabiliTrak OFF light
Y
illuminates and the appropriate
DIC messages display. See Ride
Control System Messages on
page 5-33.
.Press and release the
StabiliTrak button again to turn
on both systems.
See Traction Control/Electronic
Stability Control on page 9-29.
Tire Pressure Monitor
This vehicle may have a Tire
Pressure Monitor System (TPMS).
The low tire pressure warning light
alerts to a significant loss in
pressure of one of the vehicle's
tires. If the warning light comes on,
stop as soon as possible and inflate
the tires to the recommended
pressure shown on the Tire and
Loading Information label. See
Vehicle Load Limits on page 9-9.
The warning light will remain on until
the tire pressure is corrected.
The low tire pressure warning light
may come on in cool weather when
the vehicle is first started, and then
turn off as the vehicle is driven. This
may be an early indicator that the
tire pressures are getting low and
the tires need to be inflated to the
proper pressure. The TPMS does not replace normal
monthly tire maintenance. Maintain
the correct tire pressures.
See
Tire Pressure Monitor System
on page 10-51.Engine Oil Life System
The engine oil life system calculates
engine oil life based on vehicle use
and displays a DIC message when
it is necessary to change the engine
oil and filter. The oil life system
should be reset to 100% only
following an oil change.
Resetting the Oil Life System
1. Turn the ignition to ON/RUN, with the engine off.
2. Fully press and release the accelerator pedal three times
within five seconds.
3. Turn the key to LOCK/OFF.
See Engine Oil Life System on
page 10-8.
Page 30 of 379
Black plate (3,1)Chevrolet Express Owner Manual (GMNA-Localizing-U.S./Canada/Mexico-
7707481) - 2015 - CRC - 4/30/14
Keys, Doors, and Windows 2-3
Q(Lock):Press once to lock all
doors. If enabled through the Driver
Information Center (DIC), the
parking lamps flash once to indicate
locking has occurred.
The horn may chirp when
Qis
pressed again within five seconds.
See Vehicle Personalization on
page 5-38.
K(Unlock): Press to unlock the
driver door. If
Kis pressed again
within five seconds, all remaining
doors unlock.
The interior lamps come on and
stay on for 20 seconds or until the
ignition is turned on. If enabled
through the DIC, the parking lamps
flash twice to indicate unlocking has
occurred. See Vehicle
Personalization on page 5-38.
j(Cargo Door): Press to unlock
only the cargo doors.
/(Remote Vehicle Start): For
vehicles with this feature, press
Q
and then press and hold/for at least four seconds or until the turn
signal lamps flash to start the
engine from outside the vehicle
using the RKE transmitter. See
Remote Vehicle Start on page 2-4.
L(Vehicle Locator/Panic
Alarm): Press and release to
initiate vehicle locator. The turn
signal lamps flash and the horn
sounds three times.
Press and hold
Lfor more than
two seconds to activate the panic
alarm. The turn signal lamps flash
and the horn sounds repeatedly for
30 seconds. The alarm turns off
when the ignition is moved to ON/
RUN or
Lis pressed again. The
ignition must be in LOCK/OFF for
the panic alarm to work.
Programming Transmitters to
the Vehicle
Only RKE transmitters programmed
to the vehicle will work. If a
transmitter is lost or stolen, a
replacement can be purchased and
programmed through your dealer. When the replacement transmitter is
programmed to the vehicle, all
remaining transmitters must also be
programmed. Any lost or stolen
transmitters no longer work once the
new transmitter is programmed.
Each vehicle can have up to
four transmitters programmed to it.
Battery Replacement
Replace the battery if the REPLACE
BATTERY IN REMOTE KEY
message displays in the DIC. See
Key and Lock Messages on
page 5-32.
{Caution
When replacing the battery, do
not touch any of the circuitry on
the transmitter. Static from your
body could damage the
transmitter.
Page 94 of 379
Black plate (1,1)Chevrolet Express Owner Manual (GMNA-Localizing-U.S./Canada/Mexico-
7707481) - 2015 - CRC - 4/30/14
Instruments and Controls 5-1
Instruments and
Controls
Controls
Steering Wheel Adjustment . . . 5-2
Steering Wheel Controls . . . . . . 5-2
Horn . . . . . . . . . . . . . . . . . . . . . . . . . . 5-3
Windshield Wiper/Washer . . . . . 5-3
Compass . . . . . . . . . . . . . . . . . . . . . 5-4
Clock . . . . . . . . . . . . . . . . . . . . . . . . . 5-6
Power Outlets . . . . . . . . . . . . . . . . . 5-7
Cigarette Lighter . . . . . . . . . . . . . . 5-8
Ashtrays . . . . . . . . . . . . . . . . . . . . . . 5-8
Warning Lights, Gauges, and
Indicators
Warning Lights, Gauges, andIndicators . . . . . . . . . . . . . . . . . . . . 5-9
Instrument Cluster . . . . . . . . . . . 5-10
Speedometer . . . . . . . . . . . . . . . . 5-11
Odometer . . . . . . . . . . . . . . . . . . . . 5-11
Trip Odometer . . . . . . . . . . . . . . . 5-11
Fuel Gauge . . . . . . . . . . . . . . . . . . 5-11
Engine Oil Pressure Gauge . . . . . . . . . . . . . . . . . . . . . . 5-12
Engine Coolant Temperature Gauge . . . . . . . . . . . . . . . . . . . . . . 5-13 Voltmeter Gauge . . . . . . . . . . . . . 5-13
Safety Belt Reminders . . . . . . . 5-14
Airbag Readiness Light . . . . . . 5-14
Airbag On-Off Light . . . . . . . . . . 5-15
Charging System Light . . . . . . 5-16
Malfunction
Indicator Lamp . . . . . . . . . . . . . 5-17
Brake System Warning Light . . . . . . . . . . . . . . . . . . . . . . . 5-19
Antilock Brake System (ABS) Warning Light . . . . . . . . . . . . . . 5-20
Tow/Haul Mode Light . . . . . . . . 5-21
StabiliTrak
®OFF Light . . . . . . . 5-21
Traction Control System (TCS)/StabiliTrak
®Light . . . . 5-21
Tire Pressure Light . . . . . . . . . . 5-22
Engine Oil Pressure Light . . . . 5-22
Low Fuel Warning Light . . . . . . 5-23
Security Light . . . . . . . . . . . . . . . . 5-23
High-Beam On Light . . . . . . . . . 5-23
Cruise Control Light . . . . . . . . . 5-23
Information Displays
Driver Information Center (DIC) . . . . . . . . . . . . . . . 5-24
Vehicle Messages
Vehicle Messages . . . . . . . . . . . 5-29
Battery Voltage and ChargingMessages . . . . . . . . . . . . . . . . . . 5-29
Brake System Messages . . . . 5-29
Compass Messages . . . . . . . . . 5-30
Door Ajar Messages . . . . . . . . . 5-30
Engine Cooling System Messages . . . . . . . . . . . . . . . . . . 5-31
Engine Oil Messages . . . . . . . . 5-31
Engine Power Messages . . . . 5-32
Fuel System Messages . . . . . . 5-32
Key and Lock Messages . . . . . 5-32
Lamp Messages . . . . . . . . . . . . . 5-33
Object Detection System Messages . . . . . . . . . . . . . . . . . . 5-33
Ride Control System Messages . . . . . . . . . . . . . . . . . . 5-33
Airbag System Messages . . . . 5-35
Security Messages . . . . . . . . . . 5-35
Service Vehicle Messages . . . 5-35
Tire Messages . . . . . . . . . . . . . . . 5-36
Transmission Messages . . . . . 5-36
Vehicle Reminder Messages . . . . . . . . . . . . . . . . . . 5-37
Vehicle Personalization
Vehicle Personalization . . . . . . 5-38
Page 95 of 379
Black plate (2,1)Chevrolet Express Owner Manual (GMNA-Localizing-U.S./Canada/Mexico-
7707481) - 2015 - CRC - 4/30/14
5-2 Instruments and Controls
Controls
Steering Wheel
Adjustment
For vehicles with a tilt steering
wheel, the lever is located on the
left side of the steering column.
To adjust the steering wheel:
1. Pull the lever to move thesteering wheel up or down into a
comfortable position. 2. Release the lever to lock the
steering wheel in place.
Do not adjust the steering wheel
while driving.
Steering Wheel Controls
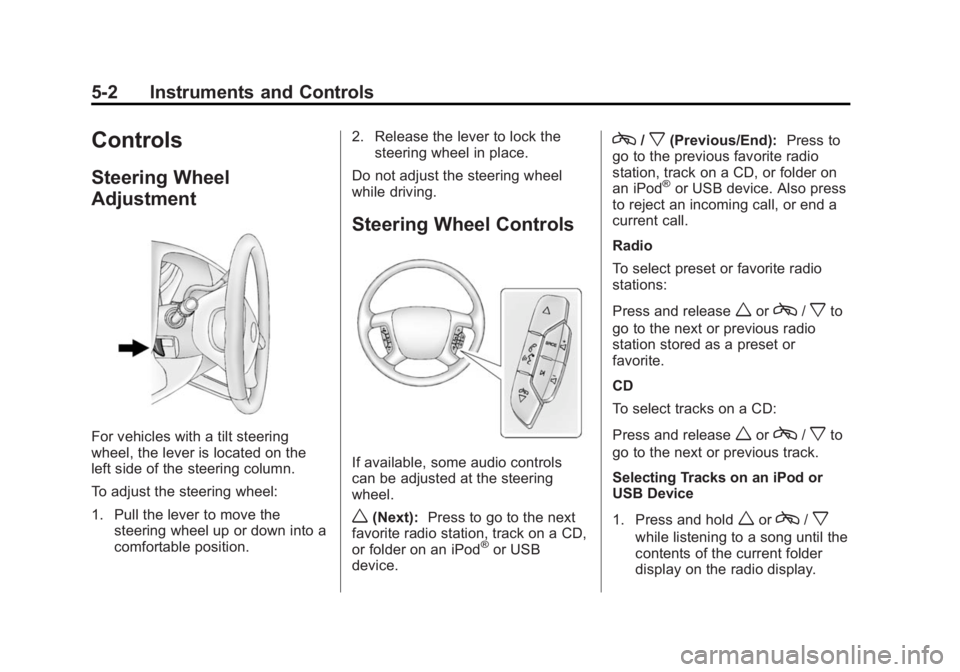
If available, some audio controls
can be adjusted at the steering
wheel.
w(Next): Press to go to the next
favorite radio station, track on a CD,
or folder on an iPod
®or USB
device.
c/x(Previous/End): Press to
go to the previous favorite radio
station, track on a CD, or folder on
an iPod
®or USB device. Also press
to reject an incoming call, or end a
current call.
Radio
To select preset or favorite radio
stations:
Press and release
worc/xto
go to the next or previous radio
station stored as a preset or
favorite.
CD
To select tracks on a CD:
Press and release
worc/xto
go to the next or previous track.
Selecting Tracks on an iPod or
USB Device
1. Press and hold
worc/x
while listening to a song until the
contents of the current folder
display on the radio display.
Page 96 of 379
Black plate (3,1)Chevrolet Express Owner Manual (GMNA-Localizing-U.S./Canada/Mexico-
7707481) - 2015 - CRC - 4/30/14
Instruments and Controls 5-3
2. Press and releaseworc/x
to scroll up or down the list, then
press and hold
w, or press¨to
play the highlighted track.
Navigating Folders on an iPod or
USB Device
1. Press and hold
worc/x
while listening to a song until the
contents of the current folder
display on the radio display.
2. Press and hold
c/xto go
back to the previous folder list.
3. Press and release
worc/x
to scroll up or down the list.
.To select a folder, press
and hold
w, or press¨
when the folder is
highlighted.
.To go back further in the
folder list, press and hold
c/x.
b/g(Push to Talk): Press to
silence the vehicle speakers only.
Press again to turn the sound on.
For vehicles with Bluetooth or
OnStar
®systems, press and hold
for longer than two seconds to
interact with those systems. See
Bluetooth on page 7-20 and OnStar,
if equipped.
SRCE (Source/Voice
Recognition): Press to switch
between the radio and CD, and for
equipped vehicles, the front
auxiliary.
¨(Seek): Press to go to the next
radio station while in AM, FM,
or SiriusXM
®.
For vehicles with a CD Player or
USB port:
Press
¨to go to the next track or
chapter while sourced to the CD.
Press
¨to select a track or a folder
when navigating folders on an iPod
or USB device. While listening to a CD, press and
hold
¨to quickly move forward
through the tracks. Release to stop
on the desired track.
+
e: Press to increase volume.
−
e: Press to decrease volume.
Horn
Press the horn symbol in the middle
of the steering wheel to sound
the horn.
Windshield Wiper/Washer
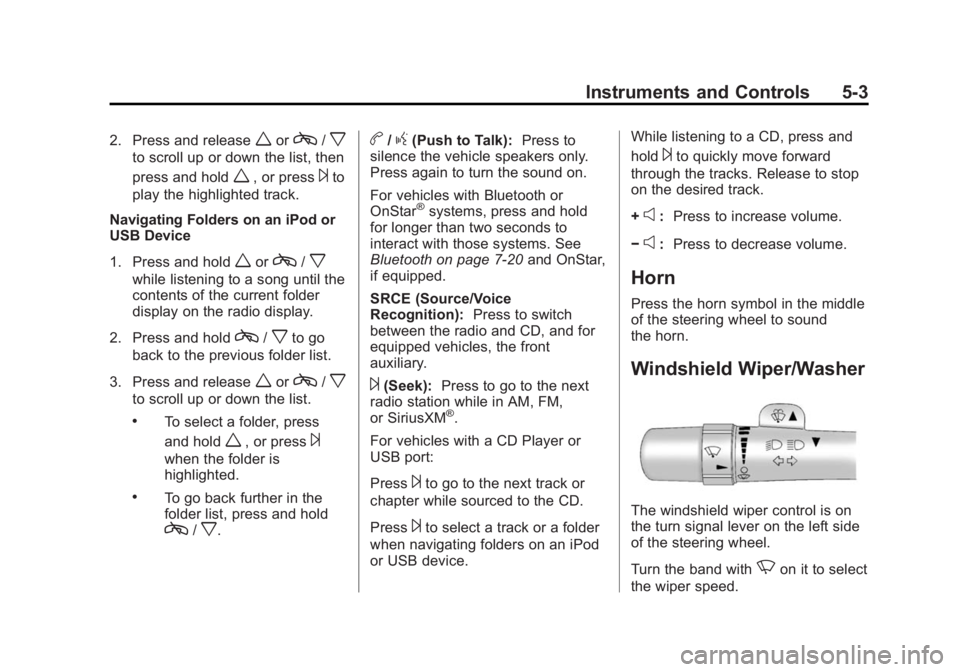
The windshield wiper control is on
the turn signal lever on the left side
of the steering wheel.
Turn the band with
Non it to select
the wiper speed.
Page 97 of 379
Black plate (4,1)Chevrolet Express Owner Manual (GMNA-Localizing-U.S./Canada/Mexico-
7707481) - 2015 - CRC - 4/30/14
5-4 Instruments and Controls
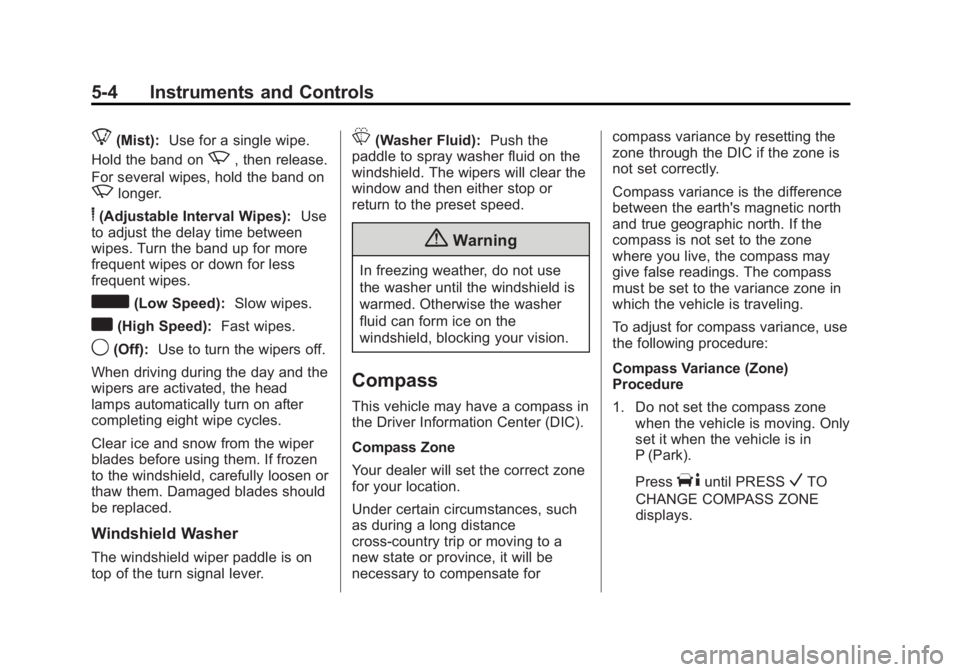
8(Mist):Use for a single wipe.
Hold the band on
z, then release.
For several wipes, hold the band on
zlonger.
6(Adjustable Interval Wipes): Use
to adjust the delay time between
wipes. Turn the band up for more
frequent wipes or down for less
frequent wipes.
d(Low Speed): Slow wipes.
a(High Speed): Fast wipes.
9(Off):Use to turn the wipers off.
When driving during the day and the
wipers are activated, the head
lamps automatically turn on after
completing eight wipe cycles.
Clear ice and snow from the wiper
blades before using them. If frozen
to the windshield, carefully loosen or
thaw them. Damaged blades should
be replaced.
Windshield Washer
The windshield wiper paddle is on
top of the turn signal lever.
L(Washer Fluid): Push the
paddle to spray washer fluid on the
windshield. The wipers will clear the
window and then either stop or
return to the preset speed.
{Warning
In freezing weather, do not use
the washer until the windshield is
warmed. Otherwise the washer
fluid can form ice on the
windshield, blocking your vision.
Compass
This vehicle may have a compass in
the Driver Information Center (DIC).
Compass Zone
Your dealer will set the correct zone
for your location.
Under certain circumstances, such
as during a long distance
cross-country trip or moving to a
new state or province, it will be
necessary to compensate for compass variance by resetting the
zone through the DIC if the zone is
not set correctly.
Compass variance is the difference
between the earth's magnetic north
and true geographic north. If the
compass is not set to the zone
where you live, the compass may
give false readings. The compass
must be set to the variance zone in
which the vehicle is traveling.
To adjust for compass variance, use
the following procedure:
Compass Variance (Zone)
Procedure
1. Do not set the compass zone
when the vehicle is moving. Only
set it when the vehicle is in
P (Park).
Press
Tuntil PRESSVTO
CHANGE COMPASS ZONE
displays.