check engine light CHEVROLET EXPRESS 2018 User Guide
[x] Cancel search | Manufacturer: CHEVROLET, Model Year: 2018, Model line: EXPRESS, Model: CHEVROLET EXPRESS 2018Pages: 356, PDF Size: 5.14 MB
Page 111 of 356
Chevrolet Express Owner Manual (GMNA-Localizing-U.S./Canada/Mexico-
11374212) - 2018 - crc - 2/2/18
110 Instruments and Controls
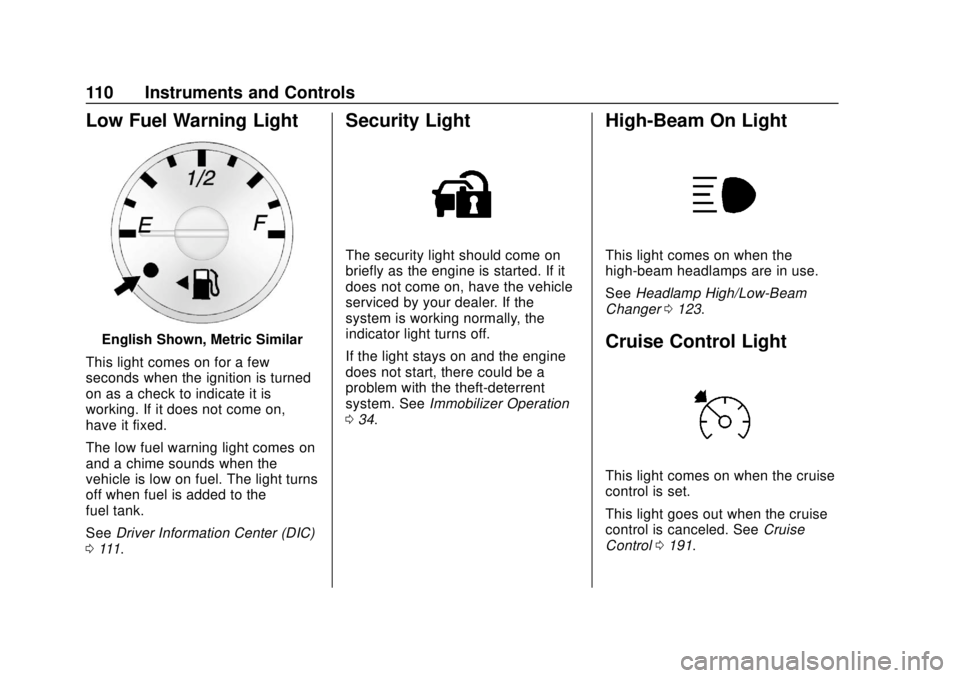
Low Fuel Warning Light
English Shown, Metric Similar
This light comes on for a few
seconds when the ignition is turned
on as a check to indicate it is
working. If it does not come on,
have it fixed.
The low fuel warning light comes on
and a chime sounds when the
vehicle is low on fuel. The light turns
off when fuel is added to the
fuel tank.
See Driver Information Center (DIC)
0 111.
Security Light
The security light should come on
briefly as the engine is started. If it
does not come on, have the vehicle
serviced by your dealer. If the
system is working normally, the
indicator light turns off.
If the light stays on and the engine
does not start, there could be a
problem with the theft-deterrent
system. See Immobilizer Operation
0 34.
High-Beam On Light
This light comes on when the
high-beam headlamps are in use.
See Headlamp High/Low-Beam
Changer 0123.
Cruise Control Light
This light comes on when the cruise
control is set.
This light goes out when the cruise
control is canceled. See Cruise
Control 0191.
Page 187 of 356
Chevrolet Express Owner Manual (GMNA-Localizing-U.S./Canada/Mexico-
11374212) - 2018 - crc - 2/2/18
186 Driving and Operating
Turn the Tow/Haul Mode on and off
by pressing the button on the
instrument panel. When Tow/Haul is
on, a light on the instrument cluster
will come on.
SeeTow/Haul Mode Light 0108.
Also see “Tow/Haul Mode” under
Towing Equipment 0209.
Tow/Haul Mode Grade Braking
Tow/Haul Mode Grade Braking is
only enabled while the Tow/Haul
Mode is selected and the vehicle is
not in the Range Selection Mode.
See “Tow/Haul Mode” listed
previously and Manual Mode0185.
Tow/Haul Mode Grade Braking
assists in maintaining desired
vehicle speeds when driving on
downhill grades by using the engine
and transmission to slow the
vehicle. To disable or enable Tow/Haul Mode
Grade Braking within the current
ignition key cycle, press and hold
the Tow/Haul button for
three seconds.
See
Towing Equipment 0209.
For other forms of grade braking,
see Automatic Transmission 0182
and Cruise Control 0191.
Brakes
Antilock Brake
System (ABS)
This vehicle has an Antilock Brake
System (ABS), an advanced
electronic braking system that helps
prevent a braking skid.
When the vehicle begins to drive
away, ABS checks itself.
A momentary motor or clicking noise
may be heard while this test is going
on, and it may even be noticed that
the brake pedal moves a little. This
is normal.
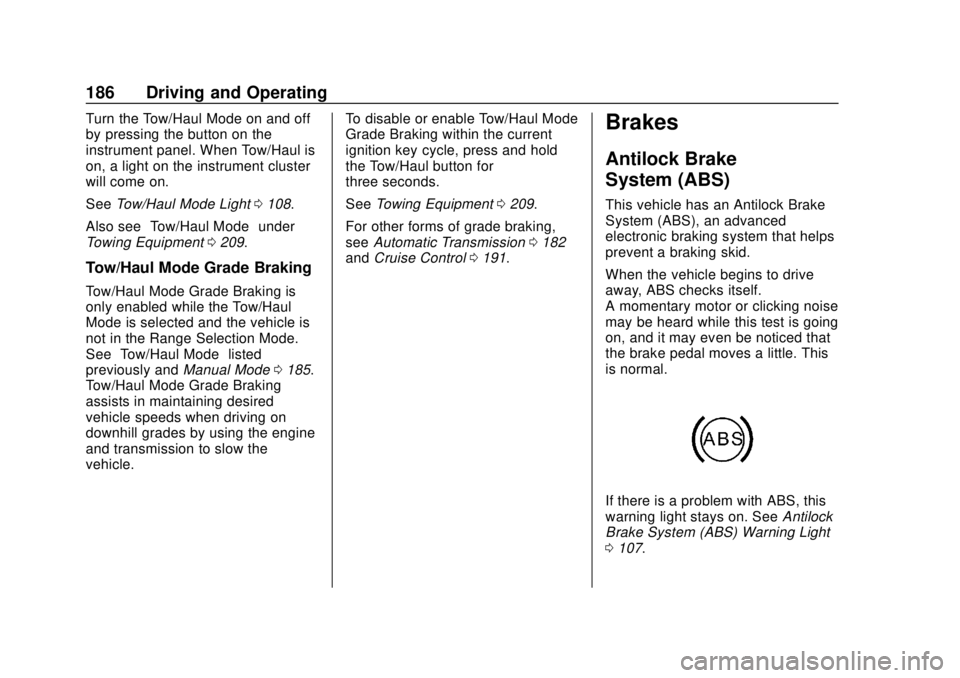
If there is a problem with ABS, this
warning light stays on. See Antilock
Brake System (ABS) Warning Light
0 107.
Page 190 of 356
Chevrolet Express Owner Manual (GMNA-Localizing-U.S./Canada/Mexico-
11374212) - 2018 - crc - 2/2/18
Driving and Operating 189
intended path. Trailer Sway Control
(TSC) is also on automatically when
the vehicle is started. SeeTrailer
Sway Control (TSC) 0211.
If cruise control is being used and
traction control or StabiliTrak begins
to limit wheel spin, cruise control will
disengage. Cruise control may be
turned back on when road
conditions allow.
Both systems come on
automatically when the vehicle is
started and begins to move. The
systems may be heard or felt while
they are operating or while
performing diagnostic checks. This
is normal and does not mean there
is a problem with the vehicle.
It is recommended to leave both
systems on for normal driving
conditions, but it may be necessary
to turn TCS off if the vehicle gets
stuck in sand, mud, ice, or snow.
See If the Vehicle Is Stuck 0169
and “Turning the Systems Off and
On” later in this section.
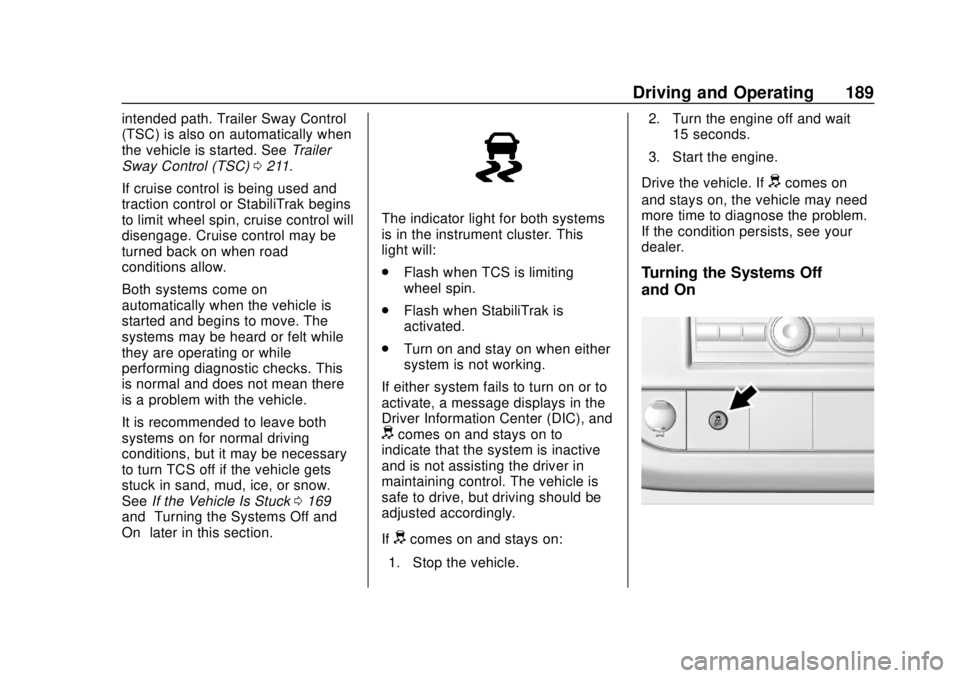
The indicator light for both systems
is in the instrument cluster. This
light will:
.
Flash when TCS is limiting
wheel spin.
. Flash when StabiliTrak is
activated.
. Turn on and stay on when either
system is not working.
If either system fails to turn on or to
activate, a message displays in the
Driver Information Center (DIC), and
dcomes on and stays on to
indicate that the system is inactive
and is not assisting the driver in
maintaining control. The vehicle is
safe to drive, but driving should be
adjusted accordingly.
If
dcomes on and stays on:
1. Stop the vehicle. 2. Turn the engine off and wait
15 seconds.
3. Start the engine.
Drive the vehicle. If
dcomes on
and stays on, the vehicle may need
more time to diagnose the problem.
If the condition persists, see your
dealer.
Turning the Systems Off
and On
Page 194 of 356
Chevrolet Express Owner Manual (GMNA-Localizing-U.S./Canada/Mexico-
11374212) - 2018 - crc - 2/2/18
Driving and Operating 193
when driving on downhill grades by
using the engine and transmission
to slow the vehicle.
If the brake pedal is applied, cruise
control will disengage.
Ending Cruise Control
There are four ways to end cruise
control:
.Step lightly on the brake pedal.
. Press
[.
. Shift the transmission to
N (Neutral).
. To turn off cruise control,
press
I.
Erasing Speed Memory
The cruise control set speed is
erased from memory if
Iis
pressed or if the vehicle is
turned off.
Driver Assistance
Systems
Rear Vision
Camera (RVC)
If equipped, the RVC system is
designed to help the driver when
backing up by displaying a view of
the area behind the vehicle.
{Warning
The camera(s) do not display
children, pedestrians, bicyclists,
crossing traffic, animals, or any
other object outside of the
cameras’ field of view, below the
bumper, or under the vehicle.
Shown distances may be different
from actual distances. Do not
drive or park the vehicle using
only these camera(s). Always
check behind and around the
vehicle before driving. Failure to
use proper care may result in
injury, death, or vehicle damage. When the vehicle is on and shifted
into R (Reverse), the video image
appears on the inside rearview
mirror. The video image disappears
after the vehicle is shifted out of
R (Reverse).
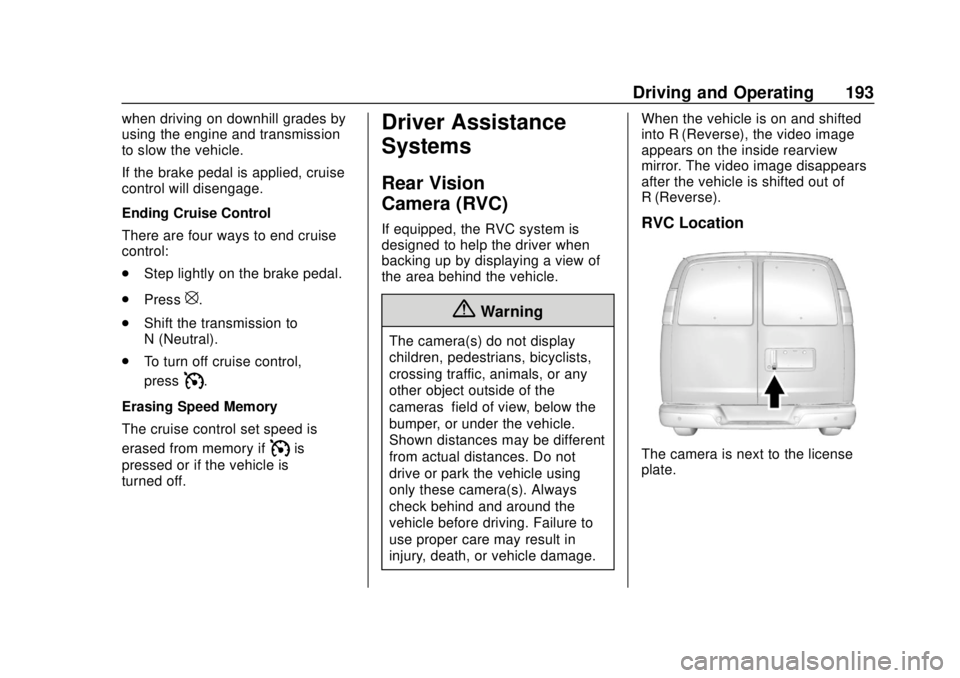
RVC Location
The camera is next to the license
plate.
Page 199 of 356
Chevrolet Express Owner Manual (GMNA-Localizing-U.S./Canada/Mexico-
11374212) - 2018 - crc - 2/2/18
198 Driving and Operating
Use regular unleaded gasoline
meeting ASTM specification D4814
with a posted octane rating of 87 or
higher. Do not use gasoline with a
posted octane rating of less than 87,
as this may cause engine knock and
will lower fuel economy.
Prohibited Fuels
Caution
Do not use fuels with any of the
following conditions; doing so
may damage the vehicle and void
its warranty:. For vehicles which are not
FlexFuel, fuel labeled
greater than 15% ethanol by
volume, such as mid-level
ethanol blends (16 –50%
ethanol), E85, or FlexFuel.
. Fuel with any amount of
methanol, methylal, and
aniline. These fuels can
corrode metal fuel system
parts or damage plastic and
rubber parts.
(Continued)
Caution (Continued)
.Fuel containing metals such
as methylcyclopentadienyl
manganese tricarbonyl
(MMT), which can damage
the emissions control
system and spark plugs.
. Fuel with a posted octane
rating of less than the
recommended fuel. Using
this fuel will lower fuel
economy and performance,
and may decrease the life of
the emissions catalyst.
California Fuel
Requirements
If the vehicle is certified to meet
California Emissions Standards, it is
designed to operate on fuels that
meet California specifications. See
the underhood emission control
label. If this fuel is not available in
states adopting California Emissions
Standards, the vehicle will operate
satisfactorily on fuels meeting federal specifications, but emission
control system performance may be
affected. The malfunction indicator
lamp could turn on and the vehicle
may not pass a smog-check test.
See
Malfunction Indicator Lamp
(Check Engine Light) 0105. If this
occurs, return to your authorized
dealer for diagnosis. If it is
determined that the condition is
caused by the type of fuel used,
repairs may not be covered by the
vehicle warranty.
Fuels in Foreign
Countries
The U.S., Canada, and Mexico post
fuel octane ratings in anti-knock
index (AKI). For fuel not to use in a
foreign country, see “Prohibited
Fuels” inFuel 0197.
Fuel Additives
To keep fuel systems clean, TOP
TIER detergent gasoline is
recommended. See Fuel0197.
Page 202 of 356
Chevrolet Express Owner Manual (GMNA-Localizing-U.S./Canada/Mexico-
11374212) - 2018 - crc - 2/2/18
Driving and Operating 201
When replacing the fuel cap, turn it
clockwise until it clicks. Make sure
the cap is fully installed. The
diagnostic system can determine if
the fuel cap has been left off or
improperly installed. This would
allow fuel to evaporate into the
atmosphere. SeeMalfunction
Indicator Lamp (Check Engine
Light) 0105.
{Warning
If a fire starts while you are
refueling, do not remove the
nozzle. Shut off the flow of fuel by
shutting off the pump or by
notifying the station attendant.
Leave the area immediately.
Caution
If a new fuel cap is needed, be
sure to get the right type of cap
from your dealer. The wrong type
of fuel cap may not fit properly,
(Continued)
Caution (Continued)
may cause the malfunction
indicator lamp to light, and could
damage the fuel tank and
emissions system. See
Malfunction Indicator Lamp
(Check Engine Light)0105.
Filling a Portable Fuel
Container
{Warning
Filling a portable fuel container
while it is in the vehicle can cause
fuel vapors that can ignite either
by static electricity or other
means. You or others could be
badly burned and the vehicle
could be damaged. Always:
. Use approved fuel
containers.
(Continued)
Warning (Continued)
.Remove the container from
the vehicle, trunk, or pickup
bed before filling.
. Place the container on the
ground.
. Place the nozzle inside the
fill opening of the container
before dispensing fuel, and
keep it in contact with the fill
opening until filling is
complete.
. Fill the container no more
than 95% full to allow for
expansion.
. Do not smoke, light
matches, or use lighters
while pumping fuel.
. Avoid using cell phones or
other electronic devices.
Page 213 of 356
Chevrolet Express Owner Manual (GMNA-Localizing-U.S./Canada/Mexico-
11374212) - 2018 - crc - 2/2/18
212 Driving and Operating
Warning (Continued)
safe speed. Check the trailer and
vehicle to help correct possible
causes. These could include an
improperly or overloaded trailer,
unrestrained cargo, improper
trailer hitch configuration,
excessive vehicle-trailer speed,
or improperly inflated or incorrect
vehicle or trailer tires. SeeTowing
Equipment 0209 for trailer ratings
and hitch setup
recommendations.
Adding non-dealer accessories can
affect the vehicle performance. See
Accessories and Modifications
0 215.
Conversions and
Add-Ons
Add-On Electrical
Equipment
{Warning
The Data Link Connector (DLC) is
used for vehicle service and
Emission Inspection/Maintenance
testing. See Malfunction
Indicator Lamp (Check Engine
Light) 0105. A device connected
to the DLC —such as an
aftermarket fleet or
driver-behavior tracking device —
may interfere with vehicle
systems. This could affect vehicle
operation and cause a crash.
Such devices may also access
information stored in the vehicle’s
systems.
Caution
Some electrical equipment can
damage the vehicle or cause
components to not work and
would not be covered by the
vehicle warranty. Always check
with your dealer before adding
electrical equipment.
Add-on equipment can drain the
vehicle's 12-volt battery, even if the
vehicle is not operating.
The vehicle has an airbag system.
Before attempting to add anything
electrical to the vehicle, see
Servicing the Airbag-Equipped
Vehicle 066 and Adding Equipment
to the Airbag-Equipped Vehicle
0 67.
Page 225 of 356
Chevrolet Express Owner Manual (GMNA-Localizing-U.S./Canada/Mexico-
11374212) - 2018 - crc - 2/2/18
224 Vehicle Care
suspected, use the following
procedures to check the fluid level.
However, if there is a large leak, it
may be necessary to have the
vehicle towed to a dealer and have
it repaired before driving the vehicle
further.
Change the fluid and filter at the
intervals listed inMaintenance
Schedule 0303, and be sure to use
the transmission fluid listed in
Recommended Fluids and
Lubricants 0310.
How to Check Automatic
Transmission Fluid
Because this operation can be
difficult, it is recommended to have
this check done at your dealer,
which can monitor the transmission
temperature. The transmission fluid
level increases with temperature. To
obtain a highly accurate fluid level
check, the transmission temperature
must be measured.
If it is decided to check the fluid
level, be sure to follow all the
instructions here, or a false reading
on the dipstick may occur.
Caution
Too much or too little fluid can
damage the transmission. Too
much can mean that some of the
fluid could come out and fall on
hot engine parts or exhaust
system parts, starting a fire. Too
little fluid could cause the
transmission to overheat. Be sure
to get an accurate reading if
checking the transmission fluid.
Wait at least 30 minutes with the
engine off, before checking the
transmission fluid level if the vehicle
has been driven:
. In hot weather, when outside
temperatures are above 32 °C
(90 °F).
. The vehicle is heavily loaded.
. At high speed for quite a while in
hot weather.
. In heavy traffic and hot weather.
. While pulling a trailer. After driving under these conditions,
a hot check can be performed. The
fluid should be hot, which is 71 °C to
93 °C (160 °F to 200 °F).
A cold fluid level check can be
performed after the vehicle has
been sitting for eight hours or more
with the engine off, but this is used
only as a reference. Let the engine
run at idle for five minutes if the
outside temperature is between
15 °C to 32 °C (60 °F to 90 °F).
Should the fluid level be low during
this cold check, the fluid must be
checked warm or hot before adding
fluid. If the outside temperature is
colder than 15 °C (60 °F) or hotter
than
32 °C (90 °F), a cold check cannot
be performed.
A warm fluid level check can be
performed by driving the vehicle
under lightly loaded conditions and
outside temperatures between 10 °C
to 27 °C (50 °F to 80 °F). The
vehicle should be driven for at least
24 km (15 mi) before performing a
warm check. Checking the fluid
Page 226 of 356
Chevrolet Express Owner Manual (GMNA-Localizing-U.S./Canada/Mexico-
11374212) - 2018 - crc - 2/2/18
Vehicle Care 225
warm or hot will give a more
accurate reading of the fluid level
than a cold check.
Because the vehicle is equipped
with a high-efficiency air-to-oil
cooler, the transmission fluid
temperature may not reach the
required hot fluid level checking
temperature under normal lightly
loaded driving vehicle conditions.
Checking the Fluid Level
Prepare the vehicle:1. Park the vehicle on a level place. Keep the engine
running.
2. With the parking brake applied, place the shift lever in P (Park).
3. With a foot on the brake pedal, move the shift lever through
each gear range, pausing for
about three seconds in each
range. When M is reached,
move the selector from M1
through M3. Then, position the
shift lever in P (Park).
4. Let the engine run at idle for two minutes or more. Then, without shutting off the
engine, use the steps that follow.
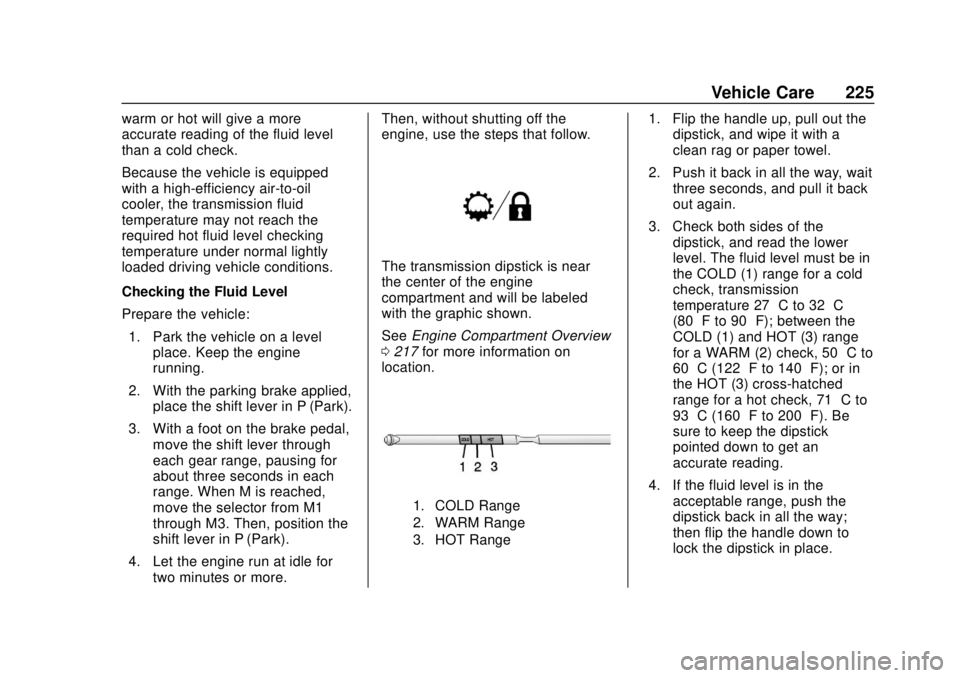
The transmission dipstick is near
the center of the engine
compartment and will be labeled
with the graphic shown.
See
Engine Compartment Overview
0 217 for more information on
location.
1. COLD Range
2. WARM Range
3. HOT Range
1. Flip the handle up, pull out the dipstick, and wipe it with a
clean rag or paper towel.
2. Push it back in all the way, wait three seconds, and pull it back
out again.
3. Check both sides of the dipstick, and read the lower
level. The fluid level must be in
the COLD (1) range for a cold
check, transmission
temperature 27 °C to 32 °C
(80 °F to 90 °F); between the
COLD (1) and HOT (3) range
for a WARM (2) check, 50 °C to
60 °C (122 °F to 140 °F); or in
the HOT (3) cross-hatched
range for a hot check, 71 °C to
93 °C (160 °F to 200 °F). Be
sure to keep the dipstick
pointed down to get an
accurate reading.
4. If the fluid level is in the acceptable range, push the
dipstick back in all the way;
then flip the handle down to
lock the dipstick in place.
Page 239 of 356
Chevrolet Express Owner Manual (GMNA-Localizing-U.S./Canada/Mexico-
11374212) - 2018 - crc - 2/2/18
238 Vehicle Care
When the brake fluid falls to a low
level, the brake warning light comes
on. SeeBrake System Warning
Light 0107.
Brake fluid absorbs water over time.
Replace brake fluid at the specified
intervals to prevent increased
stopping distance. See Maintenance
Schedule 0303.
Checking Brake Fluid
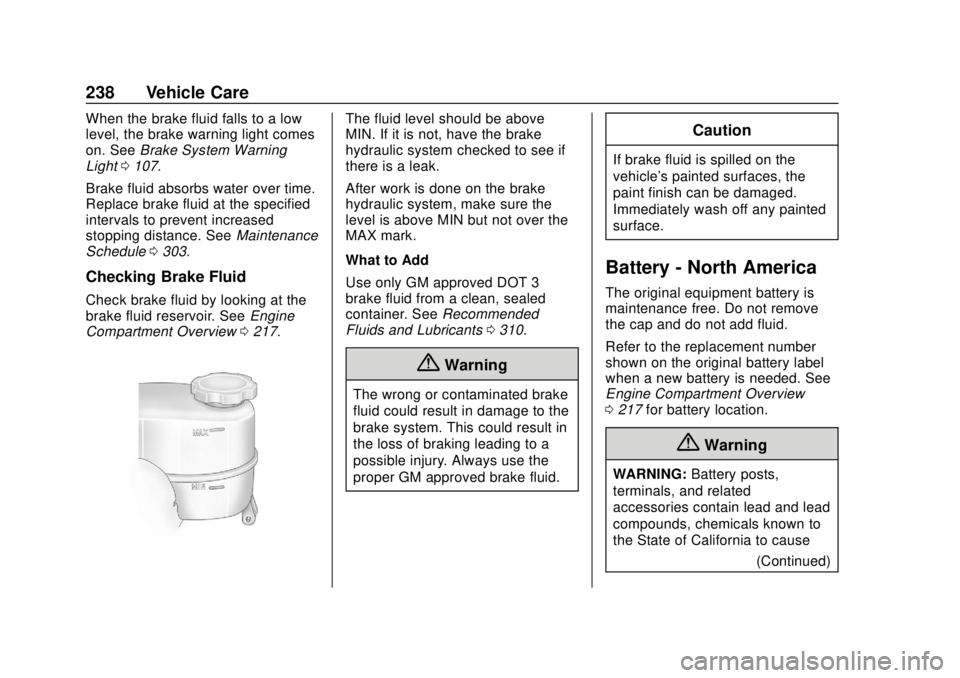
Check brake fluid by looking at the
brake fluid reservoir. See Engine
Compartment Overview 0217.
The fluid level should be above
MIN. If it is not, have the brake
hydraulic system checked to see if
there is a leak.
After work is done on the brake
hydraulic system, make sure the
level is above MIN but not over the
MAX mark.
What to Add
Use only GM approved DOT 3
brake fluid from a clean, sealed
container. See Recommended
Fluids and Lubricants 0310.
{Warning
The wrong or contaminated brake
fluid could result in damage to the
brake system. This could result in
the loss of braking leading to a
possible injury. Always use the
proper GM approved brake fluid.
Caution
If brake fluid is spilled on the
vehicle's painted surfaces, the
paint finish can be damaged.
Immediately wash off any painted
surface.
Battery - North America
The original equipment battery is
maintenance free. Do not remove
the cap and do not add fluid.
Refer to the replacement number
shown on the original battery label
when a new battery is needed. See
Engine Compartment Overview
0217 for battery location.
{Warning
WARNING: Battery posts,
terminals, and related
accessories contain lead and lead
compounds, chemicals known to
the State of California to cause
(Continued)