display CHEVROLET EXPRESS 2018 Repair Manual
[x] Cancel search | Manufacturer: CHEVROLET, Model Year: 2018, Model line: EXPRESS, Model: CHEVROLET EXPRESS 2018Pages: 356, PDF Size: 5.14 MB
Page 222 of 356
Chevrolet Express Owner Manual (GMNA-Localizing-U.S./Canada/Mexico-
11374212) - 2018 - crc - 2/2/18
Vehicle Care 221
If a low oil Driver Information Center
(DIC) message displays, check the
oil level.
Follow these guidelines:
.To get an accurate reading, park
the vehicle on level ground.
Check the engine oil level after
the engine has been off for at
least two hours. Checking the
engine oil level on steep grades
or too soon after engine shutoff
can result in incorrect readings.
Accuracy improves when
checking a cold engine prior to
starting. Remove the dipstick
and check the level.
. If unable to wait two hours, the
engine must be off for at least
15 minutes if the engine is
warm, or at least 30 minutes if
the engine is not warm. Pull out
the dipstick, wipe it with a clean
paper towel or cloth, then push it
back in all the way. Remove it
again, keeping the tip down, and
check the level.When to Add Engine Oil
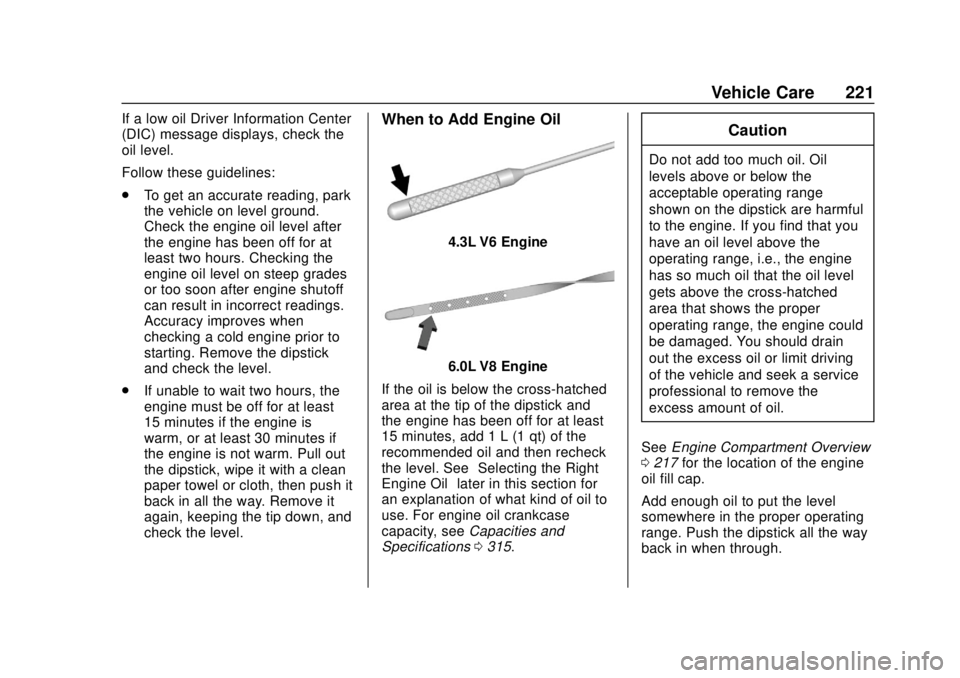
4.3L V6 Engine
6.0L V8 Engine
If the oil is below the cross-hatched
area at the tip of the dipstick and
the engine has been off for at least
15 minutes, add 1 L (1 qt) of the
recommended oil and then recheck
the level. See “Selecting the Right
Engine Oil” later in this section for
an explanation of what kind of oil to
use. For engine oil crankcase
capacity, see Capacities and
Specifications 0315.
Caution
Do not add too much oil. Oil
levels above or below the
acceptable operating range
shown on the dipstick are harmful
to the engine. If you find that you
have an oil level above the
operating range, i.e., the engine
has so much oil that the oil level
gets above the cross-hatched
area that shows the proper
operating range, the engine could
be damaged. You should drain
out the excess oil or limit driving
of the vehicle and seek a service
professional to remove the
excess amount of oil.
See Engine Compartment Overview
0 217 for the location of the engine
oil fill cap.
Add enough oil to put the level
somewhere in the proper operating
range. Push the dipstick all the way
back in when through.
Page 224 of 356
Chevrolet Express Owner Manual (GMNA-Localizing-U.S./Canada/Mexico-
11374212) - 2018 - crc - 2/2/18
Vehicle Care 223
include engine revolutions, engine
temperature, and miles driven.
Based on driving conditions, the
mileage at which an engine oil
change is indicated can vary
considerably. For the oil life system
to work properly, the system must
be reset every time the oil is
changed.
When the system has calculated
that oil life has been diminished, it
indicates that an oil change is
necessary. A CHANGE ENGINE
OIL SOON message comes on.
Change the oil as soon as possible
within the next 1 000 km (600 mi).
It is possible that, if driving under
the best conditions, the oil life
system might indicate that an oil
change is not necessary for up to a
year. The engine oil and filter must
be changed at least once a year
and, at this time, the system must
be reset. Your dealer has trained
service people who will perform this
work and reset the system. It is also
important to check the oil regularly
over the course of an oil drain
interval and keep it at the proper
level.If the system is ever reset
accidentally, the oil must be
changed at 5 000 km (3,000 mi)
since the last oil change.
Remember to reset the oil life
system whenever the oil is changed.
How to Reset the Engine Oil
Life System
Reset the system whenever the
engine oil is changed so that the
system can calculate the next
engine oil change.
To reset the Engine Oil Life System
on most models:
1. Display the OIL LIFE REMAINING on the DIC. See
Driver Information Center (DIC)
0111.
2. Press and hold
Von the DIC
while the Oil Life display is
active. The oil life will change
to 100%. The oil life system can also be reset
as follows:
1. Display the OIL LIFE REMAINING on the DIC. See
Driver Information Center (DIC)
0111.
2. Fully press and release the accelerator pedal three times
within five seconds. If the
display shows 100%, the
system is reset.
If the CHANGE ENGINE OIL SOON
message comes back on when the
vehicle is started, the engine oil life
system has not reset. Repeat the
procedure.
Automatic Transmission
Fluid (6-Speed
Transmission)
When to Check and Change
Automatic Transmission Fluid
It is usually not necessary to check
the transmission fluid level. The only
reason for fluid loss is a
transmission leak or overheated
transmission. If a small leak is
Page 235 of 356
Chevrolet Express Owner Manual (GMNA-Localizing-U.S./Canada/Mexico-
11374212) - 2018 - crc - 2/2/18
234 Vehicle Care
If No Steam is Coming from
the Engine Compartment
If an engine overheat warning is
displayed but no steam can be seen
or heard, the problem may not be
too serious. Sometimes the engine
can get a little too hot when the
vehicle:
.Climbs a long hill on a hot day.
. Stops after high-speed driving.
. Idles for long periods in traffic.
. Tows a trailer. See “Driving on
Grades” underTrailer Towing
0 205.
If the overheat warning is displayed
with no sign of steam: 1. Turn the air conditioning off.
2. Turn the heater on to the highest temperature and to the
highest fan speed. Open the
windows as necessary.
3. When it is safe to do so, pull off the road, shift to P (Park) or
N (Neutral) and let the
engine idle. If the engine coolant temperature
gauge is no longer in the overheat
zone or an overheat warning no
longer displays, the vehicle can be
driven. Continue to drive the vehicle
slowly for about 10 minutes. Keep a
safe vehicle distance from the
vehicle in front. If the warning does
not come back on, continue to drive
normally and have the cooling
system checked for proper fill and
function.
If the warning continues, pull over,
stop, and park the vehicle
right away.
If there is still no sign of steam,
push down the accelerator until the
engine speed is about twice as fast
as normal idle speed for at least
three minutes while parked. If the
warning is still on, turn off the
engine until it cools down.
If the decision is made not to lift the
hood, get service help right away.
Engine Fan
The vehicle has a clutched engine
cooling fan. When the clutch is
engaged, the fan spins faster to
provide more air to cool the engine.
In most everyday driving conditions,
the fan is spinning slower and the
clutch is not fully engaged. This
improves fuel economy and reduces
fan noise. Under heavy vehicle
loading, trailer towing, and/or high
outside temperatures, the fan speed
increases as the clutch more fully
engages, so an increase in fan
noise may be heard. This is normal
and should not be mistaken as the
transmission slipping or making
extra shifts. It is merely the cooling
system functioning properly. The fan
will slow down when additional
cooling is not required and the
clutch partially disengages.
This fan noise may be heard when
starting the engine. It will go away
as the fan clutch partially
disengages.
Page 266 of 356
Chevrolet Express Owner Manual (GMNA-Localizing-U.S./Canada/Mexico-
11374212) - 2018 - crc - 2/2/18
Vehicle Care 265
causes the tire to overheat and can
lead to tire failure. Under-inflation
also reduces fuel efficiency and tire
tread life, and may affect the
vehicle's handling and stopping
ability.
Please note that the TPMS is not a
substitute for proper tire
maintenance, and it is the driver's
responsibility to maintain correct tire
pressure, even if under-inflation has
not reached the level to trigger
illumination of the TPMS low tire
pressure telltale.
Your vehicle has also been
equipped with a TPMS malfunction
indicator to indicate when the
system is not operating properly.
The TPMS malfunction indicator is
combined with the low tire pressure
telltale. When the system detects a
malfunction, the telltale will flash for
approximately one minute and then
remain continuously illuminated.
This sequence will continue upon
subsequent vehicle start-ups as
long as the malfunction exists.When the malfunction indicator is
illuminated, the system may not be
able to detect or signal low tire
pressure as intended. TPMS
malfunctions may occur for a variety
of reasons, including the installation
of replacement or alternate tires or
wheels on the vehicle that prevent
the TPMS from functioning properly.
Always check the TPMS malfunction
telltale after replacing one or more
tires or wheels on your vehicle to
ensure that the replacement or
alternate tires and wheels allow the
TPMS to continue to function
properly.
See
Tire Pressure Monitor
Operation 0265.
See Radio Frequency Statement
0 328.
Tire Pressure Monitor
Operation
This vehicle may have a Tire
Pressure Monitor System (TPMS).
The TPMS is designed to warn the
driver when a low tire pressure
condition exists. TPMS sensors are mounted onto each tire and wheel
assembly, excluding the spare tire
and wheel assembly. The TPMS
sensors monitor the air pressure in
the tires and transmit the tire
pressure readings to a receiver
located in the vehicle.
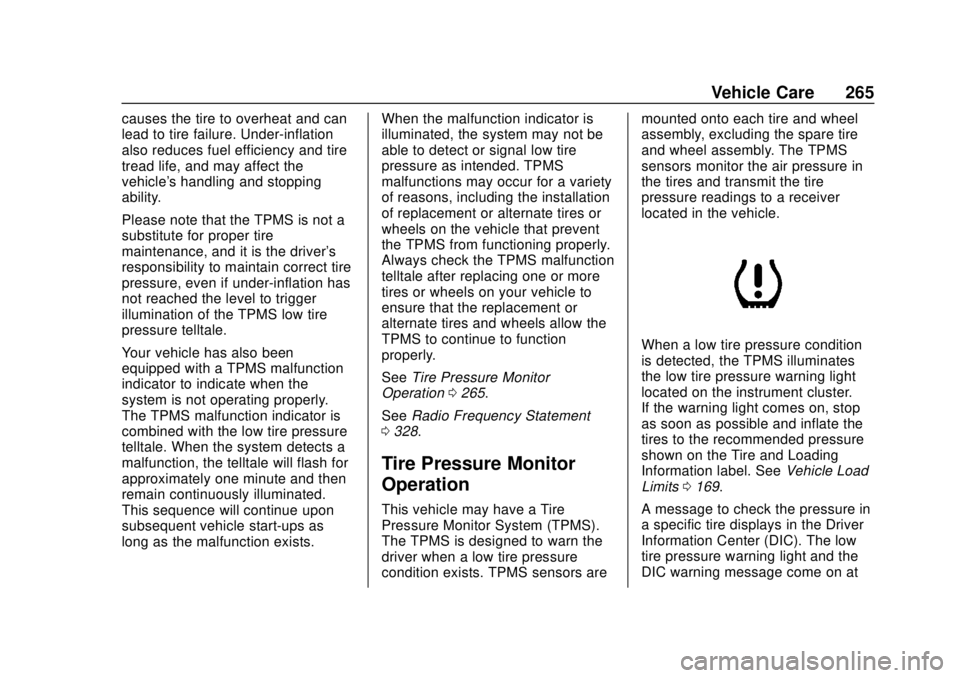
When a low tire pressure condition
is detected, the TPMS illuminates
the low tire pressure warning light
located on the instrument cluster.
If the warning light comes on, stop
as soon as possible and inflate the
tires to the recommended pressure
shown on the Tire and Loading
Information label. See
Vehicle Load
Limits 0169.
A message to check the pressure in
a specific tire displays in the Driver
Information Center (DIC). The low
tire pressure warning light and the
DIC warning message come on at
Page 267 of 356
Chevrolet Express Owner Manual (GMNA-Localizing-U.S./Canada/Mexico-
11374212) - 2018 - crc - 2/2/18
266 Vehicle Care
each ignition cycle until the tires are
inflated to the correct inflation
pressure. If the vehicle has DIC
buttons, tire pressure levels can be
viewed. For additional information
and details about the DIC operation
and displays, seeDriver Information
Center (DIC) 0111.
The low tire pressure warning light
may come on in cool weather when
the vehicle is first started, and then
turn off as the vehicle is driven. This
could be an early indicator that the
air pressure is getting low and
needs to be inflated to the proper
pressure.
A Tire and Loading Information label
shows the size of the original
equipment tires and the correct
inflation pressure for the tires when
they are cold. See Vehicle Load
Limits 0169, for an example of the
Tire and Loading Information label
and its location. Also see Tire
Pressure 0263.
The TPMS can warn about a low
tire pressure condition but it does
not replace normal tire maintenance. See
Tire Inspection
0 268, Tire Rotation 0268 andTires
0 255.
Caution
Tire sealant materials are not all
the same. A non-approved tire
sealant could damage the TPMS
sensors. TPMS sensor damage
caused by using an incorrect tire
sealant is not covered by the
vehicle warranty. Always use only
the GM approved tire sealant
available through your dealer or
included in the vehicle.
TPMS Malfunction Light and
Message
The TPMS will not function properly
if one or more of the TPMS sensors
are missing or inoperable. When the
system detects a malfunction, the
low tire pressure warning light
flashes for about one minute and
then stays on for the remainder of
the ignition cycle. A DIC warning
message also displays. The malfunction light and DIC warning
message come on at each ignition
cycle until the problem is corrected.
Some of the conditions that can
cause these to come on are:
.
One of the road tires has been
replaced with the spare tire. The
spare tire does not have a
TPMS sensor. The malfunction
light and the DIC message
should go off after the road tire
is replaced and the sensor
matching process is performed
successfully. See "TPMS Sensor
Matching Process" later in this
section.
. The TPMS sensor matching
process was not done or not
completed successfully after
rotating the tires. The
malfunction light and the DIC
message should go off after
successfully completing the
sensor matching process. See
"TPMS Sensor Matching
Process" later in this section.
. One or more TPMS sensors are
missing or damaged. The
malfunction light and the DIC
Page 268 of 356
Chevrolet Express Owner Manual (GMNA-Localizing-U.S./Canada/Mexico-
11374212) - 2018 - crc - 2/2/18
Vehicle Care 267
message should go off when the
TPMS sensors are installed and
the sensor matching process is
performed successfully. See
your dealer for service.
. Replacement tires or wheels do
not match the original equipment
tires or wheels. Tires and wheels
other than those recommended
could prevent the TPMS from
functioning properly. See Buying
New Tires 0271.
. Operating electronic devices or
being near facilities using radio
wave frequencies similar to the
TPMS could cause the TPMS
sensors to malfunction.
If the TPMS is not functioning
properly, it cannot detect or signal a
low tire pressure condition. See
your dealer for service if the TPMS
malfunction light and DIC message
come on and stay on.
TPMS Sensor Matching
Process
Each TPMS sensor has a unique
identification code. The identification
code needs to be matched to a new tire/wheel position after rotating the
vehicle’s tires or replacing one or
more of the TPMS sensors. Also,
the TPMS sensor matching process
should be performed after replacing
a spare tire with a road tire
containing the TPMS sensor. The
malfunction light and the DIC
message should go off at the next
ignition cycle. The sensors are
matched to the tire/wheel positions,
using a TPMS relearn tool, in the
following order: driver side front tire,
passenger side front tire, passenger
side rear tire, and driver side rear.
See your dealer for service or to
purchase a relearn tool. A TPMS
relearn tool can also be purchased.
See Tire Pressure Monitor Sensor
Activation Tool at
www.gmtoolsandequipment.com or
call 1-800-GM TOOLS
(1-800-468-6657).
There are two minutes to match the
first tire/wheel position, and
five minutes overall to match all four
tire/wheel positions. If it takes
longer, the matching process stops
and must be restarted.
The TPMS sensor matching
process is:
1. Set the parking brake.
2. Turn the ignition on without starting the vehicle. See
Ignition Positions 0174.
3. Press the Remote Keyless Entry (RKE) transmitter's
Q
andKbuttons at the same
time for approximately
five seconds. The horn sounds
twice to signal the receiver is in
relearn mode and TIRE
LEARNING ACTIVE message
displays on the DIC screen.
If the vehicle does not have
RKE, press the Driver
Information Center (DIC)
vehicle information button until
the PRESS VTO RELEARN
TIRE POSITIONS message
displays. The horn sounds
twice to signal the receiver is in
relearn mode and TIRE
LEARNING ACTIVE message
displays on the DIC screen.
Page 269 of 356
Chevrolet Express Owner Manual (GMNA-Localizing-U.S./Canada/Mexico-
11374212) - 2018 - crc - 2/2/18
268 Vehicle Care
4. Start with the driver sidefront tire.
5. Place the relearn tool against the tire sidewall, near the valve
stem. Then press the button to
activate the TPMS sensor.
A horn chirp confirms that the
sensor identification code has
been matched to this tire and
wheel position.
6. Proceed to the passenger side front tire, and repeat the
procedure in Step 5.
7. Proceed to the passenger side rear tire, and repeat the
procedure in Step 5.
8. Proceed to the driver side rear tire, and repeat the procedure
in Step 5. The horn sounds two
times to indicate the sensor
identification code has been
matched to the driver side rear
tire, and the TPMS sensor
matching process is no longer
active. The TIRE LEARNING
ACTIVE message on the DIC
display screen goes off.
9. Turn the vehicle off. 10. Set all four tires to the
recommended air pressure
level as indicated on the Tire
and Loading Information label.
Tire Inspection
We recommend that the tires,
including the spare tire, if the
vehicle has one, be inspected
for signs of wear or damage at
least once a month.
Replace the tire if:
.The indicators at three or
more places around the tire
can be seen.
.There is cord or fabric
showing through the tire's
rubber.
.The tread or sidewall is
cracked, cut, or snagged
deep enough to show cord or
fabric.
.The tire has a bump, bulge,
or split.
.The tire has a puncture, cut,
or other damage that cannot
be repaired well because of
the size or location of the
damage.
Tire Rotation
Tires should be rotated every
12 000 km (7,500 mi). See
Maintenance Schedule 0303.
Tires are rotated to achieve a
uniform wear for all tires. The
first rotation is the most
important.
Any time unusual wear is
noticed, rotate the tires as soon
as possible and check the wheel
alignment. Also check for
damaged tires or wheels.
See When It Is Time for New
Tires 0270 andWheel
Replacement 0275.
Page 299 of 356
Chevrolet Express Owner Manual (GMNA-Localizing-U.S./Canada/Mexico-
11374212) - 2018 - crc - 2/2/18
298 Vehicle Care
Fabric/Carpet/Suede
Start by vacuuming the surface
using a soft brush attachment. If a
rotating vacuum brush attachment is
being used, only use it on the floor
carpet. Before cleaning, gently
remove as much of the soil as
possible:
.Gently blot liquids with a paper
towel. Continue blotting until no
more soil can be removed.
. For solid soils, remove as much
as possible prior to vacuuming.
To clean: 1. Saturate a clean, lint-free colorfast cloth with water.
Microfiber cloth is
recommended to prevent lint
transfer to the fabric or carpet.
2. Remove excess moisture by gently wringing until water does
not drip from the cleaning cloth.
3. Start on the outside edge of the soil and gently rub toward the
center. Fold the cleaning cloth to a clean area frequently to
prevent forcing the soil in to the
fabric.
4. Continue gently rubbing the soiled area until there is no
longer any color transfer from
the soil to the cleaning cloth.
5. If the soil is not completely removed, use a mild soap
solution followed only by plain
water.
If the soil is not completely
removed, it may be necessary to
use a commercial upholstery
cleaner or spot lifter. Test a small
hidden area for colorfastness before
using a commercial upholstery
cleaner or spot lifter. If ring
formation occurs, clean the entire
fabric or carpet.
After cleaning, use a paper towel to
blot excess moisture.
Cleaning High Gloss Surfaces
and Vehicle Information and
Radio Displays
Use a microfiber cloth on high gloss
surfaces or vehicle displays. First,
use a soft bristle brush to remove
dirt that can scratch the surface.
Then gently clean by rubbing with a
microfiber cloth. Never use window
cleaners or solvents. Periodically
hand wash the microfiber cloth
separately, using mild soap. Do not
use bleach or fabric softener. Rinse
thoroughly and air dry before
next use.
Caution
Do not attach a device with a
suction cup to the display. This
may cause damage and would
not be covered by the vehicle
warranty.
Page 304 of 356
Chevrolet Express Owner Manual (GMNA-Localizing-U.S./Canada/Mexico-
11374212) - 2018 - crc - 2/2/18
Service and Maintenance 303
Maintenance
Schedule
Owner Checks and Services
At Each Fuel Stop
.Check the engine oil level. See
Engine Oil 0220.
Once a Month
. Check the tire inflation
pressures. See Tire Pressure
0 263.
. Inspect the tires for wear. See
Tire Inspection 0268.
. Check the windshield washer
fluid level. See Washer Fluid
0 235.
Engine Oil Change
When the CHANGE ENGINE OIL
SOON message displays, have the
engine oil and filter changed within
the next 1 000 km/600 mi. If driven
under the best conditions, the
engine oil life system may not
indicate the need for vehicle service
for up to a year. The engine oil and filter must be changed at least once
a year and the oil life system must
be reset. Your trained dealer
technician can perform this work.
If the engine oil life system is reset
accidentally, service the vehicle
within 5 000 km/3,000 mi since the
last service. Reset the oil life
system when the oil is changed.
See
Engine Oil Life System 0222.
Power Take Off (PTO) and
Extended Idle Use
When the vehicle is used with the
PTO equipment or used in a way
that requires extended idle time,
one hour of use shall be deemed
the same as 53 km (33 mi). See
Driver Information Center (DIC)
0111 for hourmeter.
Tire Rotation and Required
Services Every 12 000 km/
7,500 mi
Rotate the tires, if recommended for
the vehicle, and perform the
following services. See Tire
Rotation 0268. .
Check engine oil level and oil
life percentage. If needed,
change engine oil and filter, and
reset oil life system.
See Engine Oil 0220 and
Engine Oil Life System 0222.
. Check engine coolant level. See
Cooling System 0229.
. Check windshield washer fluid
level. See Washer Fluid 0235.
. Visually inspect windshield wiper
blades for wear, cracking,
or contamination. See Exterior
Care 0292. Replace worn or
damaged wiper blades. See
Wiper Blade Replacement
0 242.
. Check tire inflation pressures.
See Tire Pressure 0263.
. Inspect tire wear. See Tire
Inspection 0268.
. Visually check for fluid leaks.
. Inspect engine air cleaner filter.
See Engine Air Cleaner/Filter
0 227.
. Inspect brake system. See
Exterior Care 0292.
Page 334 of 356
Chevrolet Express Owner Manual (GMNA-Localizing-U.S./Canada/Mexico-
11374212) - 2018 - crc - 2/2/18
OnStar 333
Press=to:
. Open the OnStar app on the
infotainment display. See the
infotainment manual for
information on how to use the
OnStar app.
Or
. Make a call, end a call,
or answer an incoming call.
. Give OnStar Hands-Free Calling
voice commands.
. Give OnStar Turn-by-Turn
Navigation voice commands.
. Obtain and customize the Wi-Fi
hotspot name or SSID and
password, if equipped.
Press
Qto connect to an
Advisor to:
. Verify account information or
update contact information.
. Get driving directions. .
Receive a Diagnostic check of
the vehicle's key operating
systems.
. Receive Roadside Assistance.
. Manage Wi-Fi Settings,
if equipped.
Press
>to get a priority connection
to an OnStar Advisor available 24/
7 to:
. Get help for an emergency.
. Be a Good Samaritan or
respond to an AMBER Alert.
. Get assistance in severe
weather or other crisis situations
and find evacuation routes.
OnStar Services
Emergency
Emergency Services require an
active, OnStar service plan
(excludes Basic Plan). With
Automatic Crash Response, built-in
sensors can automatically alert a
specially trained OnStar Advisor
who is immediately connected in to
the vehicle to help.
Press
>for a priority connection to
an OnStar Advisor who can contact
emergency service providers, direct
them to your exact location, and
relay important information.
With OnStar Crisis Assist, specially
trained Advisors are available
24 hours a day, 7 days a week, to
provide a central point of contact,
assistance, and information during a
crisis.
With Roadside Assistance, Advisors
can locate a nearby service provider
to help with a flat tire, a battery
jump, or an empty gas tank.