check engine CHEVROLET EXPRESS 2021 Owners Manual
[x] Cancel search | Manufacturer: CHEVROLET, Model Year: 2021, Model line: EXPRESS, Model: CHEVROLET EXPRESS 2021Pages: 289, PDF Size: 11.46 MB
Page 6 of 289
Chevrolet Express Owner Manual (GMNA-Localizing-U.S./Canada/Mexico-
15555951) - 2022 - CRC - 1/27/22
Introduction 5
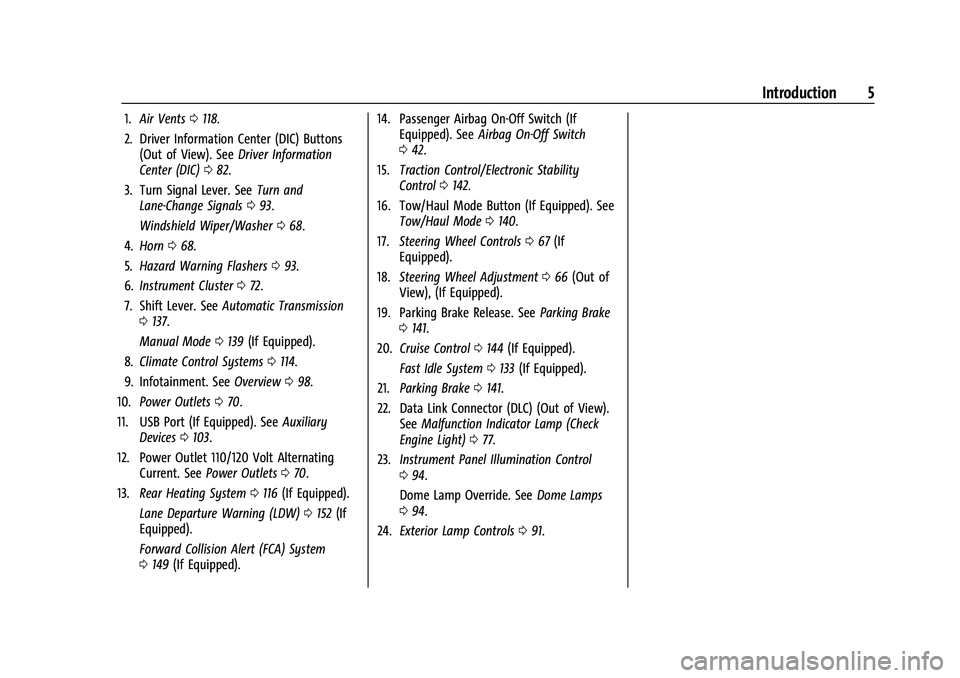
1.Air Vents 0118.
2. Driver Information Center (DIC) Buttons (Out of View). See Driver Information
Center (DIC) 082.
3. Turn Signal Lever. See Turn and
Lane-Change Signals 093.
Windshield Wiper/Washer 068.
4. Horn 068.
5. Hazard Warning Flashers 093.
6. Instrument Cluster 072.
7. Shift Lever. See Automatic Transmission
0 137.
Manual Mode 0139 (If Equipped).
8. Climate Control Systems 0114.
9. Infotainment. See Overview098.
10. Power Outlets 070.
11. USB Port (If Equipped). See Auxiliary
Devices 0103.
12. Power Outlet 110/120 Volt Alternating Current. See Power Outlets 070.
13. Rear Heating System 0116 (If Equipped).
Lane Departure Warning (LDW) 0152 (If
Equipped).
Forward Collision Alert (FCA) System
0 149 (If Equipped). 14. Passenger Airbag On-Off Switch (If
Equipped). See Airbag On-Off Switch
0 42.
15. Traction Control/Electronic Stability
Control 0142.
16. Tow/Haul Mode Button (If Equipped). See Tow/Haul Mode 0140.
17. Steering Wheel Controls 067 (If
Equipped).
18. Steering Wheel Adjustment 066 (Out of
View), (If Equipped).
19. Parking Brake Release. See Parking Brake
0 141.
20. Cruise Control 0144 (If Equipped).
Fast Idle System 0133 (If Equipped).
21. Parking Brake 0141.
22. Data Link Connector (DLC) (Out of View). SeeMalfunction Indicator Lamp (Check
Engine Light) 077.
23. Instrument Panel Illumination Control
094.
Dome Lamp Override. See Dome Lamps
0 94.
24. Exterior Lamp Controls 091.
Page 9 of 289
Chevrolet Express Owner Manual (GMNA-Localizing-U.S./Canada/Mexico-
15555951) - 2022 - CRC - 1/27/22
8 Keys, Doors, and Windows
With an active OnStar or connected service
plan, an OnStar Advisor may remotely
unlock the vehicle. SeeOnStar Overview
0 270.
Remote Keyless Entry (RKE)
System
See Radio Frequency Statement 0267.
If there is a decrease in the Remote Keyless
Entry (RKE) operating range:
.Check the distance. The transmitter may
be too far from the vehicle.
.Check the location. Other vehicles or
objects may be blocking the signal.
.Check the transmitter's battery. See
“Battery Replacement” later in this
section.
.If the transmitter is still not working
correctly, see your dealer or a qualified
technician for service.
Remote Keyless Entry (RKE)
System Operation
If equipped, the RKE transmitter functions
work up to 60 m (197 ft) away from the
vehicle. Other conditions can affect the performance
of the transmitter. See
Remote Keyless Entry
(RKE) System 08.
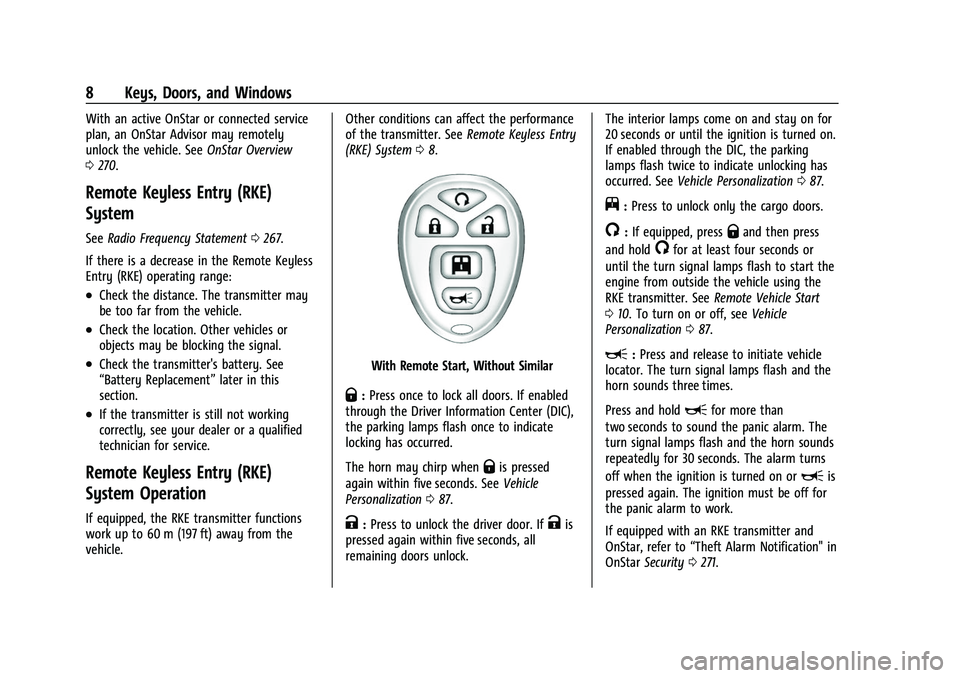
With Remote Start, Without Similar
Q:Press once to lock all doors. If enabled
through the Driver Information Center (DIC),
the parking lamps flash once to indicate
locking has occurred.
The horn may chirp when
Qis pressed
again within five seconds. See Vehicle
Personalization 087.
K:Press to unlock the driver door. IfKis
pressed again within five seconds, all
remaining doors unlock. The interior lamps come on and stay on for
20 seconds or until the ignition is turned on.
If enabled through the DIC, the parking
lamps flash twice to indicate unlocking has
occurred. See
Vehicle Personalization 087.
j:Press to unlock only the cargo doors.
/:If equipped, pressQand then press
and hold
/for at least four seconds or
until the turn signal lamps flash to start the
engine from outside the vehicle using the
RKE transmitter. See Remote Vehicle Start
0 10. To turn on or off, see Vehicle
Personalization 087.
L:Press and release to initiate vehicle
locator. The turn signal lamps flash and the
horn sounds three times.
Press and hold
Lfor more than
two seconds to sound the panic alarm. The
turn signal lamps flash and the horn sounds
repeatedly for 30 seconds. The alarm turns
off when the ignition is turned on or
Lis
pressed again. The ignition must be off for
the panic alarm to work.
If equipped with an RKE transmitter and
OnStar, refer to “Theft Alarm Notification" in
OnStar Security 0271.
Page 11 of 289
Chevrolet Express Owner Manual (GMNA-Localizing-U.S./Canada/Mexico-
15555951) - 2022 - CRC - 1/27/22
10 Keys, Doors, and Windows
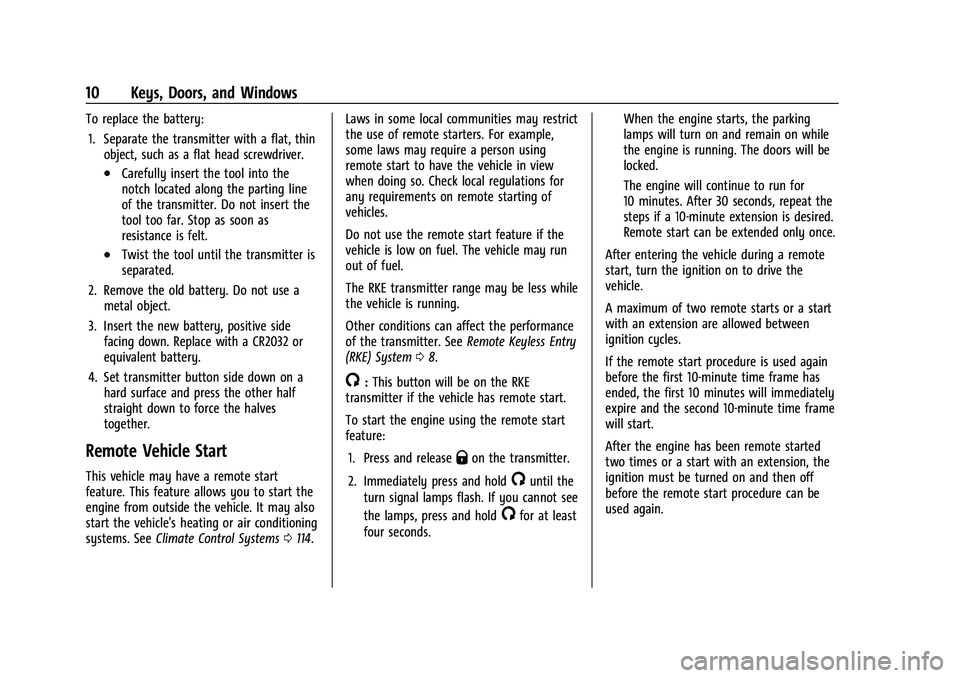
To replace the battery:1. Separate the transmitter with a flat, thin object, such as a flat head screwdriver.
.Carefully insert the tool into the
notch located along the parting line
of the transmitter. Do not insert the
tool too far. Stop as soon as
resistance is felt.
.Twist the tool until the transmitter is
separated.
2. Remove the old battery. Do not use a metal object.
3. Insert the new battery, positive side facing down. Replace with a CR2032 or
equivalent battery.
4. Set transmitter button side down on a hard surface and press the other half
straight down to force the halves
together.
Remote Vehicle Start
This vehicle may have a remote start
feature. This feature allows you to start the
engine from outside the vehicle. It may also
start the vehicle's heating or air conditioning
systems. See Climate Control Systems 0114. Laws in some local communities may restrict
the use of remote starters. For example,
some laws may require a person using
remote start to have the vehicle in view
when doing so. Check local regulations for
any requirements on remote starting of
vehicles.
Do not use the remote start feature if the
vehicle is low on fuel. The vehicle may run
out of fuel.
The RKE transmitter range may be less while
the vehicle is running.
Other conditions can affect the performance
of the transmitter. See
Remote Keyless Entry
(RKE) System 08.
/:This button will be on the RKE
transmitter if the vehicle has remote start.
To start the engine using the remote start
feature:
1. Press and release
Qon the transmitter.
2. Immediately press and hold
/until the
turn signal lamps flash. If you cannot see
the lamps, press and hold
/for at least
four seconds. When the engine starts, the parking
lamps will turn on and remain on while
the engine is running. The doors will be
locked.
The engine will continue to run for
10 minutes. After 30 seconds, repeat the
steps if a 10-minute extension is desired.
Remote start can be extended only once.
After entering the vehicle during a remote
start, turn the ignition on to drive the
vehicle.
A maximum of two remote starts or a start
with an extension are allowed between
ignition cycles.
If the remote start procedure is used again
before the first 10-minute time frame has
ended, the first 10 minutes will immediately
expire and the second 10-minute time frame
will start.
After the engine has been remote started
two times or a start with an extension, the
ignition must be turned on and then off
before the remote start procedure can be
used again.
Page 12 of 289
Chevrolet Express Owner Manual (GMNA-Localizing-U.S./Canada/Mexico-
15555951) - 2022 - CRC - 1/27/22
Keys, Doors, and Windows 11
To cancel a remote start do any of the
following:
.Press and hold/until the parking lamps
turn off.
.Turn on the hazard warning flashers.
.Turn the ignition on and then off.
The remote vehicle start feature will not
operate if:
.The key is in the ignition.
.The hood is open.
.The hazard warning flashers are on.
.There is an emission control system
malfunction. See Malfunction Indicator
Lamp (Check Engine Light) 077.
.The engine coolant temperature is
too high.
.The oil pressure is low.
.The vehicle is not in park.
.Two remote starts or a start with an
extension have already been provided.
To turn on or off, see Vehicle Personalization
0 87.
Door Locks
{Warning
.Passengers, especially children, can
easily open the doors and fall out of a
moving vehicle. When a door is locked,
the handle will not open it. The
chance of being thrown out of the
vehicle in a crash is increased if the
doors are not locked. So, all
passengers should wear seat belts
properly and the doors should be
locked whenever the vehicle is driven.
.Young children who get into unlocked
vehicles may be unable to get out.
A child can be overcome by extreme
heat and can suffer permanent injuries
or even death from heat stroke.
Always lock the vehicle whenever
leaving it.
.Outsiders can easily enter through an
unlocked door when you slow down
or stop the vehicle. Locking the doors
can help prevent this from happening.
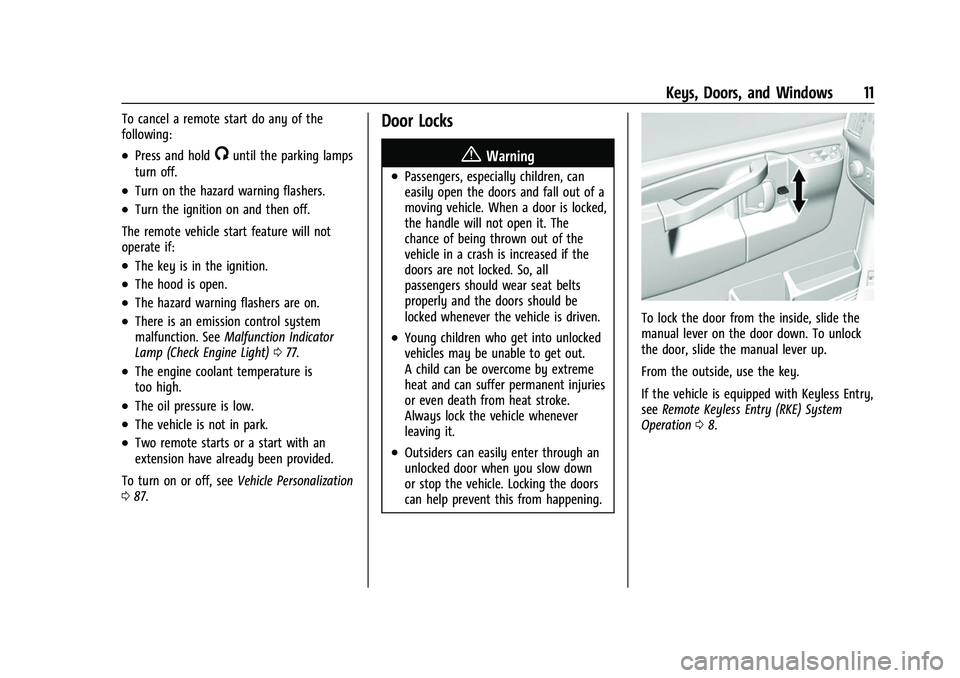
To lock the door from the inside, slide the
manual lever on the door down. To unlock
the door, slide the manual lever up.
From the outside, use the key.
If the vehicle is equipped with Keyless Entry,
see Remote Keyless Entry (RKE) System
Operation 08.
Page 17 of 289
Chevrolet Express Owner Manual (GMNA-Localizing-U.S./Canada/Mexico-
15555951) - 2022 - CRC - 1/27/22
16 Keys, Doors, and Windows
Disarming the Alarm System
To disarm the alarm system or turn off the
alarm if it has been activated:
.PressKon the RKE transmitter.
.Start the vehicle.
To avoid setting off the alarm by accident:
.Lock the vehicle after all occupants have
left the vehicle and all doors are closed.
.Always unlock a door with the RKE
transmitter.
Unlocking the driver door with the key will
not disarm the system or turn off the alarm.
How to Detect a Tamper Condition
IfKis pressed and the horn chirps and the
lights flash three times, the alarm was
activated while the alarm system was
armed.
If the alarm system has been activated, and
allowed to complete an event
(approximately one minute), a message will
appear on the Driver Information Center
(DIC) the next time the vehicle is started.
Theft Alarm Notification
To enable e-mail or text notification, see
“Theft Alarm Notification” in OnStarSecurity
0 271.
Testing the Alarm
To test the alarm:
1. Lower the driver window and open the driver door.
2. Press
Qon the RKE transmitter.
3. Close the door and wait for a few seconds.
4. Reach in through the open window, unlock the door with the manual door
lock, and open the door.
This should set off the alarm.
If the alarm does not sound when it
should but the lamps flash, check to see
if the horn works. The horn fuse may be
blown. To replace the fuse, see Fuses and
Circuit Breakers 0198.
Immobilizer
See Radio Frequency Statement 0267.
Immobilizer Operation
This vehicle is equipped with the
PASS-Key®III+ (Personalized Automotive
Security System) theft-deterrent system.
PASS-Key III+ is a passive theft deterrent
system.
The system is automatically armed when
the key is removed from the ignition.
You do not have to manually arm or disarm
the system.
The security light will come on if there is a
problem with arming or disarming the
theft-deterrent system.
If the engine does not start and the security
light comes on, the key may have a
damaged transponder. Turn the ignition off
and try again.
If the engine still does not start, and the
key appears to be undamaged, try another
ignition key. If the engine still does not
start with the other key, the vehicle needs
service. If the vehicle does start, the first
key may be faulty. See your dealer or a
locksmith who can service the PASS-Key III+
to have a new key made.
Page 18 of 289
Chevrolet Express Owner Manual (GMNA-Localizing-U.S./Canada/Mexico-
15555951) - 2022 - CRC - 1/27/22
Keys, Doors, and Windows 17
It is possible for the PASS-Key III+ decoder to
learn the transponder value of a new or
replacement key. Up to eight keys may be
programmed for the vehicle. This procedure
is for learning additional keys only. If all the
currently programmed keys are lost or do
not operate, you must see your dealer or a
locksmith who can service PASS-Key III+ to
have keys made and programmed to the
system.
See your dealer or a locksmith who can
service PASS-Key III+ to get a new key blank
that is cut exactly as the ignition key that
operates the system.
To program the new key:1. Verify the new key has
1stamped
on it.
2. Insert the original, already programmed key into the ignition lock cylinder and
start the engine. If the engine will not
start, see your dealer for service.
3. After the engine has started, turn the ignition off and remove the key.
4. Insert the key to be programmed and turn the ignition on within 10 seconds of
removing the previous key. The security message will turn off once
the key has been programmed. It may
not be apparent that the security
message went on due to how quickly
the key is programmed.
5. Repeat Steps 1–4 if additional keys are to be programmed.
If you lose or damage a PASS-Key III+ key,
see your dealer or a locksmith who can
service PASS-Key III+ to have a new
key made.
Do not leave the key or device that disarms
or deactivates the theft-deterrent system in
the vehicle.Exterior Mirrors
Convex Mirrors
{Warning
A convex mirror can make things, like
other vehicles, look farther away than
they really are. If you cut too sharply
into the next lane, you could hit a vehicle
that is driving next to you. Check the
inside mirror or glance over your
shoulder before changing lanes. If equipped, the lower portion of the driver
and passenger side mirror is convex.
A convex mirror's surface is curved so more
can be seen from the driver seat. The
convex mirror can be adjusted manually to
the driver preferred position for better
vision.
Manual Mirrors
Adjust the mirrors by moving the mirror up
and down and left and right.
The mirrors can be manually folded
in or out.
On the lower portion of each mirror is an
auxiliary convex mirror. A convex mirror's
surface is curved so you can see more from
the driver seat. The auxiliary convex mirrors
can be adjusted manually by moving the
mirror.
Page 67 of 289
Chevrolet Express Owner Manual (GMNA-Localizing-U.S./Canada/Mexico-
15555951) - 2022 - CRC - 1/27/22
66 Instruments and Controls
Instruments and Controls
Controls
Steering Wheel Adjustment . . . . . . . . . . . . 66
Steering Wheel Controls . . . . . . . . . . . . . . . . 67
Horn . . . . . . . . . . . . . . . . . . . . . . . . . . . . . . . . . . . 68
Windshield Wiper/Washer . . . . . . . . . . . . . 68
Compass . . . . . . . . . . . . . . . . . . . . . . . . . . . . . . . 68
Clock . . . . . . . . . . . . . . . . . . . . . . . . . . . . . . . . . . . 70
Power Outlets . . . . . . . . . . . . . . . . . . . . . . . . . . 70
Cigarette Lighter . . . . . . . . . . . . . . . . . . . . . . . . 71
Ashtrays . . . . . . . . . . . . . . . . . . . . . . . . . . . . . . . . 71
Warning Lights, Gauges, and Indicators
Warning Lights, Gauges, andIndicators . . . . . . . . . . . . . . . . . . . . . . . . . . . . . 71
Instrument Cluster . . . . . . . . . . . . . . . . . . . . . . 72
Speedometer . . . . . . . . . . . . . . . . . . . . . . . . . . . 72
Odometer . . . . . . . . . . . . . . . . . . . . . . . . . . . . . . 72
Trip Odometer . . . . . . . . . . . . . . . . . . . . . . . . . . 72
Fuel Gauge . . . . . . . . . . . . . . . . . . . . . . . . . . . . . 72
Engine Oil Pressure Gauge . . . . . . . . . . . . . . 73
Engine Coolant Temperature Gauge . . . . 74
Voltmeter Gauge . . . . . . . . . . . . . . . . . . . . . . . 74
Seat Belt Reminders . . . . . . . . . . . . . . . . . . . . 75
Airbag Readiness Light . . . . . . . . . . . . . . . . . . 75
Airbag On-Off Light . . . . . . . . . . . . . . . . . . . . . 76
Charging System Light . . . . . . . . . . . . . . . . . . 77
Malfunction Indicator Lamp (Check Engine Light) . . . . . . . . . . . . . . . . . . . . . . . . . . 77 Brake System Warning Light . . . . . . . . . . . 78
Antilock Brake System (ABS) Warning
Light . . . . . . . . . . . . . . . . . . . . . . . . . . . . . . . . . . 79
Tow/Haul Mode Light . . . . . . . . . . . . . . . . . . 79
Lane Departure Warning (LDW) Light . . . 79
Vehicle Ahead Indicator . . . . . . . . . . . . . . . . 80
StabiliTrak OFF Light . . . . . . . . . . . . . . . . . . . 80
Traction Control System (TCS)/StabiliTrak Light . . . . . . . . . . . . . . . . . . . . . . . . . . . . . . . . . 80
Tire Pressure Light . . . . . . . . . . . . . . . . . . . . . 80
Engine Oil Pressure Light . . . . . . . . . . . . . . . 81
Low Fuel Warning Light . . . . . . . . . . . . . . . . 81
Security Light . . . . . . . . . . . . . . . . . . . . . . . . . . 82
High-Beam On Light . . . . . . . . . . . . . . . . . . . . 82
Cruise Control Light . . . . . . . . . . . . . . . . . . . . 82
Information Displays
Driver Information Center (DIC) . . . . . . . . . 82
Vehicle Messages
Vehicle Messages . . . . . . . . . . . . . . . . . . . . . . 86
Engine Power Messages . . . . . . . . . . . . . . . . 86
Vehicle Speed Messages . . . . . . . . . . . . . . . . 87
Vehicle Personalization
Vehicle Personalization . . . . . . . . . . . . . . . . . 87
Controls
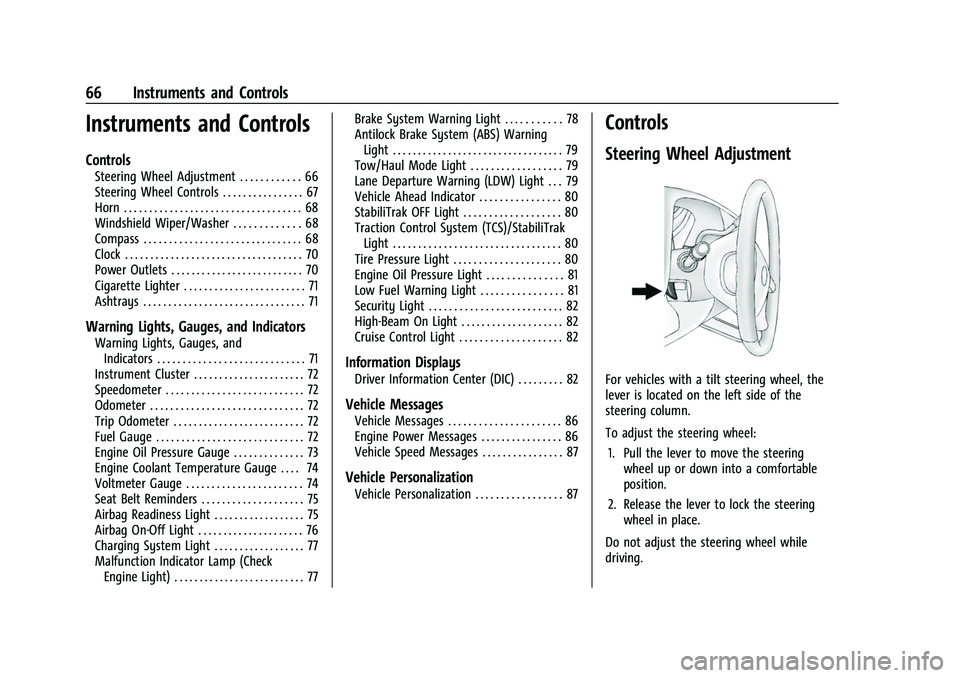
Steering Wheel Adjustment
For vehicles with a tilt steering wheel, the
lever is located on the left side of the
steering column.
To adjust the steering wheel:
1. Pull the lever to move the steering wheel up or down into a comfortable
position.
2. Release the lever to lock the steering wheel in place.
Do not adjust the steering wheel while
driving.
Page 72 of 289
Chevrolet Express Owner Manual (GMNA-Localizing-U.S./Canada/Mexico-
15555951) - 2022 - CRC - 1/27/22
Instruments and Controls 71
The 110/120 volt power outlet is on the
instrument panel.
An indicator light on the outlet turns on to
show it is in use. The light comes on when
the ignition is on, equipment requiring less
than 150 watts is plugged into the outlet,
and no system fault is detected.
The indicator light does not come on when
the ignition is off, or if the equipment is not
fully seated into the outlet.
If equipment is connected using more than
150 watts or a system fault is detected, a
protection circuit shuts off the power supply
and the indicator light turns off. To reset
the circuit, unplug the item and plug it back
in or turn the Retained Accessory Power
(RAP) off and then back on. SeeRetained
Accessory Power (RAP) 0133.
The power outlet is not designed for the
following, and may not work properly if
they are plugged in:
.Equipment with high initial peak wattage,
such as compressor-driven refrigerators
and electric power tools
.Other equipment requiring an extremely
stable power supply, such as
microcomputer-controlled electric blankets
and touch sensor lamps
.Medical equipment
Cigarette Lighter
If equipped with a cigarette lighter, to heat,
push it in all the way and let go. When it is
ready for use, it will pop back out by itself.
Do not use the lighter to plug in accessory
devices. Use the power outlets provided.
Caution
Holding a cigarette lighter in while it is
heating does not let the lighter back
away from the heating element when it
is hot. Damage from overheating can
occur to the lighter or heating element,
or a fuse could be blown. Do not hold a
cigarette lighter in while it is heating.
Ashtrays
If equipped with a removable ashtray, it can
be placed into the front floor console
cupholder. Open the cover to use.
Caution
If papers, pins, or other flammable items
are put in the ashtray, hot cigarettes or
other smoking materials could ignite
(Continued)
Caution (Continued)
them and possibly damage the vehicle.
Never put flammable items in the
ashtray.
Warning Lights, Gauges, and
Indicators
Warning lights and gauges can signal that
something is wrong before it becomes
serious enough to cause an expensive repair
or replacement. Paying attention to the
warning lights and gauges could prevent
injury.
Some warning lights come on briefly when
the engine is started to indicate they are
working. When one of the warning lights
comes on and stays on while driving,
or when one of the gauges shows there
may be a problem, check the section that
explains what to do. Waiting to do repairs
can be costly and even dangerous.
Page 75 of 289
Chevrolet Express Owner Manual (GMNA-Localizing-U.S./Canada/Mexico-
15555951) - 2022 - CRC - 1/27/22
74 Instruments and Controls
Caution
Lack of proper engine oil maintenance
can damage the engine. Driving with the
engine oil low can also damage the
engine. The repairs would not be covered
by the vehicle warranty. Check the oil
level as soon as possible. Add oil if
required, but if the oil level is within the
operating range and the oil pressure is
still low, have the vehicle serviced.
Always follow the maintenance schedule
for changing engine oil.
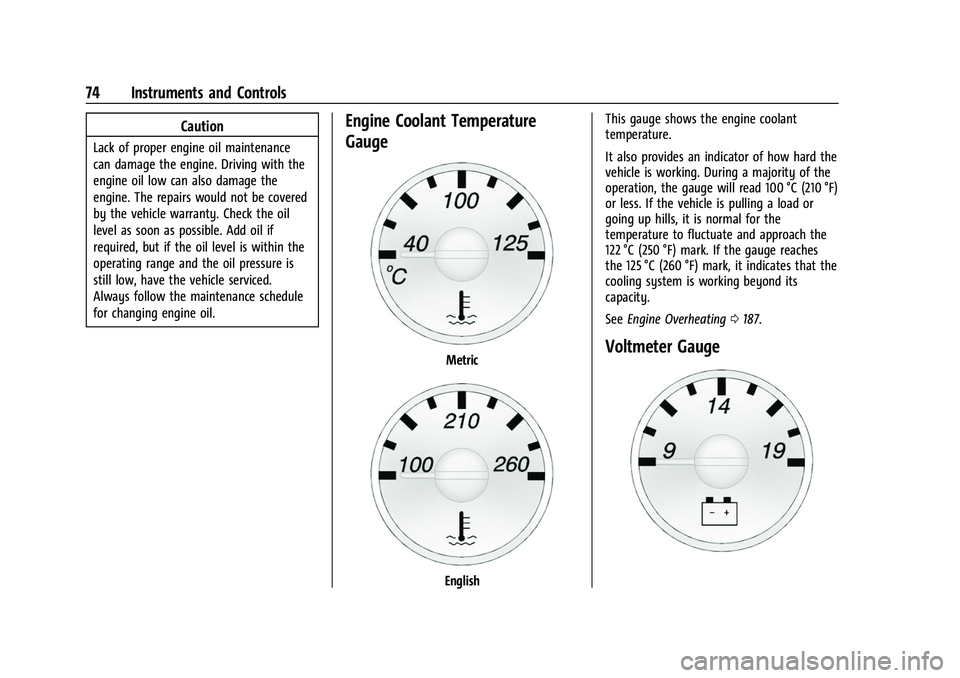
Engine Coolant Temperature
Gauge
Metric
EnglishThis gauge shows the engine coolant
temperature.
It also provides an indicator of how hard the
vehicle is working. During a majority of the
operation, the gauge will read 100 °C (210 °F)
or less. If the vehicle is pulling a load or
going up hills, it is normal for the
temperature to fluctuate and approach the
122 °C (250 °F) mark. If the gauge reaches
the 125 °C (260 °F) mark, it indicates that the
cooling system is working beyond its
capacity.
See
Engine Overheating 0187.
Voltmeter Gauge
Page 76 of 289

Chevrolet Express Owner Manual (GMNA-Localizing-U.S./Canada/Mexico-
15555951) - 2022 - CRC - 1/27/22
Instruments and Controls 75
When the engine is not running, but the
ignition is on, this gauge shows the
battery's state of charge in DC volts.
When the engine is running, the gauge
shows the condition of the charging system.
Readings between the low and high warning
zones indicate the normal operating range.
Readings in the low warning zone may occur
when a large number of electrical
accessories are operating in the vehicle and
the engine is left at an idle for an extended
period. This condition is normal since the
charging system is not able to provide full
power at engine idle. As engine speeds are
increased, this condition should correct itself
as higher engine speeds allow the charging
system to create maximum power.
The vehicle can be only driven for a short
time with the reading in either warning
zone. If it must be driven, turn off all
unnecessary accessories.
Readings in either warning zone indicate a
possible problem in the electrical system.
Have the vehicle serviced as soon as
possible.Seat Belt Reminders
Driver Seat Belt Reminder Light
There is a seat belt reminder light on the
instrument cluster.
When the vehicle is started, this light
flashes and a chime may come on to remind
the driver to fasten their seat belt. Then the
light stays on solid until the belt is buckled.
This cycle may continue several times if the
driver remains or becomes unbuckled while
the vehicle is moving.
If the driver seat belt is buckled, neither the
light nor the chime comes on.
Airbag Readiness Light
This light shows if there is an electrical
problem with the airbag system. It is
located in the instrument cluster. The
system check includes the airbag sensor(s),
the airbag on-off switch, the pretensioners
(if equipped), the airbag modules, thewiring, and the crash sensing and diagnostic
module. For more information on the airbag
system, see
Airbag System 037.
The airbag readiness light comes on for
several seconds when the vehicle is started.
If the light does not come on then, have it
fixed immediately.
{Warning
If the airbag readiness light stays on
after the vehicle is started or comes on
while driving, it means the airbag system
might not be working properly. The
airbags in the vehicle might not inflate in
a crash, or they could even inflate
without a crash. To help avoid injury,
have the vehicle serviced right away.
If there is a problem with the airbag
system, a Driver Information Center (DIC)
message may also come on.