coolant temperature CHEVROLET EXPRESS CARGO 2021 Owner's Manual
[x] Cancel search | Manufacturer: CHEVROLET, Model Year: 2021, Model line: EXPRESS CARGO, Model: CHEVROLET EXPRESS CARGO 2021Pages: 296, PDF Size: 6.68 MB
Page 4 of 296
Chevrolet Express Owner Manual (GMNA-Localizing-U.S./Canada/Mexico-
14583525) - 2021 - CRC - 1/4/21
Introduction 3
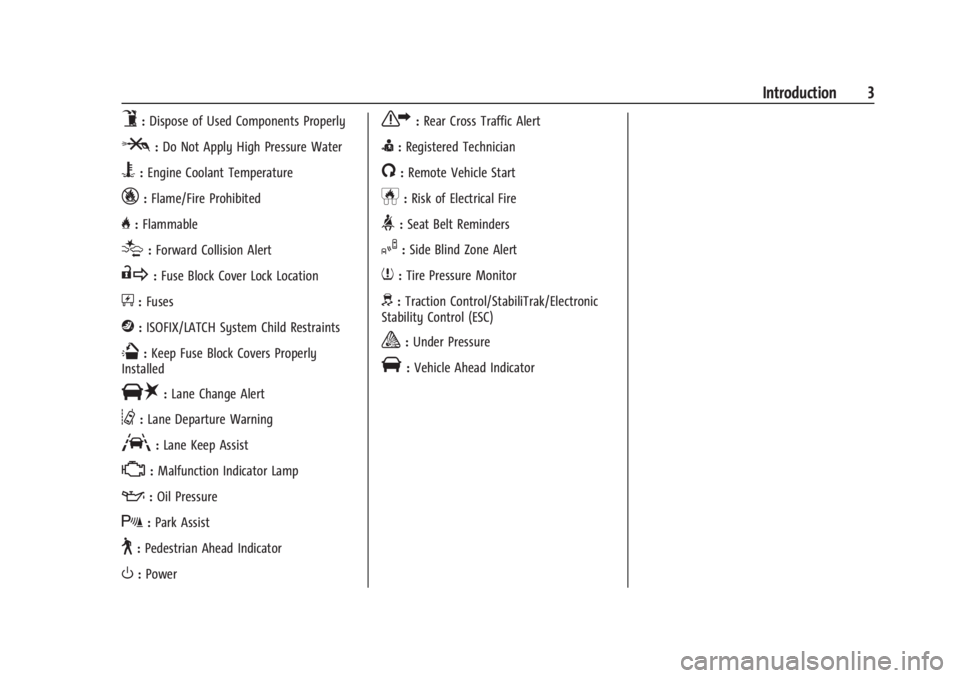
9:Dispose of Used Components Properly
P:Do Not Apply High Pressure Water
B:Engine Coolant Temperature
_:Flame/Fire Prohibited
H: Flammable
[:Forward Collision Alert
R:Fuse Block Cover Lock Location
+:Fuses
j:ISOFIX/LATCH System Child Restraints
Q:Keep Fuse Block Covers Properly
Installed
|: Lane Change Alert
@:Lane Departure Warning
A:Lane Keep Assist
*: Malfunction Indicator Lamp
::Oil Pressure
X:Park Assist
~:Pedestrian Ahead Indicator
O:Power
7:Rear Cross Traffic Alert
I:Registered Technician
/:Remote Vehicle Start
h:Risk of Electrical Fire
>:Seat Belt Reminders
I:Side Blind Zone Alert
7:Tire Pressure Monitor
d:Traction Control/StabiliTrak/Electronic
Stability Control (ESC)
a: Under Pressure
V: Vehicle Ahead Indicator
Page 11 of 296
Chevrolet Express Owner Manual (GMNA-Localizing-U.S./Canada/Mexico-
14583525) - 2021 - CRC - 12/9/20
10 Keys, Doors, and Windows
3. Insert the new battery, positive sidefacing down. Replace with a CR2032 or
equivalent battery.
4. Snap the transmitter back together.
Remote Vehicle Start
This vehicle may have a remote start
feature. This feature allows you to start the
engine from outside the vehicle. It may also
start the vehicle's heating or air conditioning
systems. See Climate Control Systems 0119.
Laws in some local communities may restrict
the use of remote starters. For example,
some laws may require a person using
remote start to have the vehicle in view
when doing so. Check local regulations for
any requirements on remote starting of
vehicles.
Do not use the remote start feature if the
vehicle is low on fuel. The vehicle may run
out of fuel.
The RKE transmitter range may be less while
the vehicle is running.
Other conditions can affect the performance
of the transmitter. See Remote Keyless Entry
(RKE) System 08.
/:This button will be on the RKE
transmitter if the vehicle has remote start.
To start the engine using the remote start
feature:
1. Press and release
Qon the transmitter.
2. Immediately press and hold
/until the
turn signal lamps flash. If you cannot see
the lamps, press and hold
/for at least
four seconds.
When the engine starts, the parking
lamps will turn on and remain on while
the engine is running. The doors will be
locked.
The engine will continue to run for
10 minutes. After 30 seconds, repeat the
steps if a 10-minute extension is desired.
Remote start can be extended only once.
After entering the vehicle during a remote
start, turn the ignition on to drive the
vehicle.
A maximum of two remote starts or a start
with an extension are allowed between
ignition cycles. If the remote start procedure is used again
before the first 10-minute time frame has
ended, the first 10 minutes will immediately
expire and the second 10-minute time frame
will start.
After the engine has been remote started
two times or a start with an extension, the
ignition must be turned on and then off
before the remote start procedure can be
used again.
To cancel a remote start do any of the
following:
.Press and hold/until the parking lamps
turn off.
.Turn on the hazard warning flashers.
.Turn the ignition on and then off.
The remote vehicle start feature will not
operate if:
.The key is in the ignition.
.The hood is open.
.The hazard warning flashers are on.
.There is an emission control system
malfunction. See Malfunction Indicator
Lamp (Check Engine Light) 076.
.The engine coolant temperature is
too high.
.The oil pressure is low.
Page 66 of 296
Chevrolet Express Owner Manual (GMNA-Localizing-U.S./Canada/Mexico-
14583525) - 2021 - CRC - 12/9/20
Instruments and Controls 65
Instruments and Controls
Controls
Steering Wheel Adjustment . . . . . . . . . . . . 65
Steering Wheel Controls . . . . . . . . . . . . . . . 66
Horn . . . . . . . . . . . . . . . . . . . . . . . . . . . . . . . . . . . 67
Windshield Wiper/Washer . . . . . . . . . . . . . . 67
Compass . . . . . . . . . . . . . . . . . . . . . . . . . . . . . . . 67
Clock . . . . . . . . . . . . . . . . . . . . . . . . . . . . . . . . . . . 69
Power Outlets . . . . . . . . . . . . . . . . . . . . . . . . . . 69
Cigarette Lighter . . . . . . . . . . . . . . . . . . . . . . . 70
Ashtrays . . . . . . . . . . . . . . . . . . . . . . . . . . . . . . . . 70
Warning Lights, Gauges, and Indicators
Warning Lights, Gauges, andIndicators . . . . . . . . . . . . . . . . . . . . . . . . . . . . . 70
Instrument Cluster . . . . . . . . . . . . . . . . . . . . . . 71
Speedometer . . . . . . . . . . . . . . . . . . . . . . . . . . . . 71
Odometer . . . . . . . . . . . . . . . . . . . . . . . . . . . . . . . 71
Trip Odometer . . . . . . . . . . . . . . . . . . . . . . . . . . 71
Fuel Gauge . . . . . . . . . . . . . . . . . . . . . . . . . . . . . 72
Engine Oil Pressure Gauge . . . . . . . . . . . . . . 72
Engine Coolant Temperature Gauge . . . . 73
Voltmeter Gauge . . . . . . . . . . . . . . . . . . . . . . . 73
Seat Belt Reminders . . . . . . . . . . . . . . . . . . . . 74
Airbag Readiness Light . . . . . . . . . . . . . . . . . 74
Airbag On-Off Light . . . . . . . . . . . . . . . . . . . . . 75
Charging System Light . . . . . . . . . . . . . . . . . 76
Malfunction Indicator Lamp (Check Engine Light) . . . . . . . . . . . . . . . . . . . . . . . . . 76 Brake System Warning Light . . . . . . . . . . . . 77
Antilock Brake System (ABS) Warning
Light . . . . . . . . . . . . . . . . . . . . . . . . . . . . . . . . . . 78
Tow/Haul Mode Light . . . . . . . . . . . . . . . . . . 78
Lane Departure Warning (LDW) Light . . . 79
Vehicle Ahead Indicator . . . . . . . . . . . . . . . . 79
StabiliTrak OFF Light . . . . . . . . . . . . . . . . . . . . 79
Traction Control System (TCS)/StabiliTrak Light . . . . . . . . . . . . . . . . . . . . . . . . . . . . . . . . . . 79
Tire Pressure Light . . . . . . . . . . . . . . . . . . . . . 80
Engine Oil Pressure Light . . . . . . . . . . . . . . . 80
Low Fuel Warning Light . . . . . . . . . . . . . . . . 80
Security Light . . . . . . . . . . . . . . . . . . . . . . . . . . . 81
High-Beam On Light . . . . . . . . . . . . . . . . . . . . 81
Cruise Control Light . . . . . . . . . . . . . . . . . . . . . 81
Information Displays
Driver Information Center (DIC) . . . . . . . . . 81
Vehicle Messages
Vehicle Messages . . . . . . . . . . . . . . . . . . . . . . . 85
Engine Power Messages . . . . . . . . . . . . . . . . 85
Vehicle Speed Messages . . . . . . . . . . . . . . . . 86
Vehicle Personalization
Vehicle Personalization . . . . . . . . . . . . . . . . . 86
Controls
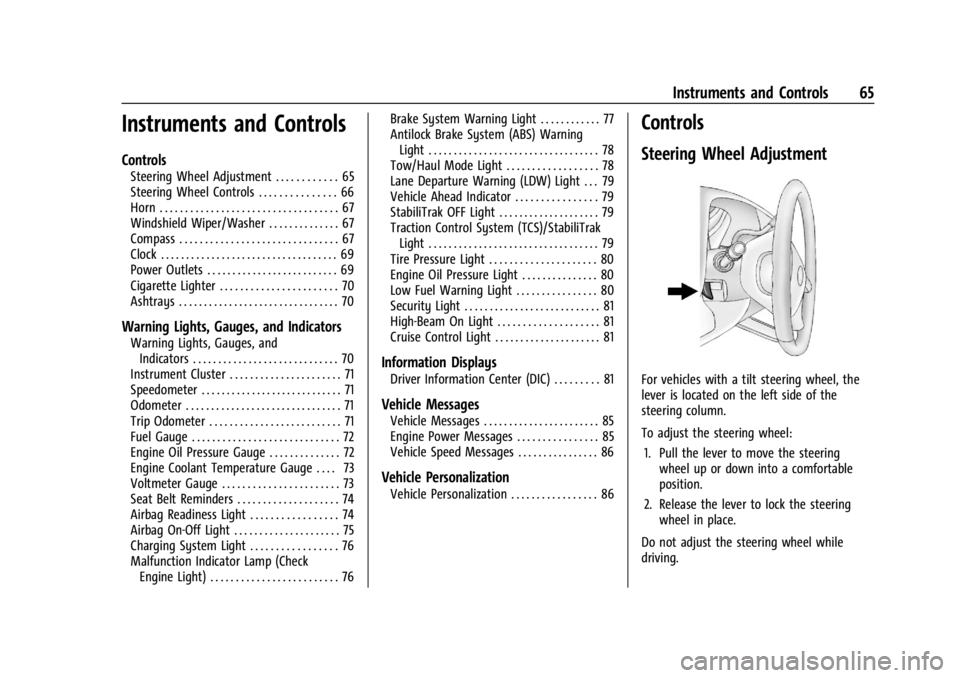
Steering Wheel Adjustment
For vehicles with a tilt steering wheel, the
lever is located on the left side of the
steering column.
To adjust the steering wheel:
1. Pull the lever to move the steering wheel up or down into a comfortable
position.
2. Release the lever to lock the steering wheel in place.
Do not adjust the steering wheel while
driving.
Page 72 of 296
Chevrolet Express Owner Manual (GMNA-Localizing-U.S./Canada/Mexico-
14583525) - 2021 - CRC - 12/9/20
Instruments and Controls 71
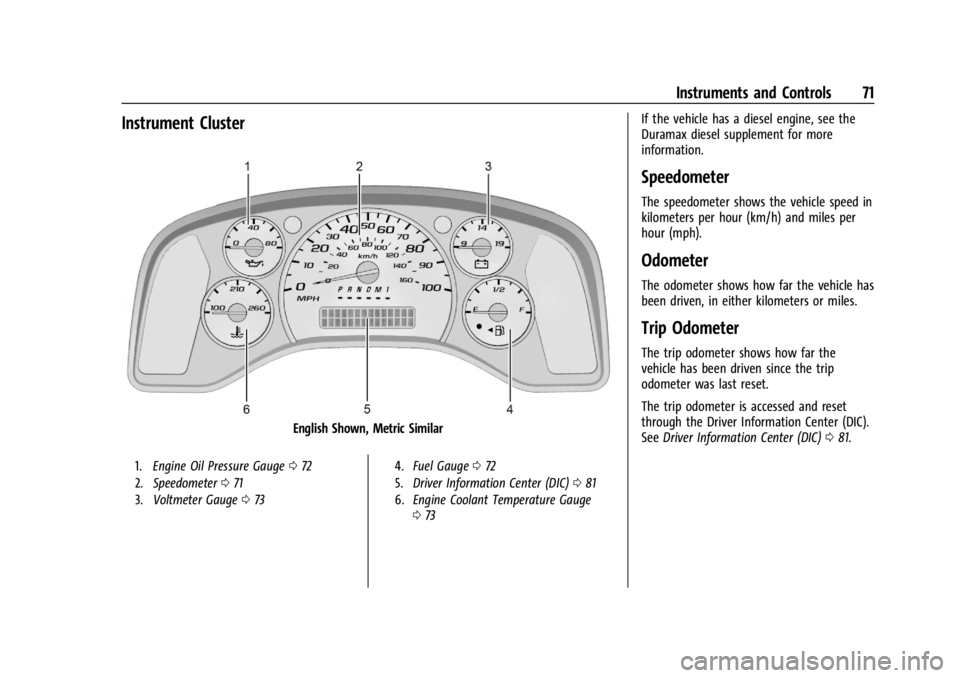
Instrument Cluster
English Shown, Metric Similar
1.Engine Oil Pressure Gauge 072
2. Speedometer 071
3. Voltmeter Gauge 073 4.
Fuel Gauge 072
5. Driver Information Center (DIC) 081
6. Engine Coolant Temperature Gauge
073
If the vehicle has a diesel engine, see the
Duramax diesel supplement for more
information.
Speedometer
The speedometer shows the vehicle speed in
kilometers per hour (km/h) and miles per
hour (mph).
Odometer
The odometer shows how far the vehicle has
been driven, in either kilometers or miles.
Trip Odometer
The trip odometer shows how far the
vehicle has been driven since the trip
odometer was last reset.
The trip odometer is accessed and reset
through the Driver Information Center (DIC).
See Driver Information Center (DIC) 081.
Page 74 of 296
Chevrolet Express Owner Manual (GMNA-Localizing-U.S./Canada/Mexico-
14583525) - 2021 - CRC - 12/9/20
Instruments and Controls 73
The oil pressure gauge shows the engine oil
pressure in psi (pounds per square inch)
or kPa (kilopascals) when the engine is
running.
Oil pressure may vary with engine speed,
outside temperature and oil viscosity, but
readings above the low pressure zone
indicate the normal operating range.
A reading in the low pressure zone may be
caused by a dangerously low oil level or
other problem causing low oil pressure.
Caution
Lack of proper engine oil maintenance
can damage the engine. Driving with the
engine oil low can also damage the
engine. The repairs would not be covered
by the vehicle warranty. Check the oil
level as soon as possible. Add oil if
required, but if the oil level is within the
operating range and the oil pressure is
still low, have the vehicle serviced.
Always follow the maintenance schedule
for changing engine oil.
Engine Coolant Temperature
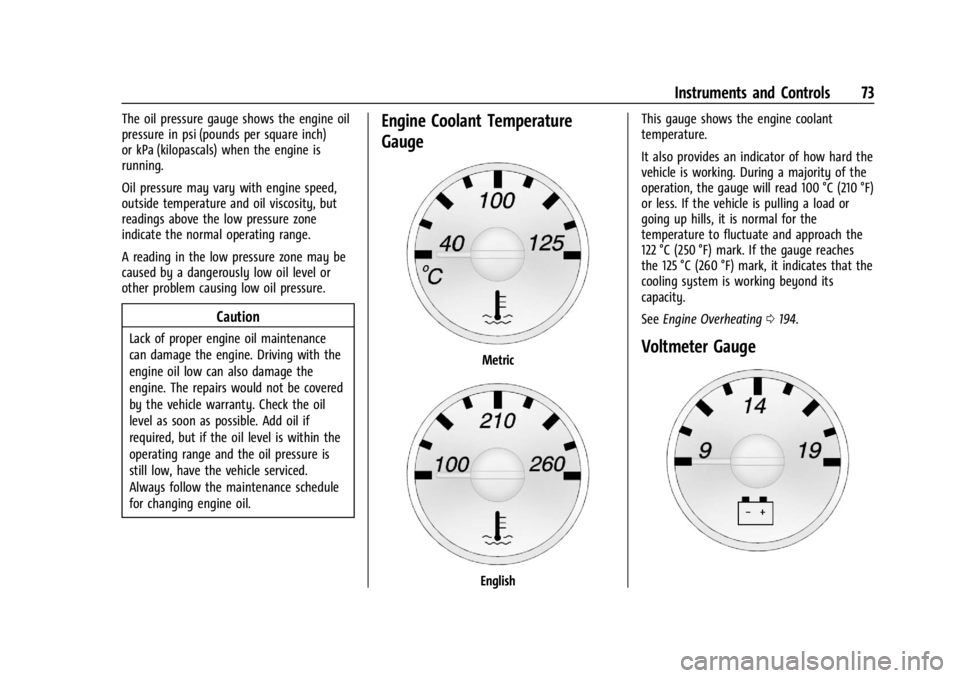
Gauge
Metric
EnglishThis gauge shows the engine coolant
temperature.
It also provides an indicator of how hard the
vehicle is working. During a majority of the
operation, the gauge will read 100 °C (210 °F)
or less. If the vehicle is pulling a load or
going up hills, it is normal for the
temperature to fluctuate and approach the
122 °C (250 °F) mark. If the gauge reaches
the 125 °C (260 °F) mark, it indicates that the
cooling system is working beyond its
capacity.
See
Engine Overheating 0194.
Voltmeter Gauge
Page 140 of 296

Chevrolet Express Owner Manual (GMNA-Localizing-U.S./Canada/Mexico-
14583525) - 2021 - CRC - 12/9/20
Driving and Operating 139
Engine Coolant Heater
If the vehicle has a diesel engine, see the
Duramax diesel supplement.
{Warning
Do not plug in the engine block heater
while the vehicle is parked in a garage or
under a carport. Property damage or
personal injury may result. Always park
the vehicle in a clear open area away
from buildings or structures.
The engine coolant heater can provide easier
starting and better fuel economy during
engine warm-up in cold weather conditions
at or below −18 °C (0 °F). Vehicles with an
engine coolant heater should be plugged in
at least four hours before starting.
An internal thermostat in the plug end of
the cord may exist which will prevent
engine coolant heater operation at
temperatures above −18 °C (0 °F).
To Use the Engine Coolant Heater
1. Turn off the engine.
2. Open the hood and unwrap the
electrical cord.
The cord for the engine coolant heater is
on the driver side of the engine
compartment.
Check the heater cord for damage. If it is
damaged, do not use it. See your dealer
for a replacement. Inspect the cord for
damage yearly.
3. Plug it into a normal, grounded 110-volt AC outlet.
{Warning
Improper use of the heater cord or an
extension cord can damage the cord and
may result in overheating and fire.
.Plug the cord into a three-prong
electrical utility receptacle that is
protected by a ground fault detection
function. An ungrounded outlet could
cause an electric shock.
.Use a weatherproof, heavy-duty,
15 amp-rated extension cord if needed.
Failure to use the recommended
extension cord in good operating
condition, or using a damaged heater
or extension cord, could make it
overheat and cause a fire, property
damage, electric shock, and injury.
.Do not operate the vehicle with the
heater cord permanently attached to
the vehicle. Possible heater cord and
thermostat damage could occur.
.While in use, do not let the heater
cord touch vehicle parts or sharp
edges. Never close the hood on the
heater cord.
(Continued)
Page 163 of 296
Chevrolet Express Owner Manual (GMNA-Localizing-U.S./Canada/Mexico-
14583525) - 2021 - CRC - 12/9/20
162 Driving and Operating
The trailer structure, the tires, and the
brakes must be all be rated to carry the
intended cargo. Inadequate trailer
equipment can cause the combination to
operate in an unexpected or unsafe manner.
Before driving, inspect all trailer hitch parts
and attachments, safety chains, electrical
connectors, lamps, tires, and mirrors. See
Towing Equipment0172. If the trailer has
electric brakes, start the combination
moving and then manually apply the trailer
brake controller to check the trailer brakes
work. During the trip, occasionally check
that the cargo and trailer are secure and
that the lamps and any trailer brakes are
working.
Towing with a Stability Control System
When towing, the stability control system
might be heard. The system reacts to
vehicle movement caused by the trailer,
which mainly occurs during cornering. This is
normal when towing heavier trailers.
Following Distance
Stay at least twice as far behind the vehicle
ahead as you would when driving without a
trailer. This can help to avoid heavy braking
and sudden turns.
Passing
More passing distance is needed when
towing a trailer. The combination of the
vehicle and trailer will not accelerate as
quickly and is much longer than the vehicle
alone. It is necessary to go much farther
beyond the passed vehicle before returning
to the lane. Pass on level roadways. Avoid
passing on hills if possible.
Backing Up
Hold the bottom of the steering wheel with
one hand. To move the trailer to the left,
move that hand to the left. To move the
trailer to the right, move that hand to the
right. Always back up slowly and, if possible,
have someone guide you.
Making Turns
Caution
Turn more slowly and make wider arcs
when towing a trailer to prevent damage
to your vehicle. Making very sharp turns
could cause the trailer to contact the
vehicle. Make wider turns than normal when towing,
so trailer will not go over soft shoulders,
over curbs, or strike road signs, trees,
or other objects. Always signal turns well in
advance. Do not steer or brake suddenly.
Driving on Grades
Reduce speed and shift to a lower gear
before starting down a long or steep
downhill grade. If the transmission is not
shifted down, the brakes may overheat and
result in reduced braking efficiency.
The vehicle can tow in D (Drive). Shift the
transmission to a lower gear if the
transmission shifts too often under heavy
loads and/or hilly conditions.
When towing at higher altitudes, engine
coolant will boil at a lower temperature
than at lower altitudes. If the engine is
turned off immediately after towing at high
altitude on steep uphill grades, the vehicle
could show signs similar to engine
overheating. To avoid this, let the engine
run, preferably on level ground, with the
transmission in P (Park) for a few minutes
before turning the engine off. If the
overheat warning comes on, see
Engine
Overheating 0194.
Page 192 of 296

Chevrolet Express Owner Manual (GMNA-Localizing-U.S./Canada/Mexico-
14583525) - 2021 - CRC - 12/9/20
Vehicle Care 191
Caution
If the air cleaner/filter is off, dirt can
easily get into the engine, which could
damage it. Always have the air cleaner/
filter in place when driving.
Cooling System
The cooling system allows the engine to
maintain the correct working temperature.
4.3L V6 Engine
1. Radiator Pressure Cap
2. Coolant Recovery Tank
3. Engine Cooling Fan (Out of View)
6.6L V8 Engine
1. Radiator Pressure Cap
2. Coolant Recovery Tank
3. Engine Cooling Fan (Out of View)
{Warning
An underhood electric fan can start up
even when the engine is not running and
can cause injury. Keep hands, clothing,
and tools away from any underhood
electric fan.
{Warning
Do not touch heater or radiator hoses,
or other engine parts. They can be very
hot and can burn you. Do not run the
engine if there is a leak; all coolant could
leak out. That could cause an engine fire
and can burn you. Fix any leak before
driving the vehicle.
Engine Coolant
The cooling system in the vehicle is filled
with DEX-COOL engine coolant. This coolant
is designed to remain in the vehicle for
5 years or 240 000 km (150,000 mi),
whichever occurs first.
The following explains the cooling system
and how to check and add coolant when it
is low. If there is a problem with engine
overheating, seeEngine Overheating 0194.
What to Use
{Warning
Plain water, or other liquids such as
alcohol, can boil before the proper
coolant mixture will. With plain water or
(Continued)
Page 193 of 296
Chevrolet Express Owner Manual (GMNA-Localizing-U.S./Canada/Mexico-
14583525) - 2021 - CRC - 12/9/20
192 Vehicle Care
Warning (Continued)
the wrong mixture, the engine could get
too hot but there would not be an
overheat warning. The engine could catch
fire and you or others could be burned.
Use a 50/50 mixture of clean, drinkable
water and DEX-COOL coolant. If using this
mixture, nothing else needs to be added.
This mixture:
.Gives freezing protection down to −37 °C
(−34 °F), outside temperature.
.Gives boiling protection up to 129 °C
(265 °F), engine temperature.
.Protects against rust and corrosion.
.Will not damage aluminum parts.
.Helps keep the proper engine
temperature.
Caution
Do not use anything other than a mix of
DEX-COOL coolant that meets GM
Standard GMW3420 and clean, drinkable
water. Anything else can cause damage
to the engine cooling system and the
vehicle, which would not be covered by
the vehicle warranty. Never dispose of engine coolant by putting
it in the trash, pouring it on the ground,
or into sewers, streams, or bodies of water.
Have the coolant changed by an authorized
service center, familiar with legal
requirements regarding used coolant
disposal. This will help protect the
environment and your health.
Checking Coolant
The vehicle must be on a level surface when
checking the coolant level.
Check to see if coolant is visible in the
coolant recovery tank. If the coolant inside
the coolant recovery tank is boiling, do not
do anything else until it cools down.
If coolant is visible but the coolant level is
not at or above the indicated mark, add a
50/50 mixture of clean, drinkable water and
DEX-COOL coolant at the coolant recovery
tank, but be sure the cooling system is cool
before this is done.
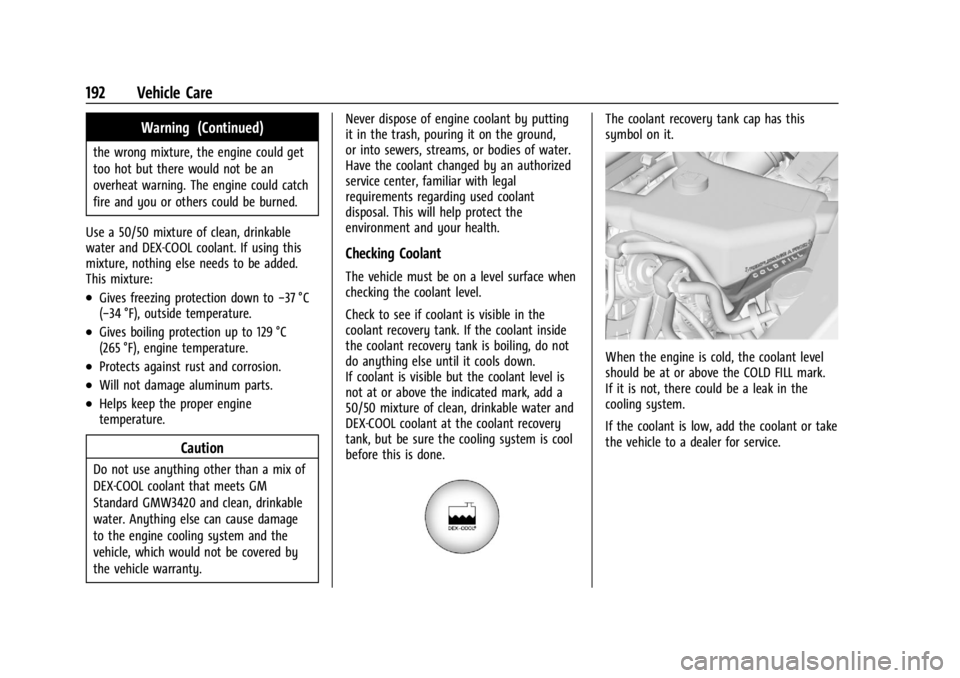
The coolant recovery tank cap has this
symbol on it.
When the engine is cold, the coolant level
should be at or above the COLD FILL mark.
If it is not, there could be a leak in the
cooling system.
If the coolant is low, add the coolant or take
the vehicle to a dealer for service.
Page 195 of 296
Chevrolet Express Owner Manual (GMNA-Localizing-U.S./Canada/Mexico-
14583525) - 2021 - CRC - 12/9/20
194 Vehicle Care
3. Fill the radiator with the proper mixture,up to the base of the filler neck. See
Recommended Fluids and Lubricants
0257 for more information about the
proper coolant mixture.
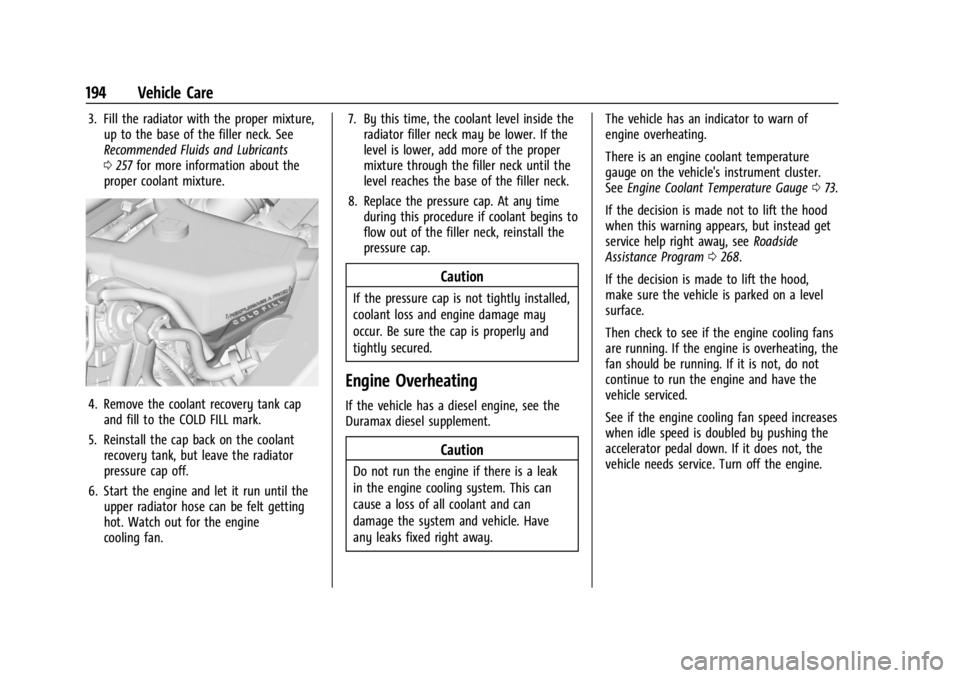
4. Remove the coolant recovery tank cap
and fill to the COLD FILL mark.
5. Reinstall the cap back on the coolant recovery tank, but leave the radiator
pressure cap off.
6. Start the engine and let it run until the upper radiator hose can be felt getting
hot. Watch out for the engine
cooling fan. 7. By this time, the coolant level inside the
radiator filler neck may be lower. If the
level is lower, add more of the proper
mixture through the filler neck until the
level reaches the base of the filler neck.
8. Replace the pressure cap. At any time during this procedure if coolant begins to
flow out of the filler neck, reinstall the
pressure cap.
Caution
If the pressure cap is not tightly installed,
coolant loss and engine damage may
occur. Be sure the cap is properly and
tightly secured.
Engine Overheating
If the vehicle has a diesel engine, see the
Duramax diesel supplement.
Caution
Do not run the engine if there is a leak
in the engine cooling system. This can
cause a loss of all coolant and can
damage the system and vehicle. Have
any leaks fixed right away. The vehicle has an indicator to warn of
engine overheating.
There is an engine coolant temperature
gauge on the vehicle's instrument cluster.
See
Engine Coolant Temperature Gauge 073.
If the decision is made not to lift the hood
when this warning appears, but instead get
service help right away, see Roadside
Assistance Program 0268.
If the decision is made to lift the hood,
make sure the vehicle is parked on a level
surface.
Then check to see if the engine cooling fans
are running. If the engine is overheating, the
fan should be running. If it is not, do not
continue to run the engine and have the
vehicle serviced.
See if the engine cooling fan speed increases
when idle speed is doubled by pushing the
accelerator pedal down. If it does not, the
vehicle needs service. Turn off the engine.