lock CHEVROLET EXPRESS CARGO VAN 2008 1.G User Guide
[x] Cancel search | Manufacturer: CHEVROLET, Model Year: 2008, Model line: EXPRESS CARGO VAN, Model: CHEVROLET EXPRESS CARGO VAN 2008 1.GPages: 414, PDF Size: 2.34 MB
Page 51 of 414
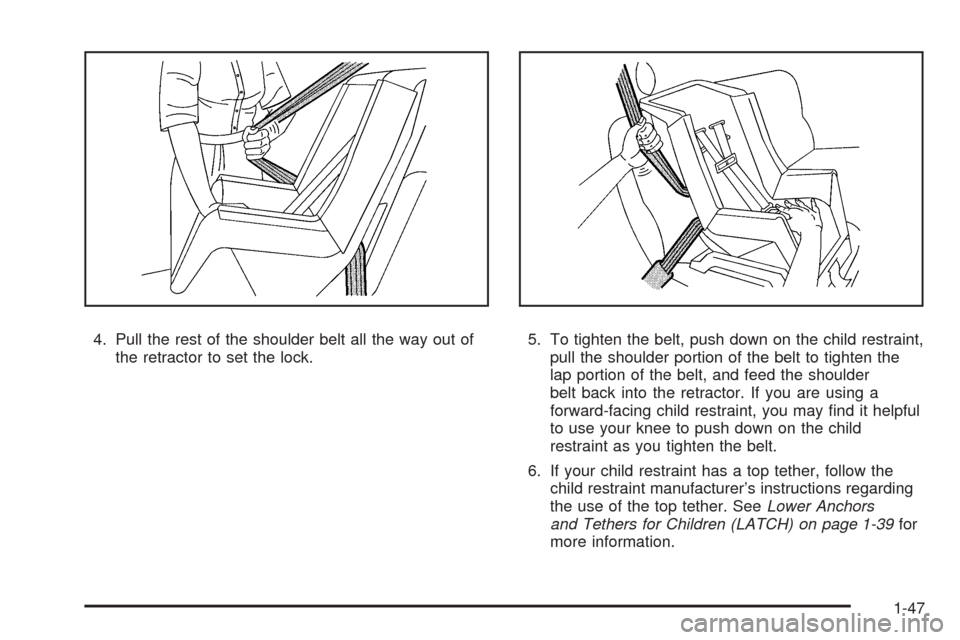
4. Pull the rest of the shoulder belt all the way out of
the retractor to set the lock.5. To tighten the belt, push down on the child restraint,
pull the shoulder portion of the belt to tighten the
lap portion of the belt, and feed the shoulder
belt back into the retractor. If you are using a
forward-facing child restraint, you may find it helpful
to use your knee to push down on the child
restraint as you tighten the belt.
6. If your child restraint has a top tether, follow the
child restraint manufacturer’s instructions regarding
the use of the top tether. SeeLower Anchors
and Tethers for Children (LATCH) on page 1-39for
more information.
1-47
Page 54 of 414
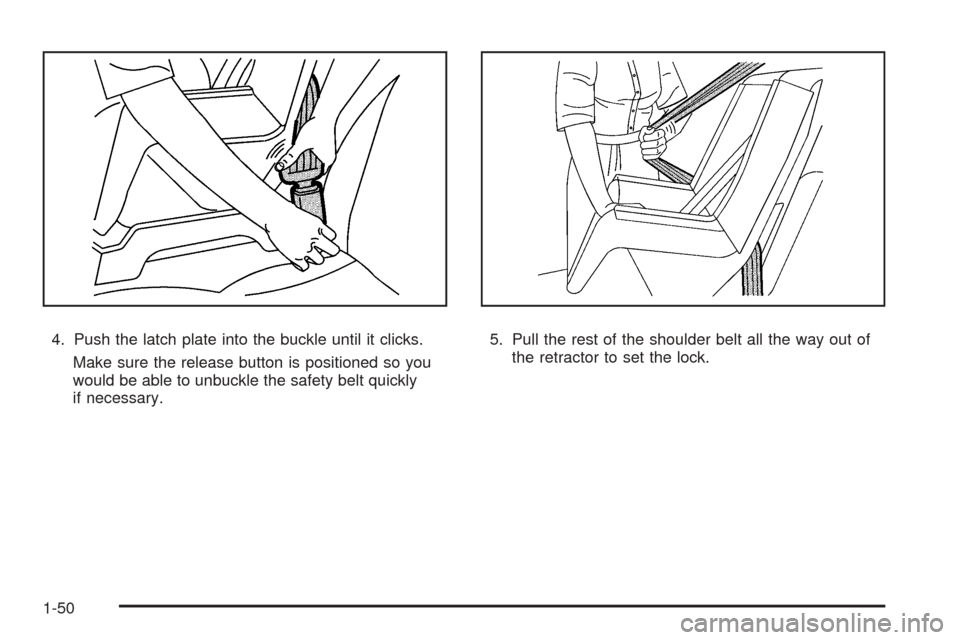
4. Push the latch plate into the buckle until it clicks.
Make sure the release button is positioned so you
would be able to unbuckle the safety belt quickly
if necessary.5. Pull the rest of the shoulder belt all the way out of
the retractor to set the lock.
1-50
Page 59 of 414
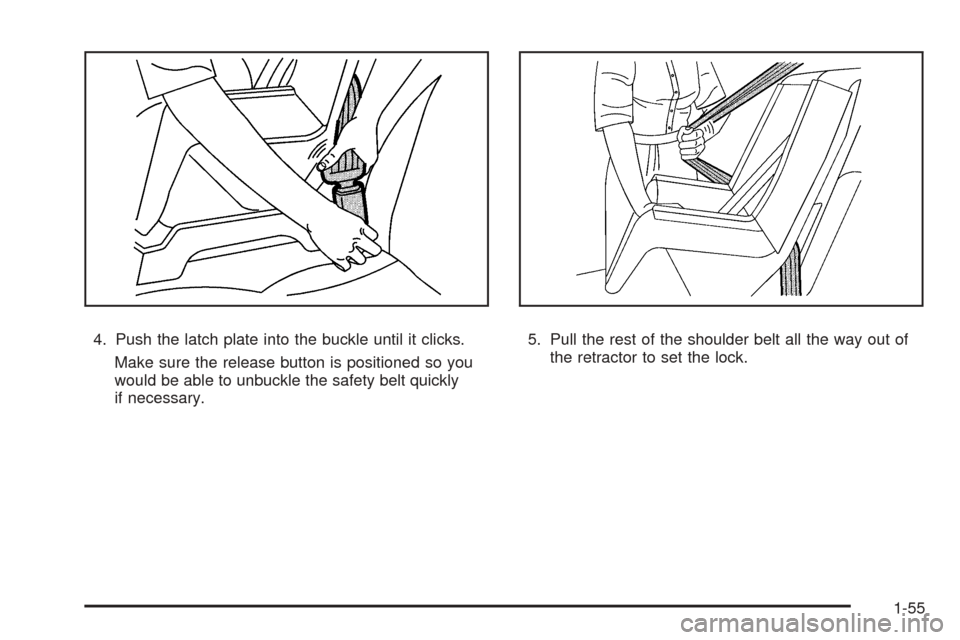
4. Push the latch plate into the buckle until it clicks.
Make sure the release button is positioned so you
would be able to unbuckle the safety belt quickly
if necessary.5. Pull the rest of the shoulder belt all the way out of
the retractor to set the lock.
1-55
Page 66 of 414
For passenger vans with a sliding door, on the
passenger’s side of the vehicle, you will have a separate
roof-rail airbag for the passenger seated directly
behind the right front passenger and the third row
outboard passenger position.
{CAUTION:
If something is between an occupant and an
airbag, the airbag might not in�ate properly or
it might force the object into that person
causing severe injury or even death. The path
of an in�ating airbag must be kept clear. Do
not put anything between an occupant and an
airbag, and do not attach or put anything on
the steering wheel hub or on or near any other
airbag covering.
If your vehicle has roof-rail airbags, never
secure anything to the roof of your vehicle by
routing the rope or tie down through any door
or window opening. If you do, the path of an
in�ating roof-rail airbag will be blocked.
When Should an Airbag In�ate?
Frontal airbags are designed to inflate in moderate to
severe frontal or near-frontal crashes to help reduce the
potential for severe injuries mainly to the driver’s or
right front passenger’s head and chest. However, they
are only designed to inflate if the impact exceeds a
predetermined deployment threshold. Deployment
thresholds are used to predict how severe a crash is
likely to be in time for the airbags to inflate and
help restrain the occupants.
Whether your frontal airbags will or should deploy is not
based on how fast your vehicle is traveling. It depends
largely on what you hit, the direction of the impact,
and how quickly your vehicle slows down.
Frontal airbags may inflate at different crash speeds.
For example:
•If the vehicle hits a stationary object, the airbags
could inflate at a different crash speed than if the
vehicle hits a moving object.
•If the vehicle hits an object that deforms, the
airbags could inflate at a different crash speed than
if the vehicle hits an object that does not deform.
1-62
Page 69 of 414
The parts of the airbag that come into contact with you
may be warm, but not too hot to touch. There may
be some smoke and dust coming from the vents in the
deflated airbags. Airbag inflation does not prevent
the driver from seeing out of the windshield or being
able to steer the vehicle, nor does it prevent people from
leaving the vehicle.
{CAUTION:
When an airbag in�ates, there may be dust in
the air. This dust could cause breathing
problems for people with a history of asthma
or other breathing trouble. To avoid this,
everyone in the vehicle should get out as soon
as it is safe to do so. If you have breathing
problems but cannot get out of the vehicle
after an airbag in�ates, then get fresh air by
opening a window or a door. If you experience
breathing problems following an airbag
deployment, you should seek medical
attention.Your vehicle has a feature that may automatically
unlock the doors, turn the interior lamps on, and turn
the hazard warning flashers on when the airbags inflate.
You can lock the doors, turn the interior lamps off,
and turn the hazard warning flashers off by using the
controls for those features.
In many crashes severe enough to inflate the airbag,
windshields are broken by vehicle deformation.
Additional windshield breakage may also occur from the
right front passenger airbag.•Airbags are designed to inflate only once. After an
airbag inflates, you will need some new parts for
the airbag system. If you do not get them, the airbag
system will not be there to help protect you in
another crash. A new system will include airbag
modules and possibly other parts. The service
manual for your vehicle covers the need to replace
other parts.
•Your vehicle has a crash sensing and diagnostic
module which records information after a crash.
SeeVehicle Data Recording and Privacy on
page 7-16andEvent Data Recorders on page 7-17.
•Let only qualified technicians work on the airbag
systems. Improper service can mean that an
airbag system will not work properly. See your
dealer/retailer for service.
1-65
Page 81 of 414
Keys...............................................................2-2
Remote Keyless Entry (RKE) System................2-3
Remote Keyless Entry (RKE) System
Operation...................................................2-4
Doors and Locks.............................................2-6
Door Locks....................................................2-6
Power Door Locks..........................................2-7
Cargo Door Relocking.....................................2-7
Delayed Locking.............................................2-7
Programmable Automatic Door Locks................2-7
Automatic Door Lock.......................................2-8
Automatic Door Unlock....................................2-8
Rear Door Security Locks................................2-8
Lockout Protection..........................................2-9
Sliding Side Door...........................................2-9
60/40 Swing-Out Side Door............................2-10
Rear Doors..................................................2-12
Windows........................................................2-13
Manual Windows..........................................2-14
Power Windows............................................2-14
Swing-Out Windows......................................2-16
Enhanced Technology Glass..........................2-17
Sun Visors...................................................2-17
Theft-Deterrent Systems..................................2-17
PASS-Key
®III+............................................2-18
PASS-Key®III+ Operation..............................2-18Starting and Operating Your Vehicle................2-20
New Vehicle Break-In....................................2-20
Ignition Positions..........................................2-20
Retained Accessory Power (RAP)...................2-21
Starting the Engine.......................................2-21
Fuel Regulator.............................................2-23
Engine Coolant Heater..................................2-23
Automatic Transmission Operation...................2-24
Tow/Haul Mode............................................2-27
Parking Brake..............................................2-28
Shifting Into PARK (P)...................................2-29
Shifting Out of PARK (P)...............................2-30
Parking Over Things That Burn.......................2-31
Engine Exhaust............................................2-31
Running the Engine While Parked...................2-32
Mirrors...........................................................2-33
Manual Rearview Mirror.................................2-33
Outside Manual Mirror...................................2-33
Outside Camper-Type Mirrors.........................2-33
Outside Power Mirrors...................................2-34
Outside Convex Mirror...................................2-34
Outside Heated Mirrors..................................2-35
Storage Areas................................................2-35
Section 2 Features and Controls
2-1
Page 82 of 414
Keys
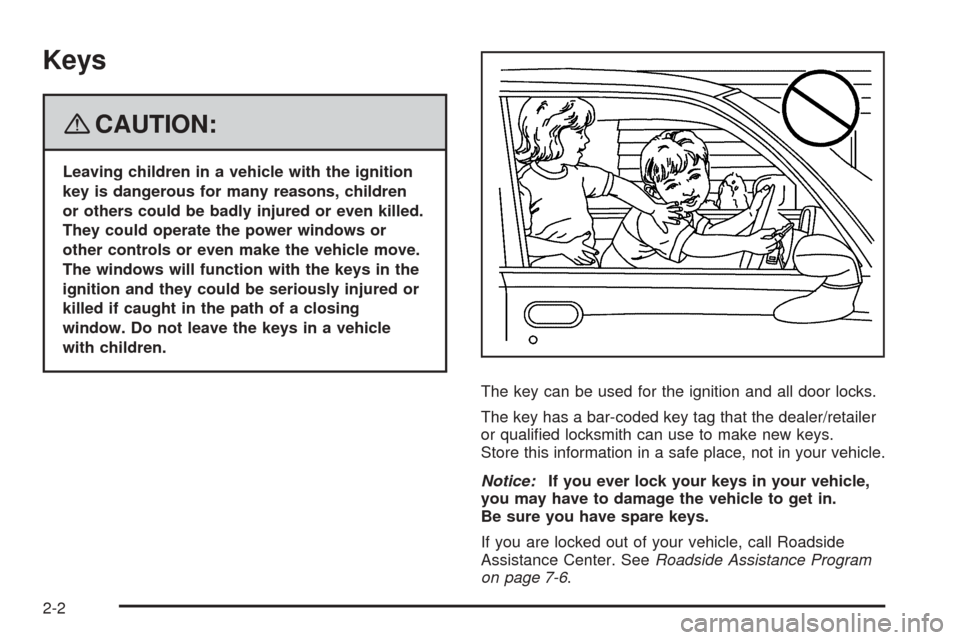
{CAUTION:
Leaving children in a vehicle with the ignition
key is dangerous for many reasons, children
or others could be badly injured or even killed.
They could operate the power windows or
other controls or even make the vehicle move.
The windows will function with the keys in the
ignition and they could be seriously injured or
killed if caught in the path of a closing
window. Do not leave the keys in a vehicle
with children.
The key can be used for the ignition and all door locks.
The key has a bar-coded key tag that the dealer/retailer
or qualified locksmith can use to make new keys.
Store this information in a safe place, not in your vehicle.
Notice:If you ever lock your keys in your vehicle,
you may have to damage the vehicle to get in.
Be sure you have spare keys.
If you are locked out of your vehicle, call Roadside
Assistance Center. SeeRoadside Assistance Program
on page 7-6.
2-2
Page 83 of 414
Remote Keyless Entry (RKE)
System
If the vehicle has the Remote Keyless Entry (RKE)
system, it operates on a radio frequency subject
to Federal Communications Commission (FCC) Rules
and with Industry Canada.
This device complies with Part 15 of the FCC Rules.
Operation is subject to the following two conditions:
1. This device may not cause interference.
2. This device must accept any interference received,
including interference that may cause undesired
operation of the device.
This device complies with RSS-210 of Industry Canada.
Operation is subject to the following two conditions:
1. This device may not cause interference.
2. This device must accept any interference received,
including interference that may cause undesired
operation of the device.Changes or modifications to this system by other than
an authorized service facility could void authorization to
use this equipment.
At times you may notice a decrease in range. This is
normal for any RKE system. If the transmitter does not
work or if you have to stand closer to your vehicle
for the transmitter to work, try this:
•Check the distance. You may be too far from your
vehicle. You may need to stand closer during
rainy or snowy weather.
•Check the location. Other vehicles or objects may
be blocking the signal. Take a few steps to the
left or right, hold the transmitter higher, and
try again.
•Check to determine if battery replacement is
necessary. See “Battery Replacement” later in this
section.
•If you are still having trouble, see your dealer/retailer
or a qualified technician for service.
2-3
Page 84 of 414
Remote Keyless Entry (RKE)
System Operation
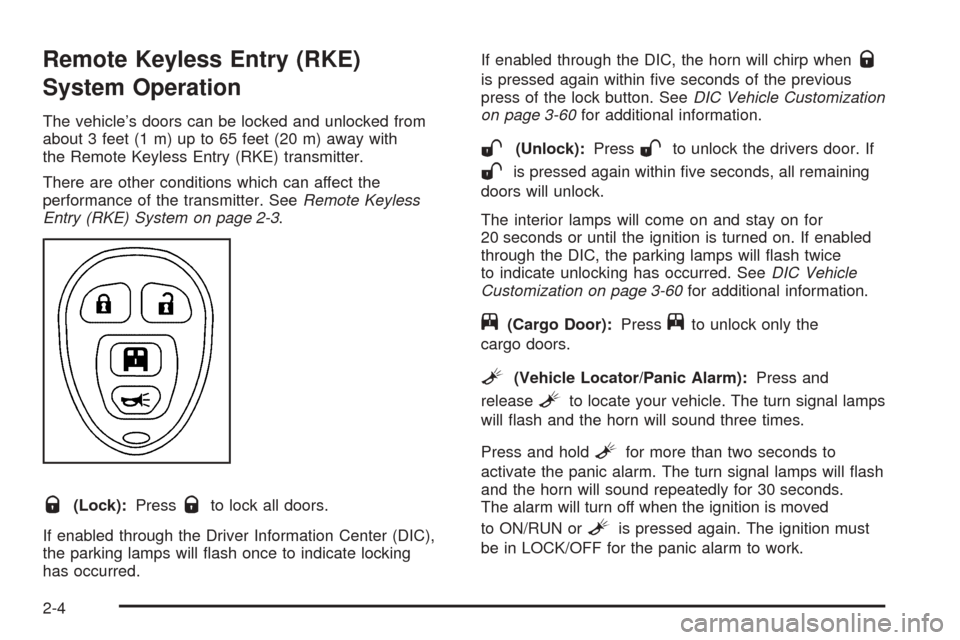
The vehicle’s doors can be locked and unlocked from
about 3 feet (1 m) up to 65 feet (20 m) away with
the Remote Keyless Entry (RKE) transmitter.
There are other conditions which can affect the
performance of the transmitter. SeeRemote Keyless
Entry (RKE) System on page 2-3.
Q(Lock):PressQto lock all doors.
If enabled through the Driver Information Center (DIC),
the parking lamps will flash once to indicate locking
has occurred.If enabled through the DIC, the horn will chirp when
Q
is pressed again within five seconds of the previous
press of the lock button. SeeDIC Vehicle Customization
on page 3-60for additional information.
W(Unlock):PressWto unlock the drivers door. If
Wis pressed again within five seconds, all remaining
doors will unlock.
The interior lamps will come on and stay on for
20 seconds or until the ignition is turned on. If enabled
through the DIC, the parking lamps will flash twice
to indicate unlocking has occurred. SeeDIC Vehicle
Customization on page 3-60for additional information.
j(Cargo Door):Pressjto unlock only the
cargo doors.
L(Vehicle Locator/Panic Alarm):Press and
release
Lto locate your vehicle. The turn signal lamps
will flash and the horn will sound three times.
Press and hold
Lfor more than two seconds to
activate the panic alarm. The turn signal lamps will flash
and the horn will sound repeatedly for 30 seconds.
The alarm will turn off when the ignition is moved
to ON/RUN or
Lis pressed again. The ignition must
be in LOCK/OFF for the panic alarm to work.
2-4
Page 85 of 414
Matching Transmitter(s) to Your
Vehicle
Each RKE transmitter is coded to prevent another
transmitter from unlocking your vehicle. If a transmitter
is lost or stolen, a replacement can be purchased
through your dealer/retailer. All transmitters need to be
re-coded to match the new transmitter. The lost
transmitter will no longer work after the new transmitters
are re-coded. Each vehicle can have a maximum of
four transmitters matched to it. See “Relearn Remote
Key” underDIC Operation and Displays on page 3-45
for instructions on how to match RKE transmitters
to your vehicle.
Battery Replacement
Replace the battery if the REPLACE BATTERY IN
REMOTE KEY message displays in the DIC. See
“REPLACE BATTERY IN REMOTE KEY” underDIC
Warnings and Messages on page 3-52for additional
information.
Notice:When replacing the battery, use care not to
touch any of the circuitry. Static from your body
transferred to these surfaces may damage the
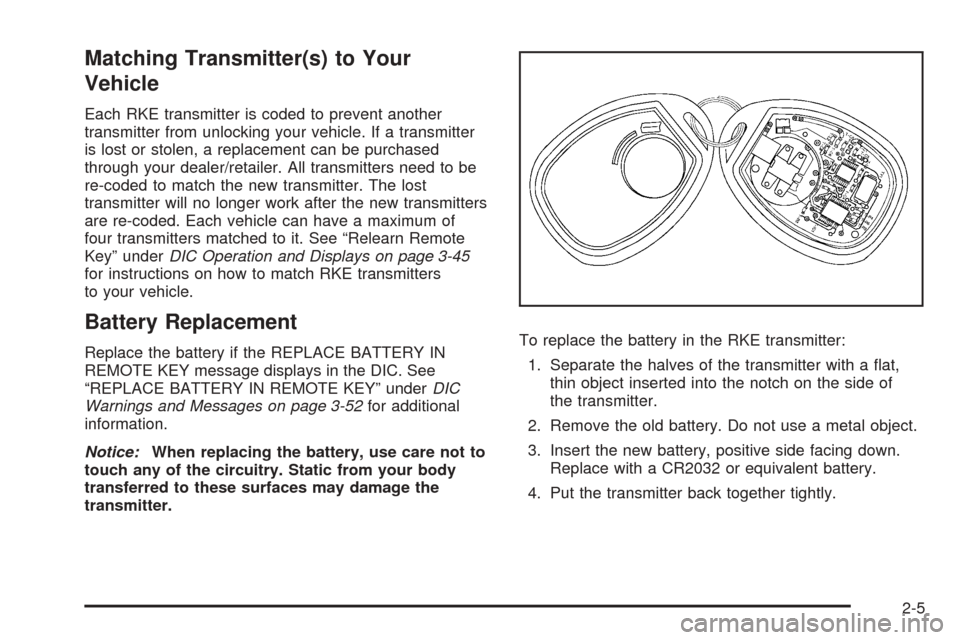
transmitter.To replace the battery in the RKE transmitter:
1. Separate the halves of the transmitter with a flat,
thin object inserted into the notch on the side of
the transmitter.
2. Remove the old battery. Do not use a metal object.
3. Insert the new battery, positive side facing down.
Replace with a CR2032 or equivalent battery.
4. Put the transmitter back together tightly.
2-5