heating CHEVROLET EXPRESS CARGO VAN 2008 1.G Owners Manual
[x] Cancel search | Manufacturer: CHEVROLET, Model Year: 2008, Model line: EXPRESS CARGO VAN, Model: CHEVROLET EXPRESS CARGO VAN 2008 1.GPages: 414, PDF Size: 2.34 MB
Page 117 of 414
Instrument Panel Overview...............................3-4
Hazard Warning Flashers................................3-6
Other Warning Devices...................................3-6
Horn.............................................................3-6
Tilt Wheel.....................................................3-6
Turn Signal/Multifunction Lever.........................3-7
Turn and Lane-Change Signals........................3-8
Headlamp High/Low-Beam Changer..................3-9
Flash-to-Pass.................................................3-9
Windshield Wipers..........................................3-9
Windshield Washer.......................................3-10
Cruise Control..............................................3-11
Exterior Lamps.............................................3-14
Headlamps on Reminder................................3-15
Daytime Running Lamps (DRL).......................3-15
Automatic Headlamp System..........................3-16
Instrument Panel Brightness...........................3-16
Dome Lamps...............................................3-17
Dome Lamp Override....................................3-17
Entry/Exit Lighting.........................................3-17
Reading Lamps............................................3-17
Electric Power Management...........................3-17
Battery Run-Down Protection..........................3-18
Accessory Power Outlet(s).............................3-18
Ashtray(s) and Cigarette Lighter......................3-19Climate Controls............................................3-19
Climate Control System.................................3-19
Outlet Adjustment.........................................3-22
Rear Heating System....................................3-22
Rear Air Conditioning and Heating System.......3-23
Warning Lights, Gages, and Indicators............3-25
Instrument Panel Cluster................................3-26
Speedometer and Odometer...........................3-27
Trip Odometer..............................................3-27
Safety Belt Reminders...................................3-28
Airbag Readiness Light..................................3-29
Airbag Off Light............................................3-30
Passenger Airbag Status Indicator...................3-31
Charging System Light..................................3-33
Voltmeter Gage............................................3-34
Brake System Warning Light..........................3-34
Antilock Brake System Warning Light...............3-35
StabiliTrak
®Indicator Light..............................3-36
Engine Coolant Temperature Gage..................3-36
Tire Pressure Light.......................................3-37
Malfunction Indicator Lamp.............................3-38
Oil Pressure Gage........................................3-41
Oil Pressure Light.........................................3-42
Security Light...............................................3-42
Cruise Control Light......................................3-42
Section 3 Instrument Panel
3-1
Page 121 of 414
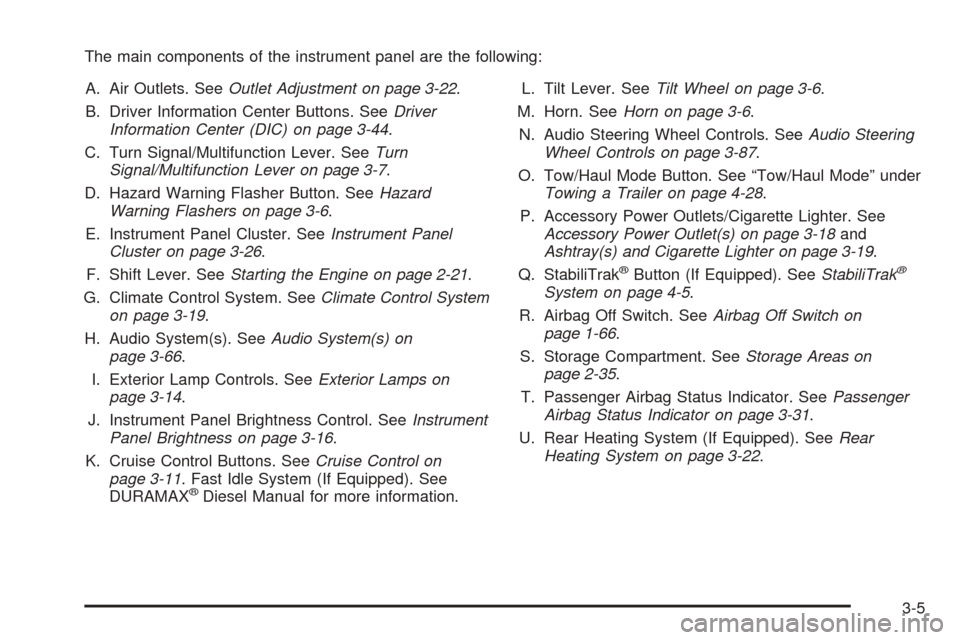
The main components of the instrument panel are the following:
A. Air Outlets. SeeOutlet Adjustment on page 3-22.
B. Driver Information Center Buttons. SeeDriver
Information Center (DIC) on page 3-44.
C. Turn Signal/Multifunction Lever. SeeTurn
Signal/Multifunction Lever on page 3-7.
D. Hazard Warning Flasher Button. SeeHazard
Warning Flashers on page 3-6.
E. Instrument Panel Cluster. SeeInstrument Panel
Cluster on page 3-26.
F. Shift Lever. SeeStarting the Engine on page 2-21.
G. Climate Control System. SeeClimate Control System
on page 3-19.
H. Audio System(s). SeeAudio System(s) on
page 3-66.
I. Exterior Lamp Controls. SeeExterior Lamps on
page 3-14.
J. Instrument Panel Brightness Control. SeeInstrument
Panel Brightness on page 3-16.
K. Cruise Control Buttons. SeeCruise Control on
page 3-11. Fast Idle System (If Equipped). See
DURAMAX
®Diesel Manual for more information.L. Tilt Lever. SeeTilt Wheel on page 3-6.
M. Horn. SeeHorn on page 3-6.
N. Audio Steering Wheel Controls. SeeAudio Steering
Wheel Controls on page 3-87.
O. Tow/Haul Mode Button. See “Tow/Haul Mode” under
Towing a Trailer on page 4-28.
P. Accessory Power Outlets/Cigarette Lighter. See
Accessory Power Outlet(s) on page 3-18and
Ashtray(s) and Cigarette Lighter on page 3-19.
Q. StabiliTrak
®Button (If Equipped). SeeStabiliTrak®
System on page 4-5.
R. Airbag Off Switch. SeeAirbag Off Switch on
page 1-66.
S. Storage Compartment. SeeStorage Areas on
page 2-35.
T. Passenger Airbag Status Indicator. SeePassenger
Airbag Status Indicator on page 3-31.
U. Rear Heating System (If Equipped). SeeRear
Heating System on page 3-22.
3-5
Page 135 of 414
Ashtray(s) and Cigarette Lighter
If your vehicle has this feature it is located in the center
console or on the instrument panel. Pull up on the
ashtray door to open it if it is in the console or pull the
door open it if it is on the instrument panel.
Notice:If you put papers, pins, or other �ammable
items in the ashtray, hot cigarettes or other
smoking materials could ignite them and possibly
damage your vehicle. Never put �ammable items in
the ashtray.
To remove the ashtray, pull it out from the console or
from the slide out door. To reinstall the ashtray,
slide it back to the original position.
To use the cigarette lighter, if the vehicle has one, push
it in all the way, and let go. When it is ready for use,
it will pop back out by itself.
Do not use the lighter to plug in accessory devices. Use
the power outlets provided.
Notice:Holding a cigarette lighter in while it is
heating does not let the lighter back away from the
heating element when it is hot. Damage from
overheating can occur to the lighter or heating
element, or a fuse could be blown. Do not hold a
cigarette lighter in while it is heating.
Climate Controls
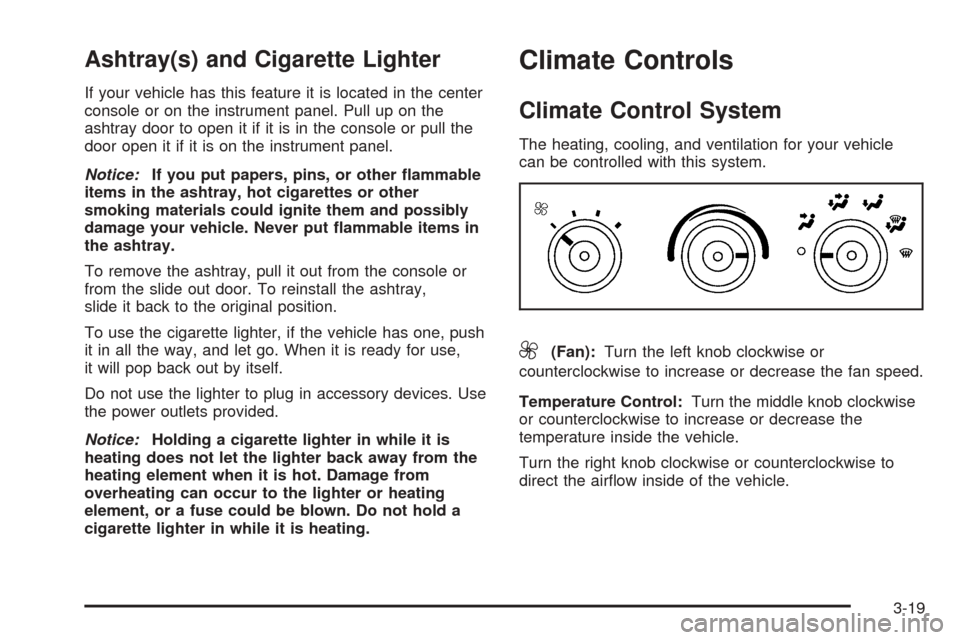
Climate Control System
The heating, cooling, and ventilation for your vehicle
can be controlled with this system.
9(Fan):Turn the left knob clockwise or
counterclockwise to increase or decrease the fan speed.
Temperature Control:Turn the middle knob clockwise
or counterclockwise to increase or decrease the
temperature inside the vehicle.
Turn the right knob clockwise or counterclockwise to
direct the airflow inside of the vehicle.
3-19
Page 136 of 414
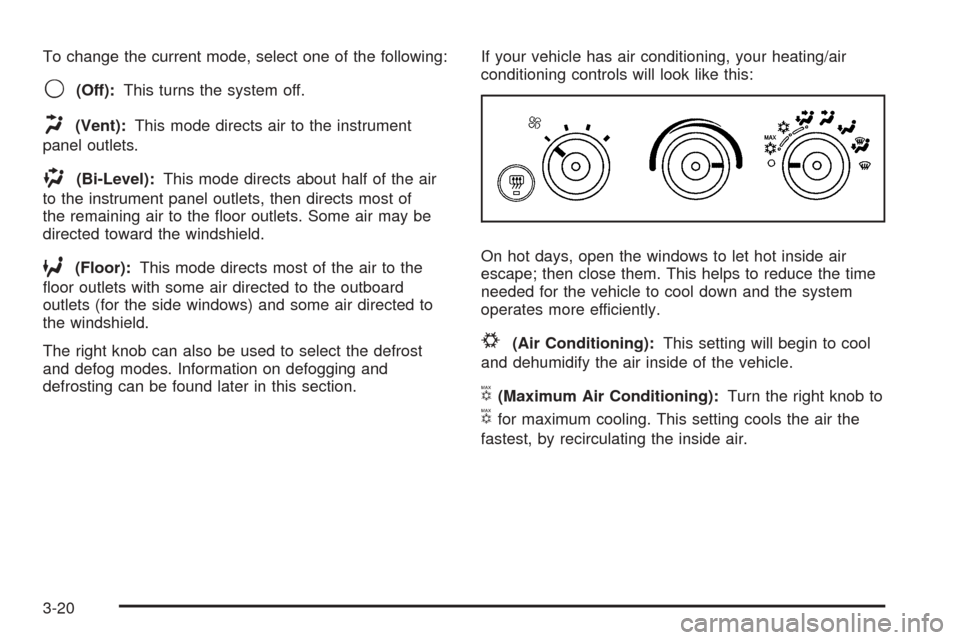
To change the current mode, select one of the following:
9(Off):This turns the system off.
H(Vent):This mode directs air to the instrument
panel outlets.
)(Bi-Level):This mode directs about half of the air
to the instrument panel outlets, then directs most of
the remaining air to the floor outlets. Some air may be
directed toward the windshield.
6(Floor):This mode directs most of the air to the
floor outlets with some air directed to the outboard
outlets (for the side windows) and some air directed to
the windshield.
The right knob can also be used to select the defrost
and defog modes. Information on defogging and
defrosting can be found later in this section.If your vehicle has air conditioning, your heating/air
conditioning controls will look like this:
On hot days, open the windows to let hot inside air
escape; then close them. This helps to reduce the time
needed for the vehicle to cool down and the system
operates more efficiently.
#(Air Conditioning):This setting will begin to cool
and dehumidify the air inside of the vehicle.
V(Maximum Air Conditioning):Turn the right knob to
Vfor maximum cooling. This setting cools the air the
fastest, by recirculating the inside air.
3-20
Page 138 of 414
Outlet Adjustment
Use the outlets located near the center and on the sides
of the instrument panel to change the direction of
airflow.
Operation Tips
•Clear away any ice, snow or leaves from the air
inlets at the base of the windshield that may
block the flow of air into your vehicle.
•Use of non-GM approved hood deflectors may
adversely affect the performance of the system.
•Keep the path under the front seats clear of objects
to help circulate the air inside of your vehicle more
effectively.
Rear Heating System
Your vehicle may have a rear heating system that
allows you to adjust the amount of air flowing into the
rear of the vehicle, from the front-seating area. This
feature works with the main climate-control system in
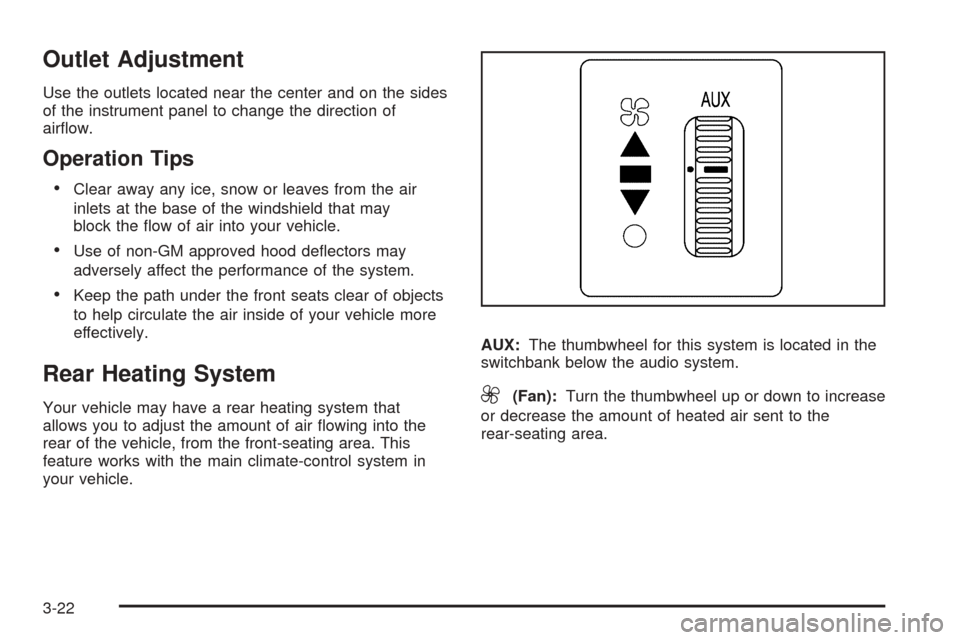
your vehicle.AUX:The thumbwheel for this system is located in the
switchbank below the audio system.9(Fan):Turn the thumbwheel up or down to increase
or decrease the amount of heated air sent to the
rear-seating area.
3-22
Page 139 of 414
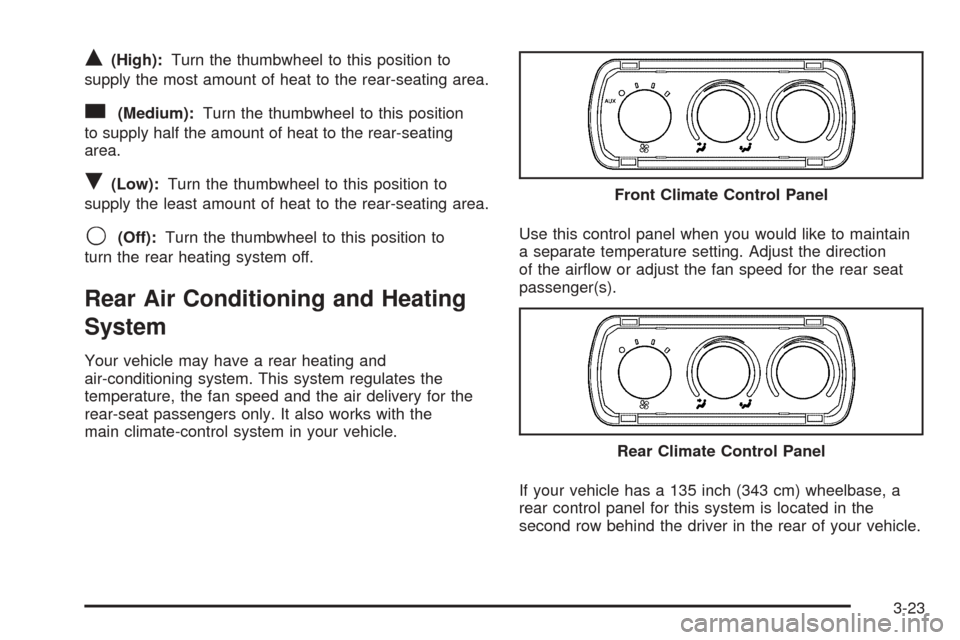
Q(High):Turn the thumbwheel to this position to
supply the most amount of heat to the rear-seating area.
c(Medium):Turn the thumbwheel to this position
to supply half the amount of heat to the rear-seating
area.
R(Low):Turn the thumbwheel to this position to
supply the least amount of heat to the rear-seating area.
9(Off):Turn the thumbwheel to this position to
turn the rear heating system off.
Rear Air Conditioning and Heating
System
Your vehicle may have a rear heating and
air-conditioning system. This system regulates the
temperature, the fan speed and the air delivery for the
rear-seat passengers only. It also works with the
main climate-control system in your vehicle.Use this control panel when you would like to maintain
a separate temperature setting. Adjust the direction
of the airflow or adjust the fan speed for the rear seat
passenger(s).
If your vehicle has a 135 inch (343 cm) wheelbase, a
rear control panel for this system is located in the
second row behind the driver in the rear of your vehicle.Front Climate Control Panel
Rear Climate Control Panel
3-23
Page 152 of 414
StabiliTrak®Indicator Light
If you have the
StabiliTrak®system, this
light will be on or flashing,
according to the
description table for the
StabiliTrak
®system.
For more information, seeStabiliTrak
®System on
page 4-5.
You will hear three chimes if the light turns on and one
chime if the light turns off.
If this light remains on steady, your vehicle needs to be
taken in for service.
Engine Coolant Temperature Gage
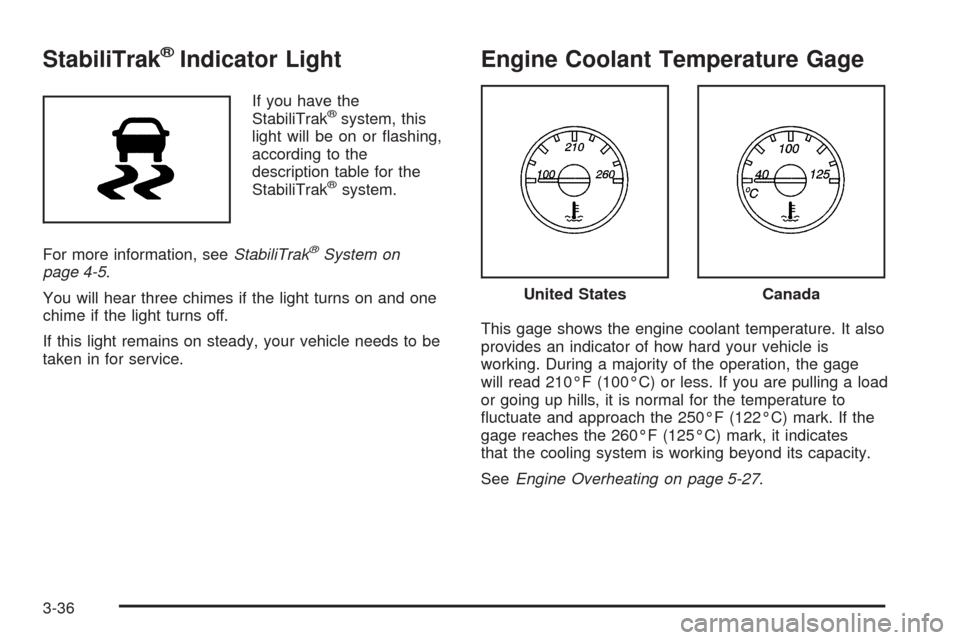
This gage shows the engine coolant temperature. It also
provides an indicator of how hard your vehicle is
working. During a majority of the operation, the gage
will read 210°F (100°C) or less. If you are pulling a load
or going up hills, it is normal for the temperature to
fluctuate and approach the 250°F (122°C) mark. If the
gage reaches the 260°F (125°C) mark, it indicates
that the cooling system is working beyond its capacity.
SeeEngine Overheating on page 5-27.
United StatesCanada
3-36
Page 170 of 414
ENGINE OIL LOW ADD OIL
If your vehicle has an oil level sensor, this message
displays if the oil level in the vehicle is low. Check the oil
level and correct it as necessary. You may need to let the
vehicle cool or warm up and cycle the ignition to be sure
this message clears. SeeEngine Oil (Gasoline Engine)
on page 5-15for additional information.
ENGINE OVERHEATED IDLE ENGINE
Notice:If you drive your vehicle while the engine is
overheating, severe engine damage may occur. If
an overheat warning appears on the instrument
panel cluster and/or DIC, stop the vehicle as soon
as possible. SeeEngine Overheating on page 5-27
for more information.
This message displays when the engine coolant
temperature is too hot. Stop and allow the vehicle to
idle until it cools down. SeeEngine Coolant
Temperature Gage on page 3-36.
ENGINE OVERHEATED STOP ENGINE
Notice:If you drive your vehicle while the engine
is overheating, severe engine damage may occur. If
an overheat warning appears on the instrument
panel cluster and/or DIC, stop the vehicle as soon
as possible. SeeEngine Overheating on page 5-27
for more information.This message displays and a chime sounds if the
engine cooling system reaches unsafe temperatures for
operation. Stop and turn off the vehicle as soon as it
is safe to do so to avoid severe damage. This message
clears when the engine has cooled to a safe operating
temperature.
ENGINE POWER IS REDUCED
This message displays and a chime sounds when the
cooling system temperature gets too hot and the engine
further enters the engine coolant protection mode. See
Engine Overheating on page 5-27for further information.
This message also displays when the vehicle’s engine
power is reduced. Reduced engine power can affect the
vehicle’s ability to accelerate. If this message is on,
but there is no reduction in performance, proceed
to your destination. The performance may be reduced
the next time the vehicle is driven. The vehicle may
be driven at a reduced speed while this message is on,
but acceleration and speed may be reduced. Anytime
this message stays on, the vehicle should be taken
to your dealer/retailer for service as soon as possible.
FUEL LEVEL LOW
This message displays if the fuel level is low. Refuel as
soon as possible. SeeFuel Gage on page 3-43and
Fuel on page 5-5for more information.
3-54
Page 172 of 414
RIGHT REAR DOOR OPEN
On some vehicles, this message displays and a chime
sounds if the passenger side rear door is not fully
closed and the vehicle is in a drive gear. Stop and turn
off the vehicle, check the door for obstructions, and
close the door again. Check to see if the message still
appears on the DIC.
SERVICE A/C SYSTEM
This message displays when the electronic sensors that
control the air conditioning and heating systems are
no longer working. Have the climate control system
serviced by your dealer/retailer if you notice a drop in
heating and air conditioning efficiency.
SERVICE AIR BAG
This message displays if there is a problem with the
airbag system. Have your dealer/retailer inspect
the system for problems. SeeAirbag Readiness Light
on page 3-29andAirbag System on page 1-57for more
information.
SERVICE BATTERY CHARGING
SYSTEM
On some vehicles, this message displays if there is a
problem with the battery charging system. Under certain
conditions, the charging system light may also turn
on in the instrument panel cluster. SeeCharging System
Light on page 3-33. Driving with this problem could
drain the battery. Turn off all unnecessary accessories.
Have the electrical system checked as soon as
possible. See your dealer/retailer.
SERVICE BRAKE SYSTEM
This message displays along with the brake system
warning light if there is a problem with the brake system.
SeeBrake System Warning Light on page 3-34. If this
message appears, stop as soon as possible and turn off
the vehicle. Restart the vehicle and check for the
message on the DIC display. If the message is still
displayed or appears again when you begin driving, the
brake system needs service as soon as possible.
See your dealer/retailer.
3-56
Page 174 of 414
SERVICE VEHICLE SOON
This message displays when a non-emissions related
malfunction occurs. Have the vehicle serviced by
your dealer/retailer as soon as possible.
STABILITRAK NOT READY
If your vehicle has StabiliTrak®, this message may
display and the StabiliTrak®indicator light on the
instrument panel cluster may be on after first driving the
vehicle and exceeding 20 mph (32 km/h) for 30 seconds.
The StabiliTrak
®system is not functional until the
light has turned off. SeeStabiliTrak®System on
page 4-5for more information.
STABILITRAK OFF
If your vehicle has StabiliTrak®, this message displays
when you turn off StabiliTrak®, or when the stability
control has been automatically disabled. To limit wheel
spin and realize the full benefits of the stability
enhancement system, you should normally leave
StabiliTrak
®on. However, you should turn StabiliTrak®
off if your vehicle gets stuck in sand, mud, ice, or
snow and you want to rock your vehicle to attempt to
free it, or if you are driving in extreme off-road conditions
and require more wheel spin. SeeIf Your Vehicle is
Stuck in Sand, Mud, Ice, or Snow on page 4-19. To turn
the StabiliTrak
®system on or off, seeStabiliTrak®
System on page 4-5.There are several conditions that can cause this
message to appear.
•One condition is overheating, which could occur if
StabiliTrak®activates continuously for an extended
period of time.
•The message also displays if the brake system
warning light is on. SeeBrake System Warning
Light on page 3-34.
•The message could display if the stability system
takes longer than usual to complete its diagnostic
checks due to driving conditions.
•The message displays if an engine or vehicle
related problem has been detected and the vehicle
needs service. See your dealer/retailer.
•The message also displays if the vehicle is shifted
into 4LO.
The message turns off as soon as the conditions that
caused the message to be displayed are no longer
present.
3-58