power steering CHEVROLET EXPRESS CARGO VAN 2009 1.G Owners Manual
[x] Cancel search | Manufacturer: CHEVROLET, Model Year: 2009, Model line: EXPRESS CARGO VAN, Model: CHEVROLET EXPRESS CARGO VAN 2009 1.GPages: 408, PDF Size: 2.36 MB
Page 4 of 408
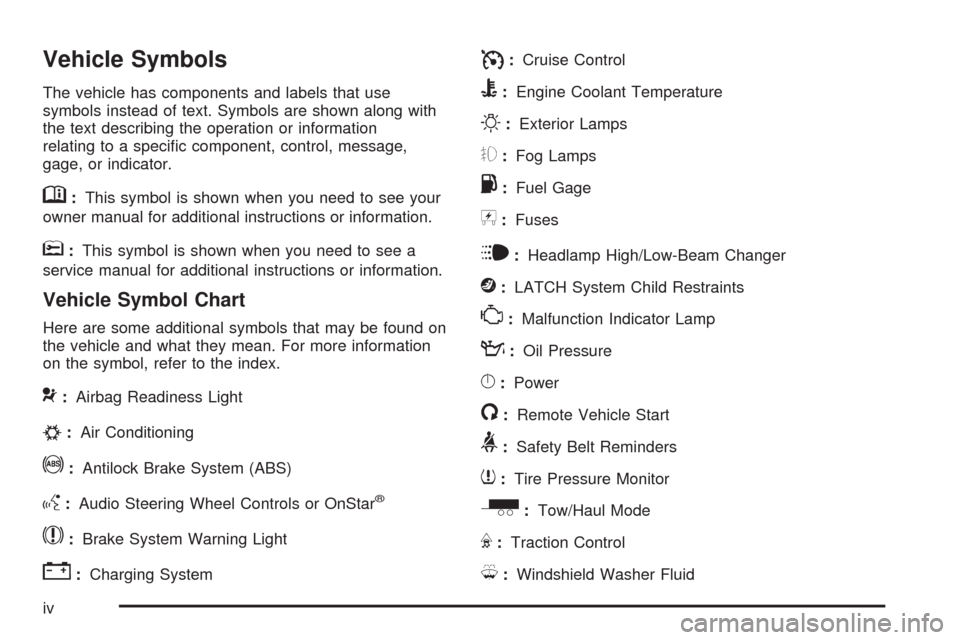
Vehicle Symbols
The vehicle has components and labels that use
symbols instead of text. Symbols are shown along with
the text describing the operation or information
relating to a specific component, control, message,
gage, or indicator.
M:This symbol is shown when you need to see your
owner manual for additional instructions or information.
*:This symbol is shown when you need to see a
service manual for additional instructions or information.
Vehicle Symbol Chart
Here are some additional symbols that may be found on
the vehicle and what they mean. For more information
on the symbol, refer to the index.
9:Airbag Readiness Light
#:Air Conditioning
!:Antilock Brake System (ABS)
g:Audio Steering Wheel Controls or OnStar®
$:Brake System Warning Light
":Charging System
I:Cruise Control
B:Engine Coolant Temperature
O:Exterior Lamps
#:Fog Lamps
.:Fuel Gage
+:Fuses
i:Headlamp High/Low-Beam Changer
j:LATCH System Child Restraints
*:Malfunction Indicator Lamp
::Oil Pressure
}:Power
/:Remote Vehicle Start
>:Safety Belt Reminders
7:Tire Pressure Monitor
_:Tow/Haul Mode
F:Traction Control
M:Windshield Washer Fluid
iv
Page 106 of 408
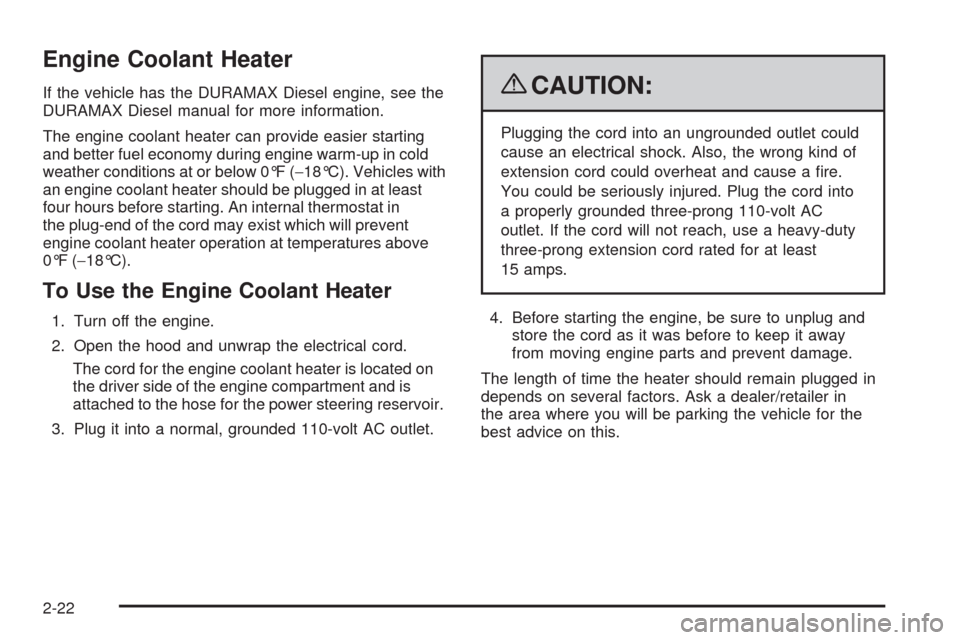
Engine Coolant Heater
If the vehicle has the DURAMAX Diesel engine, see the
DURAMAX Diesel manual for more information.
The engine coolant heater can provide easier starting
and better fuel economy during engine warm-up in cold
weather conditions at or below 0°F (−18°C). Vehicles with
an engine coolant heater should be plugged in at least
four hours before starting. An internal thermostat in
the plug-end of the cord may exist which will prevent
engine coolant heater operation at temperatures above
0°F (−18°C).
To Use the Engine Coolant Heater
1. Turn off the engine.
2. Open the hood and unwrap the electrical cord.
The cord for the engine coolant heater is located on
the driver side of the engine compartment and is
attached to the hose for the power steering reservoir.
3. Plug it into a normal, grounded 110-volt AC outlet.
{CAUTION:
Plugging the cord into an ungrounded outlet could
cause an electrical shock. Also, the wrong kind of
extension cord could overheat and cause a fire.
You could be seriously injured. Plug the cord into
a properly grounded three-prong 110-volt AC
outlet. If the cord will not reach, use a heavy-duty
three-prong extension cord rated for at least
15 amps.
4. Before starting the engine, be sure to unplug and
store the cord as it was before to keep it away
from moving engine parts and prevent damage.
The length of time the heater should remain plugged in
depends on several factors. Ask a dealer/retailer in
the area where you will be parking the vehicle for the
best advice on this.
2-22
Page 123 of 408
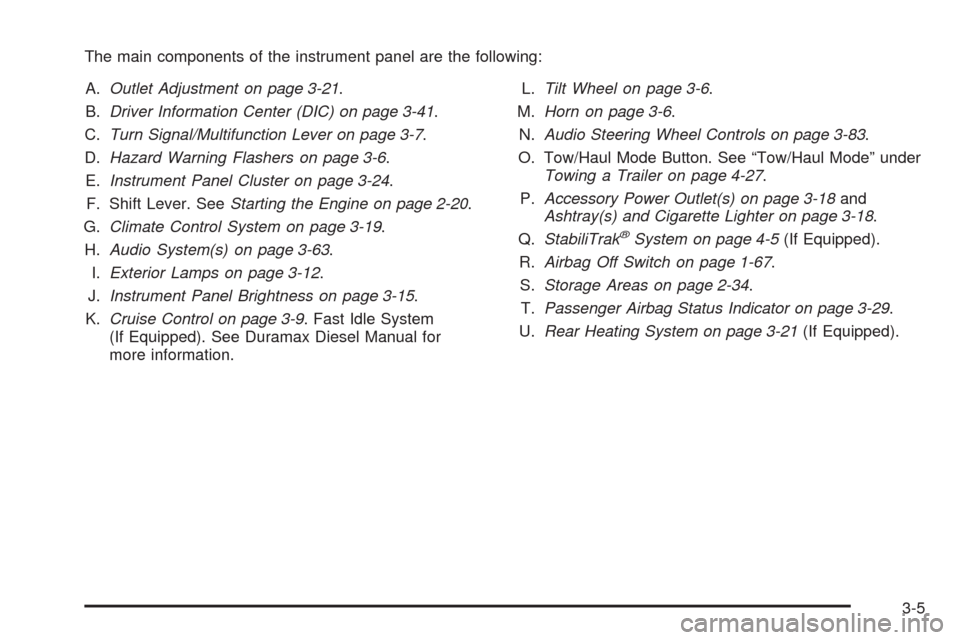
The main components of the instrument panel are the following:
A.Outlet Adjustment on page 3-21.
B.Driver Information Center (DIC) on page 3-41.
C.Turn Signal/Multifunction Lever on page 3-7.
D.Hazard Warning Flashers on page 3-6.
E.Instrument Panel Cluster on page 3-24.
F. Shift Lever. SeeStarting the Engine on page 2-20.
G.Climate Control System on page 3-19.
H.Audio System(s) on page 3-63.
I.Exterior Lamps on page 3-12.
J.Instrument Panel Brightness on page 3-15.
K.Cruise Control on page 3-9. Fast Idle System
(If Equipped). See Duramax Diesel Manual for
more information.L.Tilt Wheel on page 3-6.
M.Horn on page 3-6.
N.Audio Steering Wheel Controls on page 3-83.
O. Tow/Haul Mode Button. See “Tow/Haul Mode” under
Towing a Trailer on page 4-27.
P.Accessory Power Outlet(s) on page 3-18and
Ashtray(s) and Cigarette Lighter on page 3-18.
Q.StabiliTrak
®System on page 4-5(If Equipped).
R.Airbag Off Switch on page 1-67.
S.Storage Areas on page 2-34.
T.Passenger Airbag Status Indicator on page 3-29.
U.Rear Heating System on page 3-21(If Equipped).
3-5
Page 210 of 408
Locking Rear Axle
Vehicles with a locking rear axle can give more traction
on snow, mud, ice, sand or gravel. It works like a
standard axle most of the time, but when traction is low,
this feature will allow the rear wheel with the most traction
to move the vehicle.
All-Wheel Drive (AWD) System
If the vehicle has this feature, engine power is sent to all
four wheels when extra traction is needed. This is like
four-wheel drive, but there is no separate lever or switch
to engage or disengage the front axle. It is fully automatic,
and adjusts itself as needed for road conditions.
Steering
Power Steering
If you lose power steering assist because the engine
stops or the system is not functioning, you can steer but
it will take much more effort.
Steering Tips
It is important to take curves at a reasonable speed.
Traction in a curve depends on the condition of the tires
and the road surface, the angle at which the curve is
banked, and your speed. While in a curve, speed is the
one factor you can control.
If you need to reduce speed, do it before you enter the
curve, while the front wheels are straight ahead.
Try to adjust the speed so you can drive through the
curve. Maintain a reasonable, steady speed. Wait
to accelerate until you are out of the curve, and then
accelerate gently into the straightaway.
4-8
Page 245 of 408
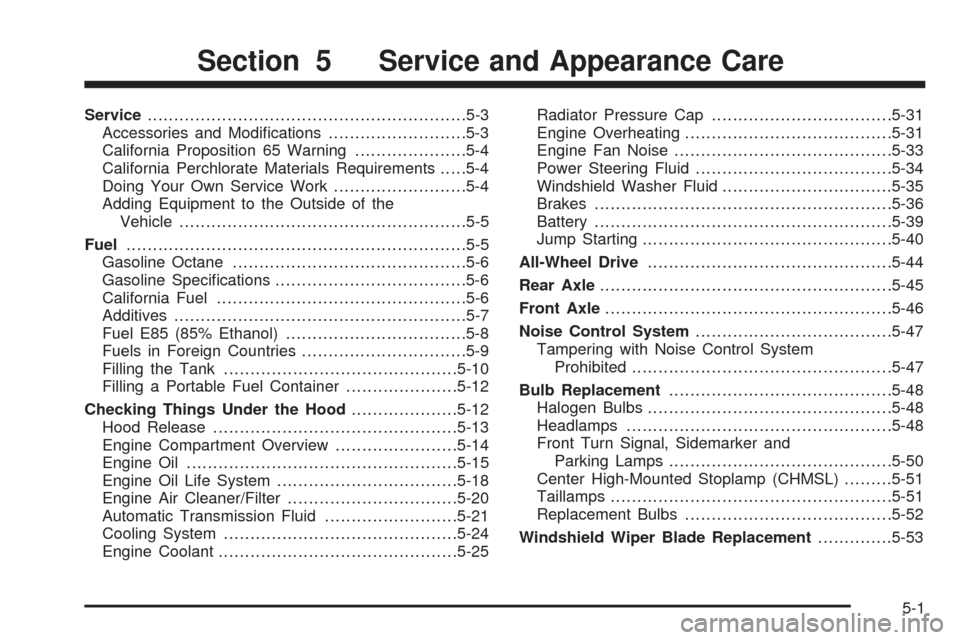
Service............................................................5-3
Accessories and Modifications..........................5-3
California Proposition 65 Warning.....................5-4
California Perchlorate Materials Requirements.....5-4
Doing Your Own Service Work.........................5-4
Adding Equipment to the Outside of the
Vehicle......................................................5-5
Fuel................................................................5-5
Gasoline Octane............................................5-6
Gasoline Specifications....................................5-6
California Fuel...............................................5-6
Additives.......................................................5-7
Fuel E85 (85% Ethanol)..................................5-8
Fuels in Foreign Countries...............................5-9
Filling the Tank............................................5-10
Filling a Portable Fuel Container.....................5-12
Checking Things Under the Hood....................5-12
Hood Release..............................................5-13
Engine Compartment Overview.......................5-14
Engine Oil...................................................5-15
Engine Oil Life System..................................5-18
Engine Air Cleaner/Filter................................5-20
Automatic Transmission Fluid.........................5-21
Cooling System............................................5-24
Engine Coolant.............................................5-25Radiator Pressure Cap..................................5-31
Engine Overheating.......................................5-31
Engine Fan Noise.........................................5-33
Power Steering Fluid.....................................5-34
Windshield Washer Fluid................................5-35
Brakes........................................................5-36
Battery........................................................5-39
Jump Starting...............................................5-40
All-Wheel Drive..............................................5-44
Rear Axle
.......................................................5-45
Front Axle......................................................5-46
Noise Control System.....................................5-47
Tampering with Noise Control System
Prohibited.................................................5-47
Bulb Replacement..........................................5-48
Halogen Bulbs..............................................5-48
Headlamps..................................................5-48
Front Turn Signal, Sidemarker and
Parking Lamps..........................................5-50
Center High-Mounted Stoplamp (CHMSL).........5-51
Taillamps.....................................................5-51
Replacement Bulbs.......................................5-52
Windshield Wiper Blade Replacement..............5-53
Section 5 Service and Appearance Care
5-1
Page 259 of 408
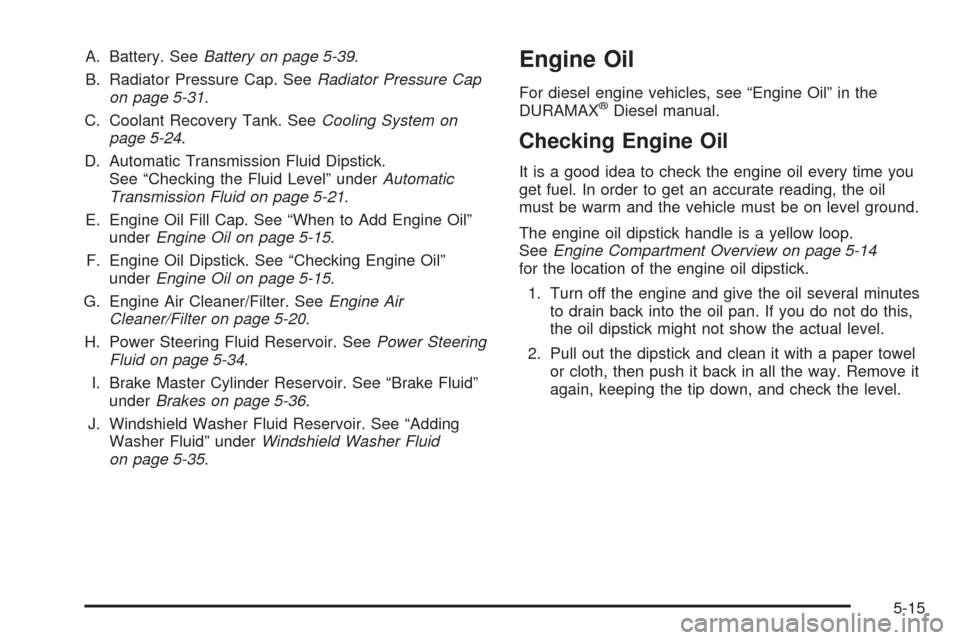
A. Battery. SeeBattery on page 5-39.
B. Radiator Pressure Cap. SeeRadiator Pressure Cap
on page 5-31.
C. Coolant Recovery Tank. SeeCooling System on
page 5-24.
D. Automatic Transmission Fluid Dipstick.
See “Checking the Fluid Level” underAutomatic
Transmission Fluid on page 5-21.
E. Engine Oil Fill Cap. See “When to Add Engine Oil”
underEngine Oil on page 5-15.
F. Engine Oil Dipstick. See “Checking Engine Oil”
underEngine Oil on page 5-15.
G. Engine Air Cleaner/Filter. SeeEngine Air
Cleaner/Filter on page 5-20.
H. Power Steering Fluid Reservoir. SeePower Steering
Fluid on page 5-34.
I. Brake Master Cylinder Reservoir. See “Brake Fluid”
underBrakes on page 5-36.
J. Windshield Washer Fluid Reservoir. See “Adding
Washer Fluid” underWindshield Washer Fluid
on page 5-35.Engine Oil
For diesel engine vehicles, see “Engine Oil” in the
DURAMAX®Diesel manual.
Checking Engine Oil
It is a good idea to check the engine oil every time you
get fuel. In order to get an accurate reading, the oil
must be warm and the vehicle must be on level ground.
The engine oil dipstick handle is a yellow loop.
SeeEngine Compartment Overview on page 5-14
for the location of the engine oil dipstick.
1. Turn off the engine and give the oil several minutes
to drain back into the oil pan. If you do not do this,
the oil dipstick might not show the actual level.
2. Pull out the dipstick and clean it with a paper towel
or cloth, then push it back in all the way. Remove it
again, keeping the tip down, and check the level.
5-15
Page 278 of 408
Power Steering Fluid
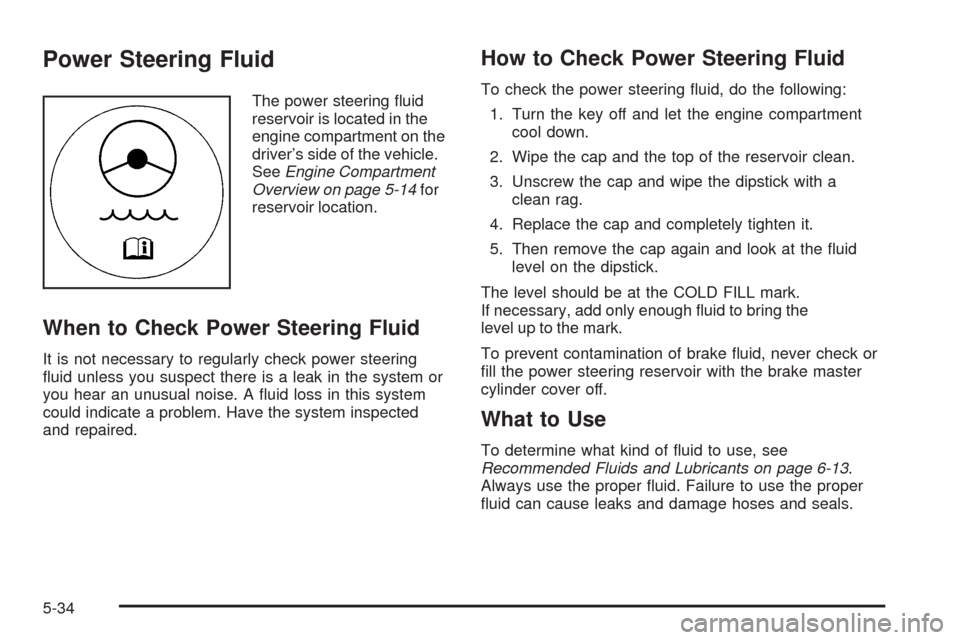
The power steering fluid
reservoir is located in the
engine compartment on the
driver’s side of the vehicle.
SeeEngine Compartment
Overview on page 5-14for
reservoir location.
When to Check Power Steering Fluid
It is not necessary to regularly check power steering
fluid unless you suspect there is a leak in the system or
you hear an unusual noise. A fluid loss in this system
could indicate a problem. Have the system inspected
and repaired.
How to Check Power Steering Fluid
To check the power steering fluid, do the following:
1. Turn the key off and let the engine compartment
cool down.
2. Wipe the cap and the top of the reservoir clean.
3. Unscrew the cap and wipe the dipstick with a
clean rag.
4. Replace the cap and completely tighten it.
5. Then remove the cap again and look at the fluid
level on the dipstick.
The level should be at the COLD FILL mark.
If necessary, add only enough fluid to bring the
level up to the mark.
To prevent contamination of brake fluid, never check or
fill the power steering reservoir with the brake master
cylinder cover off.
What to Use
To determine what kind of fluid to use, see
Recommended Fluids and Lubricants on page 6-13.
Always use the proper fluid. Failure to use the proper
fluid can cause leaks and damage hoses and seals.
5-34
Page 303 of 408
Tire Terminology and De�nitions
Air Pressure:The amount of air inside the
tire pressing outward on each square inch of
the tire. Air pressure is expressed in pounds
per square inch (psi) or kilopascal (kPa).
Accessory Weight
:This means the combined
weight of optional accessories. Some examples of
optional accessories are, automatic transmission,
power steering, power brakes, power windows,
power seats, and air conditioning.
Aspect Ratio
:The relationship of a tire’s height
to its width.
Belt
:A rubber coated layer of cords that is
located between the plies and the tread. Cords
may be made from steel or other reinforcing
materials.
Bead
:The tire bead contains steel wires wrapped
by steel cords that hold the tire onto the rim.
Bias Ply Tire
:A pneumatic tire in which the plies
are laid at alternate angles less than 90 degrees
to the centerline of the tread.Cold Tire Pressure
:The amount of air pressure
in a tire, measured in pounds per square inch (psi)
or kilopascals (kPa) before a tire has built up heat
from driving. SeeInflation - Tire Pressure on
page 5-62.
Curb Weight
:The weight of a motor vehicle with
standard and optional equipment including the
maximum capacity of fuel, oil, and coolant,
but without passengers and cargo.
DOT Markings
:A code molded into the sidewall
of a tire signifying that the tire is in compliance
with the U.S. Department of Transportation (DOT)
motor vehicle safety standards. The DOT code
includes the Tire Identification Number (TIN), an
alphanumeric designator which can also identify the
tire manufacturer, production plant, brand, and date
of production.
GVWR
:Gross Vehicle Weight Rating.
SeeLoading the Vehicle on page 4-19.
GAWR FRT
:Gross Axle Weight Rating for the
front axle. SeeLoading the Vehicle on page 4-19.
GAWR RR
:Gross Axle Weight Rating for the
rear axle. SeeLoading the Vehicle on page 4-19.
5-59
Page 353 of 408
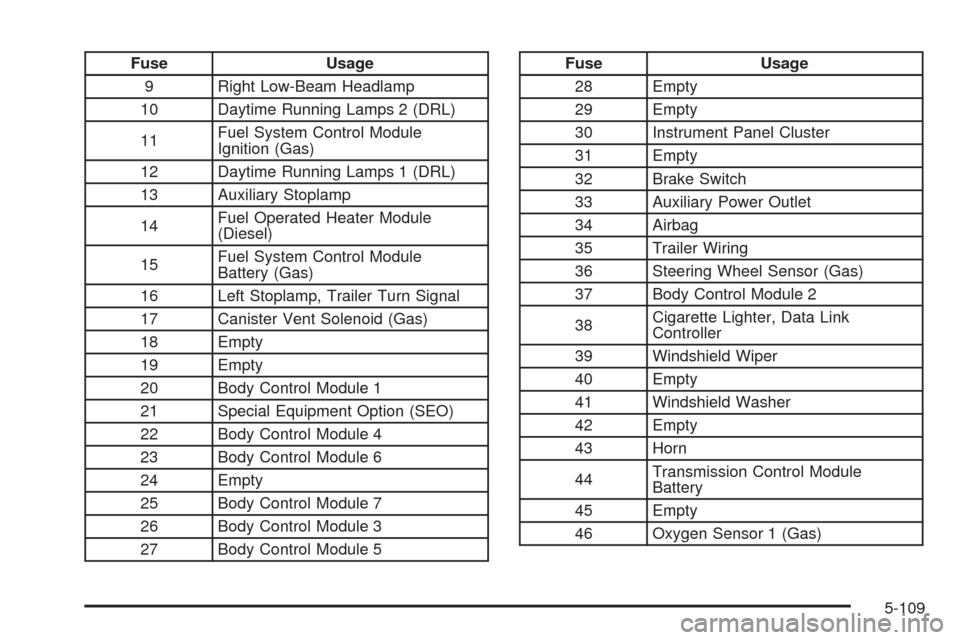
Fuse Usage
9 Right Low-Beam Headlamp
10 Daytime Running Lamps 2 (DRL)
11Fuel System Control Module
Ignition (Gas)
12 Daytime Running Lamps 1 (DRL)
13 Auxiliary Stoplamp
14Fuel Operated Heater Module
(Diesel)
15Fuel System Control Module
Battery (Gas)
16 Left Stoplamp, Trailer Turn Signal
17 Canister Vent Solenoid (Gas)
18 Empty
19 Empty
20 Body Control Module 1
21 Special Equipment Option (SEO)
22 Body Control Module 4
23 Body Control Module 6
24 Empty
25 Body Control Module 7
26 Body Control Module 3
27 Body Control Module 5Fuse Usage
28 Empty
29 Empty
30 Instrument Panel Cluster
31 Empty
32 Brake Switch
33 Auxiliary Power Outlet
34 Airbag
35 Trailer Wiring
36 Steering Wheel Sensor (Gas)
37 Body Control Module 2
38Cigarette Lighter, Data Link
Controller
39 Windshield Wiper
40 Empty
41 Windshield Washer
42 Empty
43 Horn
44Transmission Control Module
Battery
45 Empty
46 Oxygen Sensor 1 (Gas)
5-109
Page 364 of 408
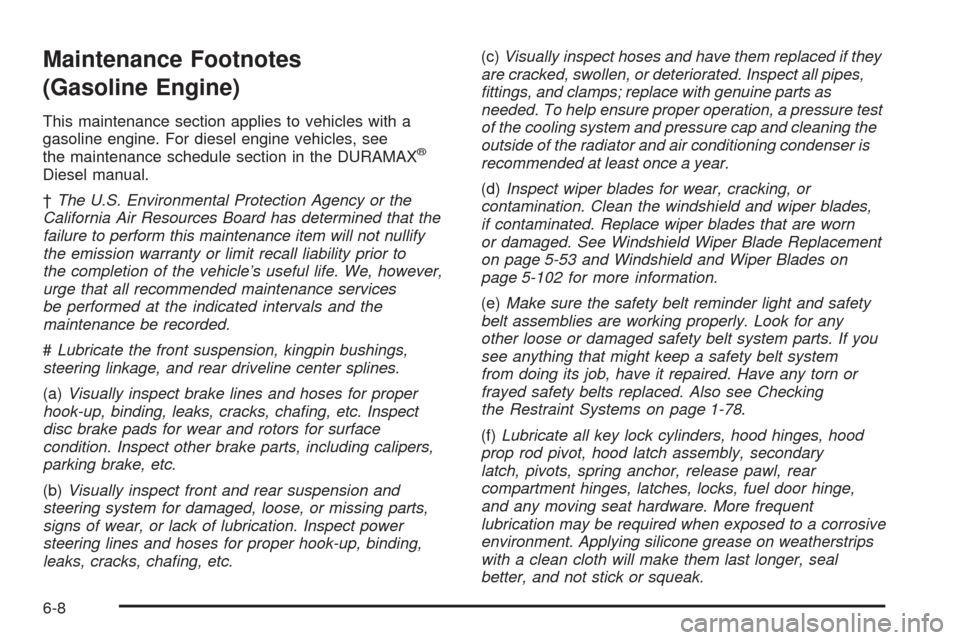
Maintenance Footnotes
(Gasoline Engine)
This maintenance section applies to vehicles with a
gasoline engine. For diesel engine vehicles, see
the maintenance schedule section in the DURAMAX
®
Diesel manual.
†The U.S. Environmental Protection Agency or the
California Air Resources Board has determined that the
failure to perform this maintenance item will not nullify
the emission warranty or limit recall liability prior to
the completion of the vehicle’s useful life. We, however,
urge that all recommended maintenance services
be performed at the indicated intervals and the
maintenance be recorded.
#Lubricate the front suspension, kingpin bushings,
steering linkage, and rear driveline center splines.
(a)Visually inspect brake lines and hoses for proper
hook-up, binding, leaks, cracks, chafing, etc. Inspect
disc brake pads for wear and rotors for surface
condition. Inspect other brake parts, including calipers,
parking brake, etc.
(b)Visually inspect front and rear suspension and
steering system for damaged, loose, or missing parts,
signs of wear, or lack of lubrication. Inspect power
steering lines and hoses for proper hook-up, binding,
leaks, cracks, chafing, etc.(c)Visually inspect hoses and have them replaced if they
are cracked, swollen, or deteriorated. Inspect all pipes,
fittings, and clamps; replace with genuine parts as
needed. To help ensure proper operation, a pressure test
of the cooling system and pressure cap and cleaning the
outside of the radiator and air conditioning condenser is
recommended at least once a year.
(d)Inspect wiper blades for wear, cracking, or
contamination. Clean the windshield and wiper blades,
if contaminated. Replace wiper blades that are worn
or damaged. See Windshield Wiper Blade Replacement
on page 5-53 and Windshield and Wiper Blades on
page 5-102 for more information.
(e)Make sure the safety belt reminder light and safety
belt assemblies are working properly. Look for any
other loose or damaged safety belt system parts. If you
see anything that might keep a safety belt system
from doing its job, have it repaired. Have any torn or
frayed safety belts replaced. Also see Checking
the Restraint Systems on page 1-78.
(f)Lubricate all key lock cylinders, hood hinges, hood
prop rod pivot, hood latch assembly, secondary
latch, pivots, spring anchor, release pawl, rear
compartment hinges, latches, locks, fuel door hinge,
and any moving seat hardware. More frequent
lubrication may be required when exposed to a corrosive
environment. Applying silicone grease on weatherstrips
with a clean cloth will make them last longer, seal
better, and not stick or squeak.
6-8