belt CHEVROLET EXPRESS CARGO VAN 2013 1.G Owners Manual
[x] Cancel search | Manufacturer: CHEVROLET, Model Year: 2013, Model line: EXPRESS CARGO VAN, Model: CHEVROLET EXPRESS CARGO VAN 2013 1.GPages: 402, PDF Size: 6.46 MB
Page 1 of 402

Black plate (1,1)Chevrolet Express Owner Manual - 2013 - 1stPrintReady - 6/19/12
2013 Chevrolet Express Owner ManualM
In Brief. . . . . . . . . . . . . . . . . . . . . . . . 1-1
Instrument Panel . . . . . . . . . . . . . . 1-2
Initial Drive Information . . . . . . . . 1-4
Vehicle Features . . . . . . . . . . . . . 1-14
Performance and Maintenance . . . . . . . . . . . . . . . . 1-18
Keys, Doors, and Windows . . . . . . . . . . . . . . . . . . . . 2-1
Keys and Locks . . . . . . . . . . . . . . . 2-1
Doors . . . . . . . . . . . . . . . . . . . . . . . . . . 2-9
Vehicle Security . . . . . . . . . . . . . . 2-11
Exterior Mirrors . . . . . . . . . . . . . . . 2-13
Interior Mirrors . . . . . . . . . . . . . . . . 2-15
Windows . . . . . . . . . . . . . . . . . . . . . 2-15
Seats and Restraints . . . . . . . . . 3-1
Head Restraints . . . . . . . . . . . . . . . 3-2
Front Seats . . . . . . . . . . . . . . . . . . . . 3-2
Rear Seats . . . . . . . . . . . . . . . . . . . . 3-4
Safety Belts . . . . . . . . . . . . . . . . . . . . 3-8
Airbag System . . . . . . . . . . . . . . . . 3-16
Child Restraints . . . . . . . . . . . . . . 3-33 Storage
. . . . . . . . . . . . . . . . . . . . . . . 4-1
Storage Compartments . . . . . . . . 4-1
Instruments and Controls . . . . 5-1
Controls . . . . . . . . . . . . . . . . . . . . . . . 5-2
Warning Lights, Gauges, and Indicators . . . . . . . . . . . . . . . . . . . . 5-8
Information Displays . . . . . . . . . . 5-24
Vehicle Messages . . . . . . . . . . . . 5-29
Vehicle Personalization . . . . . . . 5-38
Lighting . . . . . . . . . . . . . . . . . . . . . . . 6-1
Exterior Lighting . . . . . . . . . . . . . . . 6-1
Interior Lighting . . . . . . . . . . . . . . . . 6-5
Lighting Features . . . . . . . . . . . . . . 6-6
Infotainment System . . . . . . . . . 7-1
Introduction . . . . . . . . . . . . . . . . . . . . 7-1
Radio . . . . . . . . . . . . . . . . . . . . . . . . . . 7-7
Audio Players . . . . . . . . . . . . . . . . 7-12
Phone . . . . . . . . . . . . . . . . . . . . . . . . 7-21 Climate Controls
. . . . . . . . . . . . . 8-1
Climate Control Systems . . . . . . 8-1
Air Vents . . . . . . . . . . . . . . . . . . . . . . . 8-7
Driving and Operating . . . . . . . . 9-1
Driving Information . . . . . . . . . . . . . 9-2
Starting and Operating . . . . . . . 9-14
Engine Exhaust . . . . . . . . . . . . . . 9-21
Automatic Transmission . . . . . . 9-22
Drive Systems . . . . . . . . . . . . . . . . 9-30
Brakes . . . . . . . . . . . . . . . . . . . . . . . 9-30
Ride Control Systems . . . . . . . . 9-32
Cruise Control . . . . . . . . . . . . . . . . 9-34
Object Detection Systems . . . . 9-37
Fuel . . . . . . . . . . . . . . . . . . . . . . . . . . 9-42
Towing . . . . . . . . . . . . . . . . . . . . . . . 9-47
Conversions and Add-Ons . . . 9-57
Page 5 of 402

Black plate (5,1)Chevrolet Express Owner Manual - 2013 - 1stPrintReady - 6/19/12
Introduction v
i:Top Tether Anchors for Child
Restraints
*: Malfunction Indicator Lamp
::Oil Pressure
}:Power
/:Remote Vehicle Start
>:Safety Belt Reminders
7:Tire Pressure Monitor
_: Tow/Haul Mode
d:Traction Control/StabiliTrak®
M:Windshield Washer Fluid
Page 7 of 402
Black plate (1,1)Chevrolet Express Owner Manual - 2013 - 1stPrintReady - 6/19/12
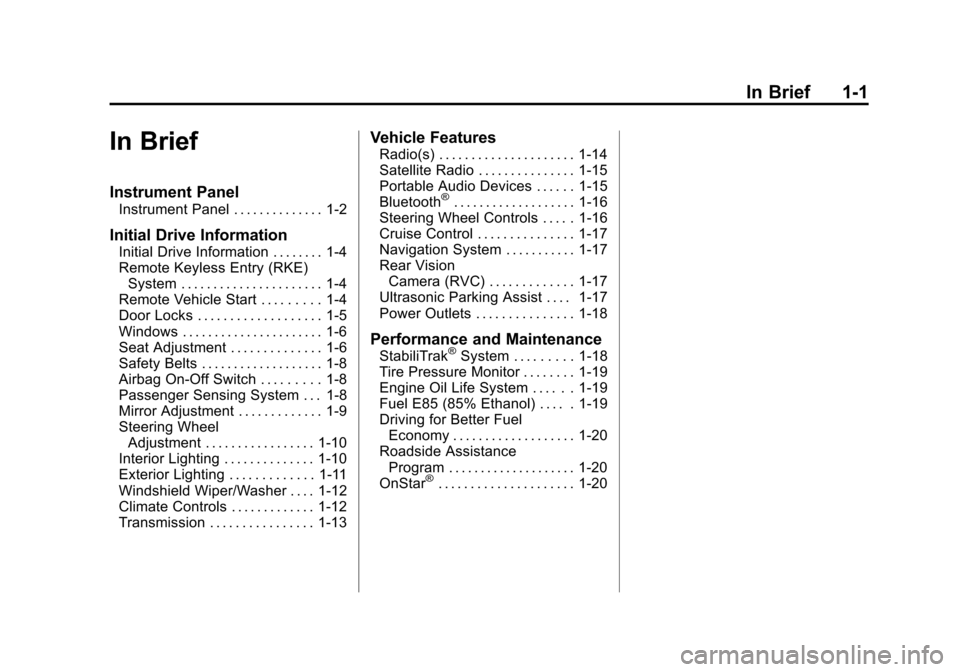
In Brief 1-1
In Brief
Instrument Panel
Instrument Panel . . . . . . . . . . . . . . 1-2
Initial Drive Information
Initial Drive Information . . . . . . . . 1-4
Remote Keyless Entry (RKE)System . . . . . . . . . . . . . . . . . . . . . . 1-4
Remote Vehicle Start . . . . . . . . . 1-4
Door Locks . . . . . . . . . . . . . . . . . . . 1-5
Windows . . . . . . . . . . . . . . . . . . . . . . 1-6
Seat Adjustment . . . . . . . . . . . . . . 1-6
Safety Belts . . . . . . . . . . . . . . . . . . . 1-8
Airbag On-Off Switch . . . . . . . . . 1-8
Passenger Sensing System . . . 1-8
Mirror Adjustment . . . . . . . . . . . . . 1-9
Steering Wheel Adjustment . . . . . . . . . . . . . . . . . 1-10
Interior Lighting . . . . . . . . . . . . . . 1-10
Exterior Lighting . . . . . . . . . . . . . 1-11
Windshield Wiper/Washer . . . . 1-12
Climate Controls . . . . . . . . . . . . . 1-12
Transmission . . . . . . . . . . . . . . . . 1-13
Vehicle Features
Radio(s) . . . . . . . . . . . . . . . . . . . . . 1-14
Satellite Radio . . . . . . . . . . . . . . . 1-15
Portable Audio Devices . . . . . . 1-15
Bluetooth
®. . . . . . . . . . . . . . . . . . . 1-16
Steering Wheel Controls . . . . . 1-16
Cruise Control . . . . . . . . . . . . . . . 1-17
Navigation System . . . . . . . . . . . 1-17
Rear Vision
Camera (RVC) . . . . . . . . . . . . . 1-17
Ultrasonic Parking Assist . . . . 1-17
Power Outlets . . . . . . . . . . . . . . . 1-18
Performance and Maintenance
StabiliTrak®System . . . . . . . . . 1-18
Tire Pressure Monitor . . . . . . . . 1-19
Engine Oil Life System . . . . . . 1-19
Fuel E85 (85% Ethanol) . . . . . 1-19
Driving for Better Fuel Economy . . . . . . . . . . . . . . . . . . . 1-20
Roadside Assistance Program . . . . . . . . . . . . . . . . . . . . 1-20
OnStar
®. . . . . . . . . . . . . . . . . . . . . 1-20
Page 14 of 402
Black plate (8,1)Chevrolet Express Owner Manual - 2013 - 1stPrintReady - 6/19/12
1-8 In Brief
Safety Belts
Refer to the following sections for
important information on how to use
safety belts properly.
.Safety Belts on page 3‑8.
.How to Wear Safety Belts
Properly on page 3‑9.
.Lap-Shoulder Belt on page 3‑10.
.Lower Anchors and Tethers for
Children (LATCH System) on
page 3‑41.
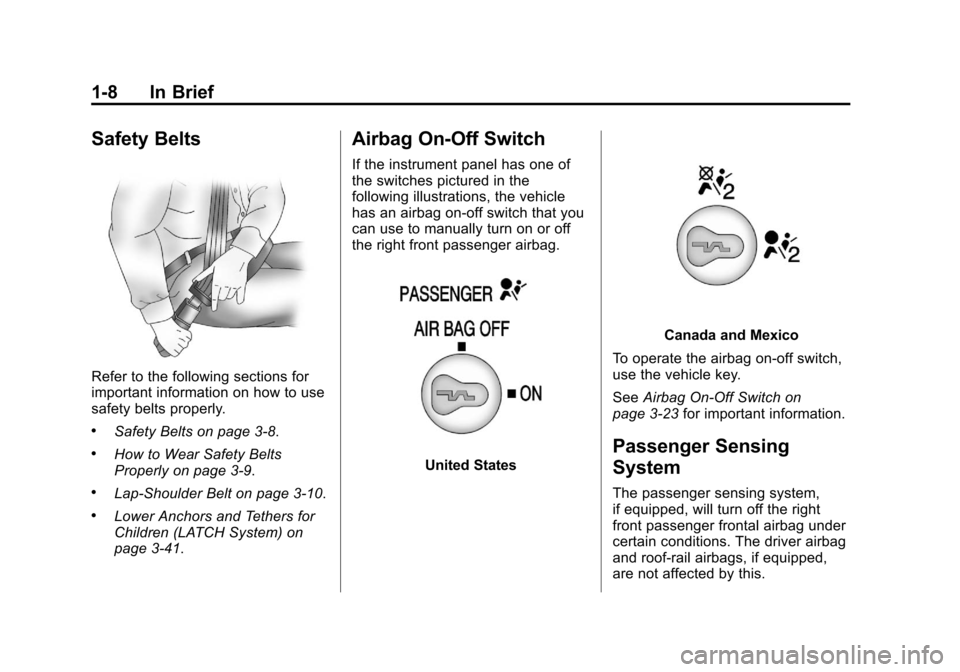
Airbag On-Off Switch
If the instrument panel has one of
the switches pictured in the
following illustrations, the vehicle
has an airbag on-off switch that you
can use to manually turn on or off
the right front passenger airbag.
United States
Canada and Mexico
To operate the airbag on‐off switch,
use the vehicle key.
See Airbag On-Off Switch on
page 3‑23 for important information.
Passenger Sensing
System
The passenger sensing system,
if equipped, will turn off the right
front passenger frontal airbag under
certain conditions. The driver airbag
and roof‐rail airbags, if equipped,
are not affected by this.
Page 32 of 402
Black plate (6,1)Chevrolet Express Owner Manual - 2013 - 1stPrintReady - 6/19/12
2-6 Keys, Doors, and Windows
The remote vehicle start feature will
not operate if:
.The key is in the ignition.
.The hood is open.
.The hazard warning flashers
are on.
.There is an emission control
system malfunction. See
Malfunction Indicator Lamp on
page 5‑17.
.The engine coolant temperature
is too high.
.The oil pressure is low.
.Two remote vehicle starts have
already been provided.
Door Locks
{WARNING
Unlocked doors can be
dangerous.
.Passengers, especially
children, can easily open the
doors and fall out of a moving
vehicle. When a door is
locked, the handle will not
open it. The chance of being
thrown out of the vehicle in a
crash is increased if the
doors are not locked. So, all
passengers should wear
safety belts properly and the
doors should be locked
whenever the vehicle is
driven.(Continued)
WARNING (CONTINUED)
.Young children who get into
unlocked vehicles may be
unable to get out. A child can
be overcome by extreme heat
and can suffer permanent
injuries or even death from
heat stroke. Always lock the
vehicle whenever leaving it.
.Outsiders can easily enter
through an unlocked door
when you slow down or stop
the vehicle. Locking the doors
can help prevent this from
happening.
Page 36 of 402
Black plate (10,1)Chevrolet Express Owner Manual - 2013 - 1stPrintReady - 6/19/12
2-10 Keys, Doors, and Windows
then open the door. When the door
is closed, the check strap will
automatically re-engage.
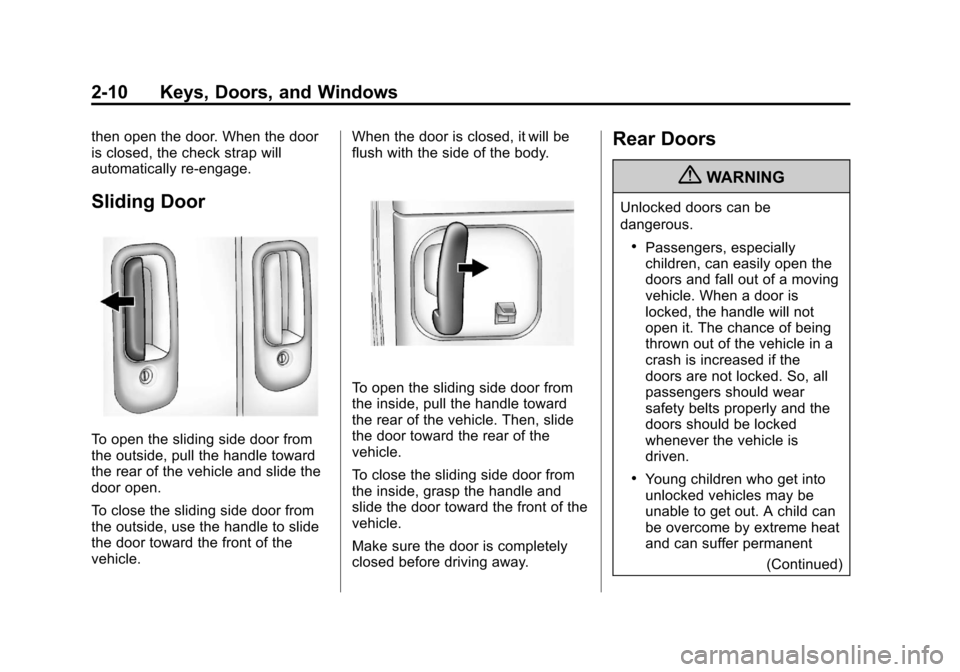
Sliding Door
To open the sliding side door from
the outside, pull the handle toward
the rear of the vehicle and slide the
door open.
To close the sliding side door from
the outside, use the handle to slide
the door toward the front of the
vehicle.When the door is closed, it will be
flush with the side of the body.
To open the sliding side door from
the inside, pull the handle toward
the rear of the vehicle. Then, slide
the door toward the rear of the
vehicle.
To close the sliding side door from
the inside, grasp the handle and
slide the door toward the front of the
vehicle.
Make sure the door is completely
closed before driving away.
Rear Doors
{WARNING
Unlocked doors can be
dangerous.
.Passengers, especially
children, can easily open the
doors and fall out of a moving
vehicle. When a door is
locked, the handle will not
open it. The chance of being
thrown out of the vehicle in a
crash is increased if the
doors are not locked. So, all
passengers should wear
safety belts properly and the
doors should be locked
whenever the vehicle is
driven.
.Young children who get into
unlocked vehicles may be
unable to get out. A child can
be overcome by extreme heat
and can suffer permanent
(Continued)
Page 43 of 402
Black plate (17,1)Chevrolet Express Owner Manual - 2013 - 1stPrintReady - 6/19/12
Keys, Doors, and Windows 2-17
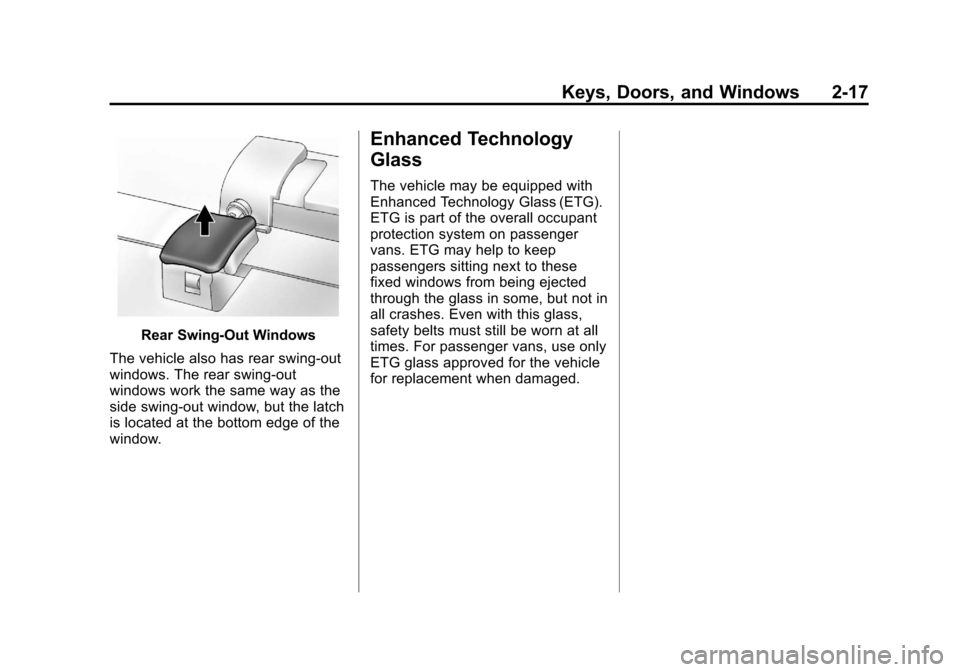
Rear Swing‐Out Windows
The vehicle also has rear swing‐out
windows. The rear swing-out
windows work the same way as the
side swing‐out window, but the latch
is located at the bottom edge of the
window.
Enhanced Technology
Glass
The vehicle may be equipped with
Enhanced Technology Glass (ETG).
ETG is part of the overall occupant
protection system on passenger
vans. ETG may help to keep
passengers sitting next to these
fixed windows from being ejected
through the glass in some, but not in
all crashes. Even with this glass,
safety belts must still be worn at all
times. For passenger vans, use only
ETG glass approved for the vehicle
for replacement when damaged.
Page 45 of 402
Black plate (1,1)Chevrolet Express Owner Manual - 2013 - 1stPrintReady - 6/19/12
Seats and Restraints 3-1
Seats and
Restraints
Head Restraints
Head Restraints . . . . . . . . . . . . . . . 3-2
Front Seats
Seat Adjustment . . . . . . . . . . . . . . 3-2
Power Seat Adjustment . . . . . . . 3-3
Reclining Seatbacks . . . . . . . . . . 3-3
Rear Seats
Rear Seats . . . . . . . . . . . . . . . . . . . . 3-4
Safety Belts
Safety Belts . . . . . . . . . . . . . . . . . . . 3-8
How to Wear Safety BeltsProperly . . . . . . . . . . . . . . . . . . . . . 3-9
Lap-Shoulder Belt . . . . . . . . . . . 3-10
Safety Belt Use During Pregnancy . . . . . . . . . . . . . . . . . . 3-14
Safety Belt Extender . . . . . . . . . 3-15 Safety System Check . . . . . . . . 3-15
Safety Belt Care . . . . . . . . . . . . . 3-15
Replacing Safety Belt System
Parts after a Crash . . . . . . . . . 3-15
Airbag System
Airbag System . . . . . . . . . . . . . . . 3-16
Where Are the Airbags? . . . . . 3-18
When Should an AirbagInflate? . . . . . . . . . . . . . . . . . . . . . 3-20
What Makes an Airbag Inflate? . . . . . . . . . . . . . . . . . . . . . 3-21
How Does an Airbag Restrain? . . . . . . . . . . . . . . . . . . . 3-21
What Will You See after an Airbag Inflates? . . . . . . . . . . . . 3-22
Airbag On-Off Switch . . . . . . . . 3-23
Passenger Sensing
System . . . . . . . . . . . . . . . . . . . . . 3-26
Servicing the Airbag-Equipped Vehicle . . . . . . . . . . . . . . . . . . . . . 3-31 Adding Equipment to the
Airbag-Equipped Vehicle . . . 3-31
Airbag System Check . . . . . . . . 3-32
Replacing Airbag System Parts after a Crash . . . . . . . . . 3-33Child Restraints
Older Children . . . . . . . . . . . . . . . 3-33
Infants and Young
Children . . . . . . . . . . . . . . . . . . . . 3-35
Child Restraint Systems . . . . . 3-38
Where to Put the Restraint . . . 3-39
Lower Anchors and Tethers for Children (LATCH
System) . . . . . . . . . . . . . . . . . . . . 3-41
Replacing LATCH System Parts After a Crash . . . . . . . . . 3-47
Securing Child Restraints (Rear Seat) . . . . . . . . . . . . . . . . . 3-48
Securing Child Restraints (Front Seat-Passenger
Sensing System) . . . . . . . . . . . 3-50
Securing Child Restraints (Front Seat-Airbag On/Off
Switch) . . . . . . . . . . . . . . . . . . . . . 3-53
Page 48 of 402
Black plate (4,1)Chevrolet Express Owner Manual - 2013 - 1stPrintReady - 6/19/12
3-4 Seats and Restraints
{WARNING
Sitting in a reclined position when
the vehicle is in motion can be
dangerous. Even when buckled
up, the safety belts cannot do
their job.
The shoulder belt will not be
against your body. Instead, it will
be in front of you. In a crash, you
could go into it, receiving neck or
other injuries.
The lap belt could go up over
your abdomen. The belt forces
would be there, not at your pelvic
bones. This could cause serious
internal injuries.
For proper protection when the
vehicle is in motion, have the
seatback upright. Then sit well
back in the seat and wear the
safety belt properly.
Do not have a seatback reclined if
the vehicle is moving.
Rear Seats
Removing the Rear Seat
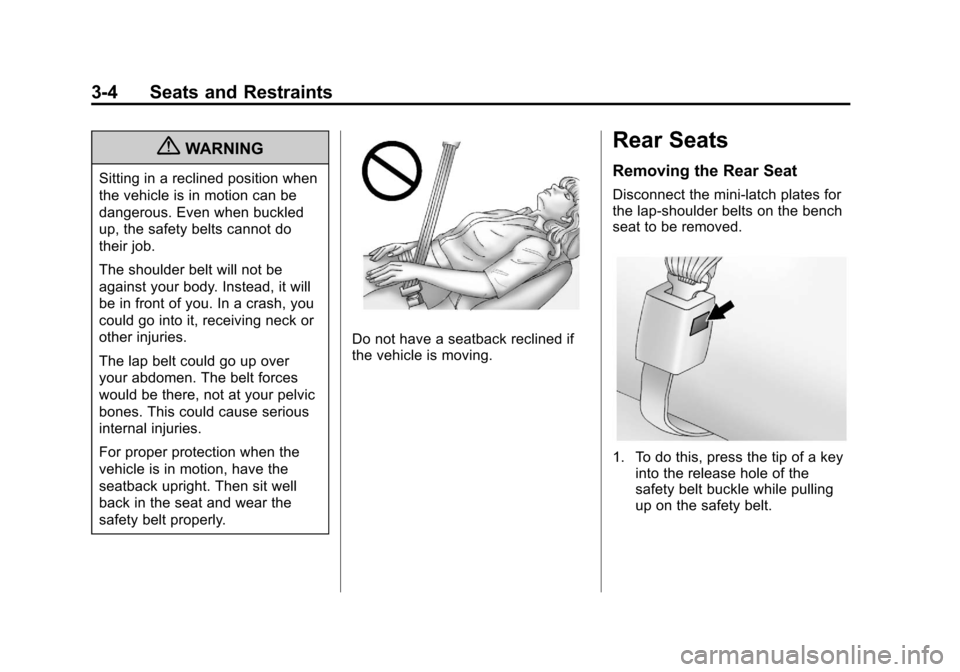
Disconnect the mini-latch plates for
the lap‐shoulder belts on the bench
seat to be removed.
1. To do this, press the tip of a keyinto the release hole of the
safety belt buckle while pulling
up on the safety belt.
Page 50 of 402
Black plate (6,1)Chevrolet Express Owner Manual - 2013 - 1stPrintReady - 6/19/12
3-6 Seats and Restraints
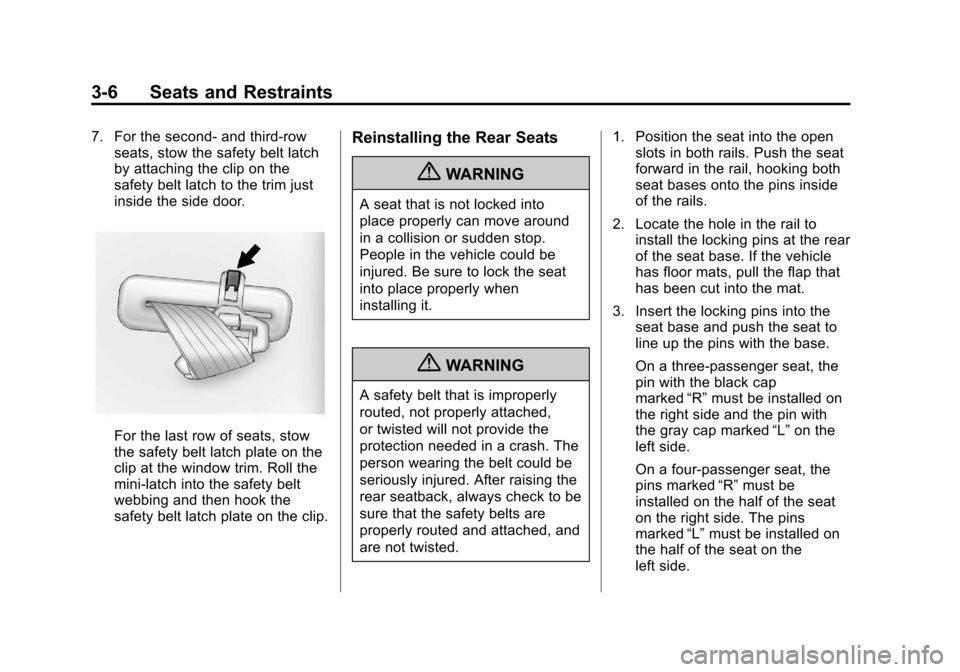
7. For the second- and third-rowseats, stow the safety belt latch
by attaching the clip on the
safety belt latch to the trim just
inside the side door.
For the last row of seats, stow
the safety belt latch plate on the
clip at the window trim. Roll the
mini-latch into the safety belt
webbing and then hook the
safety belt latch plate on the clip.
Reinstalling the Rear Seats
{WARNING
A seat that is not locked into
place properly can move around
in a collision or sudden stop.
People in the vehicle could be
injured. Be sure to lock the seat
into place properly when
installing it.
{WARNING
A safety belt that is improperly
routed, not properly attached,
or twisted will not provide the
protection needed in a crash. The
person wearing the belt could be
seriously injured. After raising the
rear seatback, always check to be
sure that the safety belts are
properly routed and attached, and
are not twisted. 1. Position the seat into the open
slots in both rails. Push the seat
forward in the rail, hooking both
seat bases onto the pins inside
of the rails.
2. Locate the hole in the rail to install the locking pins at the rear
of the seat base. If the vehicle
has floor mats, pull the flap that
has been cut into the mat.
3. Insert the locking pins into the seat base and push the seat to
line up the pins with the base.
On a three-passenger seat, the
pin with the black cap
marked “R”must be installed on
the right side and the pin with
the gray cap marked “L”on the
left side.
On a four-passenger seat, the
pins marked “R”must be
installed on the half of the seat
on the right side. The pins
marked “L”must be installed on
the half of the seat on the
left side.