spare tire location CHEVROLET EXPRESS CARGO VAN 2015 1.G Owners Manual
[x] Cancel search | Manufacturer: CHEVROLET, Model Year: 2015, Model line: EXPRESS CARGO VAN, Model: CHEVROLET EXPRESS CARGO VAN 2015 1.GPages: 377, PDF Size: 5.28 MB
Page 287 of 377

Black plate (54,1)Chevrolet Express Owner Manual (GMNA-Localizing-U.S./Canada/Mexico-
7707481) - 2015 - crc - 2/10/15
10-54 Vehicle Care
inflated to the correct inflation
pressure. If the vehicle has DIC
buttons, tire pressure levels can be
viewed. For additional information
and details about the DIC operation
and displays, seeDriver Information
Center (DIC) on page 5-24 andTire
Messages on page 5-35.
The low tire pressure warning light
may come on in cool weather when
the vehicle is first started, and then
turn off as the vehicle is driven. This
could be an early indicator that the
air pressure is getting low and
needs to be inflated to the proper
pressure.
A Tire and Loading Information label
shows the size of the original
equipment tires and the correct
inflation pressure for the tires when
they are cold. See Vehicle Load
Limits on page 9-9, for an example
of the Tire and Loading Information
label and its location. Also see Tire
Pressure on page 10-51. The TPMS can warn about a low
tire pressure condition but it does
not replace normal tire
maintenance. See
Tire Inspection
on page 10-56, Tire Rotation on
page 10-57 andTires on
page 10-42.
{Caution
Tire sealant materials are not all
the same. A non-approved tire
sealant could damage the TPMS
sensors. TPMS sensor damage
caused by using an incorrect tire
sealant is not covered by the
vehicle warranty. Always use only
the GM approved tire sealant
available through your dealer or
included in the vehicle.
TPMS Malfunction Light and
Message
The TPMS will not function properly
if one or more of the TPMS sensors
are missing or inoperable. When the
system detects a malfunction, the
low tire pressure warning light
flashes for about one minute and
then stays on for the remainder of
the ignition cycle. A DIC warning
message also displays. The
malfunction light and DIC warning
message come on at each ignition
cycle until the problem is corrected.
Some of the conditions that can
cause these to come on are:
.One of the road tires has been
replaced with the spare tire. The
spare tire does not have a
TPMS sensor. The malfunction
light and the DIC message
should go off after the road tire
is replaced and the sensor
matching process is performed
successfully. See "TPMS Sensor
Matching Process" later in this
section.
Page 290 of 377

Black plate (57,1)Chevrolet Express Owner Manual (GMNA-Localizing-U.S./Canada/Mexico-
7707481) - 2015 - crc - 2/10/15
Vehicle Care 10-57
.The tire has a puncture, cut,
or other damage that cannot
be repaired well because of
the size or location of the
damage.
Tire Rotation
Tires should be rotated every
12 000 km (7,500 mi). See
Maintenance Schedule on
page 11-3.
Tires are rotated to achieve a
uniform wear for all tires. The
first rotation is the most
important.
Any time unusual wear is
noticed, rotate the tires as soon
as possible and check the wheel
alignment. Also check for
damaged tires or wheels. See
When It Is Time for New Tires
on page 10-58andWheel
Replacement on page 10-63.
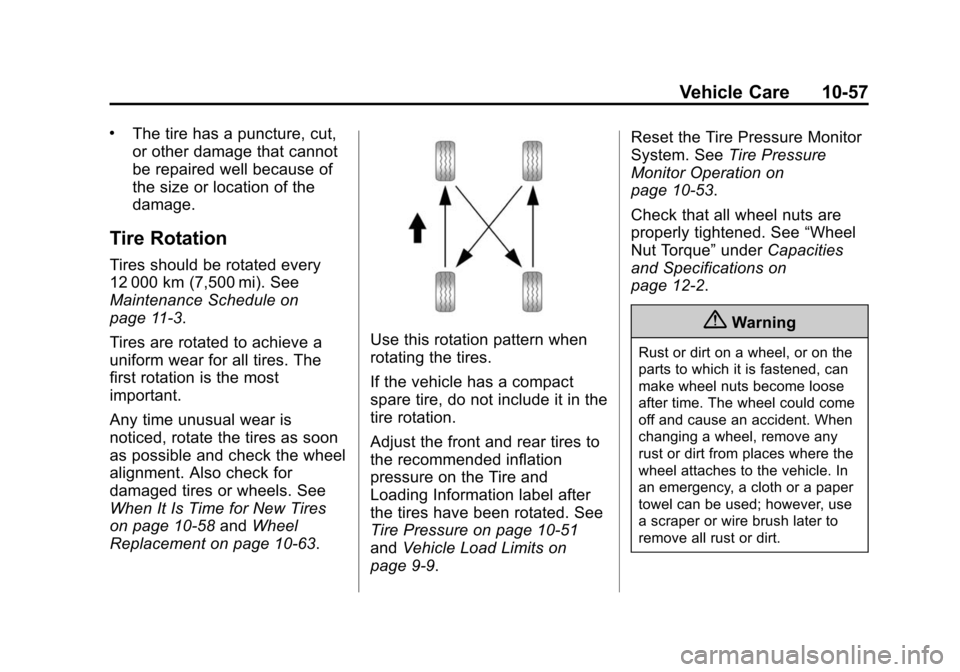
Use this rotation pattern when
rotating the tires.
If the vehicle has a compact
spare tire, do not include it in the
tire rotation.
Adjust the front and rear tires to
the recommended inflation
pressure on the Tire and
Loading Information label after
the tires have been rotated. See
Tire Pressure on page 10-51
and Vehicle Load Limits on
page 9-9. Reset the Tire Pressure Monitor
System. See
Tire Pressure
Monitor Operation on
page 10-53.
Check that all wheel nuts are
properly tightened. See “Wheel
Nut Torque” underCapacities
and Specifications on
page 12-2.
{Warning
Rust or dirt on a wheel, or on the
parts to which it is fastened, can
make wheel nuts become loose
after time. The wheel could come
off and cause an accident. When
changing a wheel, remove any
rust or dirt from places where the
wheel attaches to the vehicle. In
an emergency, a cloth or a paper
towel can be used; however, use
a scraper or wire brush later to
remove all rust or dirt.
Page 304 of 377

Black plate (71,1)Chevrolet Express Owner Manual (GMNA-Localizing-U.S./Canada/Mexico-
7707481) - 2015 - crc - 2/10/15
Vehicle Care 10-71
{Warning
Raising the vehicle with the jack
improperly positioned can
damage the vehicle and even
make the vehicle fall. To help
avoid personal injury and vehicle
damage, be sure to fit the jack lift
head into the proper location
before raising the vehicle.
5. Turn the wheel wrench clockwise to raise the vehicle.
Raise the vehicle far enough off
the ground so there is enough
room for the spare tire to fit.
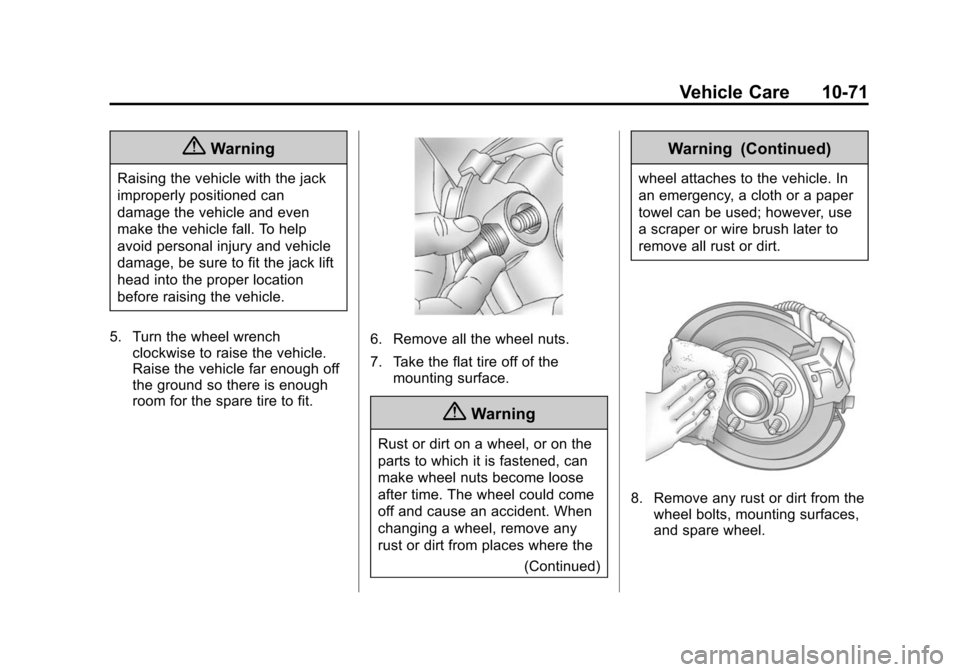
6. Remove all the wheel nuts.
7. Take the flat tire off of themounting surface.
{Warning
Rust or dirt on a wheel, or on the
parts to which it is fastened, can
make wheel nuts become loose
after time. The wheel could come
off and cause an accident. When
changing a wheel, remove any
rust or dirt from places where the
(Continued)
Warning (Continued)
wheel attaches to the vehicle. In
an emergency, a cloth or a paper
towel can be used; however, use
a scraper or wire brush later to
remove all rust or dirt.
8. Remove any rust or dirt from thewheel bolts, mounting surfaces,
and spare wheel.
Page 307 of 377

Black plate (74,1)Chevrolet Express Owner Manual (GMNA-Localizing-U.S./Canada/Mexico-
7707481) - 2015 - crc - 2/10/15
10-74 Vehicle Care
1. Put the tire on the ground at therear of the vehicle with the valve
stem pointed down.
2. Pull the retaining bar through the
center of the wheel, making sure
it is properly attached.
3. Pull the wheel toward the rear of the vehicle, keeping the cable
tight.
4. Open the passenger side rear door.
5. Insert the chisel end of the hoist handle, on an angle, through the
hole in the rear floor panel
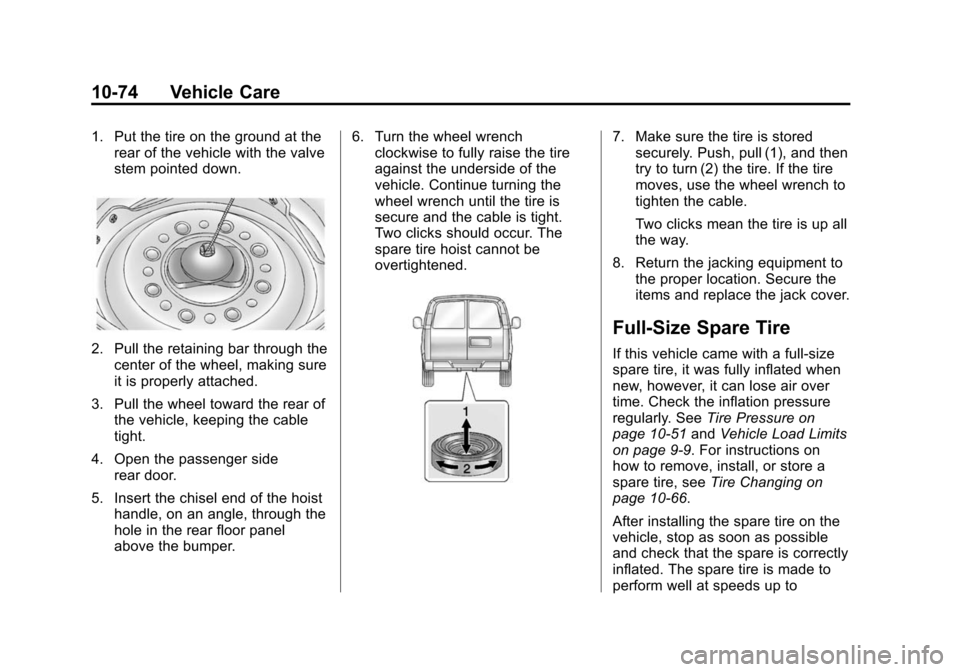
above the bumper. 6. Turn the wheel wrench
clockwise to fully raise the tire
against the underside of the
vehicle. Continue turning the
wheel wrench until the tire is
secure and the cable is tight.
Two clicks should occur. The
spare tire hoist cannot be
overtightened.
7. Make sure the tire is storedsecurely. Push, pull (1), and then
try to turn (2) the tire. If the tire
moves, use the wheel wrench to
tighten the cable.
Two clicks mean the tire is up all
the way.
8. Return the jacking equipment to the proper location. Secure the
items and replace the jack cover.
Full-Size Spare Tire
If this vehicle came with a full-size
spare tire, it was fully inflated when
new, however, it can lose air over
time. Check the inflation pressure
regularly. See Tire Pressure on
page 10-51 andVehicle Load Limits
on page 9-9. For instructions on
how to remove, install, or store a
spare tire, see Tire Changing on
page 10-66.
After installing the spare tire on the
vehicle, stop as soon as possible
and check that the spare is correctly
inflated. The spare tire is made to
perform well at speeds up to