stop start CHEVROLET EXPRESS PASSANGER 2007 1.G Owner's Manual
[x] Cancel search | Manufacturer: CHEVROLET, Model Year: 2007, Model line: EXPRESS PASSANGER, Model: CHEVROLET EXPRESS PASSANGER 2007 1.GPages: 458, PDF Size: 2.62 MB
Page 284 of 458
Turn Signals When Towing a Trailer
When you tow a trailer, your vehicle has to have
extra wiring and a heavy-duty turn signal
flasher (included in the optional trailering package).
The arrows on your instrument panel will flash
whenever you signal a turn or lane change.
Properly hooked up, the trailer lamps will also
flash, telling other drivers you’re about to
turn, change lanes or stop.
When towing a trailer, the arrows on your
instrument panel will flash for turns even if the bulbs
on the trailer are burned out. Thus, you may think
drivers behind you are seeing your signal when
they are not. It’s important to check occasionally to
be sure the trailer bulbs are still working.
Driving On Grades
Reduce speed and shift to a lower gearbefore
you start down a long or steep downgrade. If you
don’t shift down, you might have to use your
brakes so much that they would get hot and no
longer work well.
You can tow in DRIVE (D). You may want to shift
the transmission to THIRD (3) or a lower gear
under heavy loads and/or hilly conditions.
When towing at high altitude on steep uphill
grades, consider the following: Engine coolant will
boil at a lower temperature than at normal
altitudes. If you turn your engine off immediately
after towing at high altitude on steep uphill grades,
your vehicle may show signs similar to engine
overheating. To avoid this, let the engine run while
parked (preferably on level ground) with the
automatic transmission in PARK (P) for a few
minutes before turning the engine off. If you do get
the overheat warning, seeEngine Overheating
on page 315.
284
Page 285 of 458
Parking on Hills
{CAUTION:
You really should not park your
vehicle, with a trailer attached, on a hill.
If something goes wrong, your rig could
start to move. People can be injured,
and both your vehicle and the trailer
can be damaged.
But if you ever have to park your rig on a hill,
here’s how to do it:
1. Apply your regular brakes, but don’t shift
into PARK (P) yet. Then turn your wheels
into the curb if facing downhill or into traffic
if facing uphill.
2. Have someone place chocks under the
trailer wheels.3. When the wheel chocks are in place, release
the regular brakes until the chocks absorb
the load.
4. Reapply the regular brakes. Then apply your
parking brake and then shift to PARK (P).
5. Release the regular brakes.
When You Are Ready to Leave After
Parking on a Hill
1. Apply your regular brakes and hold the pedal
down while you:
•start your engine,
•shift into a gear, and
•release the parking brake.
2. Let up on the brake pedal.
3. Drive slowly until the trailer is clear of
the chocks.
4. Stop and have someone pick up and store
the chocks.
285
Page 286 of 458
Maintenance When Trailer Towing
Your vehicle will need service more often when
you’re pulling a trailer. See the Maintenance
Schedule for more on this. Things that are
especially important in trailer operation are
automatic transmission fluid (don’t overfill), engine
oil, axle lubricant, belt, cooling system and
brake system. Each of these is covered in this
manual, and the Index will help you find them
quickly. If you’re trailering, it’s a good idea
to review these sections before you start your trip.
Check periodically to see that all hitch nuts and
bolts are tight.
Trailer Wiring Harness
The optional heavy-duty trailer wiring package
includes a seven-wire harness assembly at the rear
of the vehicle and a four-wire harness assembly
under the left hand side of the instrument panel.
The seven-wire harness assembly is taped together
and located in a frame pocket at the driver side rear
left corner of the frame. The seven-wire harness
includes a 30-amp feed wire.Both harnesses come without connectors and
should be wired by a qualified electrical technician.
The technician can use the following color code
chart when connecting the wiring harness to your
trailer and trailer brake controller.
Seven-Wire Harness
•Light Green: Back-up lamps
•Brown: Parking lamps
•Yellow: Left stoplamp and turn signal
•Dark Green: Right stoplamp and turn signal
•Dark Blue: Use for electric trailer brakes
•Red/Black Stripe: Trailer accessory
•White (heavy gage): Ground wire
Four-Wire Harness (Trailer Brake Controller)
•Black: Ground
•Red/White Stripe: Fused Battery
•Dark Blue: Trailer Brake Feed
•Light Blue: Fused Stoplamp/CHMSL
286
Page 287 of 458
Service........................................................ 290
Accessories and Modifications................... 290
California Proposition 65 Warning.............. 291
Doing Your Own Service Work.................. 291
Adding Equipment to the Outside of
Your Vehicle.......................................... 292
Fuel............................................................. 292
Gasoline Octane........................................ 293
Gasoline Specifications.............................. 293
California Fuel........................................... 293
Additives................................................... 294
Fuel E85 (85% Ethanol)............................ 295
Fuels in Foreign Countries........................ 296
Filling the Tank......................................... 297
Filling a Portable Fuel Container............... 299
Checking Things Under the Hood.............. 300
Hood Release........................................... 300
Engine Compartment Overview.................. 302
Engine Oil (Gasoline Engine).................... 303
Engine Oil Life System
(Gasoline Engine).................................. 306
Engine Air Cleaner/Filter............................ 308
Automatic Transmission Fluid.................... 309
Engine Coolant.......................................... 312Radiator Pressure Cap.............................. 315
Engine Overheating................................... 315
Cooling System......................................... 317
Engine Fan Noise..................................... 323
Power Steering Fluid................................. 323
Windshield Washer Fluid........................... 324
Brakes...................................................... 325
Battery...................................................... 329
Jump Starting............................................ 330
All-Wheel Drive........................................... 336
Rear Axle.................................................... 337
Front Axle................................................... 338
Noise Control System................................. 338
Tampering with Noise Control System
Prohibited.............................................. 338
Bulb Replacement....................................... 340
Halogen Bulbs........................................... 340
Headlamps................................................ 340
Front Turn Signal, Sidemarker and
Parking Lamps....................................... 342
Center High-Mounted Stoplamp (CHMSL) ... 342
Taillamps................................................... 343
Replacement Bulbs................................... 344
Section 5 Service and Appearance Care
287
Page 298 of 458
{CAUTION:
Fuel can spray out on you if you open the
fuel cap too quickly. If you spill fuel and
then something ignites it, you could be
badly burned. This spray can happen if
your tank is nearly full, and is more likely
in hot weather. Open the fuel cap slowly
and wait for any hiss noise to stop.
Then unscrew the cap all the way.
Be careful not to spill fuel. Do not top off or overfill
the tank and wait a few seconds after you have
finished pumping before removing the nozzle.
Clean fuel from painted surfaces as soon
as possible. SeeWashing Your Vehicle on
page 386.
When replacing the fuel cap, turn it clockwise until
it clicks. Make sure the cap is fully installed.The diagnostic system can determine if the fuel
cap has been left off or improperly installed.
This would allow fuel to evaporate into the
atmosphere. SeeMalfunction Indicator Lamp
on page 178.
{CAUTION:
If a �re starts while you are refueling,
do not remove the nozzle. Shut off the
�ow of fuel by shutting off the pump
or by notifying the station attendant.
Leave the area immediately.
Notice:If you need a new fuel cap, be sure
to get the right type. Your dealer/retailer
can get one for you. If you get the wrong type,
it may not �t properly. This may cause your
malfunction indicator lamp to light and
may damage your fuel tank and emissions
system. SeeMalfunction Indicator Lamp
on page 178.
298
Page 377 of 458
Secondary Latch System
Your vehicle has an underbody-mounted tire
hoist assembly equipped with a secondary latch
system. It is designed to stop the spare tire
from suddenly falling off the vehicle if the cable
holding the spare tire is damaged. For the
secondary latch to work, the tire must be
stowed with the valve stem pointing down.
SeeStoring a Flat or Spare Tire and Tools on
page 380for instructions on storing the spare
tire correctly.
{CAUTION:
Before beginning this procedure read all
the instructions. Failure to read and follow
the instructions could damage the hoist
assembly and you and others could get
hurt. Read and follow the instructions
listed next.To release the spare tire from the secondary latch:
{CAUTION:
Someone standing too close during the
procedure could be injured by the jack.
If the spare tire does not slide off the jack
completely, make sure no one is behind
you or on either side of you as you pull
the jack out from the under spare.
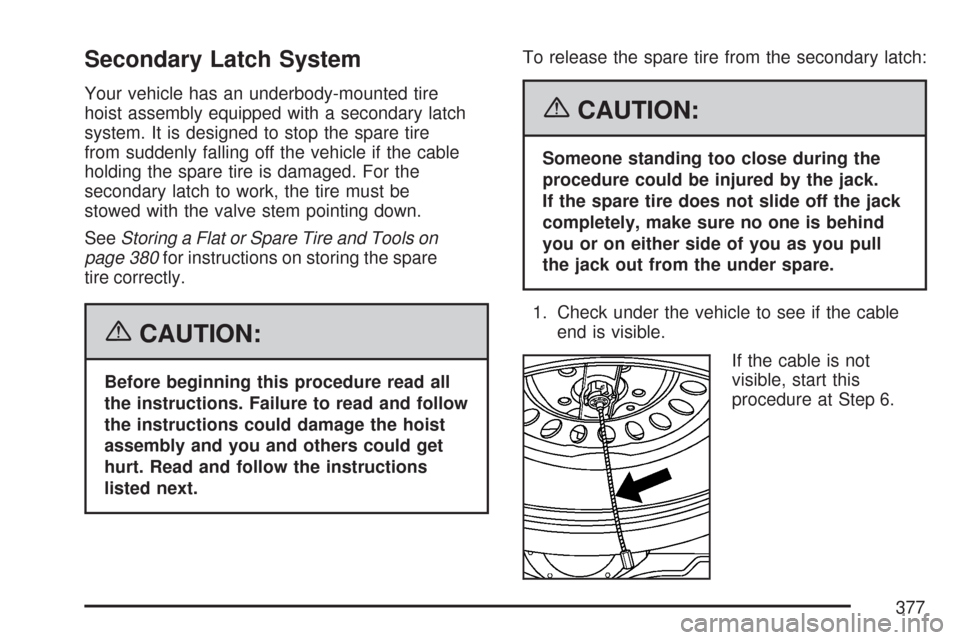
1. Check under the vehicle to see if the cable
end is visible.
If the cable is not
visible, start this
procedure at Step 6.
377