stop start CHEVROLET EXPRESS PASSANGER 2012 1.G Owner's Manual
[x] Cancel search | Manufacturer: CHEVROLET, Model Year: 2012, Model line: EXPRESS PASSANGER, Model: CHEVROLET EXPRESS PASSANGER 2012 1.GPages: 430, PDF Size: 6.35 MB
Page 235 of 430
Black plate (29,1)Chevrolet Express Owner Manual - 2012
Driving and Operating 9-29
brake pedal before you can shift
from P (Park) with the ignition in
ON/RUN.
If you cannot shift out of P (Park),
ease pressure on the shift lever and
push the shift lever all the way into
P (Park) as you maintain brake
application. Then move the shift
lever into another gear. SeeShifting
out of Park on page 9‑23.
R (Reverse): Use this gear to
back up.
Notice: Shifting to R (Reverse)
while the vehicle is moving
forward could damage the
transmission. The repairs would
not be covered by the vehicle
warranty. Shift to R (Reverse) only
after the vehicle is stopped.
To rock the vehicle back and forth to
get out of snow, ice or sand without
damaging the transmission, see If
the Vehicle Is Stuck on page 9‑10. N (Neutral):
In this position, the
engine does not connect with the
wheels. To restart the engine when
the vehicle is already moving, use
N (Neutral) only. Also, use
N (Neutral) when the vehicle is
being towed.
{WARNING
Shifting into a drive gear while the
engine is running at high speed is
dangerous. Unless your foot is
firmly on the brake pedal, the
vehicle could move very rapidly.
You could lose control and hit
people or objects. Do not shift
into a drive gear while the engine
is running at high speed.
Notice: Shifting out of P (Park)
or N (Neutral) with the engine
running at high speed may
damage the transmission. The
repairs would not be covered by
the vehicle warranty. Be sure the
engine is not running at high
speed when shifting the vehicle. D (Drive):
This position is for
normal driving. It provides the best
fuel economy. If you need more
power for passing, and you are:
.Going less than about 55 km/h
(35 mph), push the accelerator
pedal about halfway down.
.Going about 55 km/h (35 mph) or
more, push the accelerator all
the way down.
You will shift down to the next
gear and have more power.
Downshifting the transmission in
slippery road conditions could result
in skidding. See “Skidding”under
Loss of Control on page 9‑5.
Page 236 of 430
Black plate (30,1)Chevrolet Express Owner Manual - 2012
9-30 Driving and Operating
3 (Third):This position is also used
for normal driving. However it
reduces vehicle speed more than
D (Drive) without using the brakes.
You might choose 3 (Third) instead
of D (Drive) when driving on hilly,
winding roads, when towing a trailer,
so there is less shifting between
gears and when going down a
steep hill.
You should use 3 (Third) (or a lower
gear as needed) when towing a
trailer to minimize heat build-up and
extend the life of the transmission. 2 (Second):
This position reduces
vehicle speed even more than
3 (Third) without using the brakes.
You can use 2 (Second) on hills.
It can help control vehicle speed as
you go down steep mountain roads,
but then you would also want to use
the brakes off and on.
You may use this feature for
reducing torque to the rear wheels
when you are trying to start the
vehicle from a stop on slippery
road surfaces. 1 (First):
This position reduces
vehicle speed even more than
2 (Second) without using the brakes.
You can use it on very steep hills,
or in deep snow or mud. If the shift
lever is put in 1 (First) while the
vehicle is moving forward, the
transmission will not shift into first
gear until the vehicle is going slowly
enough.
Notice: Spinning the tires or
holding the vehicle in one place
on a hill using only the
accelerator pedal may damage
the transmission. The repair will
not be covered by the vehicle
warranty. If you are stuck, do not
spin the tires. When stopping on
a hill, use the brakes to hold the
vehicle in place.
Page 239 of 430
Black plate (33,1)Chevrolet Express Owner Manual - 2012
Driving and Operating 9-33
Drive Systems
All-Wheel Drive
If the vehicle has this feature,
engine power is sent to all four
wheels when extra traction is
needed. This is like four-wheel
drive, but there is no separate lever
or switch to engage or disengage
the front axle. It is fully automatic,
and adjusts itself as needed for
road conditions.
Brakes
Antilock Brake
System (ABS)
This vehicle has the Antilock Brake
System (ABS), an advanced
electronic braking system that helps
prevent a braking skid.
When the engine is started and the
vehicle begins to drive away, ABS
checks itself. A momentary motor or
clicking noise might be heard while
this test is going on, and it might
even be noticed that the brake
pedal moves a little. This is normal.If there is a problem with ABS, this
warning light stays on. SeeAntilock
Brake System (ABS) Warning Light
on page 5‑24.
If driving safely on a wet road and it
becomes necessary to slam on the
brakes and continue braking to
avoid a sudden obstacle, a
computer senses that the wheels
are slowing down. If one of the
wheels is about to stop rolling, the
computer will separately work the
brakes at each wheel.
ABS can change the brake pressure
to each wheel, as required, faster
than any driver could. This can help
the driver steer around the obstacle
while braking hard.
Page 254 of 430
Black plate (48,1)Chevrolet Express Owner Manual - 2012
9-48 Driving and Operating
Passing
More passing distance is needed
when towing a trailer. Because the
rig is longer, it is necessary to go
much farther beyond the passed
vehicle before returning to the lane.
Backing Up
Hold the bottom of the steering
wheel with one hand. Then, to move
the trailer to the left, move that hand
to the left. To move the trailer to the
right, move your hand to the right.
Always back up slowly and,
if possible, have someone
guide you.
Making Turns
Notice:Making very sharp turns
while trailering could cause the
trailer to come in contact with the
vehicle. The vehicle could be
damaged. Avoid making very
sharp turns while trailering.
When turning with a trailer, make
wider turns than normal. Do this so
the trailer will not strike soft shoulders, curbs, road signs, trees
or other objects. Avoid jerky or
sudden maneuvers. Signal well in
advance.
Turn Signals When Towing a
Trailer
The arrows on the instrument panel
flash whenever signaling a turn or
lane change. Properly hooked up,
the trailer lamps also flash, telling
other drivers the vehicle is turning,
changing lanes or stopping.
When towing a trailer, the arrows on
the instrument panel flash for turns
even if the bulbs on the trailer are
burned out. For this reason you may
think other drivers are seeing the
signal when they are not. It is
important to check occasionally to
be sure the trailer bulbs are still
working.
Driving on Grades
Reduce speed and shift to a
lower gear
beforestarting down a
long or steep downgrade. If the
transmission is not shifted down, the brakes might have to be used so
much that they would get hot and no
longer work well.
The vehicle can tow in D (Drive).
Shift the transmission to a lower
gear if the transmission shifts too
often under heavy loads and/or hilly
conditions.
When towing at high altitude on
steep uphill grades, consider the
following: Engine coolant will boil at
a lower temperature than at normal
altitudes. If the engine is turned off
immediately after towing at high
altitude on steep uphill grades, the
vehicle may show signs similar to
engine overheating. To avoid this,
let the engine run while parked,
preferably on level ground, with the
automatic transmission in P (Park)
for a few minutes before turning the
engine off. If the overheat warning
comes on, see
Engine Overheating
on page 10‑22.
Page 255 of 430
Black plate (49,1)Chevrolet Express Owner Manual - 2012
Driving and Operating 9-49
Parking on Hills
{WARNING
Parking the vehicle on a hill with
the trailer attached can be
dangerous. If something goes
wrong, the rig could start to move.
People can be injured, and both
the vehicle and the trailer can be
damaged. When possible, always
park the rig on a flat surface.
If parking the rig on a hill:
1. Press the brake pedal, but do not shift the transmission into
P (Park) yet. Turn the wheels
into the curb if facing downhill or
into traffic if facing uphill.
2. Have someone place chocks under the trailer wheels. 3. When the wheel chocks are in
place, release the brake pedal
until the chocks absorb the load.
4. Reapply the brake pedal. Then apply the parking brake and shift
into P (Park).
5. Release the brake pedal.
Leaving After Parking on a Hill
1. Apply and hold the brake pedal while you:
1.1. Start the engine.
1.2. Shift into a gear.
1.3. Release the parking brake.
2. Let up on the brake pedal.
3. Drive slowly until the trailer is clear of the chocks.
4. Stop and have someone pick up and store the chocks.
Maintenance When Trailer
Towing
The vehicle needs service more
often when pulling a trailer. See this
manual's Maintenance Schedule or
Index for more information. Things
that are especially important in
trailer operation are automatic
transmission fluid, engine oil, axle
lubricant, belts, cooling system and
brake system. It is a good idea to
inspect these before and during
the trip.
Check periodically to see that all
hitch nuts and bolts are tight.
Page 265 of 430
Black plate (1,1)Chevrolet Express Owner Manual - 2012
Vehicle Care 10-1
Vehicle Care
General Information
General Information . . . . . . . . . . 10-2
California Proposition65 Warning . . . . . . . . . . . . . . . . . 10-2
California Perchlorate Materials Requirements . . . . 10-2
Accessories and Modifications . . . . . . . . . . . . . . . 10-3
Vehicle Checks
Doing Your OwnService Work . . . . . . . . . . . . . . . 10-4
Hood . . . . . . . . . . . . . . . . . . . . . . . . 10-4
Engine Compartment Overview . . . . . . . . . . . . . . . . . . . 10-6
Engine Oil . . . . . . . . . . . . . . . . . . . 10-7
Engine Oil Life System . . . . . 10-10
Automatic Transmission Fluid (4-Speed Transmission) . . . 10-11
Automatic Transmission Fluid (6-Speed
Transmission) . . . . . . . . . . . . . 10-13
Engine Air Cleaner/Filter . . . . 10-16
Cooling System . . . . . . . . . . . . 10-18
Engine Coolant . . . . . . . . . . . . . 10-18
Engine Overheating . . . . . . . . 10-22 Engine Fan . . . . . . . . . . . . . . . . . 10-24
Power Steering Fluid . . . . . . . 10-24
Washer Fluid . . . . . . . . . . . . . . . 10-25
Brakes . . . . . . . . . . . . . . . . . . . . . 10-26
Brake Fluid . . . . . . . . . . . . . . . . . 10-27
Battery . . . . . . . . . . . . . . . . . . . . . 10-28
All-Wheel Drive . . . . . . . . . . . . . 10-29
Front Axle . . . . . . . . . . . . . . . . . . 10-30
Rear Axle . . . . . . . . . . . . . . . . . . 10-31
Noise Control System . . . . . . 10-31
Starter Switch Check . . . . . . . 10-33
Automatic Transmission Shift
Lock Control Function
Check . . . . . . . . . . . . . . . . . . . . . 10-33
Ignition Transmission Lock Check . . . . . . . . . . . . . . . . . . . . . 10-33
Park Brake and P (Park) Mechanism Check . . . . . . . . 10-34
Wiper Blade Replacement . . . . . . . . . . . . . . 10-34
Bulb Replacement
Bulb Replacement . . . . . . . . . . 10-35
Halogen Bulbs . . . . . . . . . . . . . . 10-35
Headlamps . . . . . . . . . . . . . . . . . 10-35
Front Turn Signal,Sidemarker, and Parking
Lamps . . . . . . . . . . . . . . . . . . . . 10-37
Taillamps . . . . . . . . . . . . . . . . . . . 10-38 Center High-Mounted
Stoplamp (CHMSL) . . . . . . . 10-39
License Plate Lamp . . . . . . . . 10-40
Replacement Bulbs . . . . . . . . . 10-40
Electrical System
Electrical System Overload . . . . . . . . . . . . . . . . . . 10-41
Fuses and Circuit Breakers . . . . . . . . . . . . . . . . . . 10-41
Engine Compartment Fuse Block . . . . . . . . . . . . . . . . . . . . . 10-42
Floor Console Fuse Block . . . . . . . . . . . . . . . . . . . . . 10-46
Wheels and Tires
Tires . . . . . . . . . . . . . . . . . . . . . . . . 10-49
Tire Sidewall Labeling . . . . . . 10-50
Tire Designations . . . . . . . . . . . 10-52
Tire Terminology andDefinitions . . . . . . . . . . . . . . . . 10-54
Tire Pressure . . . . . . . . . . . . . . . 10-56
Tire Pressure Monitor System . . . . . . . . . . . . . . . . . . . 10-58
Tire Pressure Monitor Operation . . . . . . . . . . . . . . . . . 10-59
Tire Inspection . . . . . . . . . . . . . . 10-62
Tire Rotation . . . . . . . . . . . . . . . 10-62
Dual Tire Rotation . . . . . . . . . . 10-64
Page 305 of 430
Black plate (41,1)Chevrolet Express Owner Manual - 2012
Vehicle Care 10-41
Electrical System
Electrical System
Overload
The vehicle has fuses and circuit
breakers to protect against an
electrical system overload.
When the current electrical load is
too heavy, the circuit breaker opens
and closes, protecting the circuit
until the current load returns to
normal or the problem is fixed.
This greatly reduces the chance of
circuit overload and fire caused by
electrical problems.
Fuses and circuit breakers protect
power devices in the vehicle.
Replace a bad fuse with a new one
of the identical size and rating.
If there is a problem on the road and
a fuse needs to be replaced, the
same amperage fuse can be
borrowed. Choose some feature of
the vehicle that is not needed to use
and replace it as soon as possible.
Headlamp Wiring
An electrical overload may cause
the lamps to go on and off, or in
some cases to remain off. Have the
headlamp wiring checked right away
if the lamps go on and off or
remain off.
Windshield Wipers
If the wiper motor overheats due to
heavy snow or ice, the windshield
wipers will stop until the motor cools
and will then restart.
Although the circuit is protected
from electrical overload, overload
due to heavy snow or ice may
cause wiper linkage damage.
Always clear ice and heavy snow
from the windshield before using
the windshield wipers.
If the overload is caused by an
electrical problem and not snow or
ice, be sure to get it fixed.
Fuses and Circuit
Breakers
The wiring circuits in the vehicle are
protected from short circuits by a
combination of fuses and circuit
breakers. This greatly reduces the
chance of fires caused by electrical
problems.
Look at the silver-colored band
inside the fuse. If the band is broken
or melted, replace the fuse. Be sure
you replace a bad fuse with a new
one of the identical size and rating.
Page 322 of 430
Black plate (58,1)Chevrolet Express Owner Manual - 2012
10-58 Vehicle Care
Tire Pressure Monitor
System
The Tire Pressure Monitor
System (TPMS) uses radio and
sensor technology to check tire
pressure levels. The TPMS sensors
monitor the air pressure in your tires
and transmit tire pressure readings
to a receiver located in the vehicle.
Each tire, including the spare
(if provided), should be checked
monthly when cold and inflated to
the inflation pressure recommended
by the vehicle manufacturer on the
vehicle placard or tire inflation
pressure label. (If your vehicle has
tires of a different size than the size
indicated on the vehicle placard or
tire inflation pressure label, you
should determine the proper tire
inflation pressure for those tires.)As an added safety feature, your
vehicle has been equipped with a
tire pressure monitoring system
(TPMS) that illuminates a low tire
pressure telltale when one or
more of your tires is significantly
under‐inflated.
Accordingly, when the low tire
pressure telltale illuminates, you
should stop and check your tires as
soon as possible, and inflate them
to the proper pressure. Driving on a
significantly under‐inflated tire
causes the tire to overheat and can
lead to tire failure. Under‐inflation
also reduces fuel efficiency and tire
tread life, and may affect the
vehicle's handling and stopping
ability.
Please note that the TPMS is
not a substitute for proper tire
maintenance, and it is the driver's
responsibility to maintain correct tire
pressure, even if under‐inflation has
not reached the level to trigger
illumination of the TPMS low tire
pressure telltale.Your vehicle has also been
equipped with a TPMS malfunction
indicator to indicate when the
system is not operating properly.
The TPMS malfunction indicator is
combined with the low tire pressure
telltale. When the system detects a
malfunction, the telltale will flash for
approximately one minute and then
remain continuously illuminated.
This sequence will continue upon
subsequent vehicle start‐ups as
long as the malfunction exists.
When the malfunction indicator is
illuminated, the system may not be
able to detect or signal low tire
pressure as intended. TPMS
malfunctions may occur for a variety
of reasons, including the installation
of replacement or alternate tires or
wheels on the vehicle that prevent
the TPMS from functioning properly.
Page 323 of 430
Black plate (59,1)Chevrolet Express Owner Manual - 2012
Vehicle Care 10-59
Always check the TPMS malfunction
telltale after replacing one or more
tires or wheels on your vehicle to
ensure that the replacement or
alternate tires and wheels allow the
TPMS to continue to function
properly.
SeeTire Pressure Monitor
Operation on page 10‑59 for
additional information.
Federal Communications
Commission (FCC) Rules and
with Industry Canada
Standards
See Radio Frequency Statement on
page 13‑22 for information
regarding Part 15 of the Federal
Communications Commission (FCC)
Rules and with Industry Canada
Standards RSS-GEN/210/220/310.
Tire Pressure Monitor
Operation
This vehicle may have a Tire
Pressure Monitor System (TPMS).
The TPMS is designed to warn the
driver when a low tire pressure
condition exists. TPMS sensors are
mounted onto each tire and wheel
assembly, excluding the spare tire
and wheel assembly. The TPMS
sensors monitor the air pressure in
the tires and transmit the tire
pressure readings to a receiver
located in the vehicle.
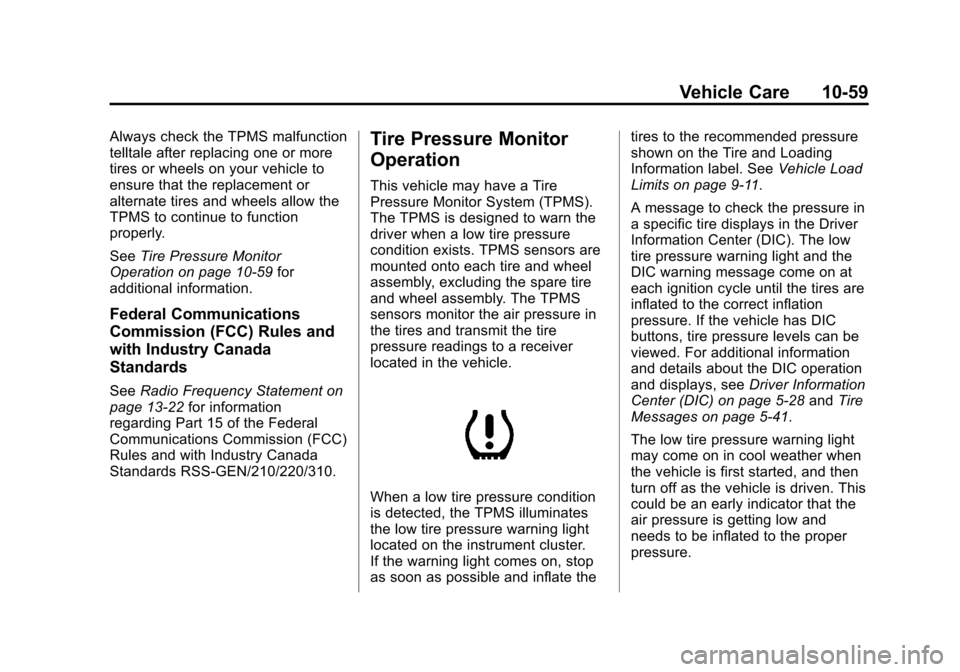
When a low tire pressure condition
is detected, the TPMS illuminates
the low tire pressure warning light
located on the instrument cluster.
If the warning light comes on, stop
as soon as possible and inflate the tires to the recommended pressure
shown on the Tire and Loading
Information label. See
Vehicle Load
Limits on page 9‑11.
A message to check the pressure in
a specific tire displays in the Driver
Information Center (DIC). The low
tire pressure warning light and the
DIC warning message come on at
each ignition cycle until the tires are
inflated to the correct inflation
pressure. If the vehicle has DIC
buttons, tire pressure levels can be
viewed. For additional information
and details about the DIC operation
and displays, see Driver Information
Center (DIC) on page 5‑28 andTire
Messages on page 5‑41.
The low tire pressure warning light
may come on in cool weather when
the vehicle is first started, and then
turn off as the vehicle is driven. This
could be an early indicator that the
air pressure is getting low and
needs to be inflated to the proper
pressure.
Page 325 of 430
Black plate (61,1)Chevrolet Express Owner Manual - 2012
Vehicle Care 10-61
.Operating electronic devices or
being near facilities using radio
wave frequencies similar to the
TPMS could cause the TPMS
sensors to malfunction.
If the TPMS is not functioning
properly, it cannot detect or signal a
low tire condition. See your dealer
for service if the TPMS malfunction
light and DIC message come on
and stay on.
TPMS Sensor Matching
Process
Each TPMS sensor has a unique
identification code. The identification
code needs to be matched to a
new tire/wheel position after rotating
the vehicle’ s tires or replacing one
or more of the TPMS sensors. Also,
the TPMS sensor matching process
should be performed after replacing
a spare tire with a road tire
containing the TPMS sensor.
The malfunction light and the DIC
message should go off at the next
ignition cycle. The sensors are
matched to the tire/wheel positions, using a TPMS relearn tool, in the
following order: driver side front tire,
passenger side front tire, passenger
side rear tire, and driver side rear.
See your dealer for service or to
purchase a relearn tool.
There are two minutes to match
the first tire/wheel position, and
five minutes overall to match all
four tire/wheel positions. If it takes
longer, the matching process stops
and must be restarted.
The TPMS sensor matching
process is:
1. Set the parking brake.
2. Turn the ignition to ON/RUN with
the engine off.
3. Press the Remote Keyless Entry (RKE) transmitter's LOCK
and UNLOCK buttons at the
same time for approximately
five seconds. The horn sounds
twice to signal the receiver is
in relearn mode and TIRE
LEARNING ACTIVE message
displays on the DIC screen. If the vehicle does not have
RKE, press the Driver
Information Center (DIC) vehicle
information button until the
PRESS
VTO RELEARN TIRE
POSITIONS message displays.
The horn sounds twice to signal
the receiver is in relearn mode
and TIRE LEARNING ACTIVE
message displays on the DIC
screen.
If the vehicle does not have RKE
or DIC buttons, press the trip
odometer reset stem located on
the instrument panel cluster until
the PRESS
VTO RELEARN
TIRE POSITIONS message
displays. The horn sounds twice
to signal the receiver is in
relearn mode and TIRE
LEARNING ACTIVE message
displays on the DIC screen.
4. Start with the driver side front tire.