change CHEVROLET HHR 2006 1.G Owners Manual
[x] Cancel search | Manufacturer: CHEVROLET, Model Year: 2006, Model line: HHR, Model: CHEVROLET HHR 2006 1.GPages: 394, PDF Size: 2.33 MB
Page 2 of 394
GENERAL MOTORS, GM, the GM Emblem,
CHEVROLET, and the CHEVROLET Emblem are
registered trademarks and the name HHR is a
trademark of General Motors Corporation.
This manual includes the latest information at the time it
was printed. We reserve the right to make changes
after that time without further notice. For vehicles rst
sold in Canada, substitute the name “General Motors of
Canada Limited” for Chevrolet Motor Division whenever
it appears in this manual.
Keep this manual in the vehicle, so it will be there if it is
needed while you are on the road. If the vehicle is
sold, leave this manual in the vehicle.
Canadian Owners
A French language copy of this manual can be obtained
from your dealer or from:
Helm, Incorporated
P.O. Box 07130
Detroit, MI 48207
How to Use This Manual
Many people read the owner manual from beginning to
end when they rst receive their new vehicle. If this
is done, it can help you learn about the features
and controls for the vehicle. Pictures and words work
together in the owner manual to explain things.
Litho in U.S.A.
Part No. 06HHR B Second Printing
©2005 General Motors Corporation. All Rights Reserved.
ii
Page 10 of 394
Power Lumbar
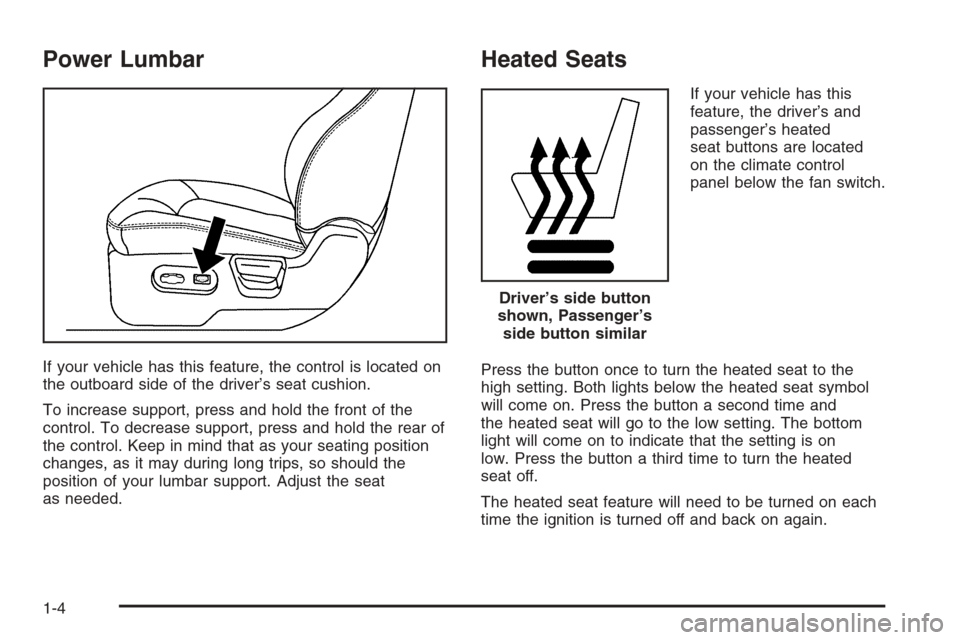
If your vehicle has this feature, the control is located on
the outboard side of the driver’s seat cushion.
To increase support, press and hold the front of the
control. To decrease support, press and hold the rear of
the control. Keep in mind that as your seating position
changes, as it may during long trips, so should the
position of your lumbar support. Adjust the seat
as needed.
Heated Seats
If your vehicle has this
feature, the driver’s and
passenger’s heated
seat buttons are located
on the climate control
panel below the fan switch.
Press the button once to turn the heated seat to the
high setting. Both lights below the heated seat symbol
will come on. Press the button a second time and
the heated seat will go to the low setting. The bottom
light will come on to indicate that the setting is on
low. Press the button a third time to turn the heated
seat off.
The heated seat feature will need to be turned on each
time the ignition is turned off and back on again.
Driver’s side button
shown, Passenger’s
side button similar
1-4
Page 42 of 394
{CAUTION:
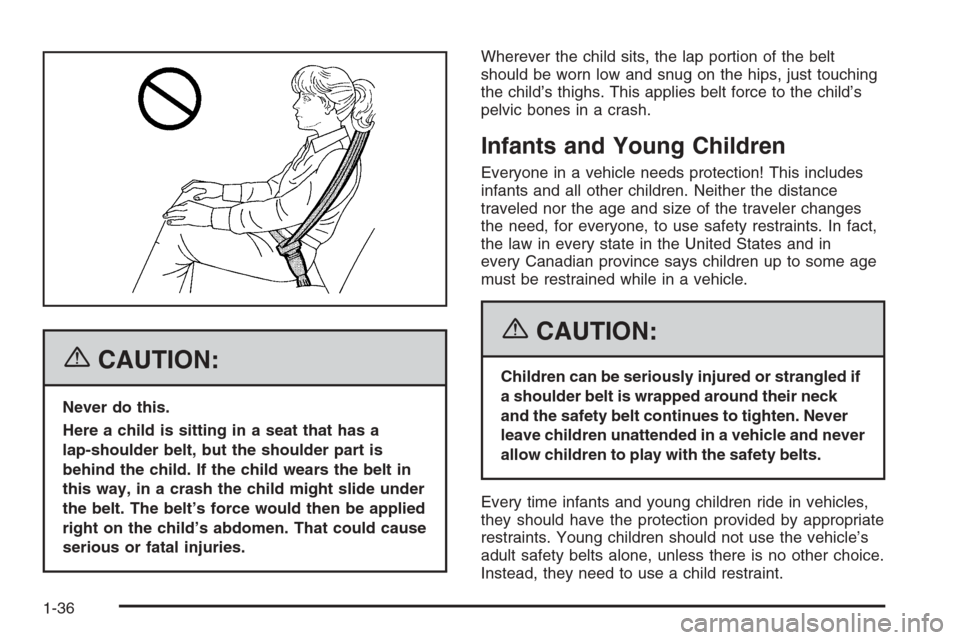
Never do this.
Here a child is sitting in a seat that has a
lap-shoulder belt, but the shoulder part is
behind the child. If the child wears the belt in
this way, in a crash the child might slide under
the belt. The belt’s force would then be applied
right on the child’s abdomen. That could cause
serious or fatal injuries.Wherever the child sits, the lap portion of the belt
should be worn low and snug on the hips, just touching
the child’s thighs. This applies belt force to the child’s
pelvic bones in a crash.
Infants and Young Children
Everyone in a vehicle needs protection! This includes
infants and all other children. Neither the distance
traveled nor the age and size of the traveler changes
the need, for everyone, to use safety restraints. In fact,
the law in every state in the United States and in
every Canadian province says children up to some age
must be restrained while in a vehicle.
{CAUTION:
Children can be seriously injured or strangled if
a shoulder belt is wrapped around their neck
and the safety belt continues to tighten. Never
leave children unattended in a vehicle and never
allow children to play with the safety belts.
Every time infants and young children ride in vehicles,
they should have the protection provided by appropriate
restraints. Young children should not use the vehicle’s
adult safety belts alone, unless there is no other choice.
Instead, they need to use a child restraint.
1-36
Page 79 of 394
Adding Equipment to Your
Airbag-Equipped Vehicle
Q:Is there anything I might add to the front or
sides of the vehicle that could keep the
airbags from working properly?
A:Yes. If you add things that change your vehicle’s
frame, bumper system, front end or side sheet
metal or height, they may keep the airbag system
from working properly. Also, the airbag system may
not work properly if you relocate any of the airbag
sensors. If you have any questions about this,
you should contact Customer Assistance before you
modify your vehicle. The phone numbers and
addresses for Customer Assistance are in Step Two
of the Customer Satisfaction Procedure in this
manual. SeeCustomer Satisfaction Procedure on
page 7-2.
Q:Because I have a disability, I have to get my
vehicle modied. How can I nd out whether
this will affect my airbag system?
A:Changing or moving any parts of the front seats,
safety belts, the airbag sensing and diagnostic
module (located under the center console), or the
instrument panel can affect the operation of
the airbag system. If you have questions, call
Customer Assistance. The phone numbers
and addresses for Customer Assistance are in
Step Two of the Customer Satisfaction Procedure
in this manual. SeeCustomer Satisfaction
Procedure on page 7-2.
1-73
Page 86 of 394
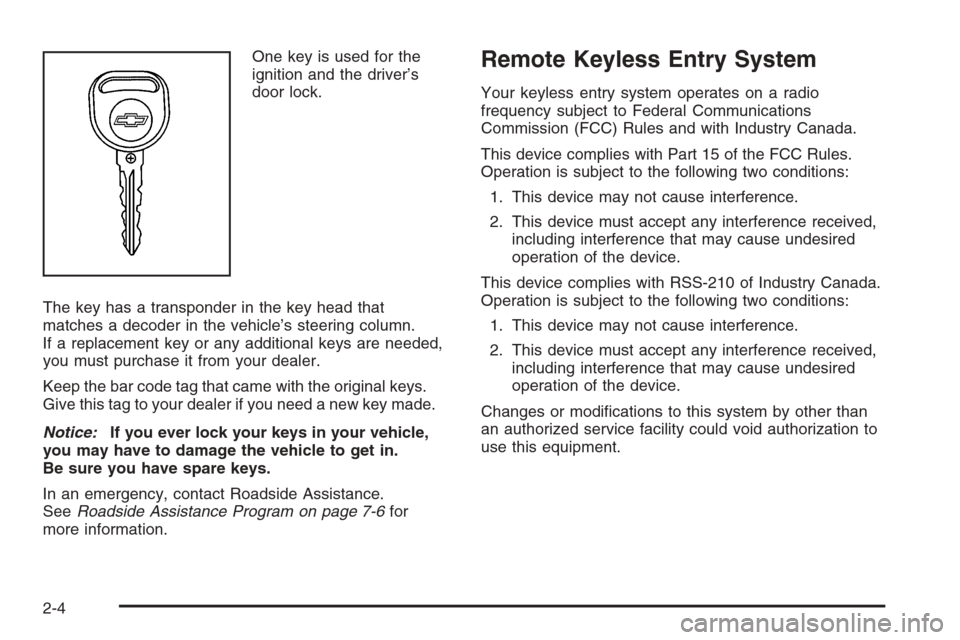
One key is used for the
ignition and the driver’s
door lock.
The key has a transponder in the key head that
matches a decoder in the vehicle’s steering column.
If a replacement key or any additional keys are needed,
you must purchase it from your dealer.
Keep the bar code tag that came with the original keys.
Give this tag to your dealer if you need a new key made.
Notice:If you ever lock your keys in your vehicle,
you may have to damage the vehicle to get in.
Be sure you have spare keys.
In an emergency, contact Roadside Assistance.
SeeRoadside Assistance Program on page 7-6for
more information.Remote Keyless Entry System
Your keyless entry system operates on a radio
frequency subject to Federal Communications
Commission (FCC) Rules and with Industry Canada.
This device complies with Part 15 of the FCC Rules.
Operation is subject to the following two conditions:
1. This device may not cause interference.
2. This device must accept any interference received,
including interference that may cause undesired
operation of the device.
This device complies with RSS-210 of Industry Canada.
Operation is subject to the following two conditions:
1. This device may not cause interference.
2. This device must accept any interference received,
including interference that may cause undesired
operation of the device.
Changes or modications to this system by other than
an authorized service facility could void authorization to
use this equipment.
2-4
Page 89 of 394
Battery Replacement
Under normal use, the battery in your remote keyless
entry transmitter should last about four years.
You can tell the battery is weak if the transmitter will not
work at the normal range in any location. If you have
to get close to your vehicle before the transmitter works,
it is probably time to change the battery.
The KEY FOB BATT LOW message in the vehicle’s
DIC will display if the remote keyless entry transmitter
battery is low.
Notice:When replacing the battery, use care not to
touch any of the circuitry. Static from your body
transferred to these surfaces may damage the
transmitter.
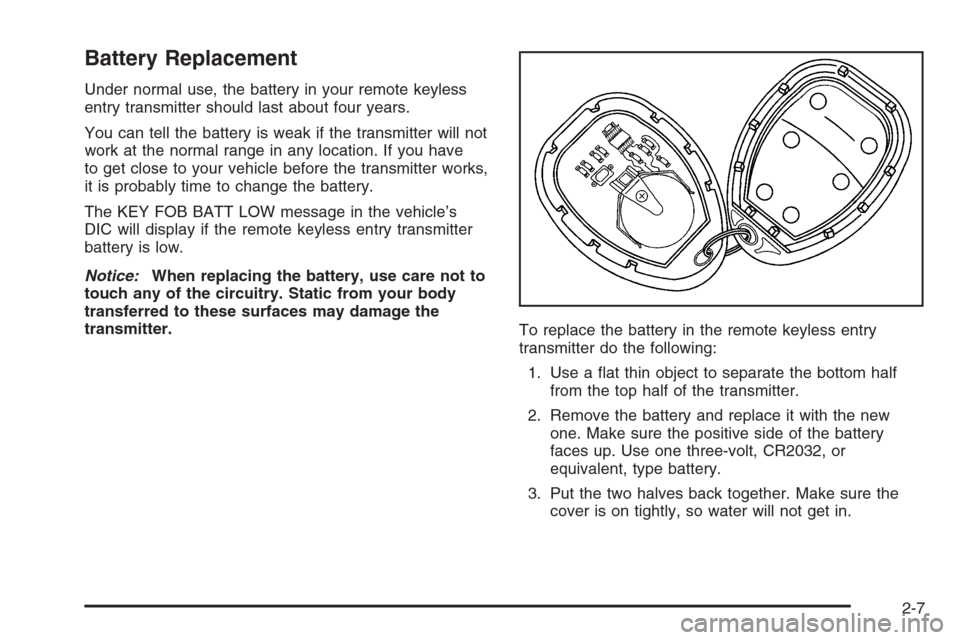
To replace the battery in the remote keyless entry
transmitter do the following:
1. Use a at thin object to separate the bottom half
from the top half of the transmitter.
2. Remove the battery and replace it with the new
one. Make sure the positive side of the battery
faces up. Use one three-volt, CR2032, or
equivalent, type battery.
3. Put the two halves back together. Make sure the
cover is on tightly, so water will not get in.
2-7
Page 101 of 394
How the System Alarm is Activated
If the system is armed, it can be activated by either:
Opening the driver’s door or tailgate. This will cause
a ten second pre-alarm chirp followed by a thirty
second full alarm of horn and lights.
Opening any other door. This will immediately
cause a full alarm of horn and lights for thirty
seconds.
When an alarm event has nished, the system will
re-arm itself automatically.
How to Turn Off the System Alarm
To turn off the system alarm, do one of the following:
Press the lock button on the remote keyless
entry transmitter. The system will then re-arm itself.
Press the unlock button on the remote keyless entry
transmitter. This will also disarm the system.
Insert the key in the ignition and turn it on. This will
also disarm the system.
How to Detect a Tamper Condition
If you hear three chirps when you press the unlock or
lock buttons on the remote keyless transmitter, it means
that the content theft security system alarm was
previously activated.
PASS-Key®III+
The PASS-Key®III+ system operates on a radio
frequency subject to Federal Communications
Commission (FCC) Rules and with Industry Canada.
This device complies with Part 15 of the FCC Rules.
Operation is subject to the following two conditions:
1. This device may not cause harmful interference.
2. This device must accept any interference received,
including interference that may cause undesired
operation.
This device complies with RSS-210 of Industry Canada.
Operation is subject to the following two conditions:
1. This device may not cause interference.
2. This device must accept any interference received,
including interference that may cause undesired
operation of the device.
Changes or modications to this system by other than
an authorized service facility could void authorization to
use this equipment.
PASS-Key
®III+ uses a radio frequency transponder in
the key that matches a decoder in your vehicle.
2-19
Page 107 of 394
Starting Procedure
1. With your foot off the accelerator pedal, turn the
ignition to START. When the engine starts, let go
of the key. The idle speed will go down as your
engine gets warm.
Your vehicle has a Computer-Controlled Cranking
System. This feature assists in starting the
engine and protects the electrical system. If the
ignition key is turned to the START position,
and then released when the engine begins cranking,
the engine will continue cranking until the vehicle
starts or until it exceeds the maximum cranking time
allowed, approximately 15 seconds to prevent
cranking motor damage. To prevent gear damage,
this system also prevents cranking if the engine
is already running. The engine cranking can
be stopped by turning the ignition switch to the
ACCESSORY or LOCK position.
Notice:Holding your key in START for longer
than 15 seconds at a time will cause your battery
to be drained much sooner. And the excessive
heat can damage your starter motor. Wait about
15 seconds between each try to help avoid draining
your battery or damaging your starter.
2. If it does not start, wait about 15 seconds and try
again to start the engine by turning the ignition to
START. Wait about 15 seconds between each try.When the engine has run about 10 seconds to
warm up, your vehicle is ready to be driven.
Do not run your engine at high speed when it
is cold.
If the weather is below freezing (32°F or 0°C),
let the engine run for a few minutes to warm up.
3. If the engine still will not start, or starts but then
stops, it could be ooded with too much gasoline.
Try pushing your accelerator pedal all the way to
the oor and holding it there as you hold the key
in START for about three seconds. If the vehicle
starts briey but then stops again, do the same
thing, but this time keep the pedal down for
ve or six seconds. This clears the extra gasoline
from the engine.
Notice:Your engine is designed to work with the
electronics in your vehicle. If you add electrical
parts or accessories, you could change the way the
engine operates. Before adding electrical equipment,
check with your dealer. If you do not, your engine
might not perform properly. Any resulting damage
would not be covered by your vehicle’s warranty.
2-25
Page 113 of 394
Shift Speeds
{CAUTION:
If you skip a gear when you downshift, you
could lose control of your vehicle. You could
injure yourself or others. Do not shift down
more than one gear at a time when you
downshift.
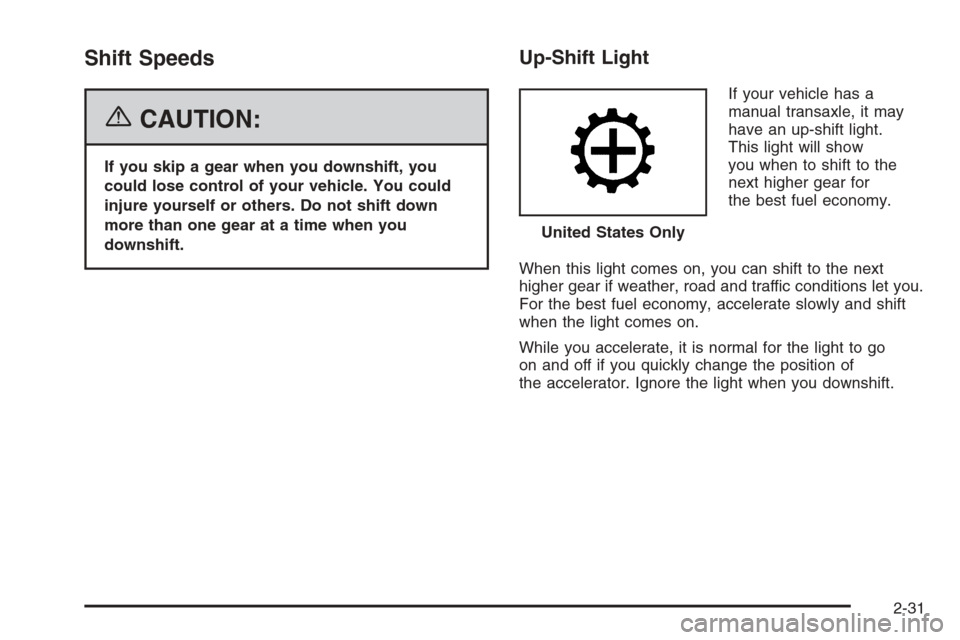
Up-Shift Light
If your vehicle has a
manual transaxle, it may
have an up-shift light.
This light will show
you when to shift to the
next higher gear for
the best fuel economy.
When this light comes on, you can shift to the next
higher gear if weather, road and traffic conditions let you.
For the best fuel economy, accelerate slowly and shift
when the light comes on.
While you accelerate, it is normal for the light to go
on and off if you quickly change the position of
the accelerator. Ignore the light when you downshift.United States Only
2-31
Page 133 of 394
Instrument Panel Overview...............................3-4
Hazard Warning Flashers................................3-6
Other Warning Devices...................................3-6
Horn .............................................................3-6
Tilt Wheel.....................................................3-6
Turn Signal/Multifunction Lever.........................3-7
Turn and Lane-Change Signals........................3-7
Headlamp High/Low-Beam Changer..................3-8
Flash-to-Pass.................................................3-8
Windshield Wipers..........................................3-8
Windshield Washer.........................................3-9
Rear Window Wiper/Washer...........................3-10
Cruise Control..............................................3-11
Headlamps..................................................3-14
Wiper Activated Headlamps............................3-14
Headlamps on Reminder................................3-15
Daytime Running Lamps (DRL).......................3-15
Automatic Headlamp System..........................3-15
Fog Lamps ..................................................3-16
Instrument Panel Brightness...........................3-16
Dome Lamp .................................................3-17
Entry/Exit Lighting.........................................3-17
Mirror Reading Lamps...................................3-17
Rear Reading Lamps....................................3-17
Battery Run-Down Protection..........................3-17
Accessory Power Outlet(s).............................3-18
Ashtray(s) and Cigarette Lighter......................3-18Climate Controls............................................3-19
Climate Control System.................................3-19
Outlet Adjustment.........................................3-22
Passenger Compartment Air Filter...................3-22
Warning Lights, Gages, and Indicators............3-24
Instrument Panel Cluster................................3-25
Speedometer and Odometer...........................3-26
Tachometer.................................................3-26
Safety Belt Reminder Light.............................3-27
Passenger Safety Belt Reminder Light.............3-27
Airbag Readiness Light..................................3-28
Passenger Airbag Status Indicator...................3-29
Charging System Light..................................3-31
Up-Shift Light...............................................3-32
Brake System Warning Light..........................3-32
Anti-Lock Brake System Warning Light.............3-33
Enhanced Traction System Warning Light.........3-34
Engine Coolant Temperature Warning Light......3-34
Engine Coolant Temperature Gage..................3-35
Malfunction Indicator Lamp.............................3-35
Oil Pressure Light.........................................3-38
Security Light...............................................3-39
Fog Lamp Light............................................3-39
Highbeam On Light.......................................3-39
Fuel Gage...................................................3-40
Section 3 Instrument Panel
3-1