buttons CHEVROLET HHR 2009 1.G Owners Manual
[x] Cancel search | Manufacturer: CHEVROLET, Model Year: 2009, Model line: HHR, Model: CHEVROLET HHR 2009 1.GPages: 450, PDF Size: 2.49 MB
Page 8 of 450
Power Lumbar
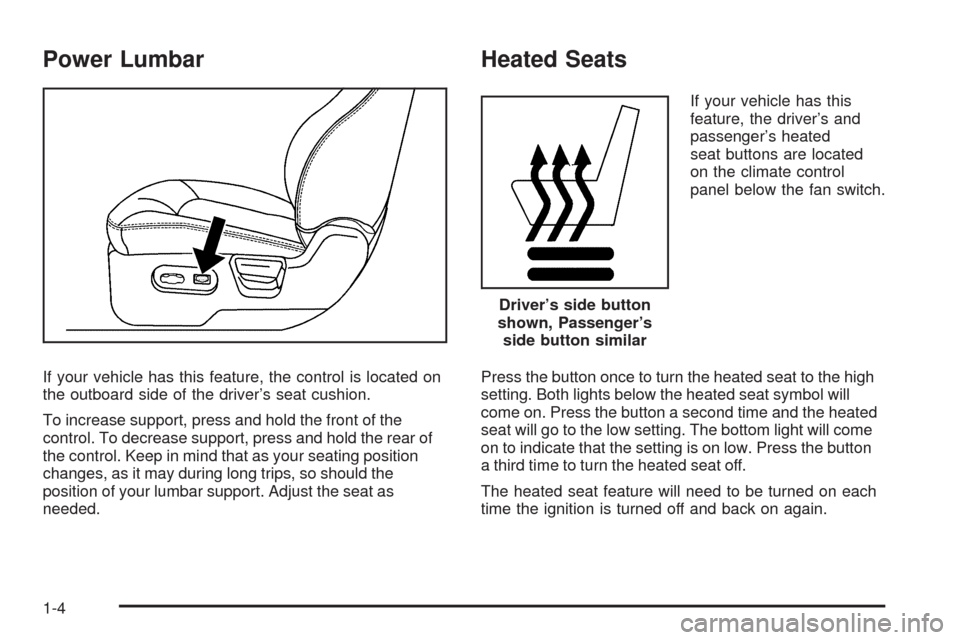
If your vehicle has this feature, the control is located on
the outboard side of the driver’s seat cushion.
To increase support, press and hold the front of the
control. To decrease support, press and hold the rear of
the control. Keep in mind that as your seating position
changes, as it may during long trips, so should the
position of your lumbar support. Adjust the seat as
needed.
Heated Seats
If your vehicle has this
feature, the driver’s and
passenger’s heated
seat buttons are located
on the climate control
panel below the fan switch.
Press the button once to turn the heated seat to the high
setting. Both lights below the heated seat symbol will
come on. Press the button a second time and the heated
seat will go to the low setting. The bottom light will come
on to indicate that the setting is on low. Press the button
a third time to turn the heated seat off.
The heated seat feature will need to be turned on each
time the ignition is turned off and back on again.
Driver’s side button
shown, Passenger’s
side button similar
1-4
Page 96 of 450
Lockout Protection
If you press the power door lock switch when the key is
in the ignition and any door is open, all the doors will
lock and the driver’s door will unlock. Be sure to remove
the key from the ignition when locking your vehicle.
The lockout protection can be overridden by pressing
and holding the power door lock in the lock position for
three seconds.
Rear Side Cargo Door
(HHR Panel Only)
The rear side cargo doors can be opened by pressing
the buttons located on the driver and passenger sides of
the instrument panel, or by using the Remote Keyless
Access (RKE) transmitter. SeeInstrument Panel
Overview on page 3-4, andRemote Keyless Entry (RKE)
System Operation on page 2-4for more information.
To use the buttons on the instrument panel, the driver
side door must be unlocked.
Push the door to close.
Liftgate
To lock the liftgate from the outside, press the lock
button on the Remote Keyless Entry (RKE) transmitter.
To unlock the liftgate with the RKE, press the unlock
button twice within �ve seconds. For more information,
seeRemote Keyless Entry (RKE) System Operation
on page 2-4. You can also use the power door
lock switch to lock and unlock the liftgate.
Open the liftgate by pressing the touchpad located in the
handle above the license plate. Once slightly opened, the
liftgate will rise by itself. Lamps in the rear of the vehicle
will come on, illuminating the rear cargo area, unless
the dome lamp lever is in the off position. For more
information, seeDome Lamp on page 3-17.
Notice:If you open the liftgate without checking for
overhead obstructions such as a garage door, you
could damage the liftgate or the liftgate glass. Always
check to make sure the area above and behind the
liftgate is clear before opening it.
2-12
Page 104 of 450
How the System Alarm is Activated
If the system is armed, it can be activated by either:
Opening the driver’s door or tailgate. This causes a
10 second pre-alarm chirp followed by a 30 second
full alarm of horn and lights.
Opening any other door. This immediately causes a
full alarm of horn and lights for 30 seconds.
When an alarm event has �nished, the system re-arms
itself automatically.
How to Turn Off the System Alarm
To turn off the system alarm, do one of the following:
Press the lock button on the RKE transmitter.
The system will then re-arm itself.
Press the unlock button on the RKE transmitter.
This will also disarm the system.
Insert the key in the ignition and turn it on. This will
also disarm the system.
How to Detect a Tamper Condition
The content theft security system alarm was previously
activated if three chirps sound when you press the
lock or unlock buttons on the RKE transmitter.
PASS-Key®III+ Electronic
Immobilizer
The PASS-Key III+ system operates on a radio
frequency subject to Federal Communications
Commission (FCC) Rules and with Industry Canada.
This device complies with Part 15 of the FCC Rules.
Operation is subject to the following two conditions:
1. This device may not cause harmful interference.
2. This device must accept any interference received,
including interference that may cause undesired
operation.
This device complies with RSS-210 of Industry Canada.
Operation is subject to the following two conditions:
1. This device may not cause interference.
2. This device must accept any interference received,
including interference that may cause undesired
operation of the device.
Changes or modi�cations to this system by other than
an authorized service facility could void authorization to
use this equipment.
PASS-Key III+ uses a radio frequency transponder in
the key that matches a decoder in the vehicle.
2-20
Page 123 of 450
Mirrors
Manual Rearview Mirror
Hold the inside rearview mirror in the center to move it for
a clearer view behind your vehicle. Adjust the mirror to
avoid glare from the headlamps behind you. Push the tab
forward for daytime use and pull it for nighttime use.
If the vehicle has map lamps, press the buttons located
at the bottom of the mirror to turn them on or off.
Automatic Dimming Rearview Mirror
The vehicle may have an automatic dimming inside
rearview mirror with a compass and map lights and/or
OnStar
®.
Vehicles with OnStar have three additional control
buttons located at the bottom of the mirror. See your
dealer/retailer for more information on the system
and how to subscribe to OnStar
®. SeeOnStar®System
on page 2-47for more information about the services
OnStar provides.
Press the buttons located at the bottom of the mirror to
turn the map lights on or off.
O(On/Off):Press to turn the dimming feature on
or off.Your vehicle may also have a Rear Vision Camera.
SeeRear Vision Camera (RVC) on page 2-44for more
information.
Automatic Dimming Mirror Operation
Automatic dimming reduces the glare of lights from
behind the vehicle. The dimming feature comes on and
the indicator light illuminates each time the vehicle is
started.
Cleaning the Mirror
Do not spray glass cleaner directly on the mirror.
Use a soft towel dampened with water.
Compass
Compass Operation
Y
/O(On/Off):If the vehicle has one of these
buttons, press to turn the compass on or off.
With the compass feature on, each time the vehicle is
started, the compass displays the current compass
direction after a few seconds.
2-39
Page 125 of 450
Outside Power Mirrors
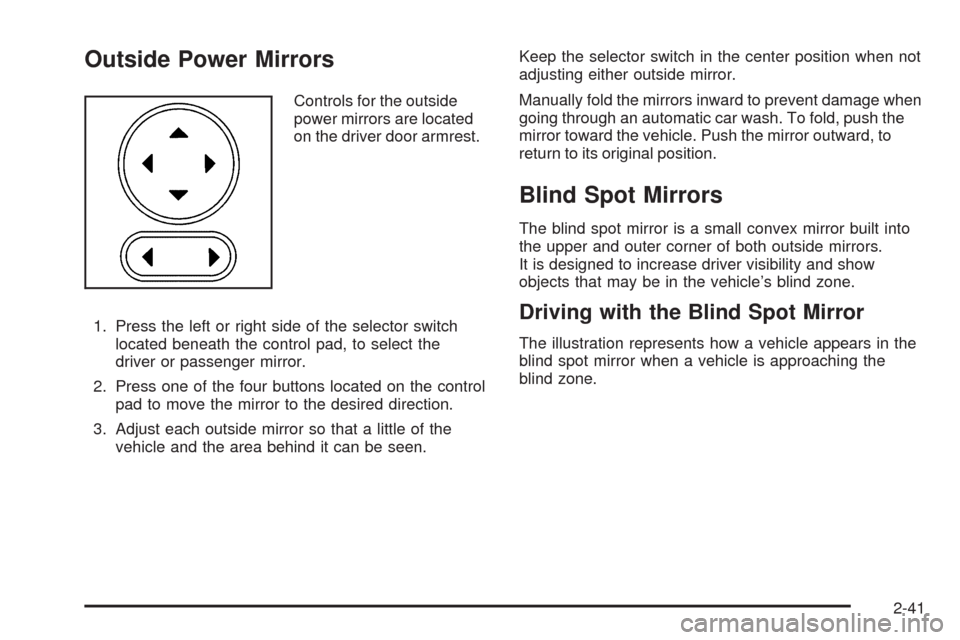
Controls for the outside
power mirrors are located
on the driver door armrest.
1. Press the left or right side of the selector switch
located beneath the control pad, to select the
driver or passenger mirror.
2. Press one of the four buttons located on the control
pad to move the mirror to the desired direction.
3. Adjust each outside mirror so that a little of the
vehicle and the area behind it can be seen.Keep the selector switch in the center position when not
adjusting either outside mirror.
Manually fold the mirrors inward to prevent damage when
going through an automatic car wash. To fold, push the
mirror toward the vehicle. Push the mirror outward, to
return to its original position.
Blind Spot Mirrors
The blind spot mirror is a small convex mirror built into
the upper and outer corner of both outside mirrors.
It is designed to increase driver visibility and show
objects that may be in the vehicle’s blind zone.
Driving with the Blind Spot Mirror
The illustration represents how a vehicle appears in the
blind spot mirror when a vehicle is approaching the
blind zone.
2-41
Page 134 of 450
How OnStar Service Works
The OnStar system can record and transmit vehicle
information. This information is automatically sent to an
OnStar Call Center when the OnStar button is pressed,
the emergency button is pressed, or if the airbags or
AACN system deploy. This information usually includes
the vehicle’s GPS location and, in the event of a crash,
additional information regarding the crash that the vehicle
was involved in (e.g. the direction from which the vehicle
was hit). When the Virtual Advisor feature of OnStar
Hands-Free Calling is used, the vehicle also sends
OnStar the vehicle’s GPS location so they can provide
services where it is located.
OnStar service cannot work unless the vehicle is in a
place where OnStar has an agreement with a wireless
service provider for service in that area. OnStar service
also cannot work unless the vehicle is in a place where
the wireless service provider OnStar has hired for that
area has coverage, network capacity and reception when
the service is needed, and technology that is compatible
with the OnStar service. Not all services are available
everywhere, particularly in remote or enclosed areas,
or at all times.Location information about the vehicle is only available
if the GPS satellite signals are unobstructed and
available.
The vehicle must have a working electrical system,
including adequate battery power, for the OnStar
equipment to operate. There are other problems OnStar
cannot control that may prevent OnStar from providing
OnStar service at any particular time or place. Some
examples are damage to important parts of the vehicle
in a crash, hills, tall buildings, tunnels, weather or
wireless phone network congestion.
Your Responsibility
Increase the volume of the radio if the OnStar advisor
cannot be heard. If the light next to the OnStar buttons
is red, the system may not be functioning properly.
Press the OnStar button and request a vehicle
diagnostic. If the light appears clear (no light is
appearing), your OnStar subscription has expired and
all services have been deactivated. Press the OnStar
button to con�rm that the OnStar equipment is active.
2-50
Page 151 of 450
{CAUTION:
Cruise control can be dangerous where you
cannot drive safely at a steady speed. So, do not
use the cruise control on winding roads or in
heavy traffic.
Cruise control can be dangerous on slippery roads.
On such roads, fast changes in tire traction can
cause excessive wheel slip, and you could lose
control. Do not use cruise control on slippery roads.
Setting Cruise Control
{CAUTION:
If you leave your cruise control on when you are not
using cruise, you might hit a button and go into
cruise when you do not want to. You could be
startled and even lose control. Keep the cruise
control switch off until you want to use cruise
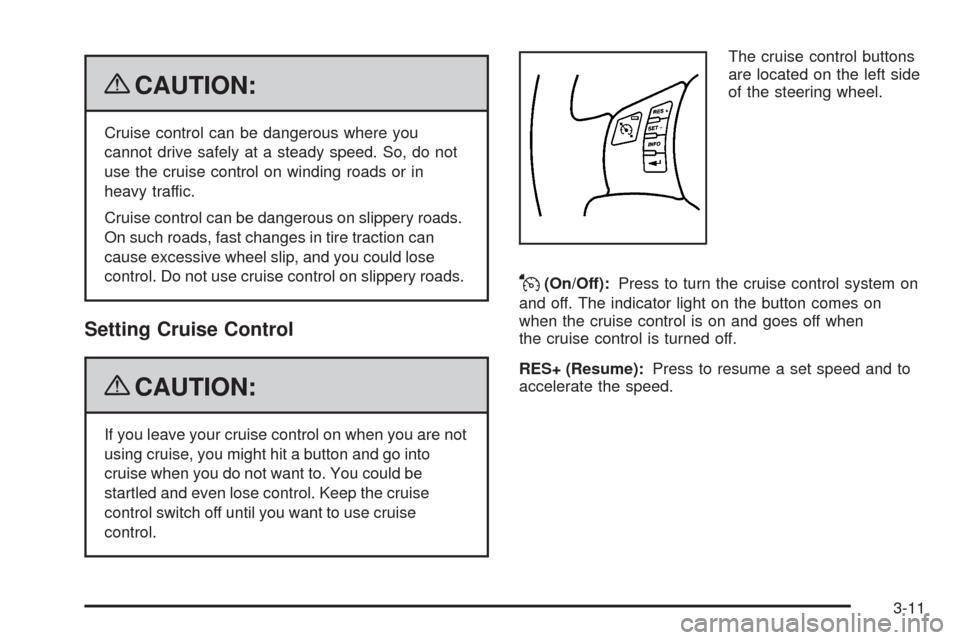
control.The cruise control buttons
are located on the left side
of the steering wheel.
J(On/Off):Press to turn the cruise control system on
and off. The indicator light on the button comes on
when the cruise control is on and goes off when
the cruise control is turned off.
RES+ (Resume):Press to resume a set speed and to
accelerate the speed.
3-11
Page 188 of 450
Driver Information Center (DIC)
Your vehicle has a Driver Information Center (DIC).
The DIC display gives you the status of many of your
vehicle’s systems. The DIC is also used to display driver
personalization menu modes and warning/status
messages. All messages will appear in the DIC display,
located at the bottom of the instrument panel cluster.
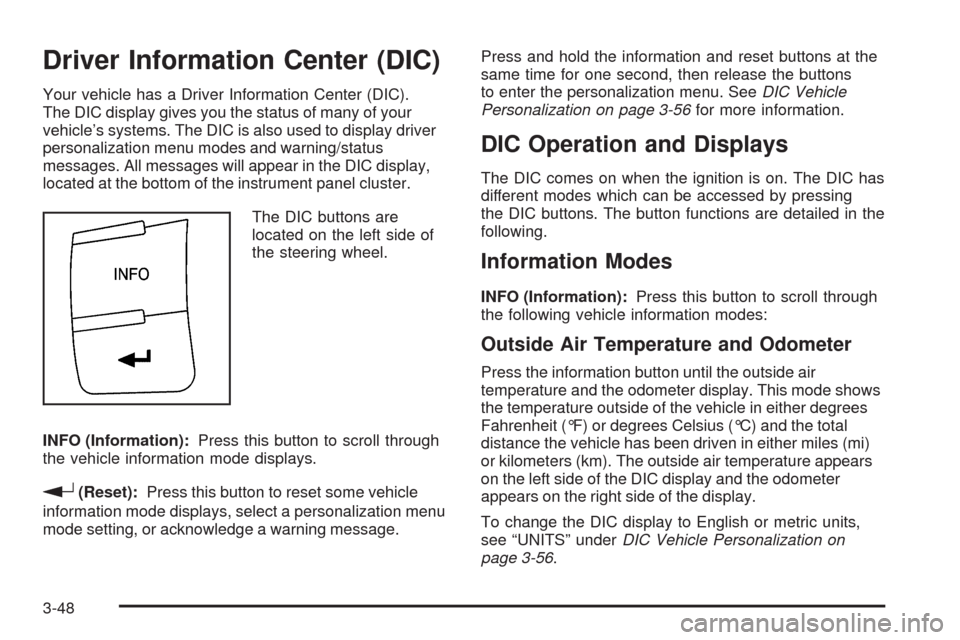
The DIC buttons are
located on the left side of
the steering wheel.
INFO (Information):Press this button to scroll through
the vehicle information mode displays.
r(Reset):Press this button to reset some vehicle
information mode displays, select a personalization menu
mode setting, or acknowledge a warning message.Press and hold the information and reset buttons at the
same time for one second, then release the buttons
to enter the personalization menu. SeeDIC Vehicle
Personalization on page 3-56for more information.
DIC Operation and Displays
The DIC comes on when the ignition is on. The DIC has
different modes which can be accessed by pressing
the DIC buttons. The button functions are detailed in the
following.
Information Modes
INFO (Information):Press this button to scroll through
the following vehicle information modes:
Outside Air Temperature and Odometer
Press the information button until the outside air
temperature and the odometer display. This mode shows
the temperature outside of the vehicle in either degrees
Fahrenheit (°F) or degrees Celsius (°C) and the total
distance the vehicle has been driven in either miles (mi)
or kilometers (km). The outside air temperature appears
on the left side of the DIC display and the odometer
appears on the right side of the display.
To change the DIC display to English or metric units,
see “UNITS” underDIC Vehicle Personalization on
page 3-56.
3-48
Page 190 of 450
OIL LIFE
Press the information button until OIL LIFE displays.
The engine oil life system shows an estimate of the oil’s
remaining useful life. It shows 100% when the system
is reset after an oil change. It alerts you to change the oil
on a schedule consistent with your driving conditions.
In addition to the engine oil life system monitoring the oil
life, additional maintenance is recommended in the
Maintenance Schedule in this manual. SeeEngine Oil
on page 5-17andScheduled Maintenance on page 6-4.
Always reset the engine oil life system after an oil
change. See “How to Reset the Engine Oil Life System”
underEngine Oil Life System on page 5-21.
COOLANT
Press the information button until COOLANT displays.
This mode shows the temperature of the engine coolant
in either degrees Fahrenheit (°F) or degrees Celsius (°C).
Tire Pressure
If your vehicle has a Tire Pressure Monitor System
(TPMS), the pressure for each tire can be viewed in the
DIC. The tire pressure is shown in either pounds per
square inch (psi) or kilopascals (kPa). Press the
information button until LF ## PSI (kPa) ## RF displays
for the front tires. Press the information button again until
LR ## PSI (kPa) ## RR displays for the rear tires.If a low tire pressure condition is detected by the system
while driving, a message advising you to check the tire
pressure appears in the display. SeeInflation - Tire
Pressure on page 5-61andDIC Warnings and Messages
on page 3-50for more information.
DIC Warnings and Messages
These messages appear if there is a problem detected
in one of your vehicle’s systems.
A message clears when the vehicle’s condition is no
longer present. To acknowledge a message and clear it
from the display, press and hold any of the DIC buttons.
If the condition is still present, the warning message
comes back on the next time the vehicle is turned off and
back on. With most messages, a warning chime sounds
when the message displays. Your vehicle may have other
warning messages.
AUTO (Automatic) LIGHTS OFF
This message displays if the automatic headlamp
system is disabled with the headlamp switch.
SeeAutomatic Headlamp System on page 3-16
for more information.
3-50
Page 196 of 450
DIC Vehicle Personalization
Your vehicle has personalization capabilities that allow
you to program certain features to a preferred setting.
All of the features listed may not be available on your
vehicle. Only the features available will be displayed on
the DIC.
The default settings for the features were set when your
vehicle left the factory, but may have been changed
from their default state since that time.
To change feature settings, use the following procedure:
Entering Personalization Menu
1. Turn the ignition on while the vehicle is stopped.
To avoid excessive drain on the battery, it is
recommended that the headlamps are turned off.
2. Press and hold the information and reset buttons at
the same time for one second, then release to enter
the personalization menu.
If the vehicle speed is greater than 2 mph (3 km/h),
only the UNITS menu will be accessible.3. Press the information button to scroll through the
available personalization menu modes.
Press the reset button to scroll through the available
settings for each mode.
If you do not make a selection within ten seconds,
the display will go back to the previous information
displayed.
Personalization Menu Modes
OIL LIFE RESET
When this feature is displayed, you can reset the engine
oil life system. To reset the system, seeEngine Oil Life
System on page 5-21. See “OIL LIFE” underDIC
Operation and Displays on page 3-48for more
information.
3-56