height adjustment CHEVROLET HHR 2009 1.G Owners Manual
[x] Cancel search | Manufacturer: CHEVROLET, Model Year: 2009, Model line: HHR, Model: CHEVROLET HHR 2009 1.GPages: 450, PDF Size: 2.49 MB
Page 30 of 450

Lap-Shoulder Belt
All seating positions in the vehicle have a
lap-shoulder belt.
The following instructions explain how to wear a
lap-shoulder belt properly.
1. Adjust the seat, if the seat is adjustable, so you can
sit up straight. To see how, see “Seats” in the Index.
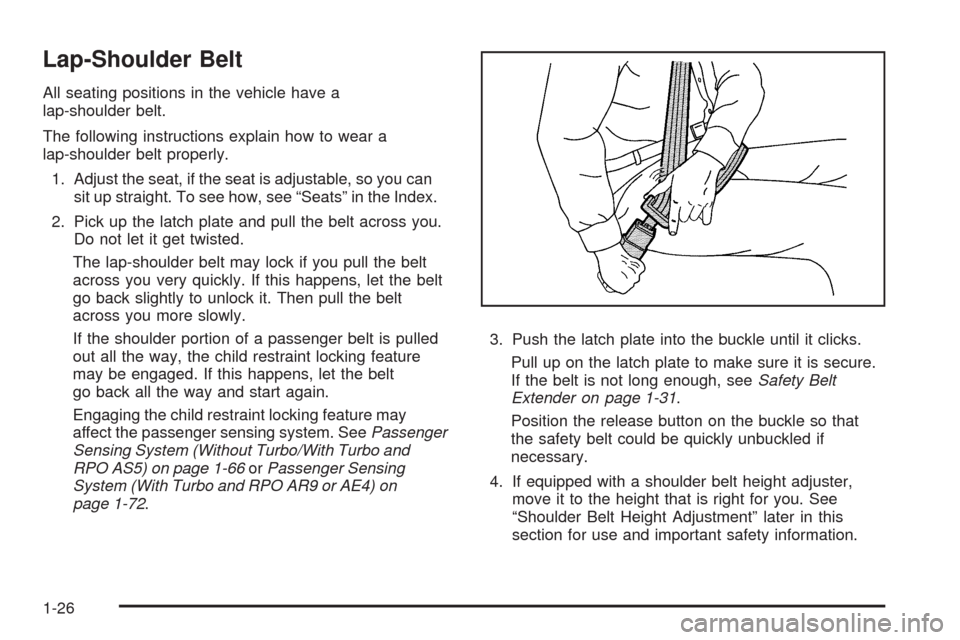
2. Pick up the latch plate and pull the belt across you.
Do not let it get twisted.
The lap-shoulder belt may lock if you pull the belt
across you very quickly. If this happens, let the belt
go back slightly to unlock it. Then pull the belt
across you more slowly.
If the shoulder portion of a passenger belt is pulled
out all the way, the child restraint locking feature
may be engaged. If this happens, let the belt
go back all the way and start again.
Engaging the child restraint locking feature may
affect the passenger sensing system. SeePassenger
Sensing System (Without Turbo/With Turbo and
RPO AS5) on page 1-66orPassenger Sensing
System (With Turbo and RPO AR9 or AE4) on
page 1-72.3. Push the latch plate into the buckle until it clicks.
Pull up on the latch plate to make sure it is secure.
If the belt is not long enough, seeSafety Belt
Extender on page 1-31.
Position the release button on the buckle so that
the safety belt could be quickly unbuckled if
necessary.
4. If equipped with a shoulder belt height adjuster,
move it to the height that is right for you. See
“Shoulder Belt Height Adjustment” later in this
section for use and important safety information.
1-26
Page 32 of 450

Shoulder Belt Height Adjuster
The vehicle has a shoulder belt height adjuster for the
driver and right front passenger seating positions.
Adjust the height so that the shoulder portion of the belt
is centered on the shoulder. The belt should be away
from the face and neck, but not falling off the shoulder.
Improper shoulder belt height adjustment could
reduce the effectiveness of the safety belt in a crash.
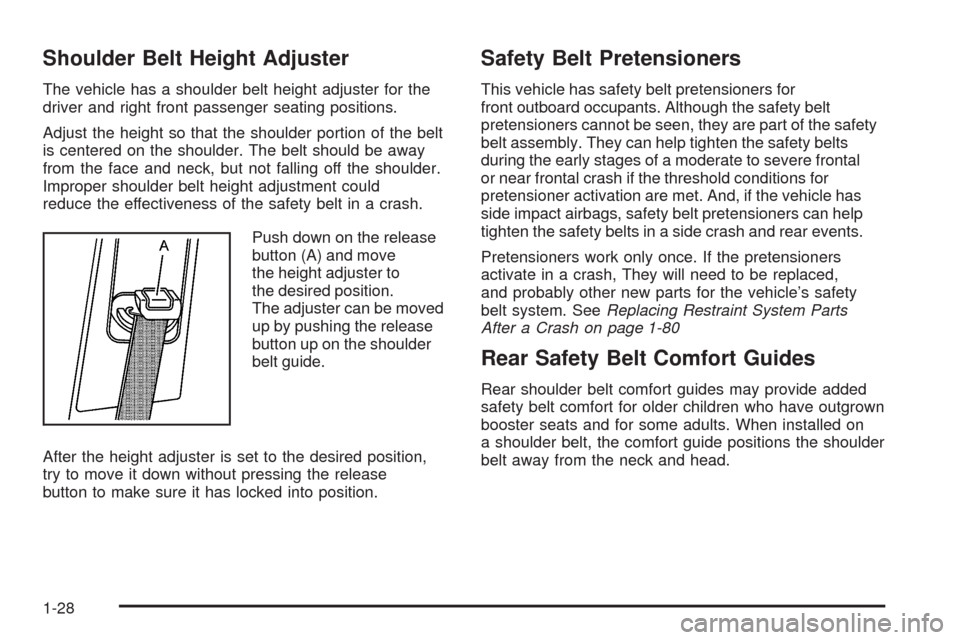
Push down on the release
button (A) and move
the height adjuster to
the desired position.
The adjuster can be moved
up by pushing the release
button up on the shoulder
belt guide.
After the height adjuster is set to the desired position,
try to move it down without pressing the release
button to make sure it has locked into position.
Safety Belt Pretensioners
This vehicle has safety belt pretensioners for
front outboard occupants. Although the safety belt
pretensioners cannot be seen, they are part of the safety
belt assembly. They can help tighten the safety belts
during the early stages of a moderate to severe frontal
or near frontal crash if the threshold conditions for
pretensioner activation are met. And, if the vehicle has
side impact airbags, safety belt pretensioners can help
tighten the safety belts in a side crash and rear events.
Pretensioners work only once. If the pretensioners
activate in a crash, They will need to be replaced,
and probably other new parts for the vehicle’s safety
belt system. SeeReplacing Restraint System Parts
After a Crash on page 1-80
Rear Safety Belt Comfort Guides
Rear shoulder belt comfort guides may provide added
safety belt comfort for older children who have outgrown
booster seats and for some adults. When installed on
a shoulder belt, the comfort guide positions the shoulder
belt away from the neck and head.
1-28
Page 315 of 450

Brake Wear
This vehicle has front disc brakes and could have rear
drum brakes or rear disc brakes.
Disc brake pads have built-in wear indicators that make
a high-pitched warning sound when the brake pads are
worn and new pads are needed. The sound can come
and go or be heard all the time the vehicle is moving,
except when applying the brake pedal �rmly.
{CAUTION:
The brake wear warning sound means that soon
the brakes will not work well. That could lead to an
accident. When the brake wear warning sound is
heard, have the vehicle serviced.
Notice:Continuing to drive with worn-out brake
pads could result in costly brake repair.
Some driving conditions or climates can cause a brake
squeal when the brakes are �rst applied or lightly applied.
This does not mean something is wrong with the brakes.Properly torqued wheel nuts are necessary to help
prevent brake pulsation. When tires are rotated, inspect
brake pads for wear and evenly tighten wheel nuts in
the proper sequence to torque speci�cations in
Capacities and Specifications on page 5-114.
If the vehicle has rear drum brakes, they do not have
wear indicators, but if a rear brake rubbing noise is heard,
have the rear brake linings inspected immediately. Rear
brake drums should be removed and inspected each time
the tires are removed for rotation or changing. When the
front brake pads are replaced, have the rear brakes
inspected, too.
Brake linings should always be replaced as complete
axle sets.
Brake Pedal Travel
See your dealer/retailer if the brake pedal does not
return to normal height, or if there is a rapid increase in
pedal travel. This could be a sign that brake service
might be required.
Brake Adjustment
Every time the brakes are applied, with or without the
vehicle moving, the brakes adjust for wear.
5-37