buttons CHEVROLET HHR 2010 1.G Owners Manual
[x] Cancel search | Manufacturer: CHEVROLET, Model Year: 2010, Model line: HHR, Model: CHEVROLET HHR 2010 1.GPages: 480, PDF Size: 5.25 MB
Page 9 of 480

A.Outlet Adjustment on page 4‑21.
B. Cruise Control
on page 4‑8(If Equipped).
C. Turn Signal/Multifunction Lever on page 4‑4.
D. Instrument Panel Cluster on page 4‑24.
E. Windshield Wipers
on page 4‑5and Windshield
Washer on page 4‑6.
F. Instrument Panel Storage on page 3‑47.
G. Traction Control System (TCS)
on page 5‑9(If Equipped). Electronic Stability Control (ESC).
See Electronic Stability Control (ESC)on
page 5‑6.
H. Passenger Airbag Status Indicator on page 4‑28.
I. Rear Side Cargo Door
on page 3‑12(If Equipped).
J. Hood Release on page 6‑15.
K. Driver Information Center (DIC) Buttons. See Driver Information Center (DIC)
on page 4‑46Buttons. L.
Horn on page 4‑3.
M. Audio Steering Wheel Controls
on page 4‑92(If Equipped).
N. Instrument Panel Brightness on page 4‑14.
O. Audio System(s) on page 4‑60.
P. Climate Control System on page 4‑18.
Q. Rear Window Wiper/Washer on page 4‑7.
R. Shift Lever (Manual Shown). See Manual
Transmission Operation
on page 3‑31and
Automatic Transmission Operation on page 3‑28.
S. Accessory Power Outlet(s).
on page 4‑16(If Equipped) and Cigarette Lighter (If Equipped).
See Ashtray(s) and Cigarette Lighteron
page 4‑18.
T. Fog Lamps
on page 4‑13(If Equipped).
U. Hazard Warning Flashers on page 4‑3.
V. Glove Box on page 3‑47.
1-3
Page 21 of 480
Vehicle Features
Radio(s)
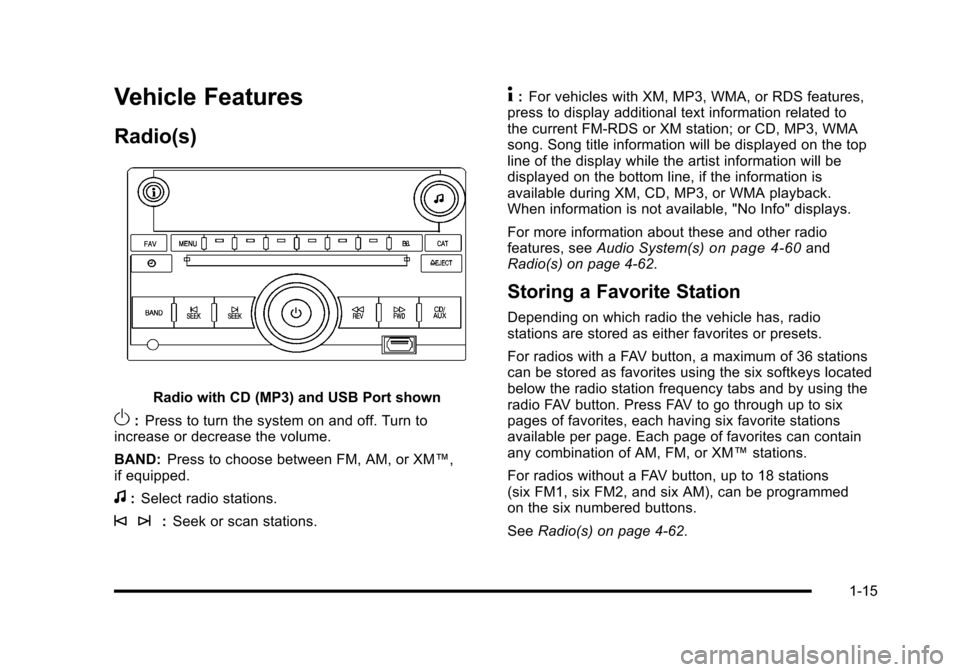
Radio with CD (MP3) and USB Port shown
O:Press to turn the system on and off. Turn to
increase or decrease the volume.
BAND: Press to choose between FM, AM, or XM™,
if equipped.
f: Select radio stations.
© ¨: Seek or scan stations.
4:For vehicles with XM, MP3, WMA, or RDS features,
press to display additional text information related to
the current FM-RDS or XM station; or CD, MP3, WMA
song. Song title information will be displayed on the top
line of the display while the artist information will be
displayed on the bottom line, if the information is
available during XM, CD, MP3, or WMA playback.
When information is not available, "No Info" displays.
For more information about these and other radio
features, see Audio System(s)
on page 4‑60and
Radio(s) on page 4‑62.
Storing a Favorite Station
Depending on which radio the vehicle has, radio
stations are stored as either favorites or presets.
For radios with a FAV button, a maximum of 36 stations
can be stored as favorites using the six softkeys located
below the radio station frequency tabs and by using the
radio FAV button. Press FAV to go through up to six
pages of favorites, each having six favorite stations
available per page. Each page of favorites can contain
any combination of AM, FM, or XM™ stations.
For radios without a FAV button, up to 18 stations
(six FM1, six FM2, and six AM), can be programmed
on the six numbered buttons.
See Radio(s) on page 4‑62.
1-15
Page 24 of 480
Driver Information Center (DIC)
The DIC display is located at the bottom of the
instrument panel cluster. It shows the status of
many vehicle systems and enables access to the
personalization menu.
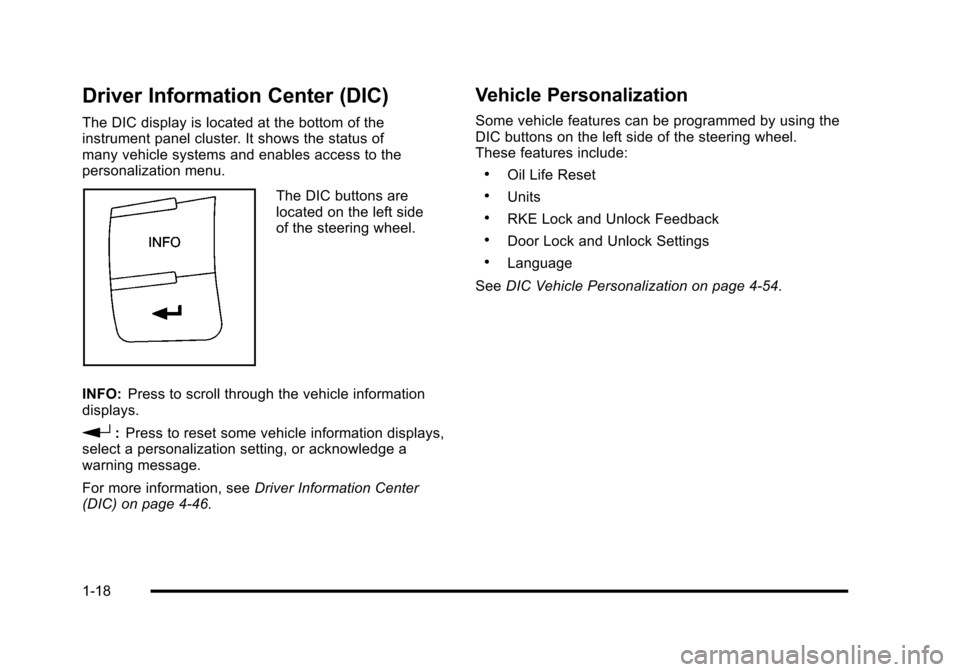
The DIC buttons are
located on the left side
of the steering wheel.
INFO: Press to scroll through the vehicle information
displays.
r: Press to reset some vehicle information displays,
select a personalization setting, or acknowledge a
warning message.
For more information, see Driver Information Center
(DIC) on page 4‑46.
Vehicle Personalization
Some vehicle features can be programmed by using the
DIC buttons on the left side of the steering wheel.
These features include:
.Oil Life Reset
.Units
.RKE Lock and Unlock Feedback
.Door Lock and Unlock Settings
.Language
See DIC Vehicle Personalization on page 4‑54.
1-18
Page 25 of 480
Cruise Control
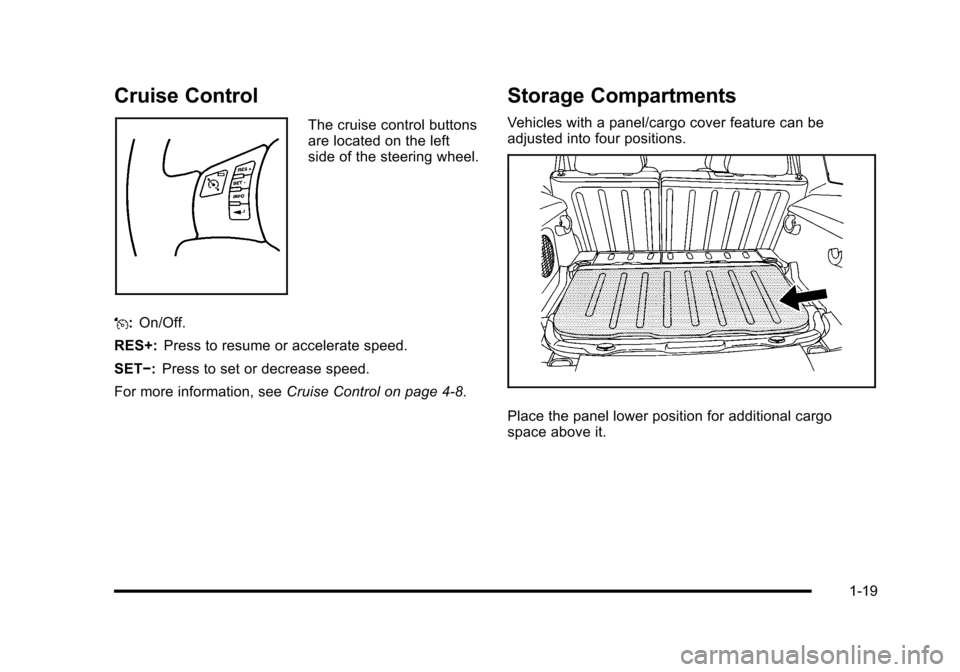
The cruise control buttons
are located on the left
side of the steering wheel.
J: On/Off.
RES+: Press to resume or accelerate speed.
SET−: Press to set or decrease speed.
For more information, see Cruise Control on page 4‑8.
Storage Compartments
Vehicles with a panel/cargo cover feature can be
adjusted into four positions.
Place the panel lower position for additional cargo
space above it.
1-19
Page 29 of 480

Engine Oil Life System
The engine oil life system calculates engine oil life
based on vehicle use and displays a DIC message
when it is necessary to change the engine oil and filter.
The oil life system should be reset to 100% only
following an oil change.
Resetting the Oil Life System
1. Turn the ignition to ON/RUN, with the engine off.
2. Press the information and reset buttons on theDriver Information Center (DIC) at the same time
to enter the personalization menu.
3. Press the information button to scroll through the available personalization menu modes until the
DIC display shows OIL-LIFE RESET.
4. Press and hold the reset button until the DIC display shows ACKNOWLEDGED. This will tell
you the system has been reset.
5. Turn the key to LOCK/OFF. For vehicles with the 2.2L (VIN Code V) or
2.4L (VIN Code B) engines, you can also reset
the system as follows:
1. Turn the ignition key to ON/RUN with the engine off.
2. Fully press and release the accelerator pedal slowly three times within five seconds.
3. Turn the key to LOCK/OFF, then start the engine.
See Engine Oil Life System on page 6‑23.
Fuel E85 (85% Ethanol)
Vehicles that have the 2.2L L4 engine (VIN Code B) or
the 2.4L L4 engine (VIN Code V) have a yellow fuel cap
and can use either unleaded gasoline or ethanol fuel
containing up to 85% ethanol (E85). See Fuel E85
(85% Ethanol)
on page 6‑8. In all other engines,
use only the unleaded gasoline described under
Gasoline Octane on page 6‑6.
1-23
Page 32 of 480
![CHEVROLET HHR 2010 1.G Owners Manual The OnStar system can record and transmit vehicle
information. This information is automatically sent to an
OnStar call center when
Qis pressed,]is pressed,
or if the airbags or ACR system deploy. Thi CHEVROLET HHR 2010 1.G Owners Manual The OnStar system can record and transmit vehicle
information. This information is automatically sent to an
OnStar call center when
Qis pressed,]is pressed,
or if the airbags or ACR system deploy. Thi](/img/24/8190/w960_8190-31.png)
The OnStar system can record and transmit vehicle
information. This information is automatically sent to an
OnStar call center when
Qis pressed,]is pressed,
or if the airbags or ACR system deploy. This information
usually includes the vehicle's GPS location and, in the
event of a crash, additional information regarding the
crash that the vehicle was involved in (e.g. the direction
from which the vehicle was hit). When the virtual
advisor feature of OnStar hands-free calling is used, the
vehicle also sends OnStar the vehicle's GPS location
so they can provide services where it is located.
Location information about the vehicle is only available
if the GPS satellite signals are unobstructed and
available.
The vehicle must have a working electrical system,
including adequate battery power, for the OnStar
equipment to operate. There are other problems OnStar
cannot control that may prevent OnStar from providing
OnStar service at any particular time or place. Some
examples are damage to important parts of the vehicle
in a crash, hills, tall buildings, tunnels, weather or
wireless phone network congestion.
OnStar Steering Wheel Controls
This vehicle may have a Talk/Mute button that can be
used to interact with OnStar hands-free calling. See
Audio Steering Wheel Controls
on page 4‑92for more
information.
On some vehicles, the mute button can be used to dial
numbers into voice mail systems, or to dial phone
extensions. See the OnStar Owner's Guide for more
information.
Your Responsibility
Increase the volume of the radio if the OnStar advisor
cannot be heard.
If the light next to the OnStar buttons is red, the system
may not be functioning properly. Press
Qand request a
vehicle diagnostic. If the light appears clear (no light is
appearing), your OnStar subscription has expired and
all services have been deactivated. Press
Qto confirm
that the OnStar equipment is active.
1-26
Page 38 of 480
Power Lumbar
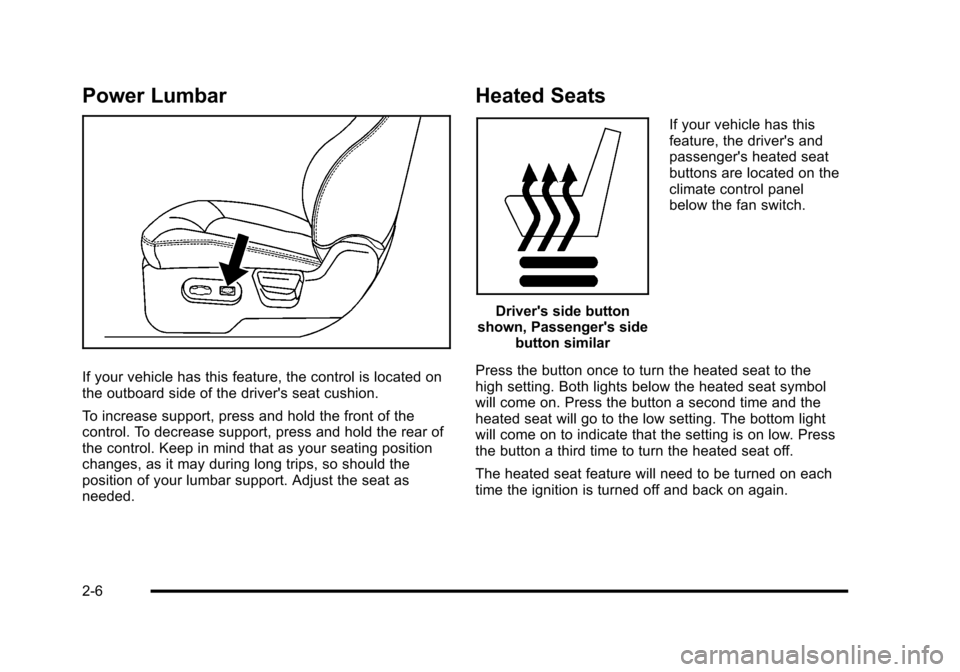
If your vehicle has this feature, the control is located on
the outboard side of the driver's seat cushion.
To increase support, press and hold the front of the
control. To decrease support, press and hold the rear of
the control. Keep in mind that as your seating position
changes, as it may during long trips, so should the
position of your lumbar support. Adjust the seat as
needed.
Heated Seats
Driver's side button
shown, Passenger's side button similar If your vehicle has this
feature, the driver's and
passenger's heated seat
buttons are located on the
climate control panel
below the fan switch.
Press the button once to turn the heated seat to the
high setting. Both lights below the heated seat symbol
will come on. Press the button a second time and the
heated seat will go to the low setting. The bottom light
will come on to indicate that the setting is on low. Press
the button a third time to turn the heated seat off.
The heated seat feature will need to be turned on each
time the ignition is turned off and back on again.
2-6
Page 124 of 480
To open a rear door while the security lock is on, do the
following:1. Unlock the door using the remote keyless entry transmitter, the power door lock switch, or by lifting
the rear door manual lock.
2. Open the door from the outside.
To cancel the rear door security lock, do the following: 1. Unlock the door and open it from the outside.
2. Insert the key into the lock below the rear door security lock label and turn it to the vertical
position.
3. Repeat the steps for the other lock.Lockout Protection
If you press the power door lock switch when the key is
in the ignition and any door is open, all the doors will
lock and the driver's door will unlock. Be sure to remove
the key from the ignition when locking your vehicle.
The lockout protection can be overridden by pressing
and holding the power door lock in the lock position for
three seconds.
Rear Side Cargo Door
The rear side cargo doors can be opened by pressing
the buttons located on the driver and passenger sides
of the instrument panel, or by using the Remote Keyless
Access (RKE) transmitter. See Instrument Panel
on
page 1‑2, and Remote Keyless Entry (RKE) System
Operationon page 3‑4Remote Keyless Entry (RKE)
System Operation for more information.
To use the buttons on the instrument panel, the driver
side door must be unlocked.
Push the door to close.
3-12
Page 132 of 480
How to Turn Off the System Alarm
To turn off the system alarm, do one of the following:
.Press the lock button on the RKE transmitter.
The system will then re-arm itself.
.Press the unlock button on the RKE transmitter.
This will also disarm the system.
.Insert the key in the ignition and turn it on. This
will also disarm the system.
How to Detect a Tamper Condition
The content theft security system alarm was previously
activated if three chirps sound when you press the lock
or unlock buttons on the RKE transmitter.
PASS-Key®III+ Electronic
Immobilizer
See Radio Frequency Statementon page 8‑17for information regarding Part 15 of the Federal
Communications Commission (FCC) Rules and
RSS-210/211 of Industry Canada.
PASS-Key®III+ Electronic
Immobilizer Operation
Your vehicle has PASS-Key®III+ (Personalized
Automotive Security System) theft-deterrent system.
PASS-Key
®III+ is a passive theft-deterrent system.
The system is automatically armed when the key is
removed from the ignition.
You do not have to manually arm or disarm the system.
The security light will come on if there is a problem with
arming or disarming the theft-deterrent system.
When the PASS-Key
®III+ system senses that someone
is using the wrong key, it prevents the vehicle from
starting. Anyone using a trial-and-error method to start
the vehicle will be discouraged because of the high
number of electrical key codes.
When trying to start the vehicle if the engine does not
start and the security light comes on, there may be a
problem with your theft-deterrent system. Turn the
ignition off and try again.
3-20
Page 153 of 480
Mirrors
Manual Rearview Mirror
Hold the inside rearview mirror in the center to move it
for a clearer view behind your vehicle. Adjust the mirror
to avoid glare from the headlamps behind you. Push the
tab forward for daytime use and pull it for nighttime use.
If the vehicle has map lamps, press the buttons located
at the bottom of the mirror to turn them on or off.
Automatic Dimming Rearview Mirror
The vehicle may have an automatic dimming inside
rearview mirror with a compass and map lights and/or
OnStar
®.
Vehicles with OnStar have three additional control
buttons located at the bottom of the mirror. See your
dealer/retailer for more information on the system and
how to subscribe to OnStar
®. See the OnStar®owners
guide for more information about the services OnStar
provides.
Press the buttons located at the bottom of the mirror to
turn the map lights on or off.
O(On/Off): Press to turn the dimming feature on or off.
Automatic Dimming Mirror Operation
Automatic dimming reduces the glare of lights from
behind the vehicle. The dimming feature comes on and
the indicator light illuminates each time the vehicle is
started.
Cleaning the Mirror
Do not spray glass cleaner directly on the mirror. Use a
soft towel dampened with water.
Compass
Compass Operation
Y
/O(On/Off): If the vehicle has one of these buttons,
press to turn the compass on or off.
With the compass feature on, each time the vehicle is
started, the compass displays the current compass
direction after a few seconds.
3-41