cruise control CHEVROLET HHR 2010 1.G Owners Manual
[x] Cancel search | Manufacturer: CHEVROLET, Model Year: 2010, Model line: HHR, Model: CHEVROLET HHR 2010 1.GPages: 480, PDF Size: 5.25 MB
Page 5 of 480
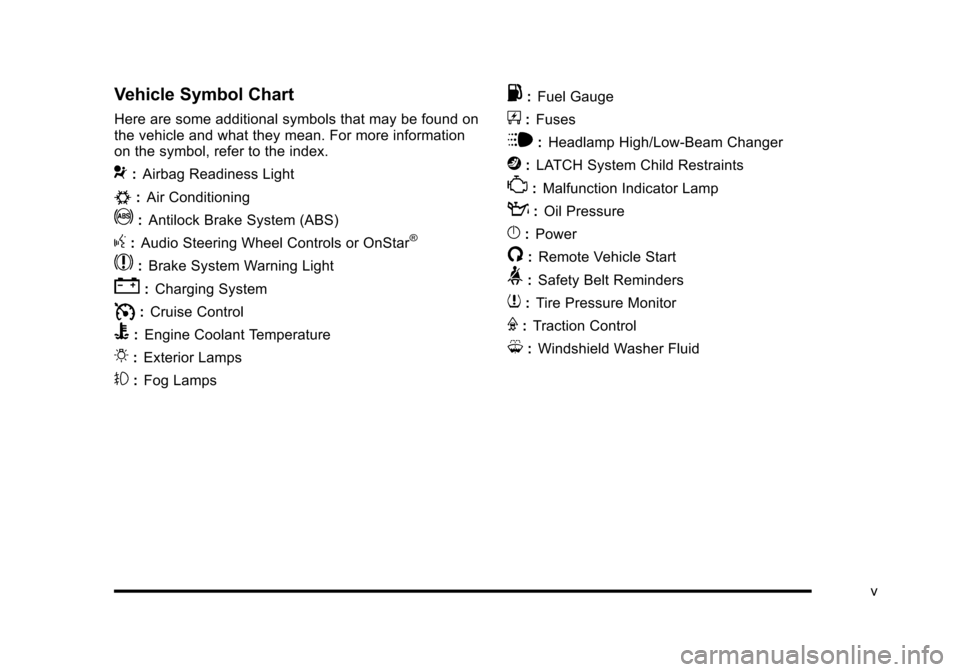
Vehicle Symbol Chart
Here are some additional symbols that may be found on
the vehicle and what they mean. For more information
on the symbol, refer to the index.
9:Airbag Readiness Light
#:Air Conditioning
!:Antilock Brake System (ABS)
g:Audio Steering Wheel Controls or OnStar®
$: Brake System Warning Light
":Charging System
I:Cruise Control
B: Engine Coolant Temperature
O:Exterior Lamps
#:Fog Lamps
.: Fuel Gauge
+:Fuses
i: Headlamp High/Low-Beam Changer
j:LATCH System Child Restraints
*: Malfunction Indicator Lamp
::Oil Pressure
}:Power
/:Remote Vehicle Start
>:Safety Belt Reminders
7:Tire Pressure Monitor
F:Traction Control
M:Windshield Washer Fluid
v
Page 7 of 480
Section 1 In Brief
Instrument Panel. . . . . . . . . . . . . . . . . . . . . . . . . . . . . . . . . . . 1-2
Initial Drive Information . . . . . . . . . . . . . . . . . . . . . . . . . . . 1-4
Remote Keyless Entry (RKE) System . . . . . . . . . . . 1-4
Remote Vehicle Start . . . . . . . . . . . . . . . . . . . . . . . . . . . 1-4
Door Locks . . . . . . . . . . . . . . . . . . . . . . . . . . . . . . . . . . . . . 1-5
Liftgate . . . . . . . . . . . . . . . . . . . . . . . . . . . . . . . . . . . . . . . . . . 1-5
Windows . . . . . . . . . . . . . . . . . . . . . . . . . . . . . . . . . . . . . . . . 1-6
Seat Adjustment . . . . . . . . . . . . . . . . . . . . . . . . . . . . . . . . 1-6
Second Row Seats . . . . . . . . . . . . . . . . . . . . . . . . . . . . . 1-8
Heated Seats . . . . . . . . . . . . . . . . . . . . . . . . . . . . . . . . . . . 1-9
Head Restraint Adjustment . . . . . . . . . . . . . . . . . . . . . . 1-9
Safety Belt . . . . . . . . . . . . . . . . . . . . . . . . . . . . . . . . . . . . . . 1-9
Sensing System for Passenger Airbag . . . . . . . . . 1-10
Mirror Adjustment . . . . . . . . . . . . . . . . . . . . . . . . . . . . . . 1-10
Steering Wheel Adjustment . . . . . . . . . . . . . . . . . . . . 1-11
Interior Lighting . . . . . . . . . . . . . . . . . . . . . . . . . . . . . . . . 1-12
Exterior Lighting . . . . . . . . . . . . . . . . . . . . . . . . . . . . . . . 1-12
Windshield Wiper/Washer . . . . . . . . . . . . . . . . . . . . . . 1-13
Climate Controls . . . . . . . . . . . . . . . . . . . . . . . . . . . . . . . 1-14 Vehicle Features
. . . . . . . . . . . . . . . . . . . . . . . . . . . . . . . . . . 1-15
Radio(s) . . . . . . . . . . . . . . . . . . . . . . . . . . . . . . . . . . . . . . . 1-15
Satellite Radio . . . . . . . . . . . . . . . . . . . . . . . . . . . . . . . . . 1-16
Portable Audio Devices (Auxiliary Input or USB Port) . . . . . . . . . . . . . . . . 1-16
Steering Wheel Controls . . . . . . . . . . . . . . . . . . . . . . . 1-17
Bluetooth
®. . . . . . . . . . . . . . . . . . . . . . . . . . . . . . . . . . . . . 1-17
Driver Information Center (DIC) . . . . . . . . . . . . . . . . 1-18
Cruise Control . . . . . . . . . . . . . . . . . . . . . . . . . . . . . . . . . 1-19
Storage Compartments . . . . . . . . . . . . . . . . . . . . . . . . 1-19
Power Outlets . . . . . . . . . . . . . . . . . . . . . . . . . . . . . . . . . 1-20
Performance and Maintenance . . . . . . . . . . . . . . . . . . 1-21
Traction Control System (TCS) . . . . . . . . . . . . . . . . 1-21
Electronic Stability Control (ESC) . . . . . . . . . . . . . . 1-21
Tire Pressure Monitor . . . . . . . . . . . . . . . . . . . . . . . . . . 1-22
Tire Sealant and Compressor Kit . . . . . . . . . . . . . . 1-22
Engine Oil Life System . . . . . . . . . . . . . . . . . . . . . . . . 1-23
Fuel E85 (85% Ethanol) . . . . . . . . . . . . . . . . . . . . . . . 1-23
Driving for Better Fuel Economy . . . . . . . . . . . . . . . 1-24
Battery . . . . . . . . . . . . . . . . . . . . . . . . . . . . . . . . . . . . . . . . . 1-24
Roadside Assistance Program . . . . . . . . . . . . . . . . . 1-24
OnStar
®. . . . . . . . . . . . . . . . . . . . . . . . . . . . . . . . . . . . . . . 1-25
1-1
Page 9 of 480

A.Outlet Adjustment on page 4‑21.
B. Cruise Control
on page 4‑8(If Equipped).
C. Turn Signal/Multifunction Lever on page 4‑4.
D. Instrument Panel Cluster on page 4‑24.
E. Windshield Wipers
on page 4‑5and Windshield
Washer on page 4‑6.
F. Instrument Panel Storage on page 3‑47.
G. Traction Control System (TCS)
on page 5‑9(If Equipped). Electronic Stability Control (ESC).
See Electronic Stability Control (ESC)on
page 5‑6.
H. Passenger Airbag Status Indicator on page 4‑28.
I. Rear Side Cargo Door
on page 3‑12(If Equipped).
J. Hood Release on page 6‑15.
K. Driver Information Center (DIC) Buttons. See Driver Information Center (DIC)
on page 4‑46Buttons. L.
Horn on page 4‑3.
M. Audio Steering Wheel Controls
on page 4‑92(If Equipped).
N. Instrument Panel Brightness on page 4‑14.
O. Audio System(s) on page 4‑60.
P. Climate Control System on page 4‑18.
Q. Rear Window Wiper/Washer on page 4‑7.
R. Shift Lever (Manual Shown). See Manual
Transmission Operation
on page 3‑31and
Automatic Transmission Operation on page 3‑28.
S. Accessory Power Outlet(s).
on page 4‑16(If Equipped) and Cigarette Lighter (If Equipped).
See Ashtray(s) and Cigarette Lighteron
page 4‑18.
T. Fog Lamps
on page 4‑13(If Equipped).
U. Hazard Warning Flashers on page 4‑3.
V. Glove Box on page 3‑47.
1-3
Page 25 of 480
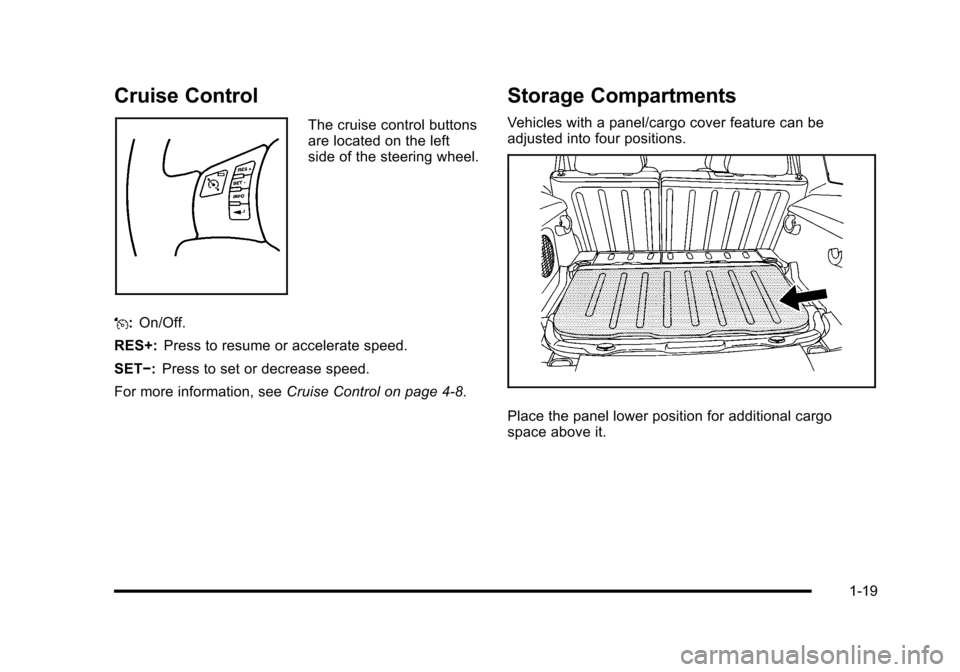
Cruise Control
The cruise control buttons
are located on the left
side of the steering wheel.
J: On/Off.
RES+: Press to resume or accelerate speed.
SET−: Press to set or decrease speed.
For more information, see Cruise Control on page 4‑8.
Storage Compartments
Vehicles with a panel/cargo cover feature can be
adjusted into four positions.
Place the panel lower position for additional cargo
space above it.
1-19
Page 30 of 480
Driving for Better Fuel Economy
Driving habits can affect fuel mileage. Here are some
driving tips to get the best fuel economy possible.
.Avoid fast starts and accelerate smoothly.
.Brake gradually and avoid abrupt stops.
.Avoid idling the engine for long periods of time.
.When road and weather conditions are
appropriate, use cruise control, if equipped.
.Always follow posted speed limits or drive more
slowly when conditions require.
.Keep vehicle tires properly inflated.
.Combine several trips into a single trip.
.Replace the vehicle's tires with the same TPC
Spec number molded into the tire's sidewall near
the size.
.Follow recommended scheduled maintenance.
Battery
This vehicle has a maintenance free battery located in
the cargo area. Access to the battery is not necessary
to jump start the vehicle. There are positive (+) and
negative (−) terminals in the engine compartment.
SeeBattery
on page 6‑40andJump Startingon
page 6‑41.
Roadside Assistance Program
U.S.: 1-800-CHEV-USA (1-800-243-8872)
TTY Users: 1-888-889-2438
Canada: 1-800-268-6800
As the owner of a new Chevrolet, you are automatically
enrolled in the Roadside Assistance program. This
program provides technically trained advisors who are
available 24 hours a day, 365 days a year, minor repair
information or towing arrangements.
Roadside Assistance and OnStar
If you have a current OnStar subscription, press the
OnStar button and the current GPS location will be sent
to an OnStar Advisor who will assess your problem,
contact Roadside Assistance, and relay exact location
to get you the help you need.
Online Owner Center
The Online Owner Center is a complimentary service
that includes online service reminders, vehicle
maintenance tips, online owner manual, special
privileges and more.
Sign up today at: www.gmownercenter.com/chevrolet
(U.S.) or www.gm.ca (Canada).
1-24
Page 167 of 480
Section 4 Instrument Panel
Instrument Panel Overview. . . . . . . . . . . . . . . . . . . . . . . . 4-3
Hazard Warning Flashers . . . . . . . . . . . . . . . . . . . . . . . 4-3
Horn . . . . . . . . . . . . . . . . . . . . . . . . . . . . . . . . . . . . . . . . . . . . 4-3
Tilt Wheel . . . . . . . . . . . . . . . . . . . . . . . . . . . . . . . . . . . . . . . 4-3
Turn Signal/Multifunction Lever . . . . . . . . . . . . . . . . . . 4-4
Turn and Lane-Change Signals . . . . . . . . . . . . . . . . . 4-4
Headlamp High/Low-Beam Changer . . . . . . . . . . . . 4-5
Flash-to-Pass . . . . . . . . . . . . . . . . . . . . . . . . . . . . . . . . . . . 4-5
Windshield Wipers . . . . . . . . . . . . . . . . . . . . . . . . . . . . . . 4-5
Windshield Washer . . . . . . . . . . . . . . . . . . . . . . . . . . . . . 4-6
Rear Window Wiper/Washer . . . . . . . . . . . . . . . . . . . . 4-7
Cruise Control . . . . . . . . . . . . . . . . . . . . . . . . . . . . . . . . . . 4-8
Headlamps . . . . . . . . . . . . . . . . . . . . . . . . . . . . . . . . . . . . 4-11
Wiper Activated Headlamps . . . . . . . . . . . . . . . . . . . . 4-11
Headlamps on Reminder . . . . . . . . . . . . . . . . . . . . . . 4-12
Daytime Running Lamps (DRL) . . . . . . . . . . . . . . . . 4-12
Automatic Headlamp System . . . . . . . . . . . . . . . . . . 4-12
Fog Lamps . . . . . . . . . . . . . . . . . . . . . . . . . . . . . . . . . . . . 4-13
Instrument Panel Brightness . . . . . . . . . . . . . . . . . . . 4-14
Dome Lamp . . . . . . . . . . . . . . . . . . . . . . . . . . . . . . . . . . . 4-14
Entry/Exit Lighting . . . . . . . . . . . . . . . . . . . . . . . . . . . . . 4-14
Reading Lamps . . . . . . . . . . . . . . . . . . . . . . . . . . . . . . . . 4-14
Electric Power Management . . . . . . . . . . . . . . . . . . . 4-15
Battery Run-Down Protection . . . . . . . . . . . . . . . . . . 4-15
Accessory Power Outlet(s) . . . . . . . . . . . . . . . . . . . . . 4-16
Ashtray(s) and Cigarette Lighter . . . . . . . . . . . . . . . 4-18 Climate Controls
. . . . . . . . . . . . . . . . . . . . . . . . . . . . . . . . . . 4-18
Climate Control System . . . . . . . . . . . . . . . . . . . . . . . . 4-18
Outlet Adjustment . . . . . . . . . . . . . . . . . . . . . . . . . . . . . . 4-21
Passenger Compartment Air Filter . . . . . . . . . . . . . 4-21
Warning Lights, Gauges, and Indicators . . . . . . . . 4-23
Instrument Panel Cluster . . . . . . . . . . . . . . . . . . . . . . . 4-24
Speedometer and Odometer . . . . . . . . . . . . . . . . . . . 4-25
Tachometer . . . . . . . . . . . . . . . . . . . . . . . . . . . . . . . . . . . . 4-25
Safety Belt Reminders . . . . . . . . . . . . . . . . . . . . . . . . . 4-26
Airbag Readiness Light . . . . . . . . . . . . . . . . . . . . . . . . 4-27
Passenger Airbag Status Indicator . . . . . . . . . . . . . 4-28
Charging System Light . . . . . . . . . . . . . . . . . . . . . . . . 4-29
Up-Shift Light . . . . . . . . . . . . . . . . . . . . . . . . . . . . . . . . . . 4-29
Brake System Warning Light . . . . . . . . . . . . . . . . . . . 4-30
Antilock Brake System (ABS) Warning Light . . . 4-31
Enhanced Traction System (ETS) Indicator/Warning Light . . . . . . . . . . . . . . . . . . . . . 4-32
Electronic Stability Control (ESC)/Traction Control System
(TCS) Indicator/Warning Light . . . . . . . . . . . . . . . 4-33
Engine Coolant Temperature Warning Light . . . . 4-34
Engine Coolant Temperature Gauge . . . . . . . . . . . 4-34
Tire Pressure Light . . . . . . . . . . . . . . . . . . . . . . . . . . . . 4-35
Malfunction Indicator Lamp . . . . . . . . . . . . . . . . . . . . 4-35
Oil Pressure Light . . . . . . . . . . . . . . . . . . . . . . . . . . . . . 4-38
Security Light . . . . . . . . . . . . . . . . . . . . . . . . . . . . . . . . . . 4-39
4-1
Page 174 of 480
Cruise Control
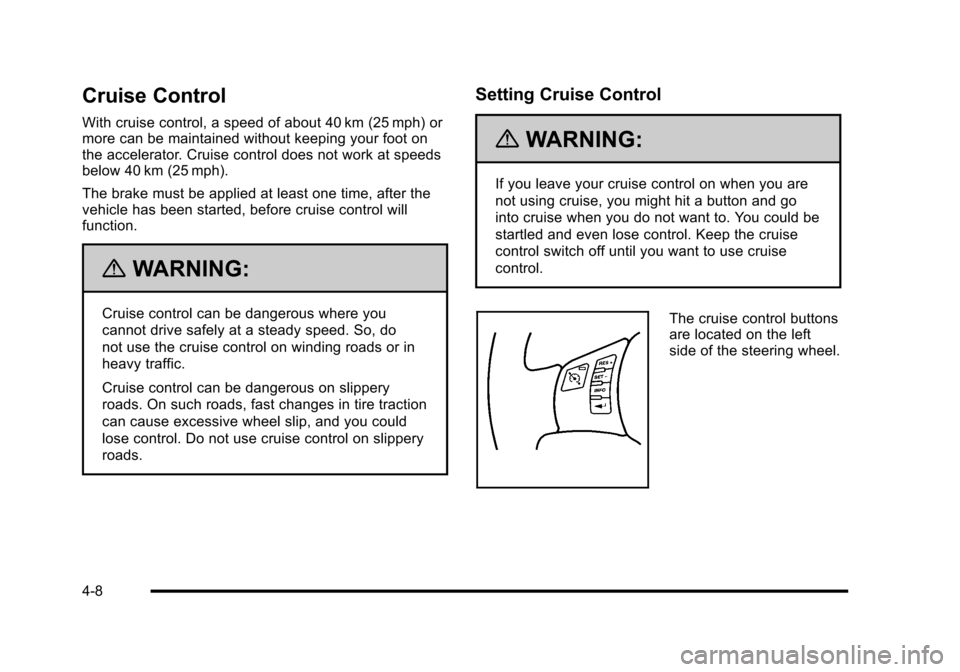
With cruise control, a speed of about 40 km (25 mph) or
more can be maintained without keeping your foot on
the accelerator. Cruise control does not work at speeds
below 40 km (25 mph).
The brake must be applied at least one time, after the
vehicle has been started, before cruise control will
function.
{WARNING:
Cruise control can be dangerous where you
cannot drive safely at a steady speed. So, do
not use the cruise control on winding roads or in
heavy traffic.
Cruise control can be dangerous on slippery
roads. On such roads, fast changes in tire traction
can cause excessive wheel slip, and you could
lose control. Do not use cruise control on slippery
roads.
Setting Cruise Control
{WARNING:
If you leave your cruise control on when you are
not using cruise, you might hit a button and go
into cruise when you do not want to. You could be
startled and even lose control. Keep the cruise
control switch off until you want to use cruise
control.
The cruise control buttons
are located on the left
side of the steering wheel.
4-8
Page 175 of 480
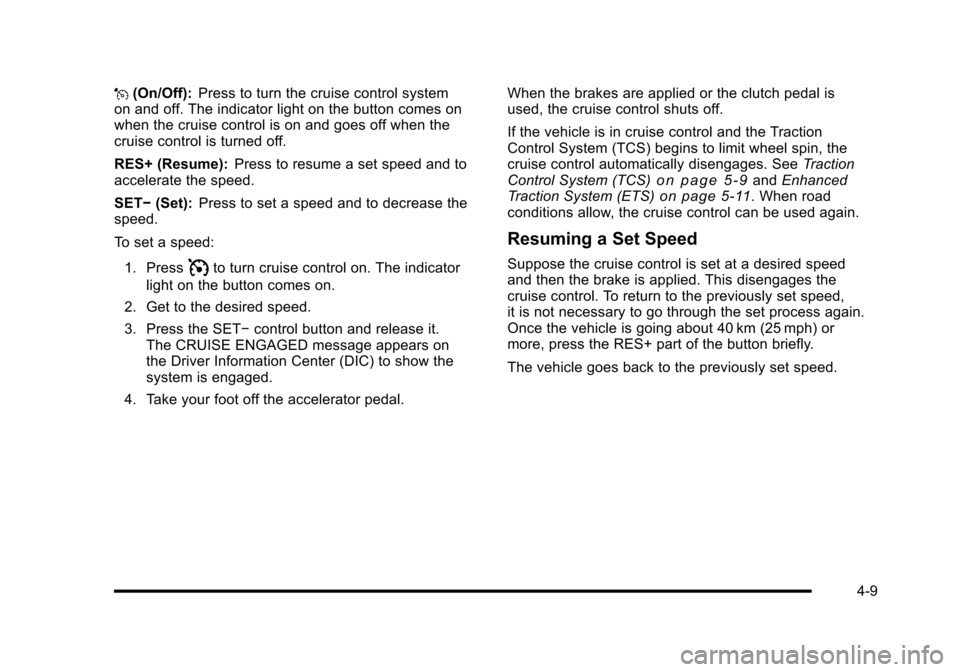
J(On/Off): Press to turn the cruise control system
on and off. The indicator light on the button comes on
when the cruise control is on and goes off when the
cruise control is turned off.
RES+ (Resume): Press to resume a set speed and to
accelerate the speed.
SET− (Set): Press to set a speed and to decrease the
speed.
To set a speed:
1. Press
Ito turn cruise control on. The indicator
light on the button comes on.
2. Get to the desired speed.
3. Press the SET− control button and release it.
The CRUISE ENGAGED message appears on
the Driver Information Center (DIC) to show the
system is engaged.
4. Take your foot off the accelerator pedal. When the brakes are applied or the clutch pedal is
used, the cruise control shuts off.
If the vehicle is in cruise control and the Traction
Control System (TCS) begins to limit wheel spin, the
cruise control automatically disengages. See
Traction
Control System (TCS)
on page 5‑9and Enhanced
Traction System (ETS)on page 5‑11. When road
conditions allow, the cruise control can be used again.
Resuming a Set Speed
Suppose the cruise control is set at a desired speed
and then the brake is applied. This disengages the
cruise control. To return to the previously set speed,
it is not necessary to go through the set process again.
Once the vehicle is going about 40 km (25 mph) or
more, press the RES+ part of the button briefly.
The vehicle goes back to the previously set speed.
4-9
Page 176 of 480
Increasing Speed While Using Cruise
Control
There are two ways to go to a higher speed.1. Disengage the cruise control by applying the brake pedal, but do not turn it off. Accelerate to a higher
speed and reset the cruise control.
2. If the cruise control system is already engaged, press the RES+ button. Hold it there until the
desired speed is reached, and then release the
button. To increase the vehicle speed in small
amounts, press the RES+ button briefly and then
release it. Each time this is done, the vehicle goes
about 1.6 km/h (1 mph) faster.
Reducing Speed While Using Cruise
Control
If the cruise control system is already engaged,
.Push and hold the SET− button until the lower
speed desired is reached, then release it.
.To slow down in small amounts, push the
SET− button briefly. Each time this is done, the
vehicle goes about 1.6 km/h (1 mph) slower.
Passing Another Vehicle While Using
Cruise Control
Use the accelerator pedal to increase the vehicle
speed. When you take your foot off the pedal, the
vehicle slows down to the cruise control speed you
set earlier.
Using Cruise Control on Hills
How well the cruise control works on hills depends upon
the vehicle speed, load and the steepness of the hills.
When going up steep hills, the accelerator pedal might
need to be applied to maintain the vehicle speed. When
going downhill, the brake might need to be applied or
the vehicle might have to be shifted to a lower gear to
keep the vehicle speed down. When the brakes are
applied the cruise control turns off.
Ending Cruise Control
To end cruise control, step lightly on the brake pedal or
the clutch pedal if the vehicle has a manual
transmission.
Stepping on the brake pedal or clutch pedal will only
end the current cruise control session.
Press
Ito turn the system completely off.
4-10
Page 177 of 480
Erasing Speed Memory
The cruise control set speed memory is erased when
the cruise control or the ignition is turned off.
Headlamps
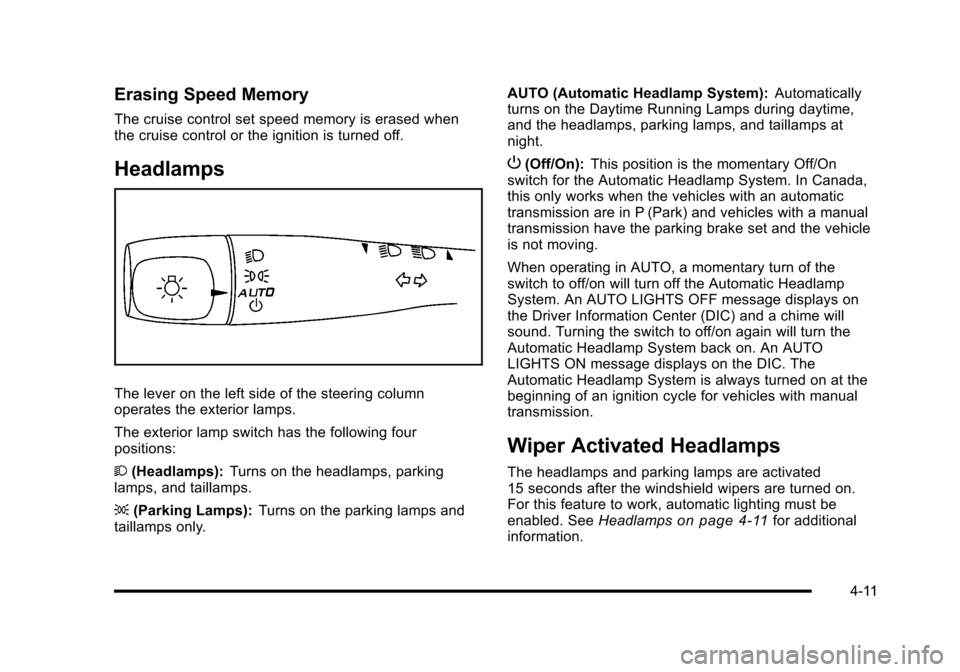
The lever on the left side of the steering column
operates the exterior lamps.
The exterior lamp switch has the following four
positions:
2(Headlamps): Turns on the headlamps, parking
lamps, and taillamps.
; (Parking Lamps): Turns on the parking lamps and
taillamps only. AUTO (Automatic Headlamp System):
Automatically
turns on the Daytime Running Lamps during daytime,
and the headlamps, parking lamps, and taillamps at
night.
P (Off/On): This position is the momentary Off/On
switch for the Automatic Headlamp System. In Canada,
this only works when the vehicles with an automatic
transmission are in P (Park) and vehicles with a manual
transmission have the parking brake set and the vehicle
is not moving.
When operating in AUTO, a momentary turn of the
switch to off/on will turn off the Automatic Headlamp
System. An AUTO LIGHTS OFF message displays on
the Driver Information Center (DIC) and a chime will
sound. Turning the switch to off/on again will turn the
Automatic Headlamp System back on. An AUTO
LIGHTS ON message displays on the DIC. The
Automatic Headlamp System is always turned on at the
beginning of an ignition cycle for vehicles with manual
transmission.
Wiper Activated Headlamps
The headlamps and parking lamps are activated
15 seconds after the windshield wipers are turned on.
For this feature to work, automatic lighting must be
enabled. See Headlamps
on page 4‑11for additional
information.
4-11