park assist CHEVROLET HHR 2010 1.G Owners Manual
[x] Cancel search | Manufacturer: CHEVROLET, Model Year: 2010, Model line: HHR, Model: CHEVROLET HHR 2010 1.GPages: 480, PDF Size: 5.25 MB
Page 138 of 480
Manual Transmission
The shift lever should be in N (Neutral) and the parking
brake engaged. Hold the clutch pedal down to the floor
and start the engine. The vehicle will not start if the
clutch pedal is not all the way down.
Starting Procedure
1. With your foot off the accelerator pedal, turn theignition key to START. When the engine starts, let
go of the key. The idle speed will go down as the
engine warms. Do not race the engine immediately
after starting it. Operate the engine and
transmission gently to allow the oil to warm up and
lubricate all moving parts.
The vehicle has a Computer-Controlled Cranking
System. This feature assists in starting the engine
and protects components. If the ignition key is
turned to the START position, and then released
when the engine begins cranking, the engine will
continue cranking for a few seconds or until the
vehicle starts. If the engine does not start and the
key is held in START for many seconds, cranking
will be stopped after 15 seconds to prevent
cranking motor damage. To prevent gear damage,
this system also prevents cranking if the engine is
already running. Engine cranking can be stopped
by turning the ignition switch to ACC/ACCESSORY
or LOCK/OFF. Notice:
Cranking the engine for long periods of
time, by returning the key to the START position
immediately after cranking has ended, can overheat
and damage the cranking motor, and drain the
battery. Wait at least 15 seconds between each try,
to let the cranking motor cool down.
2. If the engine does not start after 5‐10 seconds, especially in very cold weather (below 0°F or
−18°C), it could be flooded with too much gasoline.
Push the accelerator pedal all the way to the floor
and holding it there as you hold the key in START
for a maximum of 15 seconds. Wait at least
15 seconds between each try, to allow the cranking
motor to cool. When the engine starts, let go of the
key and accelerator. If the vehicle starts briefly but
then stops again, repeat the procedure. This clears
the extra gasoline from the engine. Do not race the
engine immediately after starting it. Operate the
engine and transmission gently until the oil warms
up and lubricates all moving parts.
Notice: The engine is designed to work with the
electronics in the vehicle. If you add electrical parts
or accessories, you could change the way the
engine operates. Before adding electrical
equipment, check with your dealer/retailer. If you
do not, the engine might not perform properly.
Any resulting damage would not be covered by the
vehicle warranty.
3-26
Page 202 of 480
If the check engine light comes on and stays on, while
the engine is running, this indicates that there is an
OBD II problem and service is required.
Malfunctions often are indicated by the system before
any problem is apparent. Being aware of the light can
prevent more serious damage to the vehicle. This
system assists the service technician in correctly
diagnosing any malfunction.
Notice:If the vehicle is continually driven with this
light on, after a while, the emission controls might
not work as well, the vehicle's fuel economy might
not be as good, and the engine might not run as
smoothly. This could lead to costly repairs that
might not be covered by the vehicle warranty.
Notice: Modifications made to the engine,
transmission, exhaust, intake, or fuel system of
the vehicle or the replacement of the original tires
with other than those of the same Tire Performance
Criteria (TPC) can affect the vehicle's emission
controls and can cause this light to come on.
Modifications to these systems could lead to
costly repairs not covered by the vehicle warranty.
This could also result in a failure to pass a
required Emission Inspection/Maintenance test.
See Accessories and Modifications on page 6‑3. This light comes on during a malfunction in one of
two ways:
Light Flashing:
A misfire condition has been detected.
A misfire increases vehicle emissions and could
damage the emission control system on the vehicle.
Diagnosis and service might be required.
To prevent more serious damage to the vehicle:
.Reduce vehicle speed.
.Avoid hard accelerations.
.Avoid steep uphill grades.
.If towing a trailer, reduce the amount of cargo
being hauled as soon as it is possible.
If the light continues to flash, when it is safe to do so,
stop the vehicle. Find a safe place to park the vehicle.
Turn the key off, wait at least 10 seconds, and restart
the engine. If the light is still flashing, follow the
previous steps and see your dealer/retailer for
service as soon as possible.
4-36
Page 266 of 480
Avoid needless heavy braking. Some people drive in
spurts, heavy acceleration followed by heavy braking,
rather than keeping pace with traffic. This is a mistake.
The brakes might not have time to cool between hard
stops. The brakes will wear out much faster with a
lot of heavy braking. Keeping pace with the traffic and
allowing realistic following distances eliminates a lot of
unnecessary braking. That means better braking and
longer brake life.
If the engine ever stops while the vehicle is being
driven, brake normally but do not pump the brakes.
If the brakes are pumped, the pedal could get harder
to push down. If the engine stops, there will still be
some power brake assist but it will be used when the
brake is applied. Once the power assist is used up, it
can take longer to stop and the brake pedal will be
harder to push.
If the vehicle has Electronic Stability Control (ESC) and
the 2.0L turbocharged engine, it also has a hydraulic
brake boost feature which supplements the power brake
system to maintain consistent brake performance under
conditions of low brake booster vacuum. Low brake
booster vacuum conditions can include initial start up
after the vehicle has been parked for several hours,
very frequent brake stops, or high altitude driving. When
hydraulic brake boost is active, minor brake pulsation or
movement might be felt but this is normal. If brake pedalfeel changes or the brake pedal feels hard to push, the
system might not be receiving the intended brake boost
and the SVC BRAKE SYSTEM DIC message may be
displayed.
Adding non‐dealer/non‐retailer accessories can affect
vehicle performance. See
Accessories and
Modifications on page 6‑3.
Antilock Brake System (ABS)
The vehicle might have the Antilock Brake System
(ABS), an advanced electronic braking system that
helps prevent a braking skid.
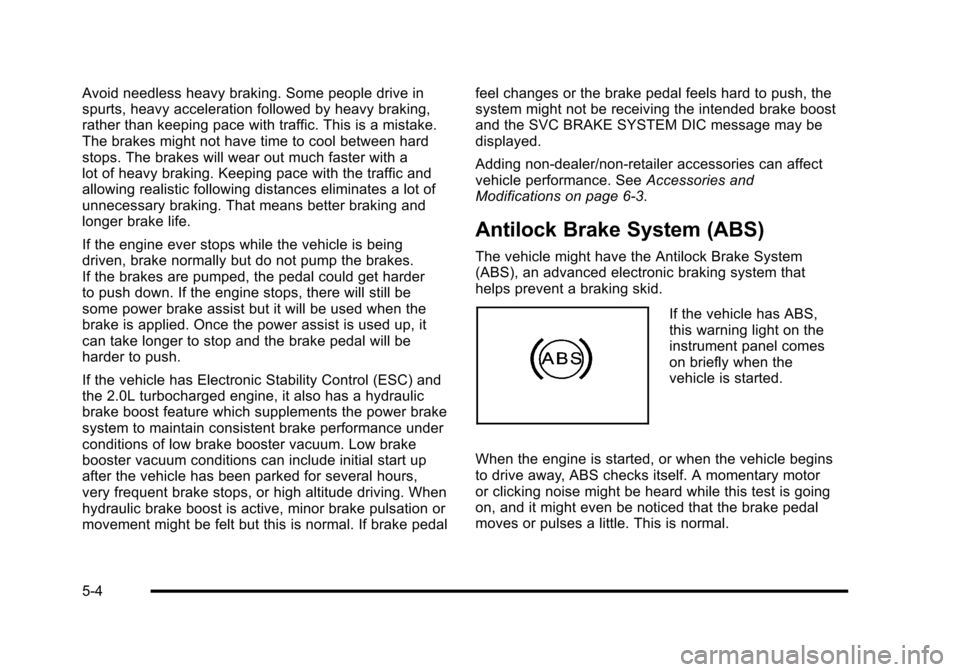
If the vehicle has ABS,
this warning light on the
instrument panel comes
on briefly when the
vehicle is started.
When the engine is started, or when the vehicle begins
to drive away, ABS checks itself. A momentary motor
or clicking noise might be heard while this test is going
on, and it might even be noticed that the brake pedal
moves or pulses a little. This is normal.
5-4
Page 336 of 480
7. Start the engine and let it run until you can feel theupper radiator hose getting hot. Watch out for the
engine cooling fan.
8. By this time, the coolant level inside the radiator filler port may be lower. If the level is lower, add
more of the proper DEX-COOL
®coolant mixture
through the fill port until the level reaches the base
of the fill port.
9. Then replace the pressure cap. At any time during this procedure, if coolant begins to flow out of the
fill port, reinstall the pressure cap. Be sure the
pressure cap is hand-tight and fully seated.
10. When the engine has cooled, check the coolant in the coolant recovery tank. The level in the coolant
recovery tank should be at the COLD FILL line
when the engine is cold.
Engine Overheating
The vehicle has several indicators to warn of engine
overheating.
You will find a coolant temperature warning light and a
coolant temperature gauge on your vehicle's instrument
panel. See Engine Coolant Temperature Warning Light
on page 4‑34andEngine Coolant Temperature Gaugeon page 4‑34for more information.
You may decide not to lift the hood when this warning
appears, but instead get service help right away. See
Roadside Assistance Program on page 8‑6.
If you do decide to lift the hood, make sure the vehicle
is parked on a level surface.
Then check to see if the engine cooling fans are
running. If the engine is overheating, both fans should
be running. If they are not, do not continue to run the
engine and have the vehicle serviced.
Notice: Engine damage from running the engine
without coolant is not covered by the warranty.
Notice: If the engine catches fire because of being
driven with no coolant, your vehicle can be badly
damaged. The costly repairs would not be covered
by the vehicle warranty.
6-34
Page 390 of 480
Changing a Flat Tire
If a tire goes flat, avoid further tire and wheel damage
by driving slowly to a level place. Turn on the hazard
warning flashers. SeeHazard Warning Flashers
on
page 4‑3.
{WARNING:
Changing a tire can be dangerous. The vehicle
can slip off the jack and roll over or fall on you or
other people. You and they could be badly injured
or even killed. Find a level place to change your
tire. To help prevent the vehicle from moving:
1. Set the parking brake firmly.
2. Put an automatic transmission shift lever in P (Park), or shift a manual transmission to
1 (First) or R (Reverse).
(Continued)
WARNING: (Continued)
3. Turn off the engine and do not restart whilethe vehicle is raised.
4. Do not allow passengers to remain in the vehicle.
To be even more certain the vehicle will not move,
you should put blocks at the front and rear of the
tire farthest away from the one being changed.
That would be the tire on the other side, at the
opposite end of the vehicle.
When the vehicle has a flat tire (B), use the following
example as a guide to assist you in the placement of
wheel blocks (A).
6-88
Page 473 of 480

Restraint System CheckChecking the Restraint Systems . . . . . . . . . . . . . . . . . . 2-78
Replacing Restraint System Parts After a
Crash . . . . . . . . . . . . . . . . . . . . . . . . . . . . . . . . . . . . . . . . . . . 2-79
Retained Accessory Power (RAP) . . . . . . . . . . . . . . . . . 3-25
Ride Control Systems . . . . . . . . . . . . . . . . . . . . . . . . . . . . . . .5-6 Electronic Stability (ESC) . . . . . . . . . . . . . . . . . . . . . . . . . . 5-6
Enhanced Traction System (ETS) . . . . . . . . . . . . . . . . 5-13
Roadside Assistance Program . . . . . . . . . . . . . . . . . . . . . . .8-6
Rocking Your Vehicle to Get it Out . . . . . . . . . . . . . . . . . 5-24
Roof Sunroof . . . . . . . . . . . . . . . . . . . . . . . . . . . . . . . . . . . . . . . . . . . 3-52
Roof Rack System . . . . . . . . . . . . . . . . . . . . . . . . . . . . . . . . . 3-50
Running the Vehicle While Parked . . . . . . . . . . . . . . . . . 3-40
S
Safety Belts Care of . . . . . . . . . . . . . . . . . . . . . . . . . . . . . . . . . . . . . . . . . . 6-113
Extender . . . . . . . . . . . . . . . . . . . . . . . . . . . . . . . . . . . . . . . . . . 2-34
How to Wear Safety Belts Properly . . . . . . . . . . . . . . . 2-19
Lap-Shoulder Belt . . . . . . . . . . . . . . . . . . . . . . . . . . . . . . . . 2-28
Reminders . . . . . . . . . . . . . . . . . . . . . . . . . . . . . . . . . . . . . . . . 4-26
Safety Belts Are for Everyone . . . . . . . . . . . . . . . . . . . . 2-14
Use During Pregnancy . . . . . . . . . . . . . . . . . . . . . . . . . . . . 2-34 Safety Defects Reporting
Canadian Government . . . . . . . . . . . . . . . . . . . . . . . . . . . . 8-14
General Motors . . . . . . . . . . . . . . . . . . . . . . . . . . . . . . . . . . . 8-14
U.S. Government . . . . . . . . . . . . . . . . . . . . . . . . . . . . . . . . . 8-13
Safety Warnings and Symbols . . . . . . . . . . . . . . . . . . . . . . . . iv
Scheduled Maintenance . . . . . . . . . . . . . . . . . . . . . . . . . . . . .7-3
Scheduling Appointments . . . . . . . . . . . . . . . . . . . . . . . . . . . .8-8
Sealant Kit, Tire . . . . . . . . . . . . . . . . . . . . . . . . . . . . . . . . . . . 6-78
Seatback, Folding Passenger . . . . . . . . . . . . . . . . . . . . . . . .2-9
Seats Driver Seat Height Adjuster . . . . . . . . . . . . . . . . . . . . . . . . 2-5
Head Restraints . . . . . . . . . . . . . . . . . . . . . . . . . . . . . . . . . . . 2-2
Heated Seats . . . . . . . . . . . . . . . . . . . . . . . . . . . . . . . . . . . . . . 2-6
Passenger Folding Seatback . . . . . . . . . . . . . . . . . . . . . . 2-9
Power Lumbar . . . . . . . . . . . . . . . . . . . . . . . . . . . . . . . . . . . . . 2-6
Power Seat . . . . . . . . . . . . . . . . . . . . . . . . . . . . . . . . . . . . . . . . 2-5
Reclining Seatbacks . . . . . . . . . . . . . . . . . . . . . . . . . . . . . . . 2-7
Split Folding Rear Seat . . . . . . . . . . . . . . . . . . . . . . . . . . . 2-11
Securing a Child Restraint Rear Seat Position . . . . . . . . . . . . . . . . . . . . . . . . . . . . . . . 2-53
Right Front Seat Position . . . . . . . . . . . . . . . . . . . . . . . . . 2-56
Security Light . . . . . . . . . . . . . . . . . . . . . . . . . . . . . . . . . . . . . . . . . . . . . . 4-39
Service . . . . . . . . . . . . . . . . . . . . . . . . . . . . . . . . . . . . . . . . . . . . . .6-3 Accessories and Modifications . . . . . . . . . . . . . . . . . . . . . 6-3
Adding Equipment to the Outside of the Vehicle . . . 6-5
Doing Your Own Work . . . . . . . . . . . . . . . . . . . . . . . . . . . . . 6-4
Engine Soon Lamp . . . . . . . . . . . . . . . . . . . . . . . . . . . . . . . 4-35
i - 11