lights CHEVROLET HHR 2011 1.G Owners Manual
[x] Cancel search | Manufacturer: CHEVROLET, Model Year: 2011, Model line: HHR, Model: CHEVROLET HHR 2011 1.GPages: 430, PDF Size: 4.57 MB
Page 1 of 430

Black plate (1,1)Chevrolet HHR Owner Manual - 2011
2011 Chevrolet HHR Owner ManualM
In Brief. . . . . . . . . . . . . . . . . . . . . . . . . . . . . . . . . . . . . . . . . . . . 1-1
Instrument Panel . . . . . . . . . . . . . . . . . . . . . . . . . . . . . . . . . 1-2
Initial Drive Information . . . . . . . . . . . . . . . . . . . . . . . . . . . 1-4
Vehicle Features . . . . . . . . . . . . . . . . . . . . . . . . . . . . . . . . 1-15
Performance and Maintenance . . . . . . . . . . . . . . . . . . 1-20
Seats and Restraint System . . . . . . . . . . . . . . . . . . . . . . 2-1
Head Restraints . . . . . . . . . . . . . . . . . . . . . . . . . . . . . . . . . . 2-2
Front Seats . . . . . . . . . . . . . . . . . . . . . . . . . . . . . . . . . . . . . . . 2-4
Rear Seats . . . . . . . . . . . . . . . . . . . . . . . . . . . . . . . . . . . . . . 2-12
Safety Belts . . . . . . . . . . . . . . . . . . . . . . . . . . . . . . . . . . . . . 2-14
Child Restraints . . . . . . . . . . . . . . . . . . . . . . . . . . . . . . . . . 2-34
Airbag System . . . . . . . . . . . . . . . . . . . . . . . . . . . . . . . . . . 2-58
Restraint System Check . . . . . . . . . . . . . . . . . . . . . . . . . 2-73
Features and Controls . . . . . . . . . . . . . . . . . . . . . . . . . . . . 3-1
Keys . . . . . . . . . . . . . . . . . . . . . . . . . . . . . . . . . . . . . . . . . . . . . 3-3
Doors and Locks . . . . . . . . . . . . . . . . . . . . . . . . . . . . . . . . . 3-8
Windows . . . . . . . . . . . . . . . . . . . . . . . . . . . . . . . . . . . . . . . . 3-15
Theft-Deterrent Systems . . . . . . . . . . . . . . . . . . . . . . . . 3-17
Starting and Operating Your Vehicle . . . . . . . . . . . . . 3-20 Mirrors . . . . . . . . . . . . . . . . . . . . . . . . . . . . . . . . . . . . . . . . . . 3-36
Object Detection Systems . . . . . . . . . . . . . . . . . . . . . . . 3-39
Storage Areas . . . . . . . . . . . . . . . . . . . . . . . . . . . . . . . . . . . 3-42
Sunroof . . . . . . . . . . . . . . . . . . . . . . . . . . . . . . . . . . . . . . . . . 3-48
Instrument Panel . . . . . . . . . . . . . . . . . . . . . . . . . . . . . . . . . 4-1
Instrument Panel Overview . . . . . . . . . . . . . . . . . . . . . . . 4-3
Climate Controls . . . . . . . . . . . . . . . . . . . . . . . . . . . . . . . . 4-18
Warning Lights, Gauges, and Indicators . . . . . . . . . 4-22
Driver Information Center (DIC) . . . . . . . . . . . . . . . . . 4-38
Audio System(s) . . . . . . . . . . . . . . . . . . . . . . . . . . . . . . . . 4-50
Driving Your Vehicle . . . . . . . . . . . . . . . . . . . . . . . . . . . . . . 5-1
Your Driving, the Road, and the Vehicle . . . . . . . . . . 5-2
Towing . . . . . . . . . . . . . . . . . . . . . . . . . . . . . . . . . . . . . . . . . . 5-28
Service and Appearance Care . . . . . . . . . . . . . . . . . . . 6-1
Service . . . . . . . . . . . . . . . . . . . . . . . . . . . . . . . . . . . . . . . . . . . 6-3
Fuel . . . . . . . . . . . . . . . . . . . . . . . . . . . . . . . . . . . . . . . . . . . . . . 6-5
Checking Things Under the Hood . . . . . . . . . . . . . . . 6-12
Headlamp Aiming . . . . . . . . . . . . . . . . . . . . . . . . . . . . . . . 6-38
Page 39 of 430
Black plate (7,1)Chevrolet HHR Owner Manual - 2011
Heated Seats
{WARNING:
If you cannot feel temperature change or pain to
the skin, the seat heater may cause burns even at
low temperatures. To reduce the risk of burns,
people with such a condition should use care
when using the seat heater, especially for long
periods of time. Do not place anything on the seat
that insulates against heat, such as a blanket,
cushion, cover or similar item. This may cause the
seat heater to overheat. An overheated seat
heater may cause a burn or may damage
the seat.
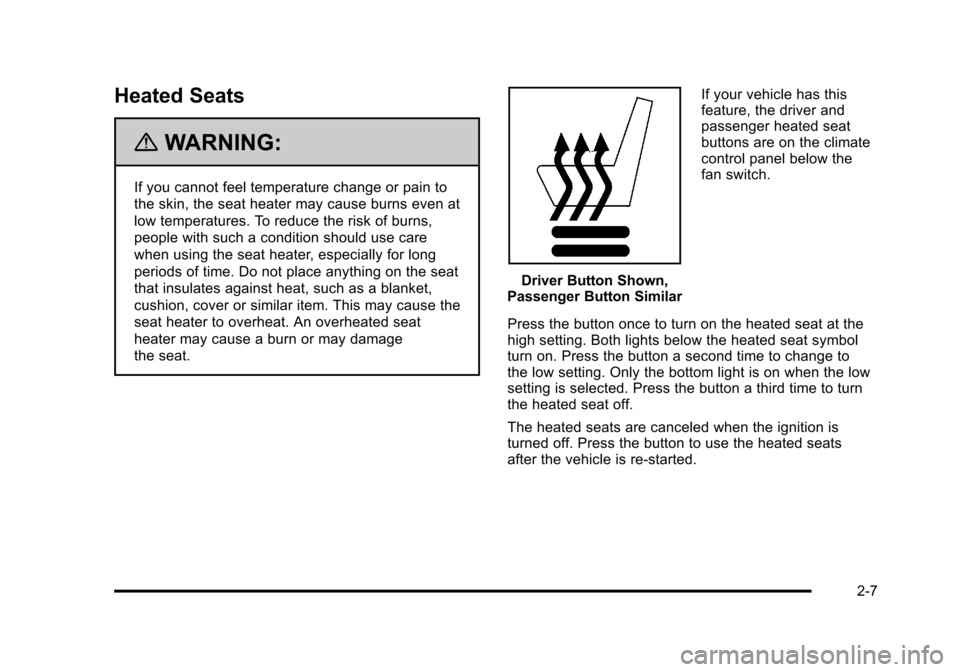
Driver Button Shown,
Passenger Button Similar If your vehicle has this
feature, the driver and
passenger heated seat
buttons are on the climate
control panel below the
fan switch.
Press the button once to turn on the heated seat at the
high setting. Both lights below the heated seat symbol
turn on. Press the button a second time to change to
the low setting. Only the bottom light is on when the low
setting is selected. Press the button a third time to turn
the heated seat off.
The heated seats are canceled when the ignition is
turned off. Press the button to use the heated seats
after the vehicle is re‐started.
2-7
Page 111 of 430
Black plate (5,1)Chevrolet HHR Owner Manual - 2011
Q(Lock):Press to lock all the doors. The interior
lamps turn off after all of the doors are closed.
If enabled through the Driver Information Center (DIC),
the parking lamps flash once to indicate locking has
occurred. If enabled through the DIC, the horn chirps to
indicate locking has occurred. See “LOCK HORN”
under DIC Vehicle Personalization
on page 4‑45for
more information.
Pressing
Qmay arm the content theft-deterrent system.
See Content Theft-Deterrent on page 3‑17.
K(Unlock): Press once to unlock the driver door.
If enabled through the DIC, the horn chirps to indicate
unlocking has occurred. See “UNLOCK HORN”under
DIC Vehicle Personalization
on page 4‑45for more
information. If
Kis pressed again within five seconds,
all remaining doors and the liftgate unlock. The interior
lamps come on and stay on for 20 seconds or until the
ignition is turned on. If enabled through the DIC, the
parking lamps flash twice to indicate unlocking has
occurred and the high beams and parking lamps may
turn on and stay on for 20 seconds or until a door is
opened. See LIGHT FLASH and EXT (Exterior) LIGHTS
under DIC Vehicle Personalization
on page 4‑45for
additional information.
L(Vehicle Locator/Panic Alarm): Press and release
to activate the vehicle locate feature. The horn chirps
three times and the headlamps and parking lamps flash
three times.
Press and hold
Lfor three seconds to sound the panic
alarm. The horn chirps and the headlamps and parking
lamps flash for 30 seconds. Press
Lagain to cancel
the panic alarm.
Remote Rear Door Operation (Panel)
*: Press and hold for about one second to open the
rear driver side door.
+: Press and hold for about one second to open the
rear passenger side door.
Programming Transmitters to the
Vehicle
Only RKE transmitters programmed to the vehicle will
work. If a transmitter is lost or stolen, a replacement can
be purchased and programmed through your dealer.
When the replacement transmitter is programmed to the
vehicle, all remaining transmitters must also be
programmed. Any lost or stolen transmitters no longer
work once the new transmitter is programmed. Each
vehicle can have up to four transmitters programmed
to it.
3-5
Page 124 of 430
Black plate (18,1)Chevrolet HHR Owner Manual - 2011
The system will arm after either of the following occur:
.30 seconds after all the doors are closed.
.60 seconds with any door open.
Press the lock button on the RKE transmitter a second
time, while all the doors are closed, to immediately arm
the system. The system still arms in 60 seconds if a
door is open. When the open door is closed, it
also arms.
The security light turns on to indicate that arming has
been initiated. Once the system is armed, the security
light flashes once every three seconds.
If the security light flashes twice per second, a door
is open.
Locking the vehicle with the manual lock knobs on the
doors will not arm the system.
Disarming the System
Disarm the system by doing any one of the following:
.Press the RKE transmitter unlock button.
.Turn the ignition on.
Once the system is disarmed, the security light stops
flashing.
How the System Alarm is Activated
If the system is armed, it can be activated by either:
.Opening the driver's door or tailgate. This causes a
10 second pre-alarm chirp followed by a 30 second
full alarm of horn and lights.
.Opening any other door. This immediately causes
a full alarm of horn and lights for 30 seconds.
When an alarm event has finished, the system re-arms
itself automatically.
How to Turn Off the System Alarm
To turn off the system alarm, do one of the following:
.Press the lock button on the RKE transmitter. The
system will then re-arm itself.
.Press the unlock button on the RKE transmitter.
This will also disarm the system.
.Insert the key in the ignition and turn it on. This will
also disarm the system.
How to Detect a Tamper Condition
The content theft security system alarm was previously
activated if three chirps sound when you press the lock
or unlock buttons on the RKE transmitter.
3-18
Page 128 of 430
Black plate (22,1)Chevrolet HHR Owner Manual - 2011
3. Come to a complete stop, shift to P (Park), andturn the ignition to LOCK/OFF. On vehicles with an
automatic transmission, the shift lever must be in
P (Park) to turn the ignition switch to the LOCK/
OFF position.
4. Set the parking brake. See Parking Brake
on
page 3‑30.
The steering can bind with the wheel turned off center.
If this happens, move it from right to left while turning
the key to ACC/ACCESSORY. If this does not work,
then the vehicle needs service.
{WARNING:
If you have a manual transmission removing the
key from the ignition switch will lock the steering
column and result in a loss of ability to steer the
vehicle. This could cause a collision. If you need
to turn the engine off while the vehicle is moving,
turn the key to ACC/ACCESSORY. ACC (ACC/ACCESSORY):
This position operates
some of the electrical accessories. It unlocks the
steering wheel and ignition.
R (ON/RUN): This is the position in which you can
operate the electrical accessories and to display some
instrument panel cluster warning and indicator lights.
The switch stays in this position when the engine is
running.
If you leave the key in the ACC/ACCESSORY or ON/
RUN position with the engine off, the battery could be
drained. You may not be able to start the vehicle if the
battery is allowed to drain for an extended period
of time.
/ (START): This position starts the engine. When the
engine starts, release the key. The ignition switch will
return to ON/RUN for driving.
A warning tone will sound when the driver door is
opened, the ignition is in LOCK/OFF or ACC/
ACCESSORY and the key is in the ignition.
3-22
Page 142 of 430
Black plate (36,1)Chevrolet HHR Owner Manual - 2011
Mirrors
Manual Rearview Mirror
Hold the inside rearview mirror in the center to move it
for a clearer view behind your vehicle. Adjust the mirror
to avoid glare from the headlamps behind you. Push the
tab forward for daytime use and pull it for nighttime use.
If the vehicle has map lamps, press the buttons located
at the bottom of the mirror to turn them on or off.
Automatic Dimming Rearview Mirror
The vehicle may have an automatic dimming inside
rearview mirror with a compass and map lights and/or
OnStar
®.
Vehicles with OnStar have three additional control
buttons located at the bottom of the mirror. See your
dealer for more information on the system and how to
subscribe to OnStar
®. See the OnStar®owners guide
for more information about the services OnStar
provides.
Press the buttons located at the bottom of the mirror to
turn the map lights on or off.
O(On/Off): Press to turn the dimming feature on or off.
Automatic Dimming Mirror Operation
Automatic dimming reduces the glare of lights from
behind the vehicle. The dimming feature comes on and
the indicator light illuminates each time the vehicle is
started.
Cleaning the Mirror
Do not spray glass cleaner directly on the mirror. Use a
soft towel dampened with water.
Compass
Compass Operation
Y
/O(On/Off): If the vehicle has one of these buttons,
press to turn the compass on or off.
With the compass feature on, each time the vehicle is
started, the compass displays the current compass
direction after a few seconds.
Compass Calibration
If after a few seconds the display does not show a
compass direction, (N for North for example), there may
be a strong magnetic field interfering with the compass.
Interference can be caused by a magnetic antenna
mount, note pad holder, or similar object. If CAL
appears in the compass window, the compass may
need to be reset or calibrated.
3-36
Page 147 of 430
Black plate (41,1)Chevrolet HHR Owner Manual - 2011
A. View displayed by the camera.
B. Corner of the rear bumper.
When the System Does Not Seem To
Work Properly
The rear vision camera system might not work properly
or display a clear image if:
.The RVC is turned off. See“Turning the Rear
Camera System On or Off” earlier in this section.
.It is dark.
.The sun or the beam of headlights is shining
directly into the camera lens.
.Ice, snow, mud, or anything else builds up on the
camera lens. Clean the lens, rinse it with water,
and wipe it with a soft cloth.
.The back of the vehicle is in an accident, the
position and mounting angle of the camera can
change or the camera can be affected. Be sure to
have the camera and its position and mounting
angle checked at your dealer.
.There are extreme temperature changes. The rear vision camera system display in the rearview
mirror may turn off or not appear as expected due to
one of the following conditions. If this occurs the left
indicator light on the mirror will flash.
.A slow flash may indicate a loss of video signal,
or no video signal present during the reverse cycle.
.A fast flash may indicate that the display has been
on for the maximum allowable time during a
reverse cycle, or the display has reached an Over
Temperature limit.
The fast flash conditions are used to protect the
video device from high temperature conditions.
Once conditions return to normal the device will
reset and the green indicator will stop flashing.
During any of these fault conditions, the display will be
blank and the indicator will continue to flash as long as
the vehicle is in R (Reverse) or until the conditions
return to normal.
Pressing and holding
zwhen the left indicator light is
flashing will turn off the video display along with the left
indicator light.
3-41
Page 157 of 430
Black plate (1,1)Chevrolet HHR Owner Manual - 2011
Section 4 Instrument Panel
Instrument Panel Overview. . . . . . . . . . . . . . . . . . . . . . . .4-3
Hazard Warning Flashers . . . . . . . . . . . . . . . . . . . . . . . 4-3
Horn . . . . . . . . . . . . . . . . . . . . . . . . . . . . . . . . . . . . . . . . . . . . 4-3
Tilt Wheel . . . . . . . . . . . . . . . . . . . . . . . . . . . . . . . . . . . . . . . 4-3
Turn Signal/Multifunction Lever . . . . . . . . . . . . . . . . . . 4-4
Turn and Lane-Change Signals . . . . . . . . . . . . . . . . . 4-4
Headlamp High/Low-Beam Changer . . . . . . . . . . . . 4-5
Flash-to-Pass . . . . . . . . . . . . . . . . . . . . . . . . . . . . . . . . . . . 4-5
Windshield Wipers . . . . . . . . . . . . . . . . . . . . . . . . . . . . . . 4-5
Windshield Washer . . . . . . . . . . . . . . . . . . . . . . . . . . . . . 4-6
Rear Window Wiper/Washer . . . . . . . . . . . . . . . . . . . . 4-7
Cruise Control . . . . . . . . . . . . . . . . . . . . . . . . . . . . . . . . . . 4-8
Headlamps . . . . . . . . . . . . . . . . . . . . . . . . . . . . . . . . . . . . 4-11
Wiper Activated Headlamps . . . . . . . . . . . . . . . . . . . 4-12
Headlamps on Reminder . . . . . . . . . . . . . . . . . . . . . . 4-12
Daytime Running Lamps (DRL) . . . . . . . . . . . . . . . . 4-12
Automatic Headlamp System . . . . . . . . . . . . . . . . . . 4-13
Fog Lamps . . . . . . . . . . . . . . . . . . . . . . . . . . . . . . . . . . . . 4-13
Instrument Panel Brightness . . . . . . . . . . . . . . . . . . . 4-14
Dome Lamp . . . . . . . . . . . . . . . . . . . . . . . . . . . . . . . . . . . 4-14
Entry/Exit Lighting . . . . . . . . . . . . . . . . . . . . . . . . . . . . . 4-14
Reading Lamps . . . . . . . . . . . . . . . . . . . . . . . . . . . . . . . . 4-14
Electric Power Management . . . . . . . . . . . . . . . . . . . 4-15
Battery Run-Down Protection . . . . . . . . . . . . . . . . . . 4-15
Accessory Power Outlet(s) . . . . . . . . . . . . . . . . . . . . . 4-15
Ashtray(s) and Cigarette Lighter . . . . . . . . . . . . . . . 4-17 Climate Controls
. . . . . . . . . . . . . . . . . . . . . . . . . . . . . . . . . . 4-18
Climate Control System . . . . . . . . . . . . . . . . . . . . . . . . 4-18
Outlet Adjustment . . . . . . . . . . . . . . . . . . . . . . . . . . . . . . 4-20
Passenger Compartment Air Filter . . . . . . . . . . . . . 4-21
Warning Lights, Gauges, and Indicators . . . . . . . .4-22
Instrument Panel Cluster . . . . . . . . . . . . . . . . . . . . . . . 4-23
Speedometer and Odometer . . . . . . . . . . . . . . . . . . . 4-24
Tachometer . . . . . . . . . . . . . . . . . . . . . . . . . . . . . . . . . . . . 4-24
Safety Belt Reminders . . . . . . . . . . . . . . . . . . . . . . . . . 4-25
Airbag Readiness Light . . . . . . . . . . . . . . . . . . . . . . . . 4-26
Passenger Airbag Status Indicator . . . . . . . . . . . . . 4-27
Charging System Light . . . . . . . . . . . . . . . . . . . . . . . . 4-28
Up-Shift Light . . . . . . . . . . . . . . . . . . . . . . . . . . . . . . . . . . 4-28
Brake System Warning Light . . . . . . . . . . . . . . . . . . . 4-29
Antilock Brake System (ABS) Warning Light . . . 4-30
Enhanced Traction System (ETS) Indicator/ Warning Light . . . . . . . . . . . . . . . . . . . . . . . . . . . . . . . . 4-30
Electronic Stability Control (ESC)/Traction Control System (TCS) Indicator/Warning
Light . . . . . . . . . . . . . . . . . . . . . . . . . . . . . . . . . . . . . . . . . 4-31
Engine Coolant Temperature Warning Light . . . . 4-32
Engine Coolant Temperature Gauge . . . . . . . . . . . 4-32
Tire Pressure Light . . . . . . . . . . . . . . . . . . . . . . . . . . . . 4-33
Malfunction Indicator Lamp . . . . . . . . . . . . . . . . . . . . 4-33
Oil Pressure Light . . . . . . . . . . . . . . . . . . . . . . . . . . . . . 4-36
Security Light . . . . . . . . . . . . . . . . . . . . . . . . . . . . . . . . . . 4-36
4-1
Page 167 of 430
Black plate (11,1)Chevrolet HHR Owner Manual - 2011
Headlamps
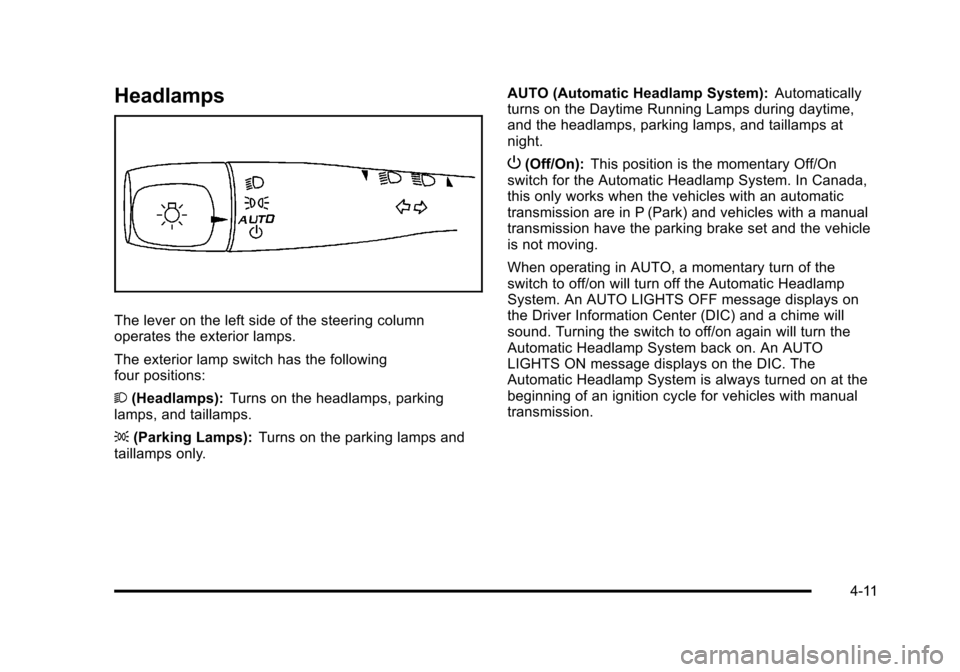
The lever on the left side of the steering column
operates the exterior lamps.
The exterior lamp switch has the following
four positions:
2(Headlamps): Turns on the headlamps, parking
lamps, and taillamps.
; (Parking Lamps): Turns on the parking lamps and
taillamps only. AUTO (Automatic Headlamp System):
Automatically
turns on the Daytime Running Lamps during daytime,
and the headlamps, parking lamps, and taillamps at
night.
P (Off/On): This position is the momentary Off/On
switch for the Automatic Headlamp System. In Canada,
this only works when the vehicles with an automatic
transmission are in P (Park) and vehicles with a manual
transmission have the parking brake set and the vehicle
is not moving.
When operating in AUTO, a momentary turn of the
switch to off/on will turn off the Automatic Headlamp
System. An AUTO LIGHTS OFF message displays on
the Driver Information Center (DIC) and a chime will
sound. Turning the switch to off/on again will turn the
Automatic Headlamp System back on. An AUTO
LIGHTS ON message displays on the DIC. The
Automatic Headlamp System is always turned on at the
beginning of an ignition cycle for vehicles with manual
transmission.
4-11
Page 168 of 430
Black plate (12,1)Chevrolet HHR Owner Manual - 2011
Wiper Activated Headlamps
The headlamps and parking lamps are activated
15 seconds after the windshield wipers are turned on.
For this feature to work, automatic lighting must be
enabled. SeeHeadlamps
on page 4‑11for additional
information.
When the ignition is turned off, the wiper-activated
headlamps will immediately turn off. They also turn off
15 seconds after the windshield wiper control is
turned off.
Headlamps on Reminder
If the drivers door is opened with the ignition off and the
lamps on, a warning chime will sound. This indicates
that the headlamps are still on.
Daytime Running Lamps (DRL)
Daytime Running Lamps (DRL) can make it easier for
others to see the front of your vehicle during the day.
Fully functional daytime running lamps are required on
all vehicles first sold in Canada. The vehicle has a light sensor on top of the instrument
panel. Do not cover this sensor or the headlamps will
come on when they are not needed.
The DRL system will make the headlamps come on at
reduced brightness when the following conditions
are met:
.The ignition is on.
.The exterior lamp control is turned to AUTO.
.The light sensor detects daytime light.
.The shift lever is not in P (Park).
While the DRL system is on, the taillamps, sidemarker
lamps, and instrument panel lights will not be on.
For vehicles with an Automatic Transmission, the
DRL system is off any time the vehicle is in P (Park).
For vehicles with a Manual Transmission, the DRL
system will be off when the vehicle is first started, the
park brake is applied, and the vehicle has not moved.
The DRL system on U.S. vehicles can also be turned
off by using the off/on switch for one ignition cycle.
The regular headlamp system should be turned on
when needed.
4-12