park assist CHEVROLET HHR 2011 1.G Owners Manual
[x] Cancel search | Manufacturer: CHEVROLET, Model Year: 2011, Model line: HHR, Model: CHEVROLET HHR 2011 1.GPages: 430, PDF Size: 4.57 MB
Page 127 of 430
Black plate (21,1)Chevrolet HHR Owner Manual - 2011
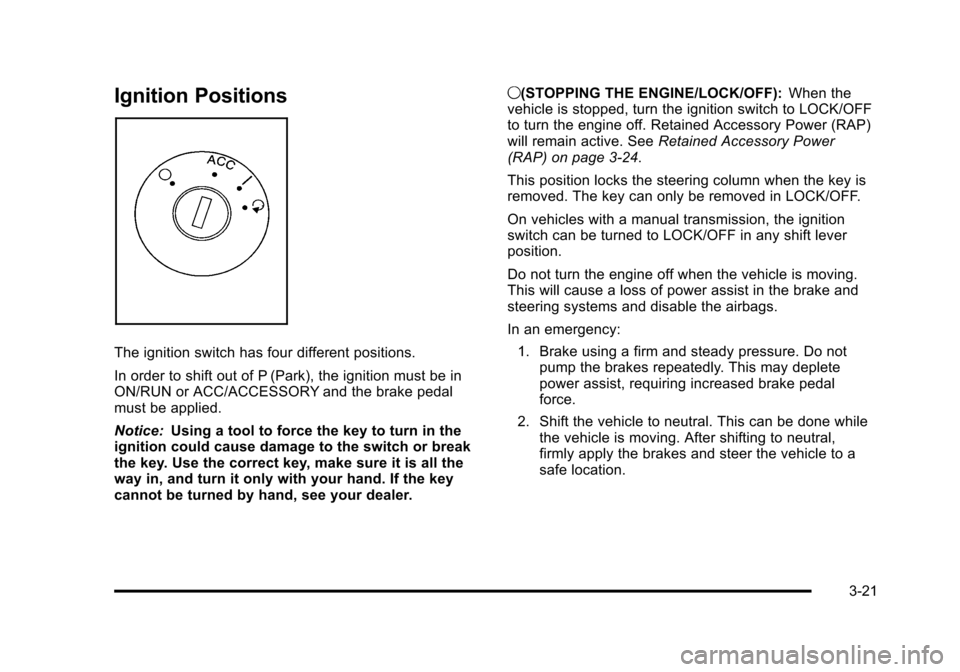
Ignition Positions
The ignition switch has four different positions.
In order to shift out of P (Park), the ignition must be in
ON/RUN or ACC/ACCESSORY and the brake pedal
must be applied.
Notice:Using a tool to force the key to turn in the
ignition could cause damage to the switch or break
the key. Use the correct key, make sure it is all the
way in, and turn it only with your hand. If the key
cannot be turned by hand, see your dealer. 9(STOPPING THE ENGINE/LOCK/OFF):
When the
vehicle is stopped, turn the ignition switch to LOCK/OFF
to turn the engine off. Retained Accessory Power (RAP)
will remain active. See Retained Accessory Power
(RAP) on page 3‑24.
This position locks the steering column when the key is
removed. The key can only be removed in LOCK/OFF.
On vehicles with a manual transmission, the ignition
switch can be turned to LOCK/OFF in any shift lever
position.
Do not turn the engine off when the vehicle is moving.
This will cause a loss of power assist in the brake and
steering systems and disable the airbags.
In an emergency:
1. Brake using a firm and steady pressure. Do not pump the brakes repeatedly. This may deplete
power assist, requiring increased brake pedal
force.
2. Shift the vehicle to neutral. This can be done while the vehicle is moving. After shifting to neutral,
firmly apply the brakes and steer the vehicle to a
safe location.
3-21
Page 130 of 430
Black plate (24,1)Chevrolet HHR Owner Manual - 2011
Retained Accessory Power (RAP)
These vehicle accessories may be used for up to
10 minutes after the engine is turned off.
.Audio System
.Power Windows, if equipped
.Sunroof, if equipped
The power windows and sunroof will continue to work
for up to 10 minutes or until any door is opened. The
radio will work when the key is in ON/RUN or ACC/
ACCESSORY. Once the key is turned from ON/RUN to
OFF/LOCK, the radio will continue to work for
10 minutes or until the driver's door is opened.
Starting the Engine
Place the transmission in the proper gear.
Automatic Transmission
Move the shift lever to P (Park) or N (Neutral). The
engine will not start in any other position. To restart the
vehicle when it is already moving, use N (Neutral) only.
Notice: Do not try to shift to P (Park) if the vehicle is
moving. If you do, you could damage the
transmission. Shift to P (Park) only when the vehicle
is stopped.
Manual Transmission
The shift lever should be in N (Neutral) and the parking
brake engaged. Hold the clutch pedal down to the floor
and start the engine. The vehicle will not start if the
clutch pedal is not all the way down.
Starting Procedure
1. With your foot off the accelerator pedal, turn the ignition key to START. When the engine starts, let
go of the key. The idle speed will go down as the
engine warms. Do not race the engine immediately
after starting it. Operate the engine and
transmission gently to allow the oil to warm up and
lubricate all moving parts.
The vehicle has a Computer-Controlled Cranking
System. This feature assists in starting the engine
and protects components. If the ignition key is
turned to the START position, and then released
when the engine begins cranking, the engine will
continue cranking for a few seconds or until the
vehicle starts. If the engine does not start and the
key is held in START for many seconds, cranking
will be stopped after 15 seconds to prevent
cranking motor damage. To prevent gear damage,
this system also prevents cranking if the engine is
already running. Engine cranking can be stopped
by turning the ignition switch to ACC/ACCESSORY
or LOCK/OFF.
3-24
Page 242 of 430
Black plate (4,1)Chevrolet HHR Owner Manual - 2011
allowing realistic following distances eliminates a lot of
unnecessary braking. That means better braking and
longer brake life.
If the engine ever stops while the vehicle is being
driven, brake normally but do not pump the brakes.
If the brakes are pumped, the pedal could get harder to
push down. If the engine stops, there will still be some
power brake assist but it will be used when the brake is
applied. Once the power assist is used up, it can take
longer to stop and the brake pedal will be harder
to push.
If the vehicle has Electronic Stability Control (ESC) and
the 2.0L turbocharged engine, it also has a hydraulic
brake boost feature which supplements the power brake
system to maintain consistent brake performance under
conditions of low brake booster vacuum. Low brake
booster vacuum conditions can include initial start up
after the vehicle has been parked for several hours,
very frequent brake stops, or high altitude driving. When
hydraulic brake boost is active, minor brake pulsation or
movement might be felt but this is normal. If brake pedal
feel changes or the brake pedal feels hard to push, the
system might not be receiving the intended brake boost
and the SVC BRAKE SYSTEM DIC message may be
displayed.
Adding non‐dealer accessories can affect vehicle
performance. SeeAccessories and Modifications
on
page 6‑3.
Antilock Brake System (ABS)
The vehicle might have the Antilock Brake
System (ABS), an advanced electronic braking
system that helps prevent a braking skid.
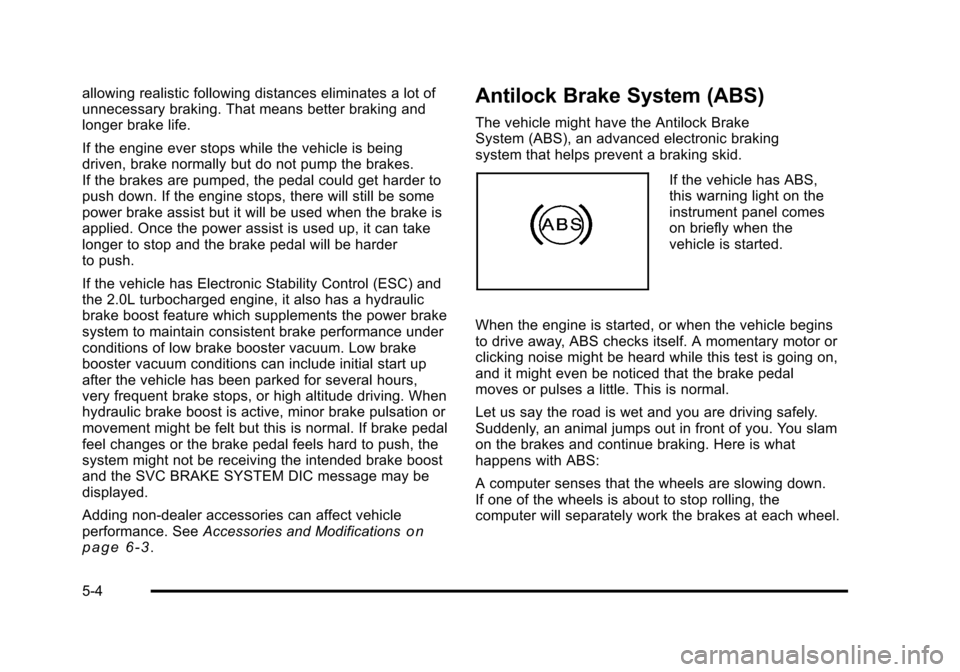
If the vehicle has ABS,
this warning light on the
instrument panel comes
on briefly when the
vehicle is started.
When the engine is started, or when the vehicle begins
to drive away, ABS checks itself. A momentary motor or
clicking noise might be heard while this test is going on,
and it might even be noticed that the brake pedal
moves or pulses a little. This is normal.
Let us say the road is wet and you are driving safely.
Suddenly, an animal jumps out in front of you. You slam
on the brakes and continue braking. Here is what
happens with ABS:
A computer senses that the wheels are slowing down.
If one of the wheels is about to stop rolling, the
computer will separately work the brakes at each wheel.
5-4
Page 250 of 430
Black plate (12,1)Chevrolet HHR Owner Manual - 2011
Steering
Electric Power Steering
If the engine stalls while driving, the power steering
assist system will continue to operate until you are able
to stop the vehicle. If power steering assist is lost
because the electric power steering system is not
functioning, the vehicle can be steered but it will take
more effort.
If you turn the steering wheel in either direction several
times until it stops, or hold the steering wheel in the
stopped position for an extended amount of time, you
may notice a reduced amount of power steering assist.
The normal amount of power steering assist should
return shortly after a few normal steering movements.
The electric power steering system does not require
regular maintenance. If you suspect steering system
problems and/or the POWER STEERING message
comes on, contact your dealer for service repairs. See
DIC Warnings and Messages on page 4‑40.
Steering Tips
It is important to take curves at a reasonable speed.
Traction in a curve depends on the condition of the tires
and the road surface, the angle at which the curve is
banked, and vehicle speed. While in a curve, speed is
the one factor that can be controlled.If there is a need to reduce speed, do it before entering
the curve, while the front wheels are straight.
Try to adjust the speed so you can drive through the
curve. Maintain a reasonable, steady speed. Wait to
accelerate until out of the curve, and then accelerate
gently into the straightaway.
Steering in Emergencies
There are times when steering can be more effective
than braking. For example, you come over a hill and
find a truck stopped in your lane, or a car suddenly pulls
out from nowhere, or a child darts out from between
parked cars and stops right in front of you. These
problems can be avoided by braking
—if you can stop
in time. But sometimes you cannot stop in time because
there is no room. That is the time for evasive
action —steering around the problem.
The vehicle can perform very well in emergencies like
these. First apply the brakes —but, unless the vehicle
has antilock brakes, not enough to lock the wheels. See
Braking
on page 5‑3. It is better to remove as much
speed as possible from a collision. Then steer around
the problem, to the left or right depending on the space
available.
5-12
Page 256 of 430
Black plate (18,1)Chevrolet HHR Owner Manual - 2011
Highway Hypnosis
Always be alert and pay attention to your surroundings
while driving. If you become tired or sleepy, find a safe
place to park your vehicle and rest.
Other driving tips include:
.Keep the vehicle well ventilated.
.Keep interior temperature cool.
.Keep your eyes moving—scan the road ahead
and to the sides.
.Check the rearview mirror and vehicle instruments
often.
Hill and Mountain Roads
Driving on steep hills or through mountains is different
than driving on flat or rolling terrain. Tips for driving in
these conditions include:
.Keep the vehicle serviced and in good shape.
.Check all fluid levels and brakes, tires, cooling
system, and transmission.
.Going down steep or long hills, shift to a
lower gear.
{WARNING:
If you do not shift down, the brakes could get so
hot that they would not work well. You would then
have poor braking or even none going down a hill.
You could crash. Shift down to let the engine
assist the brakes on a steep downhill slope.
{WARNING:
Coasting downhill in N (Neutral) or with the
ignition off is dangerous. The brakes will have to
do all the work of slowing down and they could
get so hot that they would not work well. You
would then have poor braking or even none going
down a hill. You could crash. Always have the
engine running and the vehicle in gear when
going downhill.
.Stay in your own lane. Do not swing wide or cut
across the center of the road. Drive at speeds that
let you stay in your own lane.
5-18
Page 304 of 430
Black plate (28,1)Chevrolet HHR Owner Manual - 2011
8. By this time, the coolant level inside the radiatorfiller port may be lower. If the level is lower, add
more of the proper DEX-COOL coolant mixture
through the fill port until the level reaches the base
of the fill port.
9. Then replace the pressure cap. At any time during this procedure, if coolant begins to flow out of the
fill port, reinstall the pressure cap. Be sure the
pressure cap is hand-tight and fully seated.
10. When the engine has cooled, check the coolant in the coolant recovery tank. The level in the coolant
recovery tank should be at the COLD FILL line
when the engine is cold.
Engine Overheating
The vehicle has several indicators to warn of engine
overheating.
You will find a coolant temperature warning light and a
coolant temperature gauge on your vehicle's instrument
panel. See Engine Coolant Temperature Warning Light
on page 4‑32andEngine Coolant Temperature Gaugeon page 4‑32for more information.
You may decide not to lift the hood when this warning
appears, but instead get service help right away. See
Roadside Assistance Program on page 8‑6. If you do decide to lift the hood, make sure the vehicle
is parked on a level surface.
Then check to see if the engine cooling fans are
running. If the engine is overheating, both fans should
be running. If they are not, do not continue to run the
engine and have the vehicle serviced.
Notice:
Engine damage from running the engine
without coolant is not covered by the warranty.
Notice: If the engine catches fire because of being
driven with no coolant, your vehicle can be badly
damaged. The costly repairs would not be covered
by the vehicle warranty.
If Steam Is Coming from the Engine
Compartment
{WARNING:
Steam from an overheated engine can burn you
badly, even if you just open the hood. Stay away
from the engine if you see or hear steam coming
from it. Just turn it off and get everyone away from
the vehicle until it cools down. Wait until there is
no sign of steam or coolant before you open
the hood.
(Continued)
6-28
Page 427 of 430

Black plate (11,1)Chevrolet HHR Owner Manual - 2011
Retained Accessory Power (RAP) . . . . . . . . . . . . . . . . . 3-24
Ride Control Systems . . . . . . . . . . . . . . . . . . . . . . . . . . . . . . .5-6Electronic Stability (ESC) . . . . . . . . . . . . . . . . . . . . . . . . . . 5-6
Enhanced Traction System (ETS) . . . . . . . . . . . . . . . . 5-11
Roadside Assistance Program . . . . . . . . . . . . . . . . . . . . . . .8-6
Rocking Your Vehicle to Get it Out . . . . . . . . . . . . . . . . . 5-21
Roof Sunroof . . . . . . . . . . . . . . . . . . . . . . . . . . . . . . . . . . . . . . . . . . . 3-48
Roof Rack System . . . . . . . . . . . . . . . . . . . . . . . . . . . . . . . . . 3-46
Running the Vehicle While Parked . . . . . . . . . . . . . . . . . 3-35
S
Safety Belts Care of . . . . . . . . . . . . . . . . . . . . . . . . . . . . . . . . . . . . . . . . . . . 6-95
Extender . . . . . . . . . . . . . . . . . . . . . . . . . . . . . . . . . . . . . . . . . . 2-33
How to Wear Safety Belts Properly . . . . . . . . . . . . . . . 2-19
Lap-Shoulder Belt . . . . . . . . . . . . . . . . . . . . . . . . . . . . . . . . 2-28
Reminders . . . . . . . . . . . . . . . . . . . . . . . . . . . . . . . . . . . . . . . . 4-25
Safety Belts Are for Everyone . . . . . . . . . . . . . . . . . . . . 2-14
Use During Pregnancy . . . . . . . . . . . . . . . . . . . . . . . . . . . . 2-33
Safety Defects Reporting Canadian Government . . . . . . . . . . . . . . . . . . . . . . . . . . . . 8-13
General Motors . . . . . . . . . . . . . . . . . . . . . . . . . . . . . . . . . . . 8-14
U.S. Government . . . . . . . . . . . . . . . . . . . . . . . . . . . . . . . . . 8-13
Safety Warnings and Symbols . . . . . . . . . . . . . . . . . . . . . . . . iv
Scheduled Maintenance . . . . . . . . . . . . . . . . . . . . . . . . . . . . .7-3
Scheduling Appointments . . . . . . . . . . . . . . . . . . . . . . . . . . . .8-8 Sealant Kit, Tire . . . . . . . . . . . . . . . . . . . . . . . . . . . . . . . . . . . 6-70
Seatback, Folding Passenger . . . . . . . . . . . . . . . . . . . . . . 2-10
Seats
Driver Seat Height Adjuster . . . . . . . . . . . . . . . . . . . . . . . . 2-5
Head Restraints . . . . . . . . . . . . . . . . . . . . . . . . . . . . . . . . . . . 2-2
Heated Seats . . . . . . . . . . . . . . . . . . . . . . . . . . . . . . . . . . . . . . 2-7
Passenger Folding Seatback . . . . . . . . . . . . . . . . . . . . . 2-10
Power Lumbar . . . . . . . . . . . . . . . . . . . . . . . . . . . . . . . . . . . . . 2-6
Power Seat . . . . . . . . . . . . . . . . . . . . . . . . . . . . . . . . . . . . . . . . 2-5
Reclining Seatbacks . . . . . . . . . . . . . . . . . . . . . . . . . . . . . . . 2-8
Split Folding Rear Seat . . . . . . . . . . . . . . . . . . . . . . . . . . . 2-12
Securing a Child Restraint Rear Seat Position . . . . . . . . . . . . . . . . . . . . . . . . . . . . . . . 2-51
Right Front Seat Position . . . . . . . . . . . . . . . . . . . . . . . . . 2-54
Security Light . . . . . . . . . . . . . . . . . . . . . . . . . . . . . . . . . . . . . . . . . . . . . . 4-36
Service . . . . . . . . . . . . . . . . . . . . . . . . . . . . . . . . . . . . . . . . . . . . . .6-3 Accessories and Modifications . . . . . . . . . . . . . . . . . . . . . 6-3
Adding Equipment to the Outside of the Vehicle . . . 6-5
Doing Your Own Work . . . . . . . . . . . . . . . . . . . . . . . . . . . . . 6-4
Engine Soon Light . . . . . . . . . . . . . . . . . . . . . . . . . . . . . . . . 4-33
Parts Identification Label . . . . . . . . . . . . . . . . . . . . . . . . . 6-99
Publications Ordering Information . . . . . . . . . . . . . . . . . 8-14
Scheduling Appointments . . . . . . . . . . . . . . . . . . . . . . . . . . 8-8
Servicing Your Airbag-Equipped Vehicle . . . . . . . . . . . 2-72
Setting the Clock . . . . . . . . . . . . . . . . . . . . . . . . . . . . . . . . . . 4-51
Sheet Metal Damage . . . . . . . . . . . . . . . . . . . . . . . . . . . . . . 6-98
i - 11