height CHEVROLET IMPALA 2010 9.G Owners Manual
[x] Cancel search | Manufacturer: CHEVROLET, Model Year: 2010, Model line: IMPALA, Model: CHEVROLET IMPALA 2010 9.GPages: 432, PDF Size: 1.89 MB
Page 32 of 432
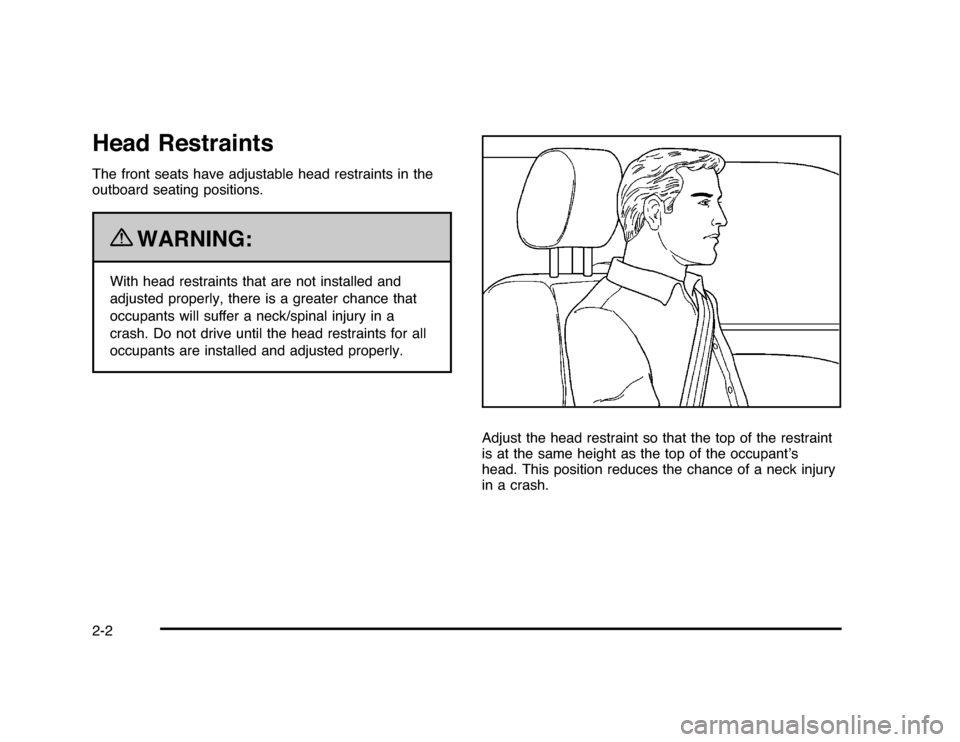
Head RestraintsThe front seats have adjustable head restraints in the
outboard seating positions.
{
WARNING:
With head restraints that are not installed and
adjusted properly, there is a greater chance that
occupants will suffer a neck/spinal injury in a
crash. Do not drive until the head restraints for all
occupants are installed and adjusted properly.
Adjust the head restraint so that the top of the restraint
is at the same height as the top of the occupant’s
head. This position reduces the chance of a neck injury
in a crash.
2-2
Page 56 of 432
4. If equipped with a shoulder belt height adjuster,
move it to the height that is right for you. See
“Shoulder Belt Height Adjustment” later in this
section for instructions on use and important safety
information.
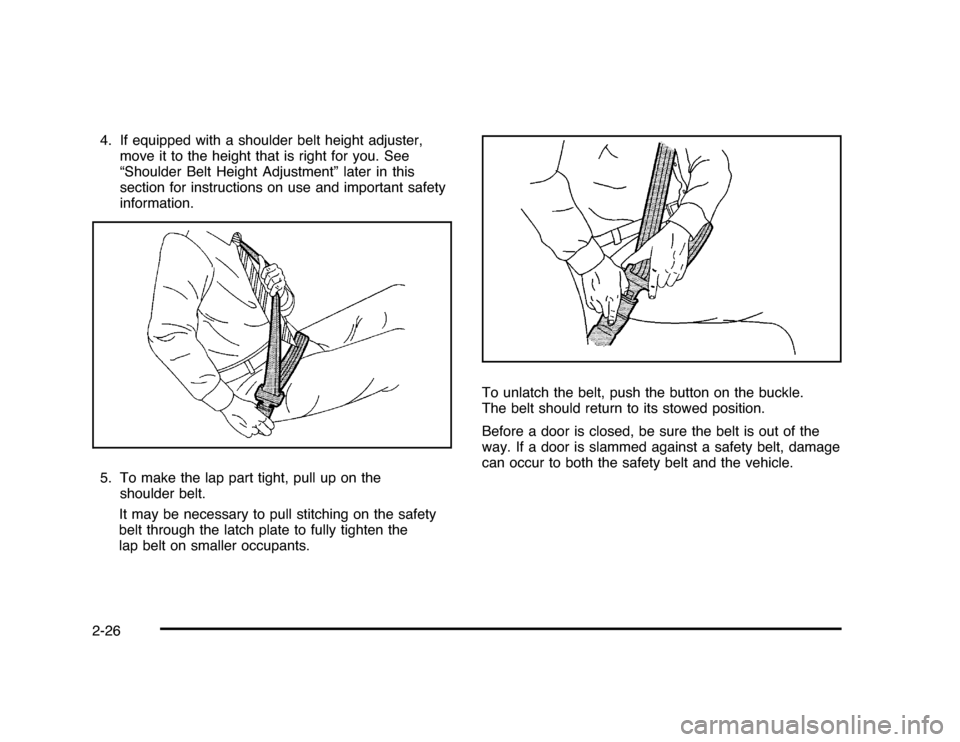
5. To make the lap part tight, pull up on the
shoulder belt.
It may be necessary to pull stitching on the safety
belt through the latch plate to fully tighten the
lap belt on smaller occupants.To unlatch the belt, push the button on the buckle.
The belt should return to its stowed position.
Before a door is closed, be sure the belt is out of the
way. If a door is slammed against a safety belt, damage
can occur to both the safety belt and the vehicle.2-26
Page 57 of 432
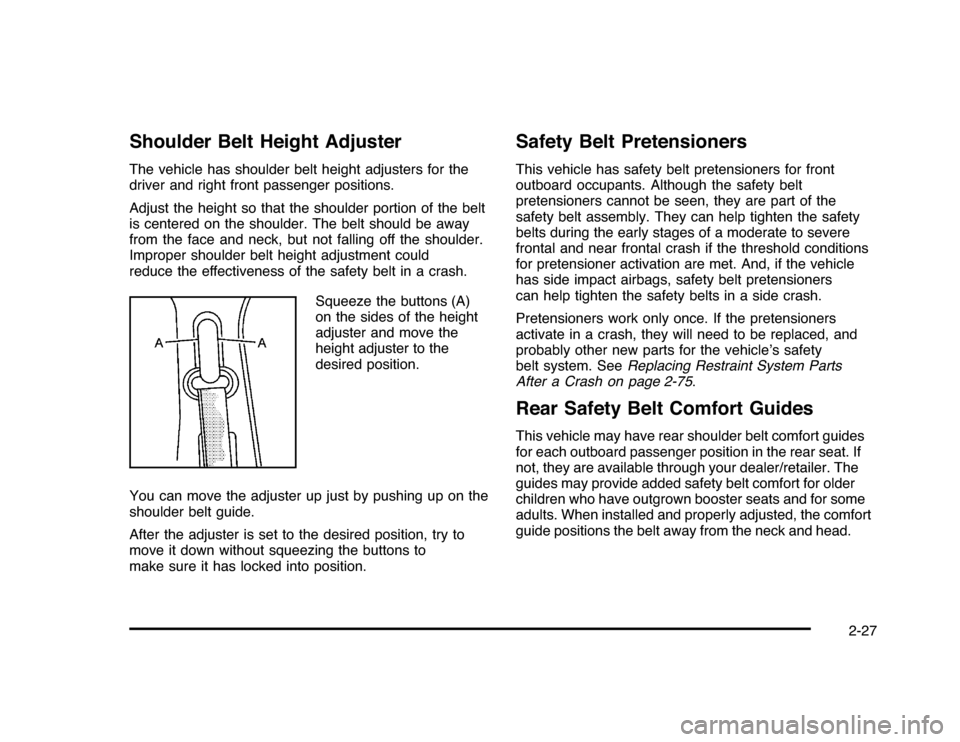
Shoulder Belt Height AdjusterThe vehicle has shoulder belt height adjusters for the
driver and right front passenger positions.
Adjust the height so that the shoulder portion of the belt
is centered on the shoulder. The belt should be away
from the face and neck, but not falling off the shoulder.
Improper shoulder belt height adjustment could
reduce the effectiveness of the safety belt in a crash.
Squeeze the buttons (A)
on the sides of the height
adjuster and move the
height adjuster to the
desired position.
You can move the adjuster up just by pushing up on the
shoulder belt guide.
After the adjuster is set to the desired position, try to
move it down without squeezing the buttons to
make sure it has locked into position.
Safety Belt PretensionersThis vehicle has safety belt pretensioners for front
outboard occupants. Although the safety belt
pretensioners cannot be seen, they are part of the
safety belt assembly. They can help tighten the safety
belts during the early stages of a moderate to severe
frontal and near frontal crash if the threshold conditions
for pretensioner activation are met. And, if the vehicle
has side impact airbags, safety belt pretensioners
can help tighten the safety belts in a side crash.
Pretensioners work only once. If the pretensioners
activate in a crash, they will need to be replaced, and
probably other new parts for the vehicle’s safety
belt system. SeeReplacing Restraint System Parts
After a Crash on page 2-75.Rear Safety Belt Comfort GuidesThis vehicle may have rear shoulder belt comfort guides
for each outboard passenger position in the rear seat. If
not, they are available through your dealer/retailer. The
guides may provide added safety belt comfort for older
children who have outgrown booster seats and for some
adults. When installed and properly adjusted, the comfort
guide positions the belt away from the neck and head.
2-27
Page 62 of 432
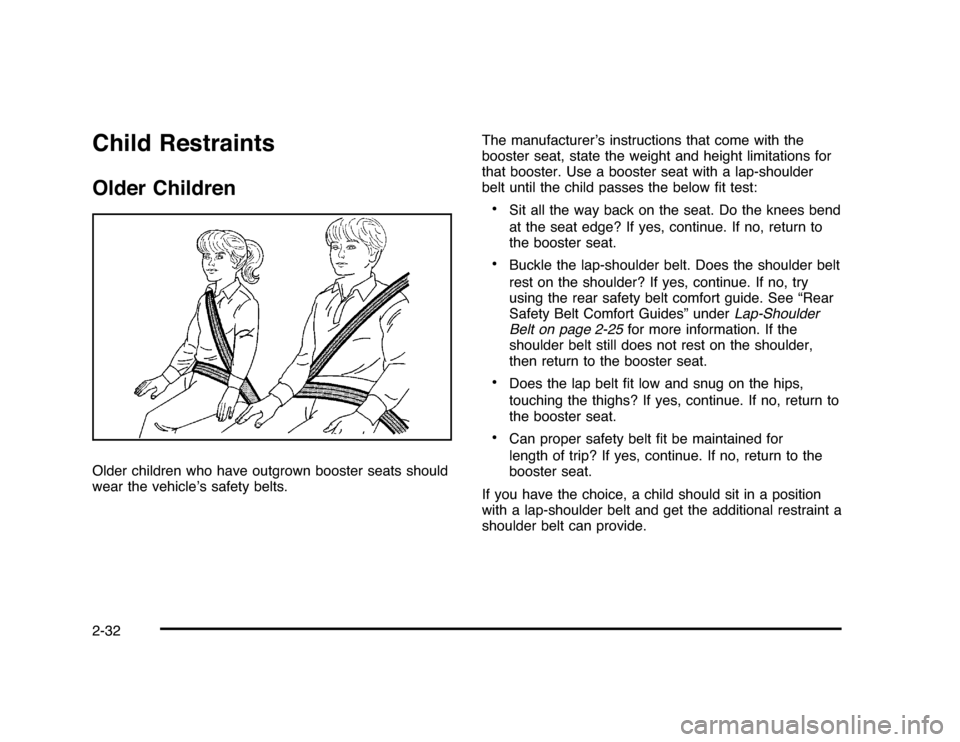
Child RestraintsOlder ChildrenOlder children who have outgrown booster seats should
wear the vehicle’s safety belts.The manufacturer’s instructions that come with the
booster seat, state the weight and height limitations for
that booster. Use a booster seat with a lap-shoulder
belt until the child passes the below fit test:
•
Sit all the way back on the seat. Do the knees bend
at the seat edge? If yes, continue. If no, return to
the booster seat.
•
Buckle the lap-shoulder belt. Does the shoulder belt
rest on the shoulder? If yes, continue. If no, try
using the rear safety belt comfort guide. See “Rear
Safety Belt Comfort Guides” underLap-Shoulder
Belt on page 2-25for more information. If the
shoulder belt still does not rest on the shoulder,
then return to the booster seat.
•
Does the lap belt fit low and snug on the hips,
touching the thighs? If yes, continue. If no, return to
the booster seat.
•
Can proper safety belt fit be maintained for
length of trip? If yes, continue. If no, return to the
booster seat.
If you have the choice, a child should sit in a position
with a lap-shoulder belt and get the additional restraint a
shoulder belt can provide.
2-32
Page 68 of 432
Q:
What are the different types of add-on child
restraints?
A:
Add-on child restraints, which are purchased by the
vehicle’s owner, are available in four basic types.
Selection of a particular restraint should take into
consideration not only the child’s weight, height, and
age but also whether or not the restraint will be
compatible with the motor vehicle in which it will
be used.
For most basic types of child restraints, there are
many different models available. When purchasing a
child restraint, be sure it is designed to be used
in a motor vehicle. If it is, the restraint will have a
label saying that it meets federal motor vehicle
safety standards.
The restraint manufacturer’s instructions that come
with the restraint state the weight and height
limitations for a particular child restraint. In addition,
there are many kinds of restraints available for
children with special needs.
{
WARNING:
To reduce the risk of neck and head injury during
a crash, infants need complete support. This is
because an infant’s neck is not fully developed
and its head weighs so much compared with
the rest of its body. In a crash, an infant in a
rear-facing child restraint settles into the restraint,
so the crash forces can be distributed across the
strongest part of an infant’s body, the back and
shoulders. Infants should always be secured in
rear-facing child restraints.
2-38
Page 103 of 432
Adding Equipment to Your
Airbag-Equipped VehicleQ:
Is there anything I might add to or change
about the vehicle that could keep the airbags
from working properly?
A:
Yes. If you add things that change the vehicle’s
frame, bumper system, height, front end or side
sheet metal, they may keep the airbag system from
working properly. Changing or moving any parts
of the front seats, safety belts, the airbag sensing
and diagnostic module, steering wheel, instrument
panel, roof-rail airbag modules, ceiling headliner
or pillar garnish trim, front sensors, side impact
sensors, or airbag wiring can affect the operation of
the airbag system.
In addition, the vehicle has a passenger sensing
system for the right front passenger position, which
includes sensors that are part of the passenger’s
seat. The passenger sensing system may not
operate properly if the original seat trim is replaced
with non-GM covers, upholstery or trim, or with
GM covers, upholstery or trim designed for a
different vehicle. Any object, such as an aftermarket
seat heater or a comfort enhancing pad or device,
installed under or on top of the seat fabric,could also interfere with the operation of the
passenger sensing system. This could either
prevent proper deployment of the passenger
airbag(s) or prevent the passenger sensing system
from properly turning off the passenger airbag(s).
SeePassenger Sensing System on page 2-66.
If you have any questions, call Customer
Assistance. The phone numbers and addresses
for Customer Assistance are in Step Two of
the Customer Satisfaction Procedure in this manual.
SeeCustomer Satisfaction Procedure on page 8-2.
Q:
Because I have a disability, I have to get
my vehicle modified. How can I find out whether
this will affect my airbag system?
A:
If you have questions, call Customer Assistance.
The phone numbers and addresses for Customer
Assistance are in Step Two of the Customer
Satisfaction Procedure in this manual. See
Customer Satisfaction Procedure on page 8-2.
In addition, your dealer/retailer and the service manual
have information about the location of the airbag
sensors, sensing and diagnostic module and airbag
wiring.
2-73
Page 307 of 432
{
WARNING:
The brake wear warning sound means that soon
the brakes will not work well. That could lead to an
accident. When the brake wear warning sound is
heard, have the vehicle serviced.
Notice:Continuing to drive with worn-out brake
pads could result in costly brake repair.
Some driving conditions or climates can cause a brake
squeal when the brakes are first applied or lightly
applied. This does not mean something is wrong with
the brakes.
Properly torqued wheel nuts are necessary to help
prevent brake pulsation. When tires are rotated, inspect
brake pads for wear and evenly tighten wheel nuts in
the proper sequence to torque specifications in
Capacities and Specifications on page 6-100.
Brake linings should always be replaced as complete
axle sets.
Brake Pedal TravelSee your dealer/retailer if the brake pedal does not
return to normal height, or if there is a rapid increase in
pedal travel. This could be a sign that brake service
might be required.Brake AdjustmentEvery time the brakes are applied, with or without the
vehicle moving, the brakes adjust for wear.Replacing Brake System PartsThe braking system on a vehicle is complex. Its many
parts have to be of top quality and work well together if
the vehicle is to have really good braking. The vehicle
was designed and tested with top-quality brake parts.
When parts of the braking system are replaced — for
example, when the brake linings wear down and new
ones are installed — be sure to get new approved
replacement parts. If this is not done, the brakes might
not work properly. For example, if someone puts in
brake linings that are wrong for the vehicle, the balance
between the front and rear brakes can change — for the
worse. The braking performance expected can change in
many other ways if the wrong replacement brake parts
are installed.
6-37
Page 322 of 432
Tire Sidewall LabelingUseful information about a tire is molded into its
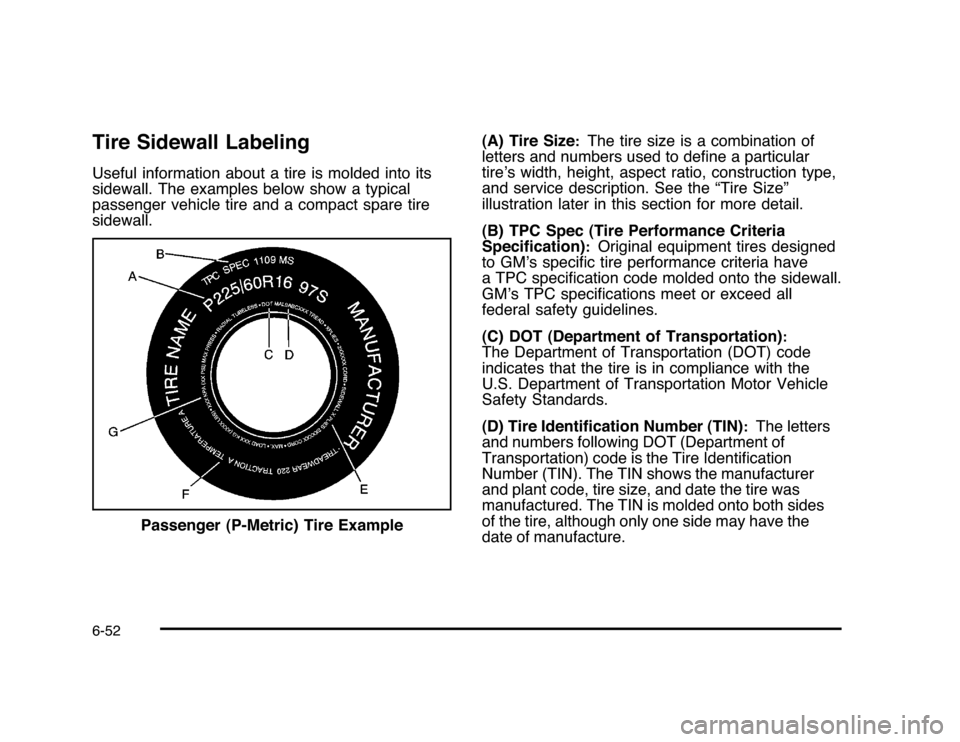
sidewall. The examples below show a typical
passenger vehicle tire and a compact spare tire
sidewall.(A) Tire Size
:
The tire size is a combination of
letters and numbers used to define a particular
tire’s width, height, aspect ratio, construction type,
and service description. See the “Tire Size”
illustration later in this section for more detail.
(B) TPC Spec (Tire Performance Criteria
Specification):
Original equipment tires designed
to GM’s specific tire performance criteria have
a TPC specification code molded onto the sidewall.
GM’s TPC specifications meet or exceed all
federal safety guidelines.
(C) DOT (Department of Transportation)
:
The Department of Transportation (DOT) code
indicates that the tire is in compliance with the
U.S. Department of Transportation Motor Vehicle
Safety Standards.
(D) Tire Identification Number (TIN)
:
The letters
and numbers following DOT (Department of
Transportation) code is the Tire Identification
Number (TIN). The TIN shows the manufacturer
and plant code, tire size, and date the tire was
manufactured. The TIN is molded onto both sides
of the tire, although only one side may have the
date of manufacture. Passenger (P-Metric) Tire Example
6-52
Page 324 of 432

(B) Tire Ply Material
:
The type of cord and
number of plies in the sidewall and under
the tread.
(C) Tire Identification Number (TIN)
:
The letters
and numbers following the DOT (Department of
Transportation) code is the Tire Identification
Number (TIN). The TIN shows the manufacturer
and plant code, tire size, and date the tire was
manufactured. The TIN is molded onto both sides
of the tire, although only one side may have the
date of manufacture.
(D) Maximum Cold Inflation Load Limit
:
Maximum load that can be carried and the
maximum pressure needed to support that load.(E) Tire Inflation
:
The temporary use tire or
compact spare tire should be inflated to 60 psi
(420 kPa). For more information on tire pressure
and inflation seeInflation - Tire Pressure on
page 6-59.
(F) Tire Size
:
A combination of letters and
numbers define a tire’s width, height, aspect
ratio, construction type, and service description.
The letter T as the first character in the tire
size means the tire is for temporary use only.
(G) TPC Spec (Tire Performance Criteria
Specification):
Original equipment tires designed
to GM’s specific tire performance criteria have
a TPC specification code molded onto the sidewall.
GM’s TPC specifications meet or exceed all
federal safety guidelines.
6-54
Page 325 of 432
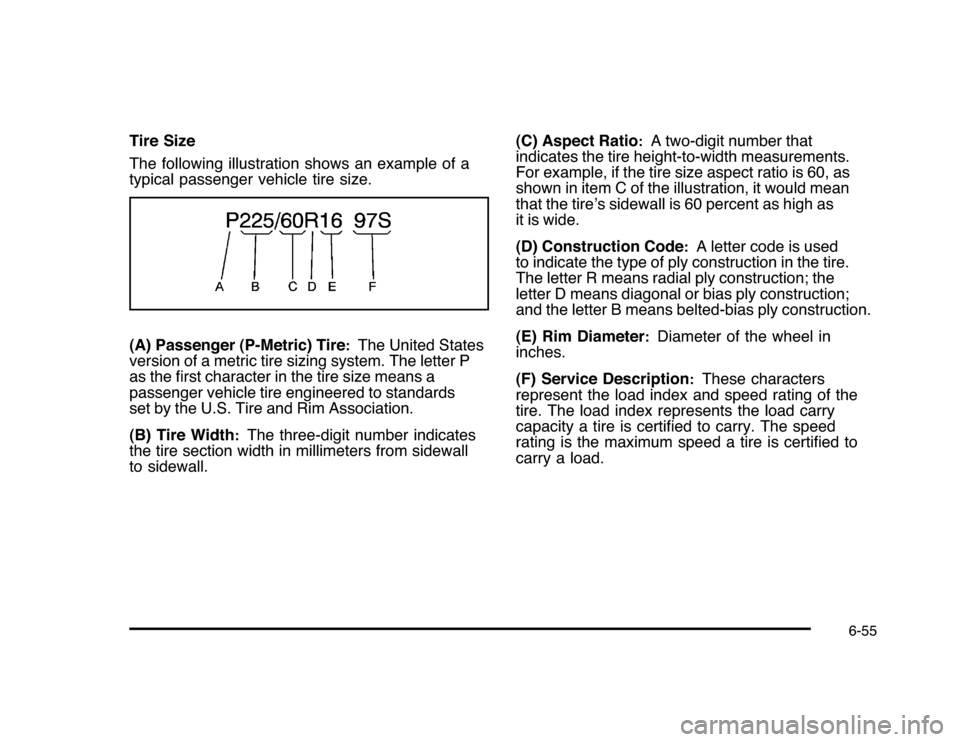
Tire Size
The following illustration shows an example of a
typical passenger vehicle tire size.
(A) Passenger (P-Metric) Tire
:
The United States
version of a metric tire sizing system. The letter P
as the first character in the tire size means a
passenger vehicle tire engineered to standards
set by the U.S. Tire and Rim Association.
(B) Tire Width
:
The three-digit number indicates
the tire section width in millimeters from sidewall
to sidewall.(C) Aspect Ratio
:
A two-digit number that
indicates the tire height-to-width measurements.
For example, if the tire size aspect ratio is 60, as
shown in item C of the illustration, it would mean
that the tire’s sidewall is 60 percent as high as
it is wide.
(D) Construction Code
:
A letter code is used
to indicate the type of ply construction in the tire.
The letter R means radial ply construction; the
letter D means diagonal or bias ply construction;
and the letter B means belted-bias ply construction.
(E) Rim Diameter
:
Diameter of the wheel in
inches.
(F) Service Description
:
These characters
represent the load index and speed rating of the
tire. The load index represents the load carry
capacity a tire is certified to carry. The speed
rating is the maximum speed a tire is certified to
carry a load.
6-55