CHEVROLET IMPALA 2013 9.G Owners Manual
Manufacturer: CHEVROLET, Model Year: 2013, Model line: IMPALA, Model: CHEVROLET IMPALA 2013 9.GPages: 350, PDF Size: 5.66 MB
Page 171 of 350
Black plate (23,1)Chevrolet Impala Owner Manual - 2013 - crc - 8/27/12
Infotainment System 7-23
Listing Stored Numbers
The list command will list all stored
numbers and name tags.
Using the“List”Command
1. Press and hold
b/gfor
two seconds.
2. Say “Directory.”
3. Say “Hands-Free Calling.”
4. Say “List.”
Making a Call
Calls can be made using the
following commands.
Dial or Call: The dial or call
command can be used
interchangeably to dial a phone
number or a stored name tag.
Digit Dial: This command allows a
phone number to be dialed by
entering the digits one at a time.
Re-dial: This command is used to
dial the last number used on the cell
phone. Using the
“Dial”or“Call”
Command
1. Press and hold
b/gfor
two seconds.
2. Say “Dial”or“Call.”
3. Say the entire number without pausing, or say the name tag.
Once connected, the person called
will be heard through the audio
speakers.
Calling 911 Emergency
1. Press and hold
b/gfor
two seconds.
2. Say “Dial”or“Call.”
3. Say “911.”
4. Say "Dial" or "Call.”
Using the “Digit Dial” Command
The digit dial command allows a
phone number to be dialed by
entering the digits one at a time.
After each digit is entered, the
system repeats back the digit it
heard followed by a tone. If an unwanted number is
recognized by the system, say
“Clear”
at any time to clear the last
number.
To hear all of the numbers
recognized by the system, say
“Verify” at any time.
1. Press and hold
b/gfor
two seconds.
2. Say “Digit Dial.”
3. Say each digit, one at a time, that you want to dial. After each
digit is entered, the system
repeats back the digit it heard
followed by a tone. After the last
digit has been entered,
say “Dial.”
Once connected, the person called
will be heard through the audio
speakers.
Using the “Re-dial”Command
1. Press and hold
b/gfor
two seconds.
2. After the tone, say “Re-dial.”
Page 172 of 350
Black plate (24,1)Chevrolet Impala Owner Manual - 2013 - crc - 8/27/12
7-24 Infotainment System
Once connected, the person called
will be heard through the audio
speakers.
Receiving a Call
When an incoming call is received,
the audio system mutes and a ring
tone is heard in the vehicle.
.Pressb/gto answer the call.
.Pressc/xto ignore a call.
Call Waiting
Call waiting must be supported on
the cell phone and enabled by the
wireless service carrier.
.Pressb/gto answer an
incoming call when another call
is active. The original call is
placed on hold.
.Pressb/gagain to return to
the original call.
.To ignore the incoming call, no
action is required.
.Pressc/xto disconnect the
current call and switch to the call
on hold.
Three-Way Calling
Three-way calling must be
supported on the cell phone and
enabled by the wireless service
carrier.
1. While on a call, press
b/g.
2. Say “Three-way call.”
3. Use the dial or call command to dial the number of the third party
to be called.
4. Once the call is connected, press
b/gto link all callers
together.
Ending a Call
Pressc/xto end a call.
Muting a Call
During a call, all sounds from inside
the vehicle can be muted so that the
person on the other end of the call
cannot hear them.
.To mute a call, pressb/g, and
then say “Mute call.”
.To cancel mute, pressb/g,
and then say “Un-mute call.”
Transferring a Call
Audio can be transferred between
the Bluetooth system and the cell
phone.
The cell phone must be paired and
connected with the Bluetooth
system before a call can be
transferred. The connection process
can take up to two minutes after the
ignition is turned to ON/RUN.
Transferring Audio from the
Bluetooth System to a Cell Phone
During a call with the audio in the
vehicle:
1. Press
b/g.
2. Say “Transfer Call.”
Page 173 of 350
Black plate (25,1)Chevrolet Impala Owner Manual - 2013 - crc - 8/27/12
Infotainment System 7-25
Transferring Audio to the
Bluetooth System from a Cell
Phone
During a call with the audio on the
cell phone, press
b/g. The audio
transfers to the vehicle. If the audio
does not transfer to the vehicle, use
the audio transfer feature on the cell
phone. See your cell phone
manufacturer's user guide for more
information.
Voice Pass-Thru
Voice pass-thru allows access to the
voice recognition commands on the
cell phone. See your cell phone
manufacturer's user guide to see if
the cell phone supports this feature.
To access contacts stored in the cell
phone:
1. Press and hold
b/gfor
two seconds.
2. Say “Bluetooth.” This command
can be skipped. 3. Say
“Voice.” The system
responds “OK, accessing
The cell phone's normal prompt
messages will go through their cycle
according to the phone's operating
instructions.
Dual Tone Multi-Frequency
(DTMF) Tones
The Bluetooth system can send
numbers and the numbers stored as
name tags during a call. You can
use this feature when calling a
menu-driven phone system.
Account numbers can also be
stored for use.
Sending a Number or Name Tag
During a Call
1. Press
b/g. The system
responds “Ready,”followed by
a tone.
2. Say “Dial.”
3. Say the number or name tag to send.
Clearing the System
Unless information is deleted out of
the in-vehicle Bluetooth system, it
will be retained indefinitely. This
includes all saved name tags in the
phone book and phone pairing
information. For information on how
to delete this information, see the
previous section “Deleting a Paired
Phone” and the previous sections
on deleting name tags.
Other Information
The Bluetooth®word mark and
logos are owned by the Bluetooth®
SIG, Inc. and any use of such marks
by General Motors is under license.
Other trademarks and trade names
are those of their respective owners.
See Radio Frequency Statement on
page 13‑15 for information
regarding Part 15 of the Federal
Communications Commission (FCC)
rules and Industry Canada
Standards RSS-GEN/210/220/310.
Page 174 of 350

Black plate (26,1)Chevrolet Impala Owner Manual - 2013 - crc - 8/27/12
7-26 Infotainment System
2NOTES
Page 175 of 350
Black plate (1,1)Chevrolet Impala Owner Manual - 2013 - crc - 8/27/12
Climate Controls 8-1
Climate Controls
Climate Control Systems
Climate Control Systems . . . . . . 8-1
Air Vents
Air Vents . . . . . . . . . . . . . . . . . . . . . . 8-5
Maintenance
Passenger Compartment AirFilter . . . . . . . . . . . . . . . . . . . . . . . . . 8-5
Climate Control Systems
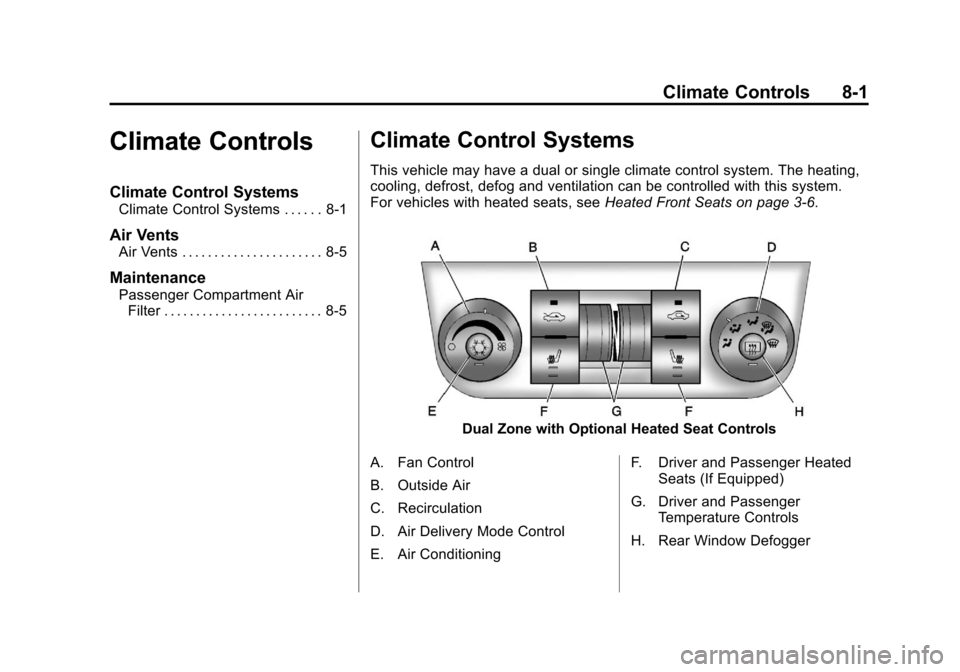
This vehicle may have a dual or single climate control system. The heating,
cooling, defrost, defog and ventilation can be controlled with this system.
For vehicles with heated seats, see Heated Front Seats on page 3‑6.
Dual Zone with Optional Heated Seat Controls
A. Fan Control
B. Outside Air
C. Recirculation
D. Air Delivery Mode Control
E. Air Conditioning F. Driver and Passenger Heated
Seats (If Equipped)
G. Driver and Passenger Temperature Controls
H. Rear Window Defogger
Page 176 of 350
Black plate (2,1)Chevrolet Impala Owner Manual - 2013 - crc - 8/27/12
8-2 Climate Controls
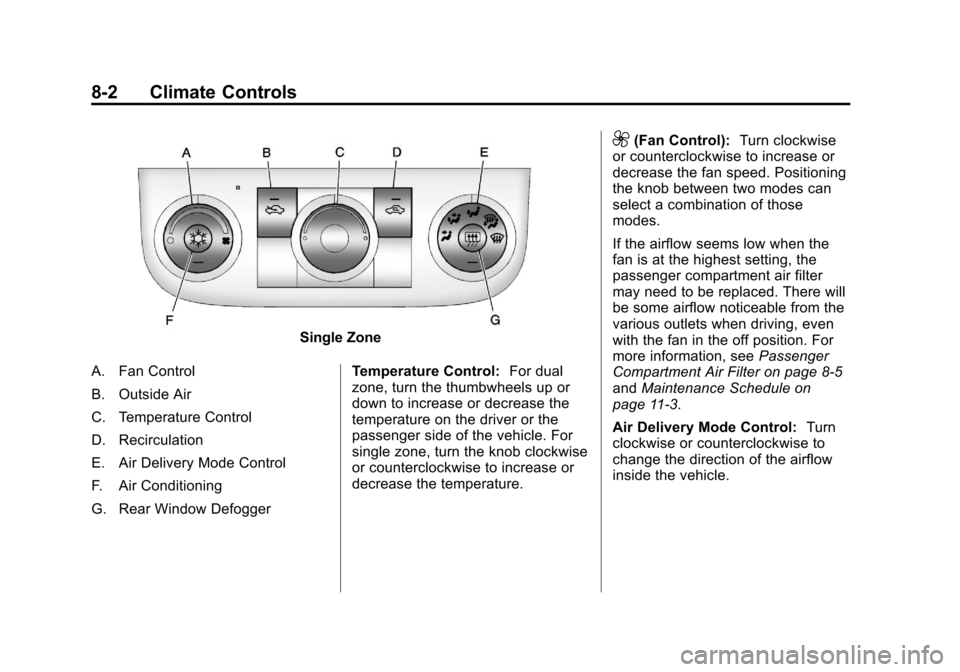
Single Zone
A. Fan Control
B. Outside Air
C. Temperature Control
D. Recirculation
E. Air Delivery Mode Control
F. Air Conditioning
G. Rear Window Defogger Temperature Control:
For dual
zone, turn the thumbwheels up or
down to increase or decrease the
temperature on the driver or the
passenger side of the vehicle. For
single zone, turn the knob clockwise
or counterclockwise to increase or
decrease the temperature.
9(Fan Control): Turn clockwise
or counterclockwise to increase or
decrease the fan speed. Positioning
the knob between two modes can
select a combination of those
modes.
If the airflow seems low when the
fan is at the highest setting, the
passenger compartment air filter
may need to be replaced. There will
be some airflow noticeable from the
various outlets when driving, even
with the fan in the off position. For
more information, see Passenger
Compartment Air Filter on page 8‑5
and Maintenance Schedule on
page 11‑3.
Air Delivery Mode Control: Turn
clockwise or counterclockwise to
change the direction of the airflow
inside the vehicle.
Page 177 of 350
Black plate (3,1)Chevrolet Impala Owner Manual - 2013 - crc - 8/27/12
Climate Controls 8-3
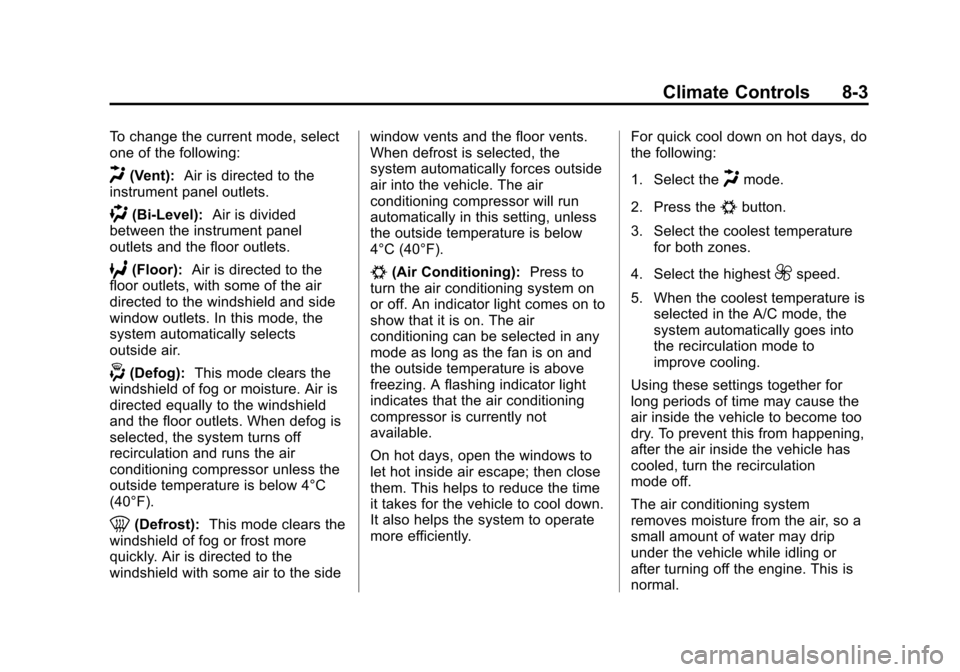
To change the current mode, select
one of the following:
H(Vent):Air is directed to the
instrument panel outlets.
)(Bi-Level): Air is divided
between the instrument panel
outlets and the floor outlets.
6(Floor): Air is directed to the
floor outlets, with some of the air
directed to the windshield and side
window outlets. In this mode, the
system automatically selects
outside air.
-(Defog): This mode clears the
windshield of fog or moisture. Air is
directed equally to the windshield
and the floor outlets. When defog is
selected, the system turns off
recirculation and runs the air
conditioning compressor unless the
outside temperature is below 4°C
(40°F).
0(Defrost): This mode clears the
windshield of fog or frost more
quickly. Air is directed to the
windshield with some air to the side window vents and the floor vents.
When defrost is selected, the
system automatically forces outside
air into the vehicle. The air
conditioning compressor will run
automatically in this setting, unless
the outside temperature is below
4°C (40°F).
#(Air Conditioning):
Press to
turn the air conditioning system on
or off. An indicator light comes on to
show that it is on. The air
conditioning can be selected in any
mode as long as the fan is on and
the outside temperature is above
freezing. A flashing indicator light
indicates that the air conditioning
compressor is currently not
available.
On hot days, open the windows to
let hot inside air escape; then close
them. This helps to reduce the time
it takes for the vehicle to cool down.
It also helps the system to operate
more efficiently. For quick cool down on hot days, do
the following:
1. Select the
Hmode.
2. Press the
#button.
3. Select the coolest temperature for both zones.
4. Select the highest
9speed.
5. When the coolest temperature is selected in the A/C mode, the
system automatically goes into
the recirculation mode to
improve cooling.
Using these settings together for
long periods of time may cause the
air inside the vehicle to become too
dry. To prevent this from happening,
after the air inside the vehicle has
cooled, turn the recirculation
mode off.
The air conditioning system
removes moisture from the air, so a
small amount of water may drip
under the vehicle while idling or
after turning off the engine. This is
normal.
Page 178 of 350
Black plate (4,1)Chevrolet Impala Owner Manual - 2013 - crc - 8/27/12
8-4 Climate Controls
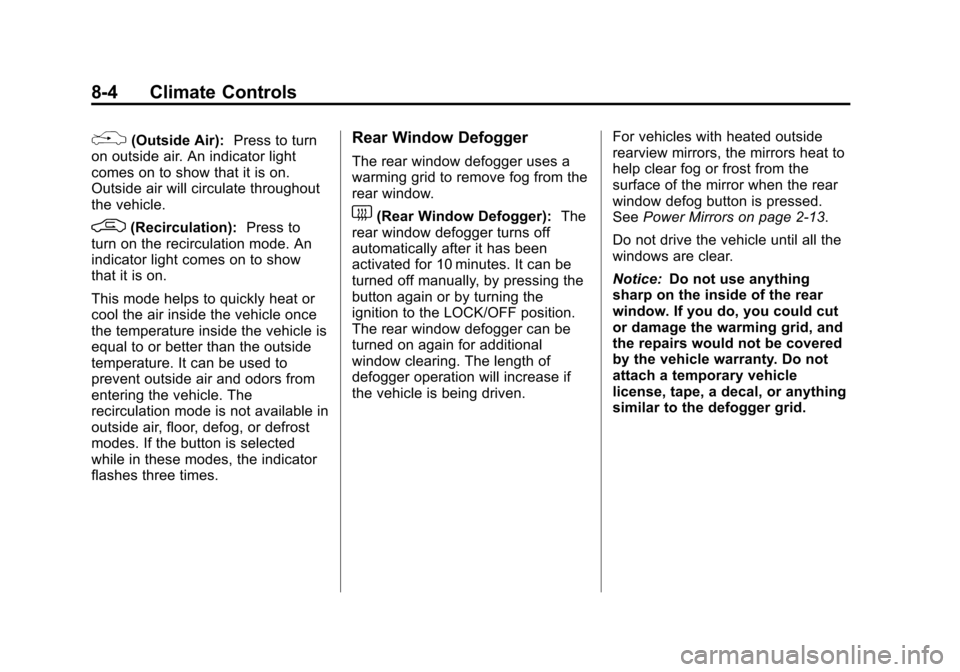
%(Outside Air):Press to turn
on outside air. An indicator light
comes on to show that it is on.
Outside air will circulate throughout
the vehicle.
/(Recirculation): Press to
turn on the recirculation mode. An
indicator light comes on to show
that it is on.
This mode helps to quickly heat or
cool the air inside the vehicle once
the temperature inside the vehicle is
equal to or better than the outside
temperature. It can be used to
prevent outside air and odors from
entering the vehicle. The
recirculation mode is not available in
outside air, floor, defog, or defrost
modes. If the button is selected
while in these modes, the indicator
flashes three times.
Rear Window Defogger
The rear window defogger uses a
warming grid to remove fog from the
rear window.
1(Rear Window Defogger): The
rear window defogger turns off
automatically after it has been
activated for 10 minutes. It can be
turned off manually, by pressing the
button again or by turning the
ignition to the LOCK/OFF position.
The rear window defogger can be
turned on again for additional
window clearing. The length of
defogger operation will increase if
the vehicle is being driven. For vehicles with heated outside
rearview mirrors, the mirrors heat to
help clear fog or frost from the
surface of the mirror when the rear
window defog button is pressed.
See
Power Mirrors on page 2‑13.
Do not drive the vehicle until all the
windows are clear.
Notice: Do not use anything
sharp on the inside of the rear
window. If you do, you could cut
or damage the warming grid, and
the repairs would not be covered
by the vehicle warranty. Do not
attach a temporary vehicle
license, tape, a decal, or anything
similar to the defogger grid.
Page 179 of 350
Black plate (5,1)Chevrolet Impala Owner Manual - 2013 - crc - 8/27/12
Climate Controls 8-5
Air Vents
Use the thumbwheel located below
or to the side of the outlet, to
change the direction of the air flow.
Operation Tips
.Clear away any ice, snow,
or leaves from the air inlets at
the base of the windshield that
may block the flow of air into the
vehicle.
.Use of non-GM approved hood
deflectors may adversely affect
the performance of the system.
.Keep the path under the front
seats clear of objects to help
circulate the air inside the
vehicle more effectively.
.If the airflow seems low when
the fan is at the highest setting,
the passenger compartment air
filter, if equipped, may need to
replaced. For more information,
seePassenger Compartment Air
Filter on page 8‑5 and
Maintenance Schedule on
page 11‑3.
.If fogging reoccurs while in vent
or bi-level modes with mild
temperature throughout the
vehicle, turn on the air
conditioner to reduce windshield
fogging.
Maintenance
Passenger Compartment
Air Filter
The vehicle has a passenger
compartment particulate air filter.
It is located in the engine
compartment, below the air inlet
grille on the passenger side.
The filter traps most of the pollen
from air entering the climate control
system. It needs to be changed
periodically to ensure system
performance. For information on
how often to change the passenger
compartment air filter, see
Maintenance Schedule on
page 11‑3.
Page 180 of 350
Black plate (6,1)Chevrolet Impala Owner Manual - 2013 - crc - 8/27/12
8-6 Climate Controls
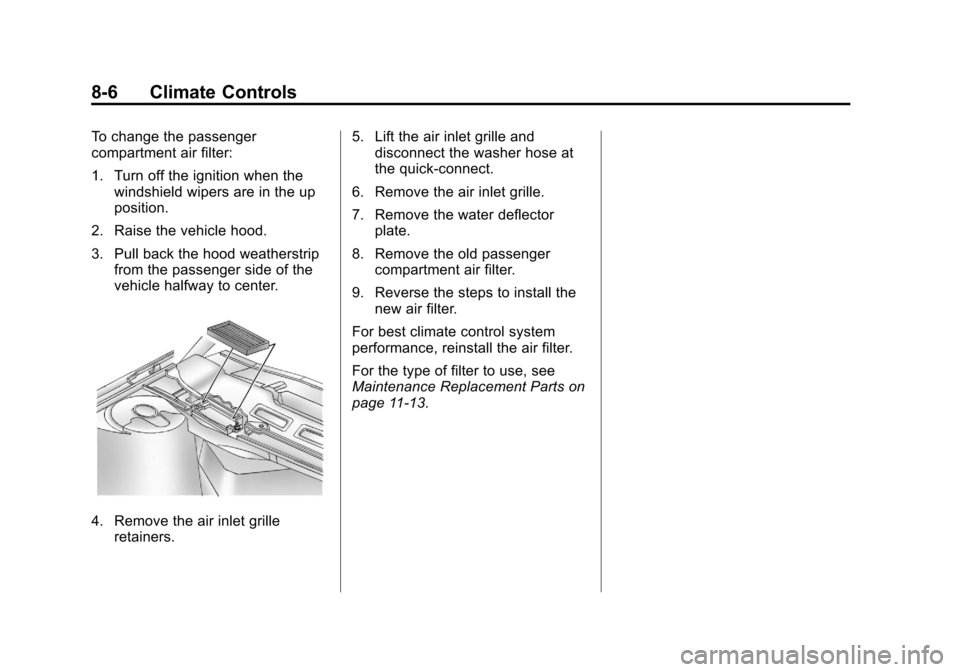
To change the passenger
compartment air filter:
1. Turn off the ignition when thewindshield wipers are in the up
position.
2. Raise the vehicle hood.
3. Pull back the hood weatherstrip from the passenger side of the
vehicle halfway to center.
4. Remove the air inlet grilleretainers. 5. Lift the air inlet grille and
disconnect the washer hose at
the quick-connect.
6. Remove the air inlet grille.
7. Remove the water deflector plate.
8. Remove the old passenger compartment air filter.
9. Reverse the steps to install the new air filter.
For best climate control system
performance, reinstall the air filter.
For the type of filter to use, see
Maintenance Replacement Parts on
page 11‑13.