horn CHEVROLET IMPALA 2013 9.G Owners Manual
[x] Cancel search | Manufacturer: CHEVROLET, Model Year: 2013, Model line: IMPALA, Model: CHEVROLET IMPALA 2013 9.GPages: 350, PDF Size: 5.66 MB
Page 9 of 350
Black plate (3,1)Chevrolet Impala Owner Manual - 2013 - crc - 8/27/12
In Brief 1-3
A.Air Vents on page 8‑5.
B. Remote Trunk Release Button. See Trunk on page 2‑9.
C. Turn and Lane‐Change Lever. See Turn and Lane-Change
Signals on page 6‑4.
D. Instrument Cluster on page 5‑9.
E. Hazard Warning Flashers on
page 6‑3.
F. Driver Information Center (DIC)
on page 5‑22.
G. Passenger Airbag Status
Indicator on page 5‑13.
H. Infotainment on page 7‑1.
I. Exterior Lamp Controls on
page 6‑1.
J. Instrument Panel Illumination
Control on page 6‑5.
Dome Lamp Control. See Dome
Lamps on page 6‑5.
K. Traction Control System (TCS)
on page 9‑25 (If Equipped). L.
Steering Wheel Adjustment on
page 5‑2.
M. Cruise Control on page 9‑28.
N. Hood Release. See Hood on
page 10‑4.
O. Data Link Connector (DLC) (Out of View). See Malfunction
Indicator Lamp on page 5‑14.
P. Horn on page 5‑3.
Q. Steering Wheel Controls on
page 5‑2 (If Equipped).
R. Ignition Positions on page 9‑13.
S. Climate Control Systems on
page 8‑1.
T. Power Outlets on page 5‑7.
U. Center Console Shift Lever (If Equipped). See Shifting Into
Park on page 9‑17.Initial Drive
Information
This section provides a brief
overview about some of the
important features that may or may
not be on your specific vehicle.
For more detailed information, refer
to each of the features which can be
found later in this owner manual.
Remote Keyless Entry
(RKE) System
The RKE transmitter is used to
remotely lock and unlock the doors
from up to 60 m (195 ft) away from
the vehicle.
Page 29 of 350
Black plate (3,1)Chevrolet Impala Owner Manual - 2013 - crc - 8/27/12
Keys, Doors, and Windows 2-3
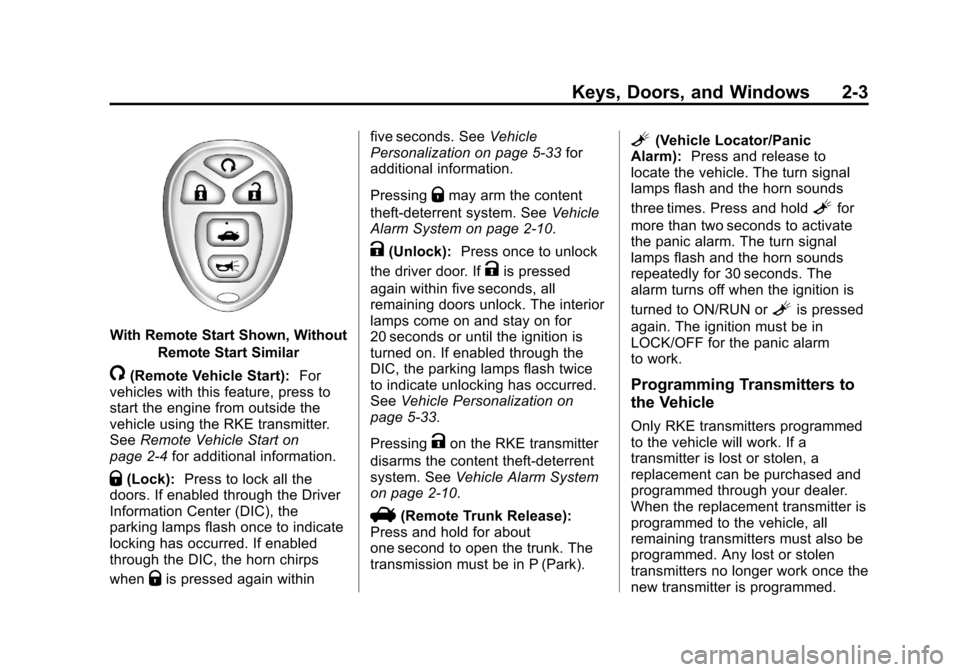
With Remote Start Shown, WithoutRemote Start Similar
/(Remote Vehicle Start): For
vehicles with this feature, press to
start the engine from outside the
vehicle using the RKE transmitter.
See Remote Vehicle Start on
page 2‑4 for additional information.
Q(Lock):Press to lock all the
doors. If enabled through the Driver
Information Center (DIC), the
parking lamps flash once to indicate
locking has occurred. If enabled
through the DIC, the horn chirps
when
Qis pressed again within five seconds. See
Vehicle
Personalization on page 5‑33 for
additional information.
Pressing
Qmay arm the content
theft-deterrent system. See Vehicle
Alarm System on page 2‑10.
K(Unlock): Press once to unlock
the driver door. If
Kis pressed
again within five seconds, all
remaining doors unlock. The interior
lamps come on and stay on for
20 seconds or until the ignition is
turned on. If enabled through the
DIC, the parking lamps flash twice
to indicate unlocking has occurred.
See Vehicle Personalization on
page 5‑33.
Pressing
Kon the RKE transmitter
disarms the content theft-deterrent
system. See Vehicle Alarm System
on page 2‑10.
V(Remote Trunk Release):
Press and hold for about
one second to open the trunk. The
transmission must be in P (Park).
L(Vehicle Locator/Panic
Alarm): Press and release to
locate the vehicle. The turn signal
lamps flash and the horn sounds
three times. Press and hold
Lfor
more than two seconds to activate
the panic alarm. The turn signal
lamps flash and the horn sounds
repeatedly for 30 seconds. The
alarm turns off when the ignition is
turned to ON/RUN or
Lis pressed
again. The ignition must be in
LOCK/OFF for the panic alarm
to work.
Programming Transmitters to
the Vehicle
Only RKE transmitters programmed
to the vehicle will work. If a
transmitter is lost or stolen, a
replacement can be purchased and
programmed through your dealer.
When the replacement transmitter is
programmed to the vehicle, all
remaining transmitters must also be
programmed. Any lost or stolen
transmitters no longer work once the
new transmitter is programmed.
Page 37 of 350
Black plate (11,1)Chevrolet Impala Owner Manual - 2013 - crc - 8/27/12
Keys, Doors, and Windows 2-11
Once armed, the alarm will go off if
someone tries to enter the vehicle
without using the RKE transmitter or
a key or turns the ignition on with an
incorrect key. The horn will sound
and the turn signal lamps will flash
for about 30 seconds.
When the alarm is armed, the trunk
may be opened with the RKE
transmitter. The power door lock
switches are disabled and the doors
remain locked. You must use your
RKE transmitter or your key to
unlock the doors when the system is
armed.
Arming with the Power Lock
Switch
The alarm system will arm when
you use either power lock switch to
lock the doors while any door is
open and the key is removed from
the ignition. The alarm system will
not arm if the trunk is open when
you use either power lock switch to
lock the doors.
Arming with the RKE
Transmitter
The alarm system will arm when the
RKE transmitter is used to lock the
doors, if the key is not in the
ignition.
Disarming with the RKE
Transmitter
The alarm system will disarm when
the RKE transmitter is used to
unlock the doors.
The first time a remote unlock
command is received, three flashes
will be seen and three horn chirps
heard to indicate an alarm condition
has occurred since last arming.
Disarming with the Key
The alarm system will disarm when
the key is inserted in the ignition
and turn it from the LOCK/OFF
position.
Immobilizer
SeeRadio Frequency Statement on
page 13‑15 for information
regarding Part 15 of the Federal
Communications Commission (FCC)
rules and Industry Canada
Standards RSS-GEN/210/220/310.
Immobilizer Operation
This vehicle has PASS-Key®III+
(Personalized Automotive Security
System) theft-deterrent system.
PASS-Key III+ is a passive
theft-deterrent system.
The system is automatically armed
when the key is removed from the
ignition.
The system is automatically
disarmed when the key is turned to
ON/RUN, ACC/ACCESSORY,
or START from the LOCK/OFF
position.
You do not have to manually arm or
disarm the system.
Page 97 of 350
Black plate (1,1)Chevrolet Impala Owner Manual - 2013 - crc - 8/27/12
Instruments and Controls 5-1
Instruments and
Controls
Controls
Steering Wheel Adjustment . . . 5-2
Steering Wheel Controls . . . . . . 5-2
Horn . . . . . . . . . . . . . . . . . . . . . . . . . . 5-3
Windshield Wiper/Washer . . . . . 5-3
Compass . . . . . . . . . . . . . . . . . . . . . 5-4
Clock . . . . . . . . . . . . . . . . . . . . . . . . . 5-6
Power Outlets . . . . . . . . . . . . . . . . . 5-7
Cigarette Lighter . . . . . . . . . . . . . . 5-8
Warning Lights, Gauges, and
Indicators
Warning Lights, Gauges, andIndicators . . . . . . . . . . . . . . . . . . . . 5-8
Instrument Cluster . . . . . . . . . . . . 5-9
Speedometer . . . . . . . . . . . . . . . . 5-10
Odometer . . . . . . . . . . . . . . . . . . . . 5-10
Tachometer . . . . . . . . . . . . . . . . . . 5-10
Fuel Gauge . . . . . . . . . . . . . . . . . . 5-10
Engine Coolant Temperature Gauge . . . . . . . . . . . . . . . . . . . . . . 5-11 Safety Belt Reminders . . . . . . . 5-12
Airbag Readiness Light . . . . . . 5-12
Passenger Airbag Status
Indicator . . . . . . . . . . . . . . . . . . . . 5-13
Charging System Light . . . . . . 5-14
Malfunction
Indicator Lamp . . . . . . . . . . . . . 5-14
Brake System Warning Light . . . . . . . . . . . . . . . . . . . . . . . 5-17
Antilock Brake System (ABS) Warning Light . . . . . . . . . . . . . . 5-18
Electronic Stability Control (ESC) Off Light . . . . . . . . . . . . . 5-18
Electronic Stability Control (ESC)/Traction Control
System (TCS) Indicator/
Warning Light . . . . . . . . . . . . . . 5-19
Engine Coolant Temperature Warning Light . . . . . . . . . . . . . . 5-19
Tire Pressure Light . . . . . . . . . . 5-20
Engine Oil Pressure Light . . . . 5-20
Security Light . . . . . . . . . . . . . . . . 5-20
High-Beam On Light . . . . . . . . . 5-21
Front Fog Lamp Light . . . . . . . . 5-21
Cruise Control Light . . . . . . . . . 5-21
Information Displays
Driver Information Center (DIC) . . . . . . . . . . . . . . . 5-22
Vehicle Messages
Vehicle Messages . . . . . . . . . . . 5-26
Battery Voltage and ChargingMessages . . . . . . . . . . . . . . . . . . 5-26
Brake System Messages . . . . 5-26
Door Ajar Messages . . . . . . . . . 5-26
Engine Cooling System Messages . . . . . . . . . . . . . . . . . . 5-27
Engine Oil Messages . . . . . . . . 5-28
Engine Power Messages . . . . 5-29
Fuel System Messages . . . . . . 5-29
Key and Lock Messages . . . . . 5-29
Lamp Messages . . . . . . . . . . . . . 5-29
Ride Control System Messages . . . . . . . . . . . . . . . . . . 5-30
Airbag System Messages . . . . 5-31
Security Messages . . . . . . . . . . 5-31
Service Vehicle Messages . . . 5-31
Tire Messages . . . . . . . . . . . . . . . 5-32
Transmission Messages . . . . . 5-33
Vehicle Reminder Messages . . . . . . . . . . . . . . . . . . 5-33
Washer Fluid Messages . . . . . 5-33
Page 99 of 350
Black plate (3,1)Chevrolet Impala Owner Manual - 2013 - crc - 8/27/12
Instruments and Controls 5-3
c/x(Previous/End):Press to
go to the previous radio station
stored as a favorite, go to the next
track if a CD is playing, reject an
incoming call, or end a current call.
b/g(Mute/Push to Talk): Press
to silence the vehicle speakers only.
Press again to turn the sound on.
For vehicles with OnStar
®or
Bluetooth®systems, press and
hold
b/gfor longer than
two seconds to interact with those
systems. See OnStar Overview on
page 14‑1 andBluetooth on
page 7‑19 for more information.
SRCE (Source): Press to choose
between the radio (AM, FM, XM),
CD, and auxiliary input jack.
+
e−e(Volume): Press to
increase or to decrease the radio
volume.
¨(Seek): Press to go to the next
radio station while in AM, FM,
or XM. Press
¨to go to the next
track or chapter while sourced to
the CD.
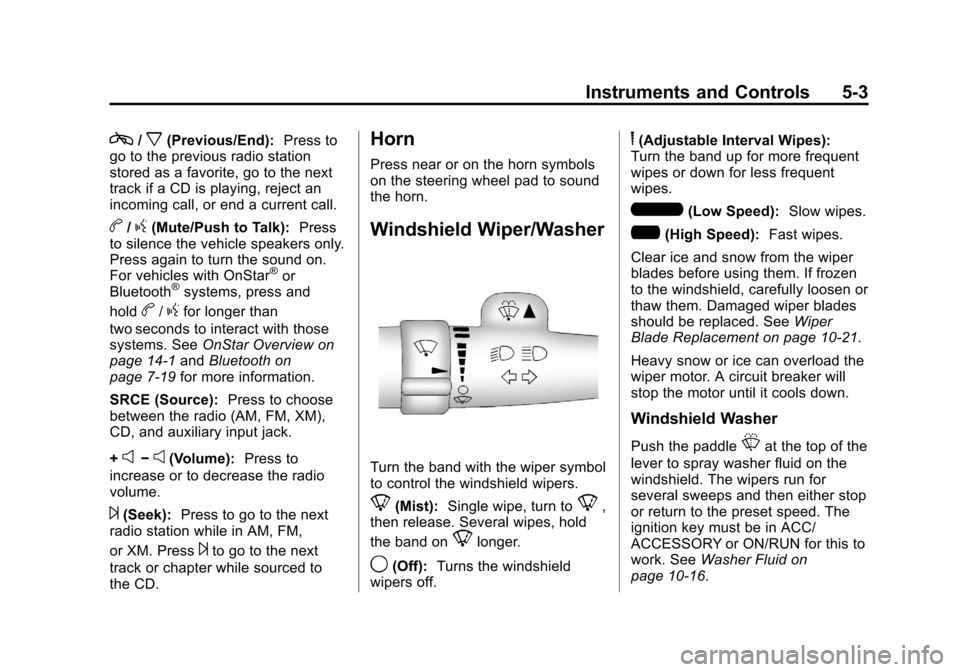
Horn
Press near or on the horn symbols
on the steering wheel pad to sound
the horn.
Windshield Wiper/Washer
Turn the band with the wiper symbol
to control the windshield wipers.
8(Mist): Single wipe, turn to8,
then release. Several wipes, hold
the band on
8longer.
9(Off): Turns the windshield
wipers off.
6(Adjustable Interval Wipes):
Turn the band up for more frequent
wipes or down for less frequent
wipes.
6(Low Speed): Slow wipes.
?(High Speed): Fast wipes.
Clear ice and snow from the wiper
blades before using them. If frozen
to the windshield, carefully loosen or
thaw them. Damaged wiper blades
should be replaced. See Wiper
Blade Replacement on page 10‑21.
Heavy snow or ice can overload the
wiper motor. A circuit breaker will
stop the motor until it cools down.
Windshield Washer
Push the paddleLat the top of the
lever to spray washer fluid on the
windshield. The wipers run for
several sweeps and then either stop
or return to the preset speed. The
ignition key must be in ACC/
ACCESSORY or ON/RUN for this to
work. See Washer Fluid on
page 10‑16.
Page 131 of 350
Black plate (35,1)Chevrolet Impala Owner Manual - 2013 - crc - 8/27/12
Instruments and Controls 5-35
AUTO DOOR UNLOCK
This feature allows you to select
whether or not to turn off the
automatic door unlocking feature.
It also allows you to select which
doors and when the doors will
automatically unlock. See
“Programmable Automatic Door
Unlock”underAutomatic Door
Locks on page 2‑7 for more
information.
Press the customization button until
AUTO DOOR UNLOCK appears on
the DIC display. Press the set/reset
button once to access the settings
for this feature. Then press the
customization button to scroll
through the following settings:
OFF: None of the doors will
automatically unlock.
DRIVER AT KEY OUT: Only the
driver door will unlock when the key
is taken out of the ignition.
DRIVER IN PARK: Only the driver
door will unlock when the vehicle is
shifted into P (Park). ALL AT KEY OUT:
All of the doors
will unlock when the key is taken
out of the ignition.
ALL IN PARK (default): All of the
doors will unlock when the vehicle is
shifted into P (Park).
NO CHANGE: No change will be
made to this feature. The current
setting will remain.
To select a setting, press the set/
reset button while the desired
setting is displayed on the DIC.
REMOTE DOOR LOCK
This feature allows you to select the
type of feedback you will receive
when locking the vehicle with the
Remote Keyless Entry (RKE)
transmitter. You will not receive
feedback when locking the vehicle
with the RKE transmitter if any of
the doors are open. See Remote
Keyless Entry (RKE) System
Operation on page 2‑2 for more
information. Press the customization button until
REMOTE DOOR LOCK appears on
the DIC display. Press the set/reset
button once to access the settings
for this feature. Then press the
customization button to scroll
through the following settings:
HORN & LIGHTS OFF:
There will
be no feedback when you press the
lock button on the RKE transmitter.
LIGHTS ONLY: The exterior lamps
will flash when you press the lock
button on the RKE transmitter.
HORN ONLY: The horn will sound
on the second press of the lock
button on the RKE transmitter.
HORN & LIGHTS ON (default):
The exterior lamps will flash when
you press the lock button on the
RKE transmitter, and the horn will
sound when the lock button is
pressed again within five seconds of
the previous command.
NO CHANGE: No change will be
made to this feature. The current
setting will remain.
Page 251 of 350
Black plate (29,1)Chevrolet Impala Owner Manual - 2013 - crc - 8/27/12
Vehicle Care 10-29
FusesUsage
CHMSL/
BCK-UP Center
High-Mounted
Stoplamp,
Back-up Lamp
DISPLAY Display
DRL 1 Daytime Running Lamps 1
DRL 2 Daytime Running Lamps 2
ECM IGN Engine Control Module (ECM),
Ignition
ECM/TCM ECM, Transmission
Control
Module (TCM)
EMISSIONS 1 Emissions 1
EMISSIONS 2 Emissions 2
ETC/ECM Electronic Throttle
Control, ECM
FAN 1 Cooling Fan 1 Fuses
Usage
FAN 2 Cooling Fan 2
FOG LAMPS Fog Lamps (If Equipped)
FSCM Fuel System Control Module
HDLP MDL Headlamp Module
HORN Horn
HTD MIR Heated Mirror
IGN 1 Ignition 1
INJ 2 Injector 2
INT LIGHTS Interior Lamps
INT LTS/
PNL DIM Interior Lamps,
Instrument Panel
Dimmer
LT HI BEAM Driver Side High-Beam
Headlamp
LT LO BEAM Driver Side Low-Beam
Headlamp Fuses
Usage
LT PARK Driver Side Parking Lamp
LT SPOT Left Spot
LT T/SIG Driver Side Turn Signal Lamp
ONSTAR OnStar
PWR DROP/
CRANK Power Drop,
Crank
RADIO Audio System
RT HI BEAM Passenger Side High-Beam
Headlamp
RT LO BEAM Passenger Side Low-Beam
Headlamp
RT PARK Passenger Side Parking Lamp
RT SPOT Right Spot
RT T/SIG Passenger Side Turn Signal Lamp
Page 265 of 350
Black plate (43,1)Chevrolet Impala Owner Manual - 2013 - crc - 8/27/12
Vehicle Care 10-43
TPMS Sensor Matching
Process
Each TPMS sensor has a unique
identification code. The identification
code needs to be matched to a new
tire/wheel position after rotating the
vehicle’s tires or replacing one or
more of the TPMS sensors. Also,
the TPMS sensor matching process
should be performed after replacing
a spare tire with a road tire
containing the TPMS sensor. The
malfunction light and the DIC
message should go off at the next
ignition cycle. The sensors are
matched to the tire/wheel positions,
using a TPMS relearn tool, in the
following order: driver side front tire,
passenger side front tire, passenger
side rear tire, and driver side rear.
See your dealer for service or to
purchase a relearn tool.
There are two minutes to match the
first tire/wheel position, and
five minutes overall to match all four
tire/wheel positions. If it takes
longer, the matching process stops
and must be restarted.The TPMS sensor matching
process is:
1. Set the parking brake.
2. Turn the ignition to ON/RUN with
the engine off.
3. Press the Remote Keyless Entry (RKE) transmitter's
QandK
buttons at the same time for
approximately five seconds. The
horn sounds twice to signal the
receiver is in relearn mode and
the TIRE LEARNING ACTIVE
message displays on the DIC
screen.
4. Start with the driver side front tire.
5. Place the relearn tool against the tire sidewall, near the valve
stem. Then press the button to
activate the TPMS sensor.
A horn chirp confirms that the
sensor identification code has
been matched to this tire and
wheel position. 6. Proceed to the passenger side
front tire, and repeat the
procedure in Step 5.
7. Proceed to the passenger side rear tire, and repeat the
procedure in Step 5.
8. Proceed to the driver side rear tire, and repeat the procedure in
Step 5. The horn sounds two
times to indicate the sensor
identification code has been
matched to the driver side rear
tire, and the TPMS sensor
matching process is no longer
active. The TIRE LEARNING
ACTIVE message on the DIC
display screen goes off.
9. Turn the ignition to LOCK/OFF.
10. Set all four tires to the recommended air pressure
level as indicated on the Tire
and Loading Information label.
Page 343 of 350

Black plate (5,1)Chevrolet Impala Owner Manual - 2013 - crc - 8/27/12
INDEX i-5
Fuel (cont'd)Filling the Tank . . . . . . . . . . . . . . . 9-34
Foreign Countries . . . . . . . . . . . . 9-31
Gasoline Specifications . . . . . . . 9-31
Gauge . . . . . . . . . . . . . . . . . . . . . . . . 5-10
Recommended . . . . . . . . . . . . . . . 9-31
Requirements, California . . . . . 9-31
System Messages . . . . . . . . . . . . 5-29
Fuses
Engine CompartmentFuse Block . . . . . . . . . . . . . . . . 10-27
Fuses and Circuit Breakers . . . . . . . . . . . . . . . . . . 10-27
Instrument Panel Fuse
Block . . . . . . . . . . . . . . . . . . . . . . 10-30
G
Garage Door Opener . . . . . . . . . . 5-39Programming . . . . . . . . . . . . . . . . . 5-39
Gasoline
Specifications . . . . . . . . . . . . . . . . . 9-31
Gauges Engine CoolantTemperature . . . . . . . . . . . . . . . . 5-11
Fuel . . . . . . . . . . . . . . . . . . . . . . . . . . 5-10
Odometer . . . . . . . . . . . . . . . . . . . . . 5-10 Gauges (cont'd)
Speedometer . . . . . . . . . . . . . . . . . 5-10
Tachometer . . . . . . . . . . . . . . . . . . . 5-10
Warning Lights and
Indicators . . . . . . . . . . . . . . . . . . . . 5-8
General Information Service and Maintenance . . . . . 11-1
Towing . . . . . . . . . . . . . . . . . . . . . . . . 9-36
Vehicle Care . . . . . . . . . . . . . . . . . . 10-2
Glove Box . . . . . . . . . . . . . . . . . . . . . . 4-1
GM Mobility Reimbursement Program . . . . . . . . . . . . . . . . . . . . . . 13-5
H
Halogen Bulbs . . . . . . . . . . . . . . . . 10-22
Hazard Warning Flashers . . . . . . . 6-3
Head Restraints . . . . . . . . . . . . . . . . 3-2
HeadlampsAiming . . . . . . . . . . . . . . . . . . . . . . 10-22
Bulb Replacement . . . . . . . . . . 10-22
Daytime Running Lamps/Automatic Headlamp
System . . . . . . . . . . . . . . . . . . . . . . . 6-2
Flash-to-Pass . . . . . . . . . . . . . . . . . . 6-2 Headlamps (cont'd)
Headlamps, Front Turn
Signal, Sidemarker, and
Parking Lamps . . . . . . . . . . . . 10-23
High-Beam On Light . . . . . . . . . . 5-21
High/Low Beam Changer . . . . . . 6-2
Heated Front Seats . . . . . . . . . . . . . 3-6
Heated Mirrors . . . . . . . . . . . . . . . . . 2-14
Heater Engine . . . . . . . . . . . . . . . . . . . . . . . . 9-16
Heating and Air Conditioning . . . 8-1
High-Beam On Light . . . . . . . . . . . 5-21
Highway Hypnosis . . . . . . . . . . . . . . 9-6
Hill and Mountain Roads . . . . . . . . 9-6
Hood . . . . . . . . . . . . . . . . . . . . . . . . . . 10-4
Horn . . . . . . . . . . . . . . . . . . . . . . . . . . . . 5-3
How to Wear Safety Belts Properly . . . . . . . . . . . . . . . . . . . . . . 3-10
I
Ignition Positions . . . . . . . . . . . . . . 9-13
Ignition Transmission Lock
Check . . . . . . . . . . . . . . . . . . . . . . . 10-20
Immobilizer . . . . . . . . . . . . . . . . . . . . 2-11