center console CHEVROLET IMPALA 2016 10.G Owners Manual
[x] Cancel search | Manufacturer: CHEVROLET, Model Year: 2016, Model line: IMPALA, Model: CHEVROLET IMPALA 2016 10.GPages: 377, PDF Size: 5.07 MB
Page 8 of 377

Chevrolet Impala Owner Manual (GMNA-Localizing-U.S/Canada-9086448) -
2016 - CRC - 5/20/15
In Brief 7
1.Instrument Panel Illumination
Control 0151.
2. Air Vents 0188.
3. Trunk Release. See Trunk
0 41.
Parking Assist Button. See
Assistance Systems for
Parking or Backing 0228 (If
Equipped).
Lane Departure Warning
(LDW) Button. See Lane
Departure Warning (LDW)
0 235.
4. Turn Signal Lever. See Turn
and Lane-Change Signals
0 151.
5. Instrument Cluster 0112.
Driver Information Center (DIC)
0 127.
6. Windshield Wiper/Washer
0106.
7. Hazard Warning Flashers
0150.
8. Light Sensor. See Automatic
Headlamp System 0150. 9. Storage Area with USB Port
Inside (If Equipped). See
Instrument Panel Storage 099
and USB Port 0164.
10. Infotainment 0155.
11. Climate Control Systems
0181.
Dual Automatic Climate Control
System 0184.
12. Storage Area with Accessory Power Outlet Inside. See
Center Console Storage 0100
and Power Outlets 0108.
13. Heated and Ventilated Front
Seats 060 (If Equipped).
14. Traction Control/Electronic
Stability Control 0216.
15. Shift Lever. See Automatic
Transmission 0211.
16. Ignition Positions (Keyless
Access) 0201 orIgnition
Positions (Key Access) 0203.
17. Steering Wheel Controls 0105.
Driver Information Center
Buttons. See Driver Information
Center (DIC) 0127. 18.
Steering Wheel Controls 0105
(Out of View).
19. Horn 0105.
20. Steering Wheel Adjustment
0104.
21. Cruise Control 0218 (If
Equipped).
Adaptive Cruise Control 0220
(If Equipped).
Heated Steering Wheel 0105
(If Equipped).
Forward Collision Alert (FCA)
System 0230 (If Equipped).
22. Instrument Panel Storage 099
(If Equipped).
Fuse Cover. See Instrument
Panel Fuse Block 0280.
23. Hood Release. See Hood
0 250.
24. Data Link Connector (Out of View). See Malfunction
Indicator Lamp (Check Engine
Light) 0120.
25. Electric Parking Brake. See Parking Brake 0214.
Page 14 of 377
Chevrolet Impala Owner Manual (GMNA-Localizing-U.S/Canada-9086448) -
2016 - CRC - 5/20/15
In Brief 13
Second Row Seats
The rear seatbacks can be folded
down to increase cargo space.
SeeRear Seats 061.
Heated and Ventilated
Seats
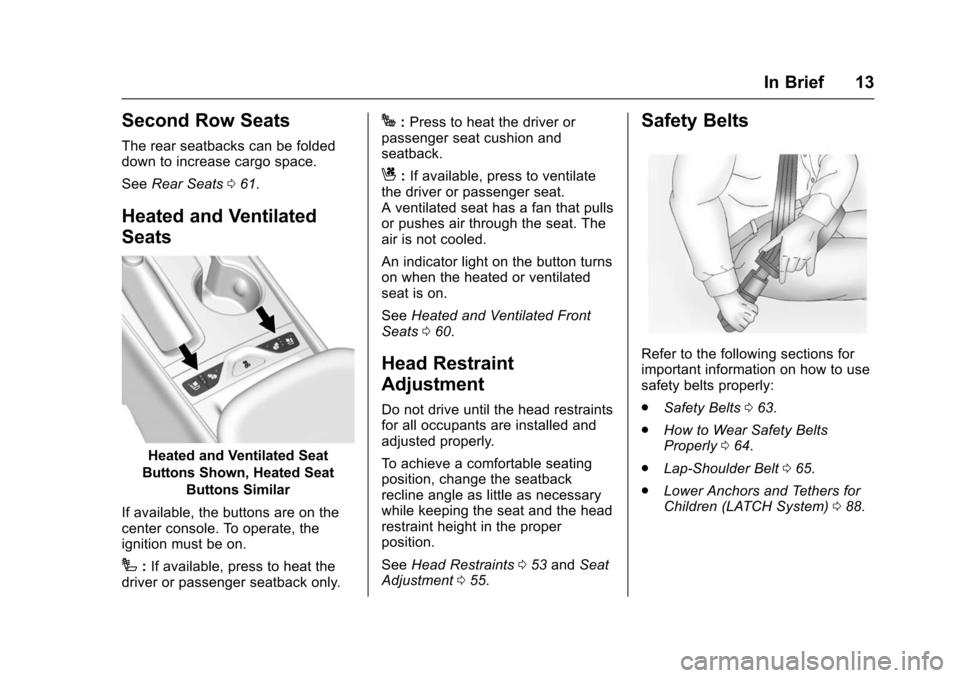
Heated and Ventilated Seat
Buttons Shown, Heated Seat
Buttons Similar
If available, the buttons are on the
center console. To operate, the
ignition must be on.
I: If available, press to heat the
driver or passenger seatback only.
J: Press to heat the driver or
passenger seat cushion and
seatback.
C: If available, press to ventilate
the driver or passenger seat.
A ventilated seat has a fan that pulls
or pushes air through the seat. The
air is not cooled.
An indicator light on the button turns
on when the heated or ventilated
seat is on.
See Heated and Ventilated Front
Seats 060.
Head Restraint
Adjustment
Do not drive until the head restraints
for all occupants are installed and
adjusted properly.
To achieve a comfortable seating
position, change the seatback
recline angle as little as necessary
while keeping the seat and the head
restraint height in the proper
position.
See Head Restraints 053 and Seat
Adjustment 055.
Safety Belts
Refer to the following sections for
important information on how to use
safety belts properly:
.
Safety Belts 063.
. How to Wear Safety Belts
Properly 064.
. Lap-Shoulder Belt 065.
. Lower Anchors and Tethers for
Children (LATCH System) 088.
Page 22 of 377
Chevrolet Impala Owner Manual (GMNA-Localizing-U.S/Canada-9086448) -
2016 - CRC - 5/20/15
In Brief 21
Portable Audio Devices
This vehicle has a 3.5 mm (1/8 in)
auxiliary input jack. If equipped,
there are up to two USB ports in the
center console and one in the
storage behind the radio. External
devices such as iPods
®, laptop
computers, MP3 players, CD
changers, and USB storage devices
may be connected, depending on
the audio system.
See Auxiliary Jack 0167 andUSB
Port 0164.
Bluetooth®
The Bluetooth®system allows users
with a Bluetooth-enabled cell phone
to make and receive hands-free
calls using the vehicle audio system
and controls.
The Bluetooth-enabled cell phone
must be paired with the in-vehicle
Bluetooth system before it can be
used in the vehicle. Not all phones
will support all functions. See
Bluetooth (Overview) 0168 or
Bluetooth (Infotainment Controls -
Base Radio) 0170 orBluetooth
(Voice Recognition - Base Radio)
0 174.
Steering Wheel Controls
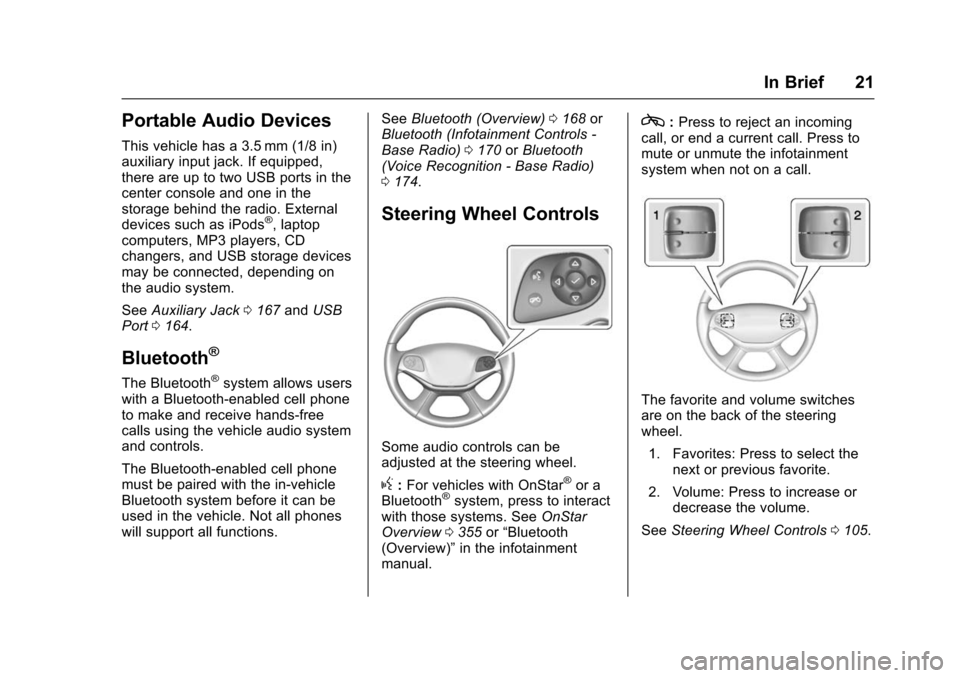
Some audio controls can be
adjusted at the steering wheel.
g:For vehicles with OnStar®or a
Bluetooth®system, press to interact
with those systems. See OnStar
Overview 0355 or“Bluetooth
(Overview)” in the infotainment
manual.
c: Press to reject an incoming
call, or end a current call. Press to
mute or unmute the infotainment
system when not on a call.
The favorite and volume switches
are on the back of the steering
wheel.
1. Favorites: Press to select the next or previous favorite.
2. Volume: Press to increase or decrease the volume.
See Steering Wheel Controls 0105.
Page 25 of 377
Chevrolet Impala Owner Manual (GMNA-Localizing-U.S/Canada-9086448) -
2016 - CRC - 5/20/15
24 In Brief
avoiding objects while in
R (Reverse). It operates at speeds
less than 8 km/h (5 mph). RPA may
display a warning triangle on the
Rear Vision Camera screen and/or
a graphic on the instrument cluster
to provide the object distance. In
addition, multiple beeps may occur
if very close to an object.
SeeAssistance Systems for Parking
or Backing 0228.
Power Outlets
The accessory power outlets can be
used to plug in electrical equipment,
such as a cell phone or MP3 player.
The vehicle has three accessory
power outlets:
.
Inside the front storage area
below the climate control
system.
. Inside the center console.
. On the rear of the center
console.
Lift the cover to access the
accessory power outlet.
See Power Outlets 0108.
Universal Remote System
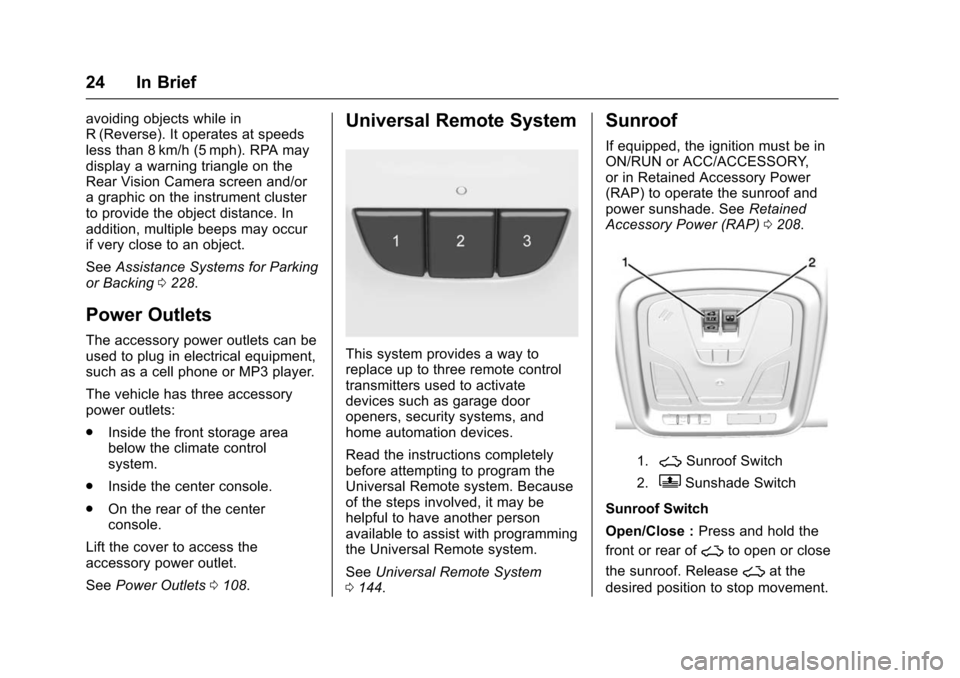
This system provides a way to
replace up to three remote control
transmitters used to activate
devices such as garage door
openers, security systems, and
home automation devices.
Read the instructions completely
before attempting to program the
Universal Remote system. Because
of the steps involved, it may be
helpful to have another person
available to assist with programming
the Universal Remote system.
See Universal Remote System
0 144.
Sunroof
If equipped, the ignition must be in
ON/RUN or ACC/ACCESSORY,
or in Retained Accessory Power
(RAP) to operate the sunroof and
power sunshade. See Retained
Accessory Power (RAP) 0208.
1.~Sunroof Switch
2.QSunshade Switch
Sunroof Switch
Open/Close : Press and hold the
front or rear of
~to open or close
the sunroof. Release
~at the
desired position to stop movement.
Page 26 of 377
Chevrolet Impala Owner Manual (GMNA-Localizing-U.S/Canada-9086448) -
2016 - CRC - 5/20/15
In Brief 25
Vent Feature :Press the front or
rear of
~to the first detent to open
and close the vent feature. The
sunshade partially opens and closes
automatically during the vent
operation.
Express Open/Express Close :
Fully press and release the front or
rear of
~. The sunroof opens and
closes automatically.
Sunshade Switch
Open/Close : Press and hold the
front or rear of
Qto open or close
the sunshade to the desired
position.
Express Open/Express Close :
Fully press and release the front or
rear of
Qto express open or
express close the sunshade. If the
sunroof is open, the sunshade will
express close just short of the open
sunroof.
See Sunroof 050.
Performance and
Maintenance
Traction Control/
Electronic Stability
Control
The Traction Control System (TCS)
limits wheel spin. The system turns
on automatically every time the
vehicle is started.
The StabiliTrak system assists with
directional control of the vehicle in
difficult driving conditions. The
system also turns on automatically
every time the vehicle is started.
.
To turn off traction control, press
and release the
gbutton on the
center console. The Traction Off
light
iilluminates.
. To turn off both traction control
and StabiliTrak, press and hold
the
gbutton, until the Traction
Off light
iand the StabiliTrak
Off light
gilluminate. .
Press and release the
gbutton
again to turn on both systems.
See Traction Control/Electronic
Stability Control 0216.
Tire Pressure Monitor
This vehicle may have a Tire
Pressure Monitor System (TPMS).
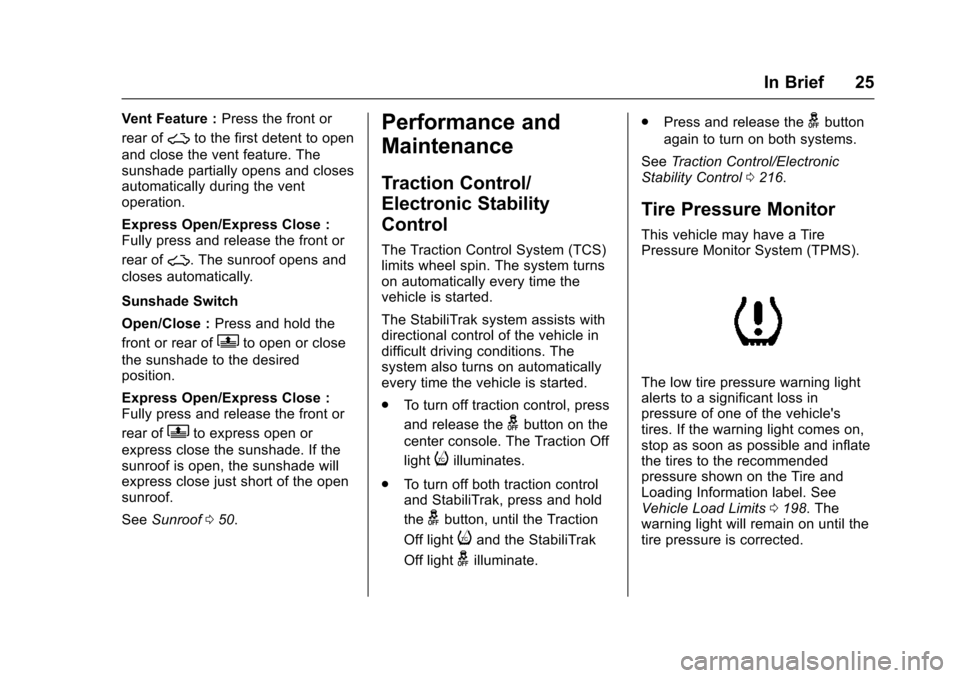
The low tire pressure warning light
alerts to a significant loss in
pressure of one of the vehicle's
tires. If the warning light comes on,
stop as soon as possible and inflate
the tires to the recommended
pressure shown on the Tire and
Loading Information label. See
Vehicle Load Limits 0198. The
warning light will remain on until the
tire pressure is corrected.
Page 34 of 377
Chevrolet Impala Owner Manual (GMNA-Localizing-U.S/Canada-9086448) -
2016 - CRC - 5/20/15
Keys, Doors, and Windows 33
If a key is lost or damaged, see your
dealer to have a new key made.
Programming without a
Recognized Transmitter (Key
Vehicles Only)
Program a new key to the vehicle
when a recognized key is not
available. Canadian regulations
require that owners see their dealer.
If there are no currently recognized
keys available, follow this procedure
to program the first key.
This procedure will take
approximately 30 minutes to
complete for the first key. The
vehicle must be off and all of the
keys you wish to program must be
with you.1. Insert the new vehicle key into the ignition.
2. Turn to ON/RUN. The security light will come on.
3. Wait 10 minutes until the security light turns off.
4. Turn the ignition to LOCK/OFF. 5. Repeat Steps 2–4 two more
times. After the third time, turn
to ON/RUN; the key is learned
and all previously known keys
will no longer work with the
vehicle.
Remaining keys can be learned by
following the procedure in
“Programming with a Recognized
Transmitter.”
Programming with a Recognized
Transmitter (Keyless Access
Vehicles Only)
A new transmitter can be
programmed to the vehicle when
there is one recognized transmitter.
To program, the vehicle must be off
and at least one currently
recognized transmitter and all new
transmitters, must be with you. 1. Place the recognized transmitter(s) in the cupholder.
2. Remove the key lock cylinder cap. See Door Locks 037.
Then insert the vehicle key into
the key lock cylinder on the
driver door handle and turn the key, counterclockwise, to the
unlock position five times within
10 seconds.
The Driver Information Center
(DIC) displays READY FOR
REMOTE #2, 3, 4 or 5.
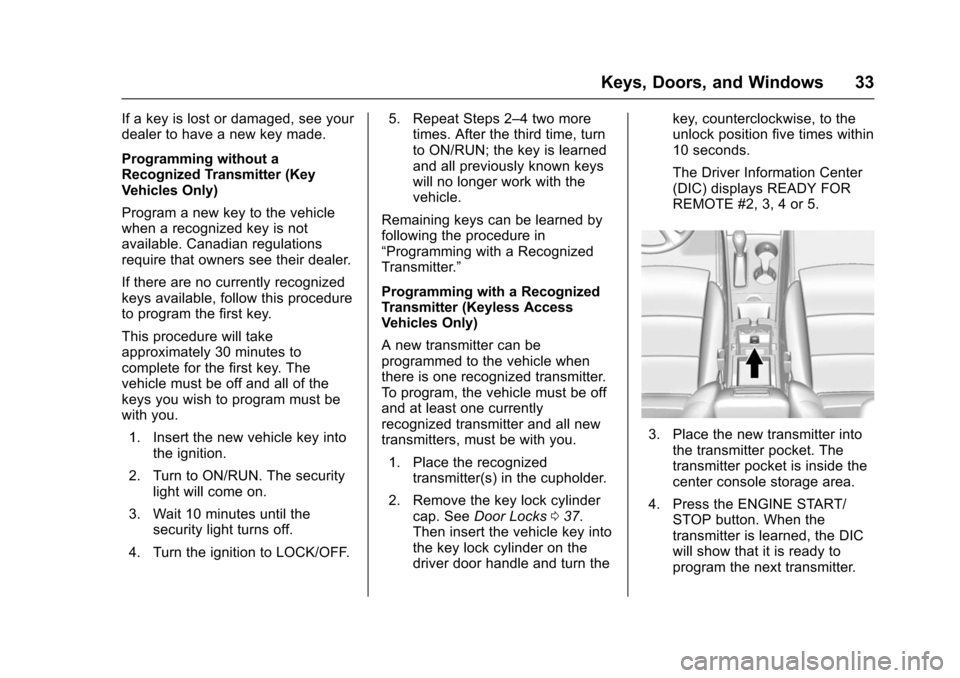
3. Place the new transmitter into
the transmitter pocket. The
transmitter pocket is inside the
center console storage area.
4. Press the ENGINE START/ STOP button. When the
transmitter is learned, the DIC
will show that it is ready to
program the next transmitter.
Page 35 of 377
Chevrolet Impala Owner Manual (GMNA-Localizing-U.S/Canada-9086448) -
2016 - CRC - 5/20/15
34 Keys, Doors, and Windows
5. Remove the transmitter fromthe transmitter pocket and
press
K.
To program additional
transmitters, repeat Steps 3–5.
When all additional transmitters
are programmed, press and
hold the ENGINE START/
STOP button for 12 seconds to
exit programming mode.
Programming without a
Recognized Transmitter (Keyless
Access Vehicles Only)
If there are no currently recognized
transmitters available, follow this
procedure to program up to eight
transmitters. This feature is not
available in Canada. This procedure
will take approximately 30 minutes
to complete. The vehicle must be off
and all of the transmitters you wish
to program must be with you. 1. Remove the key lock cylinder cap. See Door Locks 037.
Then insert the vehicle key into
the key lock cylinder on the
driver door handle and turn the key, counterclockwise, to the
unlock position five times within
10 seconds.
The Driver Information Center
(DIC) displays REMOTE
LEARN PENDING,
PLEASE WAIT.
2. Wait for 10 minutes until the DIC displays PRESS ENGINE
START BUTTON TO LEARN
and then press the ENGINE
START/STOP button.
The DIC displays will again
show REMOTE LEARN
PENDING, PLEASE WAIT.
3. Repeat Step 2 two additional times. After the third time, all
previously known transmitters
will no longer work with the
vehicle. Remaining transmitters
can be relearned during the
next steps.
The DIC display should now
show READY FOR REMOTE
# 1. 4. Place the new transmitter into
the transmitter pocket. The
transmitter pocket is inside the
center console storage area.
5. Press the ENGINE START/ STOP button. When the
transmitter is learned, the DIC
will show that it is ready to
program the next transmitter.
6. Remove the transmitter from the transmitter pocket and
press
K.
To program additional
transmitters, repeat Steps 4–6.
When all additional transmitters
are programmed, press and
hold the ENGINE START/
STOP button for 12 seconds to
exit programming mode.
Starting the Vehicle with a Low
Transmitter Battery or Wireless
Interference
If the transmitter battery is weak or
there is wireless interference, the
DIC may display NO REMOTE
DETECTED or PLACE
TRANSMITTER IN POCKET TO
Page 36 of 377
Chevrolet Impala Owner Manual (GMNA-Localizing-U.S/Canada-9086448) -
2016 - CRC - 5/20/15
Keys, Doors, and Windows 35
START when you try to start the
vehicle. The REPLACE BATTERY
IN REMOTE KEY message may
also be displayed at this time.
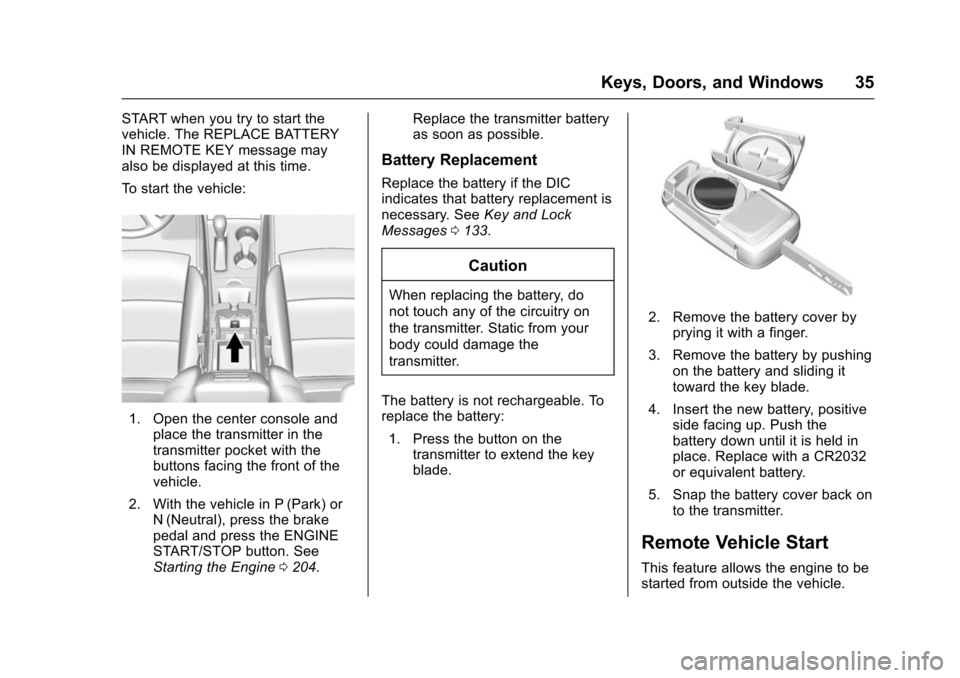
To start the vehicle:
1. Open the center console andplace the transmitter in the
transmitter pocket with the
buttons facing the front of the
vehicle.
2. With the vehicle in P (Park) or N (Neutral), press the brake
pedal and press the ENGINE
START/STOP button. See
Starting the Engine 0204. Replace the transmitter battery
as soon as possible.
Battery Replacement
Replace the battery if the DIC
indicates that battery replacement is
necessary. See
Key and Lock
Messages 0133.
Caution
When replacing the battery, do
not touch any of the circuitry on
the transmitter. Static from your
body could damage the
transmitter.
The battery is not rechargeable. To
replace the battery: 1. Press the button on the transmitter to extend the key
blade.
2. Remove the battery cover by
prying it with a finger.
3. Remove the battery by pushing on the battery and sliding it
toward the key blade.
4. Insert the new battery, positive side facing up. Push the
battery down until it is held in
place. Replace with a CR2032
or equivalent battery.
5. Snap the battery cover back on to the transmitter.
Remote Vehicle Start
This feature allows the engine to be
started from outside the vehicle.
Page 45 of 377
Chevrolet Impala Owner Manual (GMNA-Localizing-U.S/Canada-9086448) -
2016 - CRC - 5/20/15
44 Keys, Doors, and Windows
The security light in the instrument
cluster comes on if there is a
problem with arming or disarming
the theft-deterrent system.
When trying to start the vehicle, the
security light comes on briefly when
the ignition is turned on.
If the engine does not start and the
security light stays on, there is a
problem with the system. Turn the
ignition off and try again.
If the engine still does not start, and
the key appears to be undamaged
or the light continues to stay on, try
another ignition key.
If the engine still does not start with
the other key, the vehicle needs
service. If the vehicle does start, the
first key may be damaged. See your
dealer who can service the
theft-deterrent system and have a
new key made.Do not leave the key or device that
disarms or deactivates the
theft-deterrent system in the vehicle.
Immobilizer Operation
(Keyless Access)
This vehicle has a passive
theft-deterrent system.
The system does not have to be
manually armed or disarmed.
The vehicle is automatically
immobilized when the transmitter
leaves the vehicle.
The immobilization system is
disarmed when the ignition button is
pressed and a valid transmitter is
found in the vehicle.
The security light in the instrument
cluster comes on when there is a
problem with arming or disarming
the theft-deterrent system.The system has one or more
transmitters matched to an
immobilizer control unit in your
vehicle. Only a correctly matched
transmitter will start the vehicle.
If the transmitter is ever damaged,
you may not be able to start your
vehicle.
When trying to start the vehicle, the
security light comes on briefly when
the ignition is turned on.
If the engine does not start and the
security light stays on, there is a
problem with the system. Turn the
vehicle off and try again.
If the RKE transmitter appears to be
undamaged, try another transmitter.
Or, you may try placing the
transmitter in the transmitter pocket
in the center console. See
“Starting
the Vehicle with a Low Transmitter
Battery or Wireless Interference”
under Remote Keyless Entry (RKE)
System Operation 030.
If the engine does not start with the
other transmitter or when the
transmitter is in the pocket in the
center console, your vehicle needs
service. See your dealer who can
Page 61 of 377
Chevrolet Impala Owner Manual (GMNA-Localizing-U.S/Canada-9086448) -
2016 - CRC - 5/20/15
60 Seats and Restraints
If the memory position is still not
recalling, see your dealer for
service.
Heated and Ventilated
Front Seats
{Warning
If you cannot feel temperature
change or pain to the skin, the
seat heater may cause burns. To
reduce the risk of burns, people
with such a condition should use
care when using the seat heater,
especially for long periods of
time. Do not place anything on
the seat that insulates against
heat, such as a blanket, cushion,
cover, or similar item. This may
cause the seat heater to
overheat. An overheated seat
heater may cause a burn or may
damage the seat.
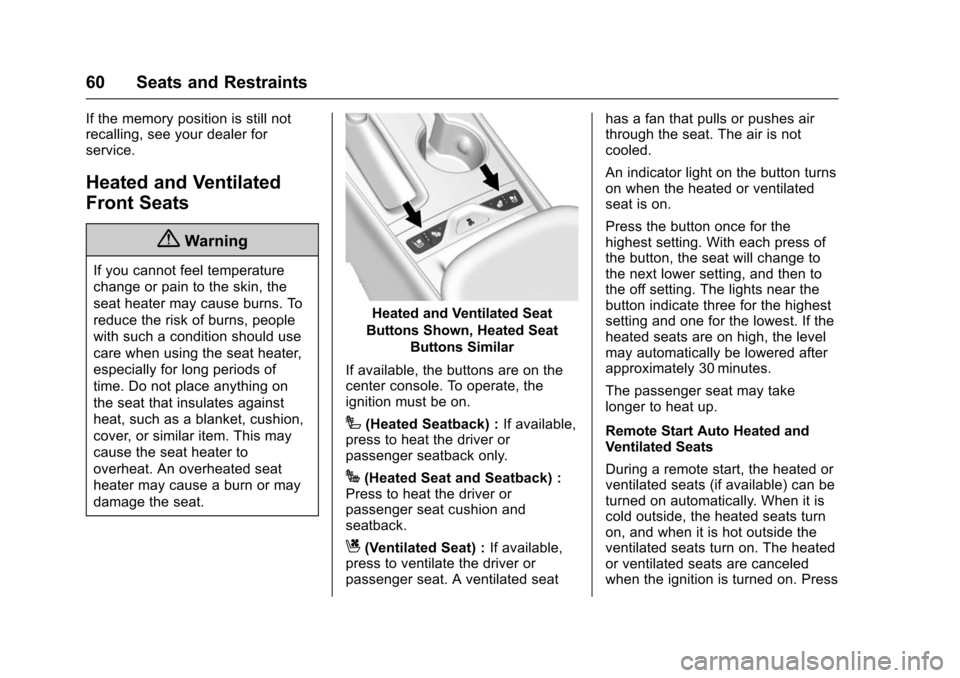
Heated and Ventilated Seat
Buttons Shown, Heated Seat Buttons Similar
If available, the buttons are on the
center console. To operate, the
ignition must be on.
I(Heated Seatback) : If available,
press to heat the driver or
passenger seatback only.
J(Heated Seat and Seatback) :
Press to heat the driver or
passenger seat cushion and
seatback.
C(Ventilated Seat) : If available,
press to ventilate the driver or
passenger seat. A ventilated seat has a fan that pulls or pushes air
through the seat. The air is not
cooled.
An indicator light on the button turns
on when the heated or ventilated
seat is on.
Press the button once for the
highest setting. With each press of
the button, the seat will change to
the next lower setting, and then to
the off setting. The lights near the
button indicate three for the highest
setting and one for the lowest. If the
heated seats are on high, the level
may automatically be lowered after
approximately 30 minutes.
The passenger seat may take
longer to heat up.
Remote Start Auto Heated and
Ventilated Seats
During a remote start, the heated or
ventilated seats (if available) can be
turned on automatically. When it is
cold outside, the heated seats turn
on, and when it is hot outside the
ventilated seats turn on. The heated
or ventilated seats are canceled
when the ignition is turned on. Press