start stop button CHEVROLET IMPALA 2020 Owner's Manual
[x] Cancel search | Manufacturer: CHEVROLET, Model Year: 2020, Model line: IMPALA, Model: CHEVROLET IMPALA 2020Pages: 328, PDF Size: 5.07 MB
Page 13 of 328
Chevrolet Impala Owner Manual (GMNA-Localizing-U.S./Canada-13688912) -
2020 - CRC - 6/5/19
12 Keys, Doors, and Windows
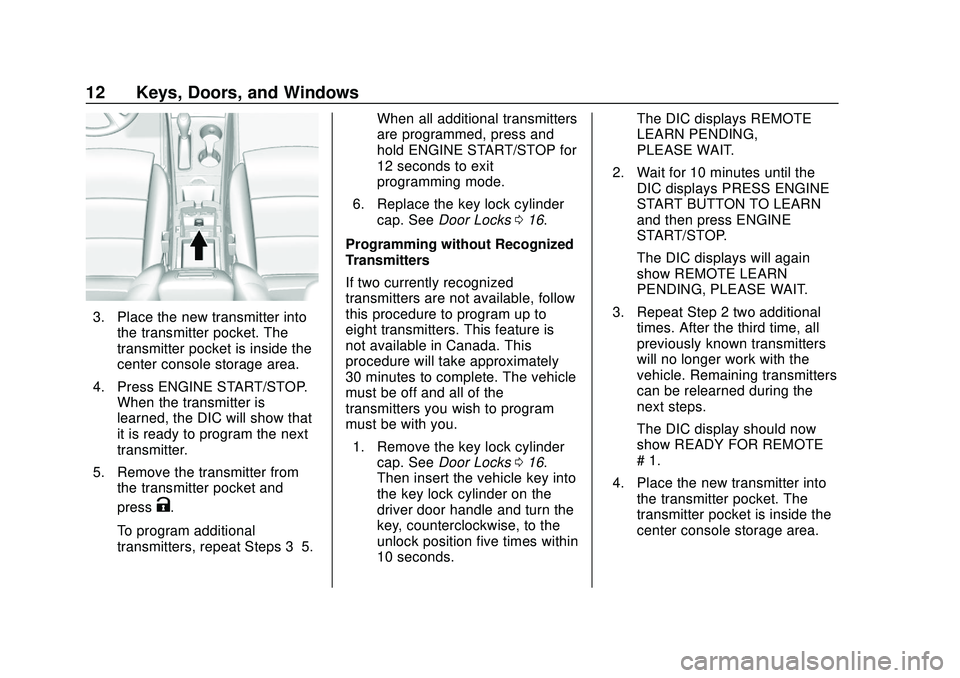
3. Place the new transmitter intothe transmitter pocket. The
transmitter pocket is inside the
center console storage area.
4. Press ENGINE START/STOP. When the transmitter is
learned, the DIC will show that
it is ready to program the next
transmitter.
5. Remove the transmitter from the transmitter pocket and
press
K.
To program additional
transmitters, repeat Steps 3–5. When all additional transmitters
are programmed, press and
hold ENGINE START/STOP for
12 seconds to exit
programming mode.
6. Replace the key lock cylinder cap. See Door Locks 016.
Programming without Recognized
Transmitters
If two currently recognized
transmitters are not available, follow
this procedure to program up to
eight transmitters. This feature is
not available in Canada. This
procedure will take approximately
30 minutes to complete. The vehicle
must be off and all of the
transmitters you wish to program
must be with you. 1. Remove the key lock cylinder cap. See Door Locks 016.
Then insert the vehicle key into
the key lock cylinder on the
driver door handle and turn the
key, counterclockwise, to the
unlock position five times within
10 seconds. The DIC displays REMOTE
LEARN PENDING,
PLEASE WAIT.
2. Wait for 10 minutes until the DIC displays PRESS ENGINE
START BUTTON TO LEARN
and then press ENGINE
START/STOP.
The DIC displays will again
show REMOTE LEARN
PENDING, PLEASE WAIT.
3. Repeat Step 2 two additional times. After the third time, all
previously known transmitters
will no longer work with the
vehicle. Remaining transmitters
can be relearned during the
next steps.
The DIC display should now
show READY FOR REMOTE
# 1.
4. Place the new transmitter into the transmitter pocket. The
transmitter pocket is inside the
center console storage area.
Page 14 of 328
Chevrolet Impala Owner Manual (GMNA-Localizing-U.S./Canada-13688912) -
2020 - CRC - 6/5/19
Keys, Doors, and Windows 13
5. Press ENGINE START/STOP.When the transmitter is
learned, the DIC will show that
it is ready to program the next
transmitter.
6. Remove the transmitter from the transmitter pocket and
press
K.
To program additional
transmitters, repeat Steps 4–6.
When all additional transmitters
are programmed, press and
hold ENGINE START/STOP for
12 seconds to exit
programming mode.
7. Replace the key lock cylinder cap. See Door Locks 016.
Starting the Vehicle with a Low
Transmitter Battery or Wireless
Interference
If the transmitter battery is weak or
there is wireless interference, the
DIC may display NO REMOTE
DETECTED or PLACE
TRANSMITTER IN POCKET TO
START when you try to start the vehicle. The DIC may display
REPLACE BATTERY IN
REMOTE KEY.
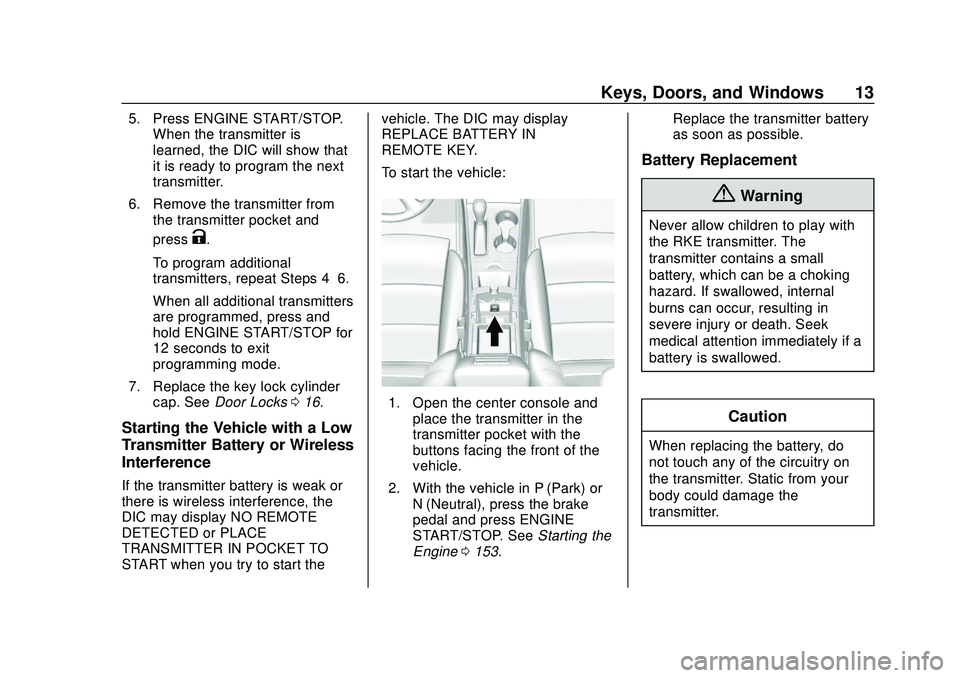
To start the vehicle:
1. Open the center console and
place the transmitter in the
transmitter pocket with the
buttons facing the front of the
vehicle.
2. With the vehicle in P (Park) or N (Neutral), press the brake
pedal and press ENGINE
START/STOP. See Starting the
Engine 0153. Replace the transmitter battery
as soon as possible.
Battery Replacement
{Warning
Never allow children to play with
the RKE transmitter. The
transmitter contains a small
battery, which can be a choking
hazard. If swallowed, internal
burns can occur, resulting in
severe injury or death. Seek
medical attention immediately if a
battery is swallowed.
Caution
When replacing the battery, do
not touch any of the circuitry on
the transmitter. Static from your
body could damage the
transmitter.
Page 40 of 328
Chevrolet Impala Owner Manual (GMNA-Localizing-U.S./Canada-13688912) -
2020 - CRC - 6/5/19
Seats and Restraints 39
2. Adjust all available memoryfeatures to the desired driving
position.
3. Press and release SET; a beep will sound.
4. Immediately press and hold the 1 or 2 memory button matching
the above DIC welcome
message until two beeps
sound.
If too much time passes
between releasing SET and
pressing 1, the memory
position will not be saved and
two beeps will not sound.
Repeat Steps 3 and 4.
1 or 2 corresponds to the driver
number. See “Identifying Driver
Number” previously in this
section.
5. Repeat Steps 1–4 for a second driver using 1 or 2.
To save the position for
Band
easy exit features, repeat Steps 1–4
using
B. This saves the position
for getting out of the vehicle. Save preferred memory feature
positions to both 1 and 2 if you are
the only driver.
Manually Recalling Memory
Positions
Press and hold 1, 2, or
Bto recall
the previously saved memory
positions.
To stop Manual Memory Recall
movement, release 1, 2, or
Bor
press any of the following controls:
. Power seat
. Memory SET
. Power mirror, with the driver or
passenger side mirror selected
. Power steering wheel,
if equipped
Auto Memory Recall
The vehicle identifies the number of
the current driver ’s RKE transmitter
(1–8). See Remote Keyless Entry
(RKE) System Operation 08. If the
RKE transmitter is 1 or 2, and Auto
Memory Recall is programmed on in
vehicle personalization, the positions saved to the same
memory button number 1 or 2 are
automatically recalled when the
ignition is turned on, or turned from
off to ACC/ACCESSORY. RKE
transmitters 3–8 will not provide
automatic memory recalls.
To turn Auto Memory Recall on or
off, see "Vehicle Personalization
Settings" previously in this section
and
Vehicle Personalization 0113.
The shift lever must be in P (Park)
to start Auto Memory Recall. Auto
Memory Recall will complete if the
vehicle is shifted out of P (Park)
prior to reaching the saved memory
position.
To stop Auto Memory Recall
movement, turn the ignition off or
press any of the following controls:
. Power seat
. Memory SET, 1, 2, or
B
.Power mirror, with the driver or
passenger side mirror selected
. Power steering wheel,
if equipped
Page 136 of 328
Chevrolet Impala Owner Manual (GMNA-Localizing-U.S./Canada-13688912) -
2020 - CRC - 6/5/19
Climate Controls 135
Fan Control :Turn the knob
clockwise or counterclockwise to
increase or decrease the fan speed.
Press AUTO to return to automatic
operation.
Air Delivery Modes : Press
Y,\,
[, or-to change the direction of
the airflow. An indicator light comes
on in the selected mode button.
Changing the mode cancels the
automatic operation and the system
goes into manual mode. Press
AUTO to return to automatic
operation.
Y: Air is directed to the instrument
panel outlets.
\: Air is directed to the instrument
panel outlets and the floor outlets.
[: Air is directed to the floor
outlets.
-: Air is directed to the windshield
and floor outlets to clear the
windows of fog or moisture.
0: Press to clear the windshield
of fog or frost more quickly. Air is
directed to the windshield and side
window outlets.
For best results, clear all snow and
ice from the windshield before
defrosting.
A/C : Press to cycle between the
off, eco, and comfort air conditioning
modes. The indicator will be lit in
comfort and eco modes and turns
off when there is no A/C function.
If the fan is turned off, the air
conditioner will not run and the
indicator light may turn off.
Press AUTO to return to automatic
operation and the air conditioner
runs automatically as needed. When
the indicator light is on, the air
conditioner runs automatically to
cool the air inside the vehicle or to
dry the air as needed to defog the
windshield faster.
For comfort a/c, press A/C. The
indicator will turn amber.
For eco a/c, press A/C again. The
indicator will turn green. This setting
balances fuel economy and air conditioning comfort. In warm
weather conditions, Auto Stops may
occur more frequently and the
vehicle interior may be warmer as
compared to the comfort air
conditioning setting. This setting
allows higher humidity inside the
vehicle and window fogging before
the engine restarts.
L:
Press to turn on
recirculation. An indicator light
comes on. Air is recirculated to
quickly cool the inside of the vehicle
or prevent outside air and odors
from entering.
Auto Defog : The climate control
system may have a sensor to
automatically detect high humidity
inside the vehicle. When high
humidity is detected, the climate
control system may adjust to
outside air supply and turn on the
air conditioner. The fan speed may
slightly increase to help prevent
fogging. If the climate control
system does not detect possible
window fogging, it returns to normal
operation. To turn Auto Defog off or
Page 152 of 328
Chevrolet Impala Owner Manual (GMNA-Localizing-U.S./Canada-13688912) -
2020 - CRC - 6/11/19
Driving and Operating 151
Starting and
Operating
New Vehicle Break-In
Caution
The vehicle does not need an
elaborate break-in. But it will
perform better in the long run if
you follow these guidelines:. Do not drive at any one
constant speed, fast or slow,
for the first 800 km (500 mi).
Do not make full-throttle
starts. Avoid downshifting to
brake or slow the vehicle.
. Avoid making hard stops for
the first 300 km (200 mi) or
so. During this time the new
brake linings are not yet
broken in. Hard stops with
new linings can mean
premature wear and earlier
replacement. Follow this
(Continued)
Caution (Continued)
breaking-in guideline every
time you get new brake
linings.
Following break-in, engine speed
and load can be gradually
increased.
Ignition Positions
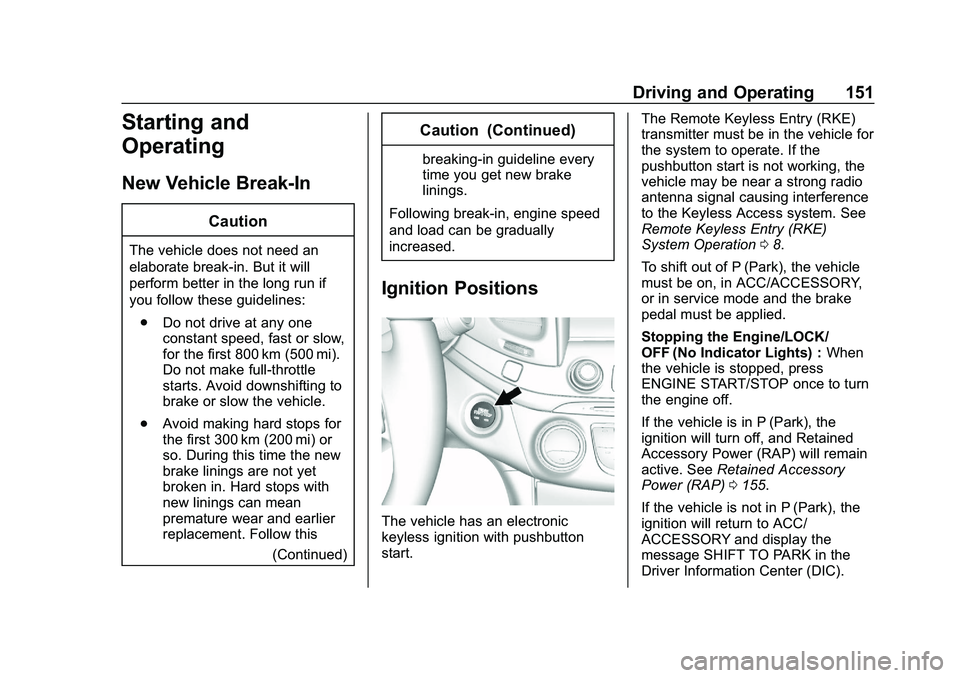
The vehicle has an electronic
keyless ignition with pushbutton
start. The Remote Keyless Entry (RKE)
transmitter must be in the vehicle for
the system to operate. If the
pushbutton start is not working, the
vehicle may be near a strong radio
antenna signal causing interference
to the Keyless Access system. See
Remote Keyless Entry (RKE)
System Operation
08.
To shift out of P (Park), the vehicle
must be on, in ACC/ACCESSORY,
or in service mode and the brake
pedal must be applied.
Stopping the Engine/LOCK/
OFF (No Indicator Lights) : When
the vehicle is stopped, press
ENGINE START/STOP once to turn
the engine off.
If the vehicle is in P (Park), the
ignition will turn off, and Retained
Accessory Power (RAP) will remain
active. See Retained Accessory
Power (RAP) 0155.
If the vehicle is not in P (Park), the
ignition will return to ACC/
ACCESSORY and display the
message SHIFT TO PARK in the
Driver Information Center (DIC).
Page 153 of 328
Chevrolet Impala Owner Manual (GMNA-Localizing-U.S./Canada-13688912) -
2020 - CRC - 6/11/19
152 Driving and Operating
When the vehicle is shifted into
P (Park), the ignition system will
turn off.
Do not turn the engine off when the
vehicle is moving. This will cause a
loss of power assist in the brake
and steering systems and disable
the airbags.
If the vehicle must be shut off in an
emergency:1. Brake using a firm and steady pressure. Do not pump the
brakes repeatedly. This may
deplete power assist, requiring
increased brake pedal force.
2. Shift the vehicle to N (Neutral). This can be done while the
vehicle is moving. After shifting
to N (Neutral), firmly apply the
brakes and steer the vehicle to
a safe location.
3. Come to a complete stop, shift to P (Park), and turn the
ignition off. The shift lever must
be in P (Park) to turn the
ignition off. 4. Set the parking brake. See
Electric Parking Brake 0161.
{Warning
Turning off the vehicle while
moving may cause loss of power
assist in the brake and steering
systems and disable the airbags.
While driving, only shut the
vehicle off in an emergency.
If the vehicle cannot be pulled over,
and must be shut off while driving,
press and hold ENGINE START/
STOP for longer than two seconds,
or press twice in five seconds.
ACC/ACCESSORY (Amber
Indicator Light) : This mode allows
some electrical accessories to be
used when the engine is off.
With the ignition off, pressing the
button one time without the brake
pedal applied will place the ignition
system in ACC/ACCESSORY. The ignition will switch from ACC/
ACCESSORY to off after
five minutes to prevent battery
rundown.
ON/RUN/START (Green Indicator
Light) :
This mode is for driving and
starting. With the ignition off and the
brake pedal applied, pressing the
button once will place the ignition
system in ON/RUN/START. Once
engine cranking begins, release the
button. Engine cranking will
continue until the engine starts. See
Starting the Engine 0153. The
ignition will then remain in ON/RUN.
Service Mode
This power mode is available for
service and diagnostics, and to
verify the proper operation of the
malfunction indicator lamp as may
be required for emission inspection
purposes. With the vehicle off and
the brake pedal not applied,
pressing and holding ENGINE
START/STOP for more than
five seconds will place the vehicle in
Service Mode. The instruments and
audio systems will operate as they
do in ON/RUN, but the vehicle will
Page 154 of 328
Chevrolet Impala Owner Manual (GMNA-Localizing-U.S./Canada-13688912) -
2020 - CRC - 6/11/19
Driving and Operating 153
not be able to be driven. The engine
will not start in Service Mode. Press
ENGINE START/STOP again to turn
the vehicle off.
Starting the Engine
Move the shift lever to P (Park) or
N (Neutral). To restart the engine
when the vehicle is already moving,
use N (Neutral) only.
Caution
Do not try to shift to P (Park) if the
vehicle is moving. If you do, you
could damage the transmission.
Shift to P (Park) only when the
vehicle is stopped.
Caution
If you add electrical parts or
accessories, you could change
the way the engine operates. Any
resulting damage would not be(Continued)
Caution (Continued)
covered by the vehicle warranty.
SeeAdd-On Electrical Equipment
0 197.
Starting Procedure 1. The Remote Keyless Entry (RKE) transmitter must
be in the vehicle. Press
ENGINE START/STOP with the
brake pedal applied. The
engine will continue cranking
until it starts.
The idle speed will go down as
the engine gets warm. Do not
race the engine immediately
after starting it.
If the RKE transmitter is not in
the vehicle, if there is
interference, or if the RKE
battery is low, a Driver
Information Center (DIC)
message will display. See
Driver Information Center (DIC)
0110.
Caution
Cranking the engine for long
periods of time, by trying to start
the engine immediately after
cranking has ended, can overheat
and damage the cranking motor,
and drain the battery. Wait at
least 15 seconds between each
try, to let the cranking motor
cool down.
2. If the engine does not start after five to 10 seconds,
especially in very cold weather
(below −18 °C or 0 °F), it could
be flooded with too much
gasoline. Try pushing the
accelerator pedal all the way to
the floor and holding it there as
you press ENGINE START/
STOP, for up to a maximum of
15 seconds. Wait at least
15 seconds between each try,
to allow the cranking motor to
cool down. When the engine
starts, let go of the button and
the accelerator. If the vehicle
Page 161 of 328
Chevrolet Impala Owner Manual (GMNA-Localizing-U.S./Canada-13688912) -
2020 - CRC - 6/11/19
160 Driving and Operating
Manual Mode
Driver Shift Control (DSC)
To use this feature, if equipped:1. Move the shift lever from D (Drive) rearward to
M (Manual Mode).
While driving in Manual Mode,
the transmission will remain in
the driver selected gear. When
coming to a stop in the manual
position, the vehicle will
automatically shift into
1 (First) gear.
2. Using the button on the shift lever, press the + (plus) end of
the button to upshift, or press
the−(minus) end of the button
to downshift.
The Driver Information Center (DIC)
in the instrument cluster will change
from the currently displayed
message to the letter “M,”for
Manual position, and a number
indicating the requested gear. While using the DSC feature the
transmission will have firmer shifting
and sportier performance. You can
use this for sport driving or when
climbing hills to stay in gear longer
or to downshift for more power or
engine braking.
The transmission will only allow you
to shift into gears appropriate for the
vehicle speed and engine
revolutions per minute (rpm):
.
The transmission will not allow
shifting to the next higher gear if
the vehicle speed or engine rpm
is too low.
. The transmission will not allow
shifting to the next lower gear if
the vehicle speed or engine rpm
is too high.
Second Gear Start Feature
When accelerating the vehicle from
a stop in snowy and icy conditions,
you may want to shift into
2 (Second) gear. A higher gear
allows you to gain more traction on
slippery surfaces. With the DSC feature, the vehicle
can be set to pull away in
2 (Second) gear.
1. Move the shift lever from D (Drive) to M (Manual Mode).
2. With the vehicle stopped, press the + (plus) end of the button to
select 2 (Second) gear. The
vehicle will start from a stop
position in 2 (Second) gear.
3. Once moving, select the desired drive gear.
Page 165 of 328
Chevrolet Impala Owner Manual (GMNA-Localizing-U.S./Canada-13688912) -
2020 - CRC - 6/11/19
164 Driving and Operating
vehicle wheel brakes to assist the
driver in keeping the vehicle on the
intended path.
If cruise control is being used and
TCS or StabiliTrak/ESC begins to
limit wheel spin, cruise control will
disengage. Cruise control may be
turned back on when road
conditions allow.
Both systems come on
automatically when the vehicle is
started and begins to move. The
systems may be heard or felt while
they are operating or while
performing diagnostic checks. This
is normal and does not mean there
is a problem with the vehicle.
It is recommended to leave both
systems on for normal driving
conditions, but it may be necessary
to turn TCS off if the vehicle gets
stuck in sand, mud, ice, or snow.
SeeIf the Vehicle Is Stuck 0147
and “Turning the Systems Off and
On” later in this section.
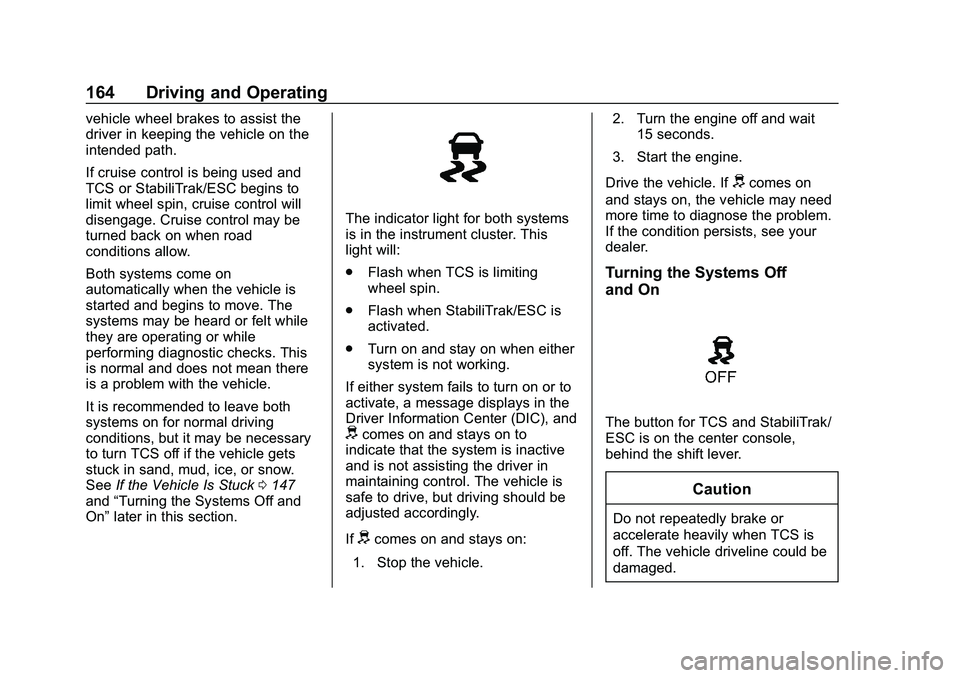
The indicator light for both systems
is in the instrument cluster. This
light will:
.
Flash when TCS is limiting
wheel spin.
. Flash when StabiliTrak/ESC is
activated.
. Turn on and stay on when either
system is not working.
If either system fails to turn on or to
activate, a message displays in the
Driver Information Center (DIC), and
dcomes on and stays on to
indicate that the system is inactive
and is not assisting the driver in
maintaining control. The vehicle is
safe to drive, but driving should be
adjusted accordingly.
If
dcomes on and stays on:
1. Stop the vehicle. 2. Turn the engine off and wait
15 seconds.
3. Start the engine.
Drive the vehicle. If
dcomes on
and stays on, the vehicle may need
more time to diagnose the problem.
If the condition persists, see your
dealer.
Turning the Systems Off
and On
The button for TCS and StabiliTrak/
ESC is on the center console,
behind the shift lever.
Caution
Do not repeatedly brake or
accelerate heavily when TCS is
off. The vehicle driveline could be
damaged.
Page 245 of 328
Chevrolet Impala Owner Manual (GMNA-Localizing-U.S./Canada-13688912) -
2020 - CRC - 6/5/19
244 Vehicle Care
could prevent the TPMS from
functioning properly. SeeBuying
New Tires 0247.
. Operating electronic devices or
being near facilities using radio
wave frequencies similar to the
TPMS could cause the TPMS
sensors to malfunction.
If the TPMS is not functioning
properly it cannot detect or signal a
low tire pressure condition. See
your dealer for service if the TPMS
malfunction light and DIC message
comes on and stays on.
TPMS Sensor Matching
Process
Each TPMS sensor has a unique
identification code. The identification
code needs to be matched to a new
tire/wheel position after rotating the
vehicle’s tires or replacing one or
more of the TPMS sensors. The
TPMS sensor matching process
should also be performed after
replacing a spare tire with a road
tire containing the TPMS sensor.
The malfunction light and the DIC
message should go off at the next ignition cycle. The sensors are
matched to the tire/wheel positions,
using a TPMS relearn tool, in the
following order: driver side front tire,
passenger side front tire, passenger
side rear tire, and driver side rear.
See your dealer for service or to
purchase a relearn tool. A TPMS
relearn tool can also be purchased.
See Tire Pressure Monitor Sensor
Activation Tool at
www.gmtoolsandequipment.com or
call 1-800-GM TOOLS
(1-800-468-6657).
There are two minutes to match the
first tire/wheel position, and
five minutes overall to match all four
tire/wheel positions. If it takes
longer, the matching process stops
and must be restarted.
The TPMS sensor matching
process is:
1. Set the parking brake.
2. Place the vehicle in Service Mode. See Ignition Positions
0 151. 3. Make sure the Tire Pressure
info page option is turned on.
The info pages on the DIC can
be turned on and off through
the Settings menu. See Driver
Information Center (DIC) 0110.
4. Use the DIC controls on the right side of the steering wheel
to scroll to the Tire Pressure
screen under the DIC
info page.
5. Press and hold
Vin the center
of the DIC controls.
The horn sounds twice to
signal the receiver is in relearn
mode and the TIRE
LEARNING ACTIVE message
displays on the DIC screen.
6. Start with the driver side front tire.
7. Place the relearn tool against the tire sidewall, near the valve
stem. Then press the button to
activate the TPMS sensor.
A horn chirp confirms that the
sensor identification code has
been matched to this tire and
wheel position.