headlamp CHEVROLET KODIAK 2006 User Guide
[x] Cancel search | Manufacturer: CHEVROLET, Model Year: 2006, Model line: KODIAK, Model: CHEVROLET KODIAK 2006Pages: 398, PDF Size: 5.72 MB
Page 219 of 398
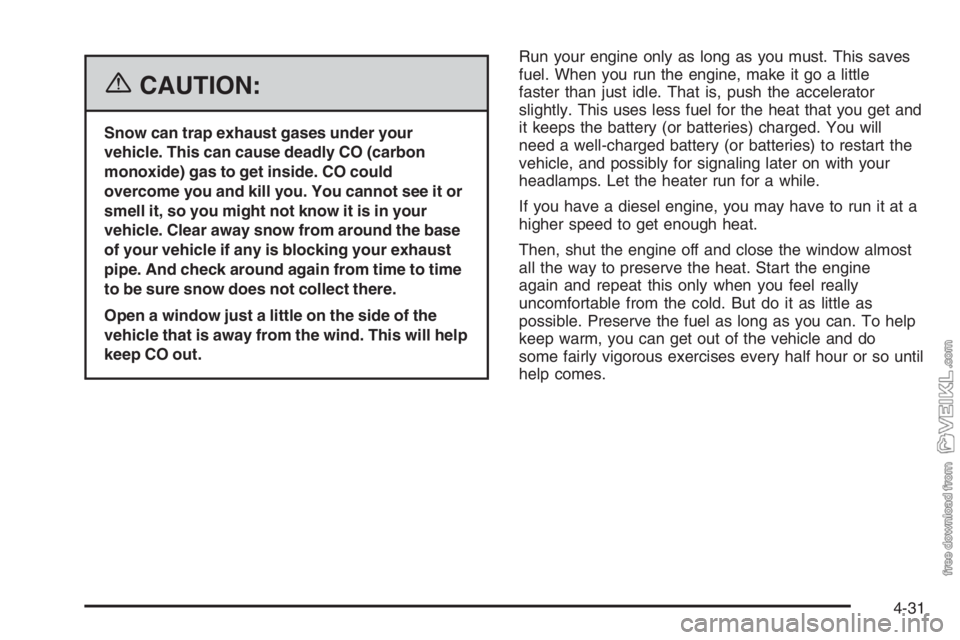
{CAUTION:
Snow can trap exhaust gases under your
vehicle. This can cause deadly CO (carbon
monoxide) gas to get inside. CO could
overcome you and kill you. You cannot see it or
smell it, so you might not know it is in your
vehicle. Clear away snow from around the base
of your vehicle if any is blocking your exhaust
pipe. And check around again from time to time
to be sure snow does not collect there.
Open a window just a little on the side of the
vehicle that is away from the wind. This will help
keep CO out.Run your engine only as long as you must. This saves
fuel. When you run the engine, make it go a little
faster than just idle. That is, push the accelerator
slightly. This uses less fuel for the heat that you get and
it keeps the battery (or batteries) charged. You will
need a well-charged battery (or batteries) to restart the
vehicle, and possibly for signaling later on with your
headlamps. Let the heater run for a while.
If you have a diesel engine, you may have to run it at a
higher speed to get enough heat.
Then, shut the engine off and close the window almost
all the way to preserve the heat. Start the engine
again and repeat this only when you feel really
uncomfortable from the cold. But do it as little as
possible. Preserve the fuel as long as you can. To help
keep warm, you can get out of the vehicle and do
some fairly vigorous exercises every half hour or so until
help comes.
4-31
Page 230 of 398
Other Service Items........................................5-70
Fuel Filter....................................................5-70
Primary Fuel Filter and Water Separator..........5-71
Secondary Fuel Filter and Water
Separator/Heater (Caterpillar
®Diesel)...........5-71
Automatic Ether Injection System
(Caterpillar
®Diesel)....................................5-72
Front Wheel Bearings with Oil-Filled Hubs........5-73
Air Conditioning System.................................5-74
Tires..............................................................5-74
Inflation - Tire Pressure.................................5-75
Wheel Loading.............................................5-75
Dual Tire Operation.......................................5-76
When It Is Time for New Tires.......................5-76
Wheel Alignment and Tire Balance..................5-77
Tightening the Wheel Nuts.............................5-77
Wheel Replacement......................................5-81
If a Tire Goes Flat........................................5-82
Appearance Care............................................5-83
Cleaning the Inside of Your Vehicle.................5-83
Fabric/Carpet...............................................5-85
Instrument Panel, Vinyl, and Other Plastic
Surfaces..................................................5-86
Care of Safety Belts......................................5-86
Weatherstrips...............................................5-86
Washing Your Vehicle...................................5-87Cleaning Exterior Lamps/Lenses.....................5-87
Finish Care..................................................5-87
Windshield and Wiper Blades.........................5-88
Aluminum or Chrome-Plated Wheels................5-89
Tires...........................................................5-89
Sheet Metal Damage.....................................5-89
Finish Damage.............................................5-89
Underbody Maintenance................................5-90
Chemical Paint Spotting.................................5-90
Vehicle Identi�cation......................................5-91
Vehicle Identification Number (VIN).................5-91
Service Statement.........................................5-92
Service Parts Identification Label.....................5-92
Electrical System............................................5-92
Add-On Electrical Equipment..........................5-92
Headlamp Wiring..........................................5-93
Windshield Wiper Fuses................................5-93
Fusible Links................................................5-93
Power Windows and Other Power Options.......5-93
Fuses and Circuit Breakers............................5-93
Instrument Panel Fuse Block..........................5-94
Underhood Fuse Block..................................5-96
Capacities and Speci�cations..........................5-99
Normal Maintenance Replacement Parts.........5-104
Section 5 Service and Appearance Care
5-2
Page 309 of 398
Wheel Replacement
Replace any wheel that is bent, cracked or badly rusted
or corroded. If wheel nuts keep coming loose, replace
the wheel. If the wheel leaks air, replace it.
Your dealer will know the kind of wheel you need.
Each new wheel should have the same load-carrying
capacity, diameter, width, offset and be mounted
the same way as the one it replaces.
If you need to replace any of your wheels, wheel bolts
or wheel nuts, replace them only with new GM original
equipment parts. This way, you will be sure to have the
right wheel, wheel bolts and wheel nuts for your vehicle.
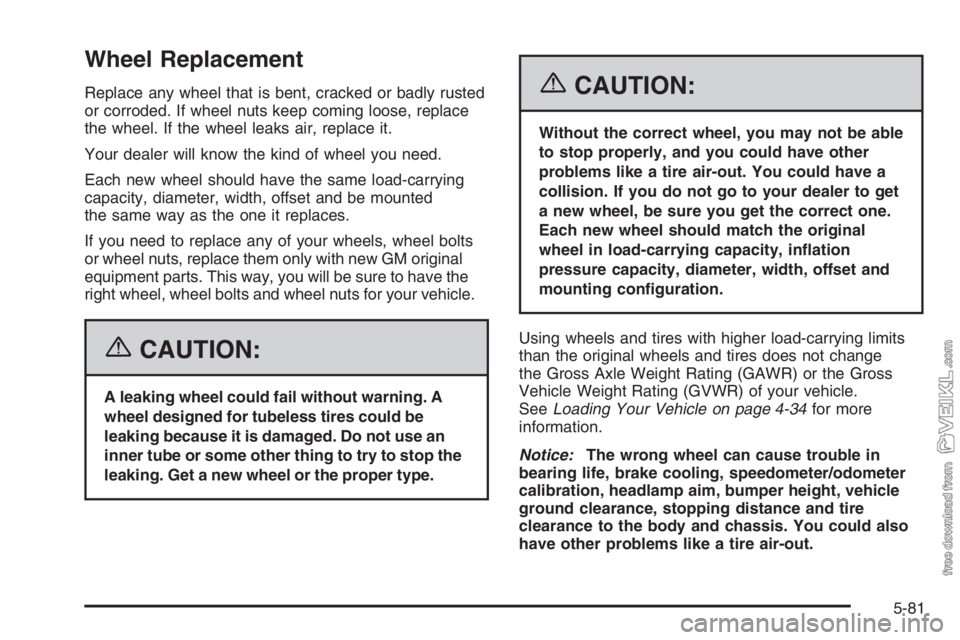
{CAUTION:
A leaking wheel could fail without warning. A
wheel designed for tubeless tires could be
leaking because it is damaged. Do not use an
inner tube or some other thing to try to stop the
leaking. Get a new wheel or the proper type.
{CAUTION:
Without the correct wheel, you may not be able
to stop properly, and you could have other
problems like a tire air-out. You could have a
collision. If you do not go to your dealer to get
a new wheel, be sure you get the correct one.
Each new wheel should match the original
wheel in load-carrying capacity, in�ation
pressure capacity, diameter, width, offset and
mounting con�guration.
Using wheels and tires with higher load-carrying limits
than the original wheels and tires does not change
the Gross Axle Weight Rating (GAWR) or the Gross
Vehicle Weight Rating (GVWR) of your vehicle.
SeeLoading Your Vehicle on page 4-34for more
information.
Notice:The wrong wheel can cause trouble in
bearing life, brake cooling, speedometer/odometer
calibration, headlamp aim, bumper height, vehicle
ground clearance, stopping distance and tire
clearance to the body and chassis. You could also
have other problems like a tire air-out.
5-81
Page 321 of 398
Headlamp Wiring
The headlamp wiring is protected by a circuit breaker in
the light switch. An electrical overload will cause the
lights to go on and off, or in some cases to remain off. If
this happens, have your headlamp wiring checked
right away.
Windshield Wiper Fuses
The windshield wiper motor is protected by a circuit
breaker inside the motor and a circuit breaker or fuse in
the fuse block. If the motor overheats, the wipers will
stop until the motor cools. If the overload is caused by
an electrical problem, be sure to get it fixed.
Fusible Links
A fusible link is a short piece of wire several gauge
sizes smaller than the circuit it protects. It will melt in an
overload situation, opening the circuit.
Your starter and other circuits have these fusible links.
The size is printed on the insulation. If the insulation
is burned beyond recognition, consult your GM dealer
for the proper size. Replace a fusible link with one of the
same size and insulation type. Fusible link insulation
is a special purpose high-temperature material.The hydraulic brake booster motor feed circuit and
starter circuit are protected by a fusible link. Vehicles
with a diesel engine have a fusible link for the intake
heater feed circuit.
Power Windows and Other
Power Options
Circuit breakers in the fuse panel protect the power
windows and other power accessories. When the current
load is too heavy, the circuit breaker opens. This
protects the circuit until the current load returns to
normal or the problem is fixed.
Fuses and Circuit Breakers
The wiring circuits in your vehicle are protected from
short circuits by a combination of fuses, circuit breakers,
maxi-fuses and fusible links. This greatly reduces the
chance of a fire caused by an electrical problem. There
may be a fuse taped to the wiring harness near the
hydraulic brake booster.
5-93
Page 326 of 398
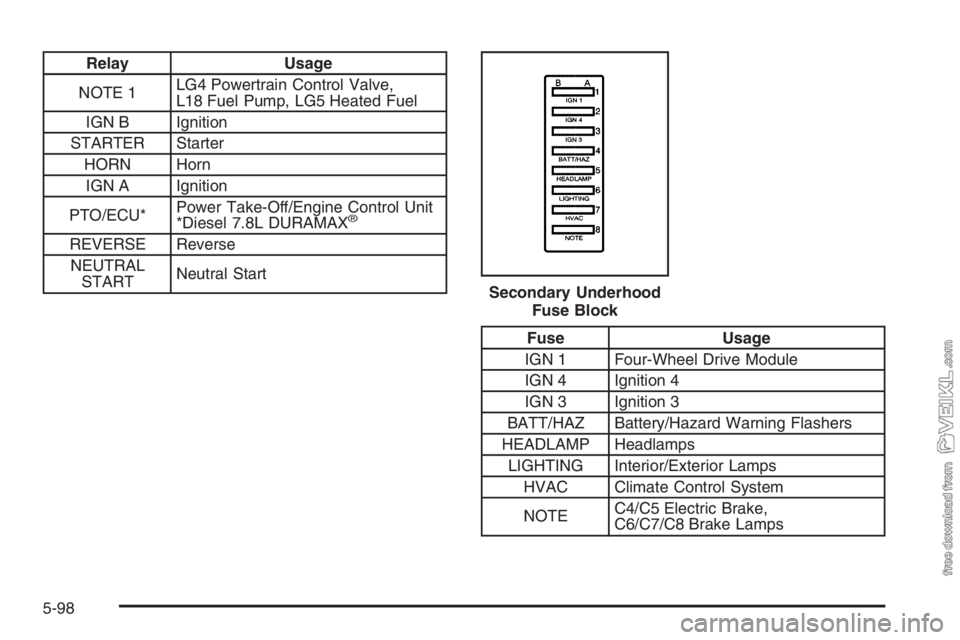
Relay Usage
NOTE 1LG4 Powertrain Control Valve,
L18 Fuel Pump, LG5 Heated Fuel
IGN B Ignition
STARTER Starter
HORN Horn
IGN A Ignition
PTO/ECU*Power Take-Off/Engine Control Unit
*Diesel 7.8L DURAMAX
®
REVERSE Reverse
NEUTRAL
STARTNeutral Start
Fuse Usage
IGN 1 Four-Wheel Drive Module
IGN 4 Ignition 4
IGN 3 Ignition 3
BATT/HAZ Battery/Hazard Warning Flashers
HEADLAMP Headlamps
LIGHTING Interior/Exterior Lamps
HVAC Climate Control System
NOTEC4/C5 Electric Brake,
C6/C7/C8 Brake Lamps Secondary Underhood
Fuse Block
5-98
Page 365 of 398
Exhaust System Check
Be alert for any changes in the sound of the exhaust
system or any smell of fumes. These are signs the
system may be leaking. Have it checked and/or repaired
at once. Refer toEngine Exhaust on page 2-45and
Running the Engine While Parked on page 2-46.
Windshield Wipers and Washers Check
Check operation and condition of the wiper blades.
Check the flow of the washer spray.
Defroster Check
Move the control to the defrost symbol and the fan to
HI or the high symbol. Then check the airflow from
the ducts at the inside base of the windshield.
Mirrors and Sun Visors Check
Check that friction joints hold mirrors and sun visors in
place.
Seat Adjuster Check
When adjusting a manual seat, be sure seat adjusters
latch by attempting to move the seat after latching.
Lamps Check
Check panel lighting, warning lights, indicator lights, and
interior lamps. On the outside, check: license plate
lamps, sidemarker lamps, reflectors or lights on outside
mirrors, headlamps, parking lamps, identification and
clearance lamps, taillamps, brake lamps, turn signals,
backup lamps, and hazard warning flashers. Have
headlamp aim checked at once if beams seem
improperly aimed.
Glass, Mirrors, Lamps and/or
Re�ectors Condition Check
Look for broken, scratched, dirty, or damaged glass,
mirrors, lamps, or reflectors that could reduce the view
or visibility or cause injury. Replace, clean or repair
promptly.
Door Latches Check
Check that doors close, latch, and lock tightly. Check for
broken, damaged, or missing parts that might prevent
tight latching.
6-31
Page 388 of 398
Customer Assistance Information (cont.)
Reporting Safety Defects to the
United States Government.........................7-10
Roadside Assistance Program......................... 7-5
Service Publications Ordering Information........7-11
D
Daytime Running Lamps..................................3-15
Daytime Running Lamps Indicator Light.............3-43
Defensive Driving............................................. 4-2
Diesel Engine
Engine Alarm and Automatic Shutdown...........2-20
Exhaust Brake............................................2-27
Exhaust Restrictor.......................................2-22
Fuel............................................................ 5-7
High Idle System.........................................2-21
Starting......................................................2-15
Differential Lock Control, Rear Axle...................4-11
Differential Lock Indicator Light.........................3-42
Doing Your Own Service Work........................... 5-4
Dome Lamps .................................................3-16
Door
Locks.......................................................... 2-6
Power Door Locks......................................... 2-7Driver
Position, Safety Belt.....................................1-15
Driving
At Night.....................................................4-18
City ...........................................................4-23
Defensive..................................................... 4-2
Drunken....................................................... 4-3
Freeway.....................................................4-24
Hill and Mountain Roads..............................4-26
In Rain and on Wet Roads...........................4-20
Rocking Your Vehicle to Get it Out.................4-32
Tow Hooks.................................................4-33
Winter........................................................4-27
Dual Tire Operation.........................................5-76
E
Electrical System
Add-On Equipment......................................5-92
Fuses and Circuit Breakers...........................5-93
Fusible Links..............................................5-93
Headlamp Wiring.........................................5-93
Instrument Panel Fuse Block.........................5-94
Power Windows and Other Power Options......5-93
Underhood Fuse Block.................................5-96
Windshield Wiper Fuses...............................5-93
4
Page 391 of 398
H
Hazard Warning Flashers................................... 3-6
Headlamp Wiring............................................5-93
Headlamps
Bulb Replacement.......................................5-68
Daytime Running Lamps...............................3-15
High/Low Beam Changer................................ 3-8
On Reminder..............................................3-15
Heater...........................................................3-20
High Idle System............................................2-21
Highbeam On Light.........................................3-43
Highway Hypnosis...........................................4-25
Hill and Mountain Roads..................................4-26
Hood
Checking Things Under................................5-22
Latches......................................................5-22
Horn ............................................................... 3-6
Hourmeter Gage.............................................3-47
How to Use This Manual...................................... ii
How to Wear Safety Belts Properly...................1-14
Hydraulic Brake Systems................................... 4-7
Hydraulic Brakes.............................................2-40
I
Ignition Positions.............................................2-12
Infants and Young Children, Restraints...............1-31
Inflation - Tire Pressure...................................5-75
Instrument Panel
Overview..................................................... 3-4
Switchbank.................................................3-18
Instrument Panel (I/P)
Brightness..................................................3-16
Cluster.......................................................3-26
J
Jump Starting.................................................5-59
K
Keyless Entry System....................................... 2-3
Keys............................................................... 2-2
7