four wheel drive CHEVROLET KODIAK 2008 Owners Manual
[x] Cancel search | Manufacturer: CHEVROLET, Model Year: 2008, Model line: KODIAK, Model: CHEVROLET KODIAK 2008Pages: 384, PDF Size: 5.4 MB
Page 1 of 384
Seats and Restraint Systems........................... 1-1
Front Seats
............................................... 1-2
Rear Seats
..............................................1-10
Safety Belts
.............................................1-11
Child Restraints
.......................................1-28
Airbag System
.........................................1-48
Restraint System Check
............................1-60
Features and Controls..................................... 2-1
Keys
........................................................ 2-2
Doors and Locks
....................................... 2-6
Windows
.................................................. 2-8
Starting and Operating Your Vehicle
...........2-10
Mirrors
....................................................2-51
Storage Areas
.........................................2-53
Instrument Panel............................................. 3-1
Instrument Panel Overview
.......................... 3-4
Climate Controls
......................................3-20
Warning Lights, Gages, and Indicators
........3-24
Audio System(s)
.......................................3-47
Driving Your Vehicle....................................... 4-1
Your Driving, the Road, and Your Vehicle
..... 4-2
Towing
...................................................4-24Service and Appearance Care.......................... 5-1
Service
..................................................... 5-4
Fuel
......................................................... 5-7
Checking Things Under the Hood
...............5-22
Rear Axle
...............................................5-72
Four-Wheel Drive
.....................................5-73
Front Axle
...............................................5-74
Noise Control System
...............................5-75
Bulb Replacement
....................................5-76
Windshield Wiper Blade Replacement
.........5-76
Other Service Items
..................................5-78
Tires
......................................................5-82
Appearance Care
.....................................5-94
Vehicle Identification
...............................5-101
Electrical System
....................................5-102
Capacities and Specifications
...................5-109
Maintenance Replacement Parts
...............5-115
Maintenance Schedule..................................... 6-1
Maintenance Schedule
................................ 6-2
Customer Assistance Information.................... 7-1
Customer Assistance and Information
........... 7-2
Reporting Safety Defects
............................ 7-9
Vehicle Data Recording and Privacy
...........7-11
Index................................................................ 1
2008 Chevrolet Kodiak Owner ManualM
Page 67 of 384
Keys...............................................................2-2
Remote Keyless Entry (RKE) System................2-3
Remote Keyless Entry (RKE) System
Operation...................................................2-4
Doors and Locks.............................................2-6
Door Locks....................................................2-6
Power Door Locks..........................................2-7
Windows.........................................................2-8
Manual Windows............................................2-8
Power Windows.............................................2-9
Sliding Rear Window.......................................2-9
Sun Visors....................................................2-9
Starting and Operating Your Vehicle................2-10
New Vehicle Break-In....................................2-10
Ignition Positions..........................................2-11
Engine Starter Over-Crank Protection..............2-12
Starting the Gasoline Engine..........................2-12
Starting the Diesel Engine..............................2-14
Engine Alarm and Automatic Shutdown............2-18
Idle Shutdown..............................................2-19
High Idle System..........................................2-20
Exhaust Restrictor (Engine Warm-Up)..............2-22
Engine Checks Before Operating....................2-23
Engine Coolant Heater..................................2-25Diesel Engine Exhaust Brake.........................2-26
Two-Speed Rear Axle...................................2-27
Automatic Transmission Operation...................2-29
Manual Transmission Operation......................2-30
Power Take-Off (PTO)...................................2-32
Four-Wheel Drive..........................................2-32
Parking.......................................................2-37
Parking Brake (With Hydraulic Brakes).............2-38
Parking Brake (With Air Brakes)......................2-41
Parking Brake Burnish Procedure....................2-43
Air Suspension.............................................2-44
Parking Over Things That Burn.......................2-44
Engine Exhaust............................................2-45
Diesel Particulate Filter (Diesel Engine)............2-46
Running the Vehicle While Parked..................2-50
Mirrors...........................................................2-51
Manual Rearview Mirror.................................2-51
Outside Manual Mirrors..................................2-51
Outside Power Mirrors...................................2-51
Outside Convex Mirrors.................................2-52
Outside Heated Mirrors..................................2-52
Storage Areas................................................2-53
Center Console Storage.................................2-53
Section 2 Features and Controls
2-1
Page 98 of 384
Power Take-Off (PTO)
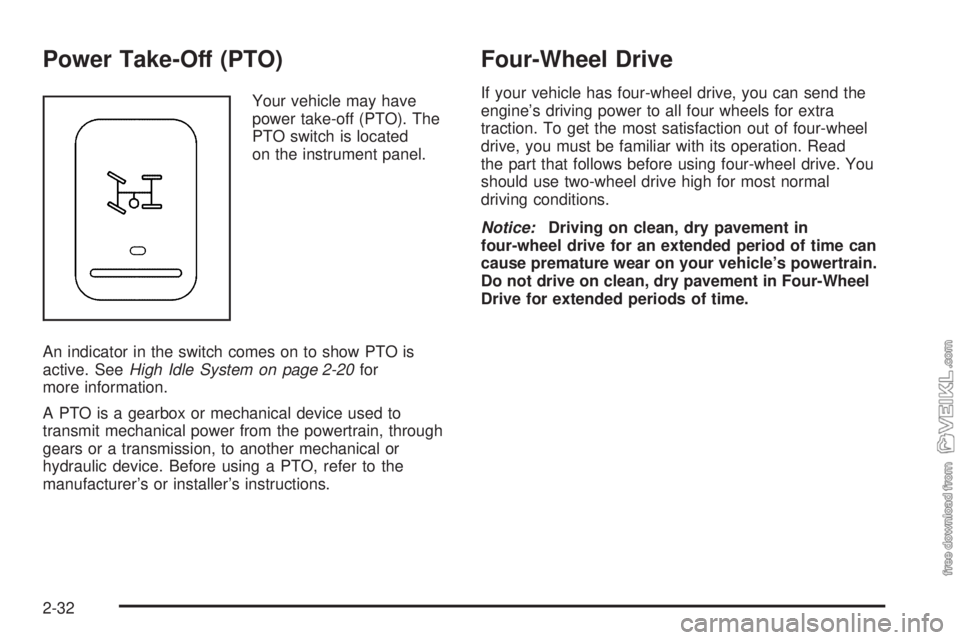
Your vehicle may have
power take-off (PTO). The
PTO switch is located
on the instrument panel.
An indicator in the switch comes on to show PTO is
active. SeeHigh Idle System on page 2-20for
more information.
A PTO is a gearbox or mechanical device used to
transmit mechanical power from the powertrain, through
gears or a transmission, to another mechanical or
hydraulic device. Before using a PTO, refer to the
manufacturer’s or installer’s instructions.
Four-Wheel Drive
If your vehicle has four-wheel drive, you can send the
engine’s driving power to all four wheels for extra
traction. To get the most satisfaction out of four-wheel
drive, you must be familiar with its operation. Read
the part that follows before using four-wheel drive. You
should use two-wheel drive high for most normal
driving conditions.
Notice:Driving on clean, dry pavement in
four-wheel drive for an extended period of time can
cause premature wear on your vehicle’s powertrain.
Do not drive on clean, dry pavement in Four-Wheel
Drive for extended periods of time.
2-32
Page 99 of 384
Locking Hubs
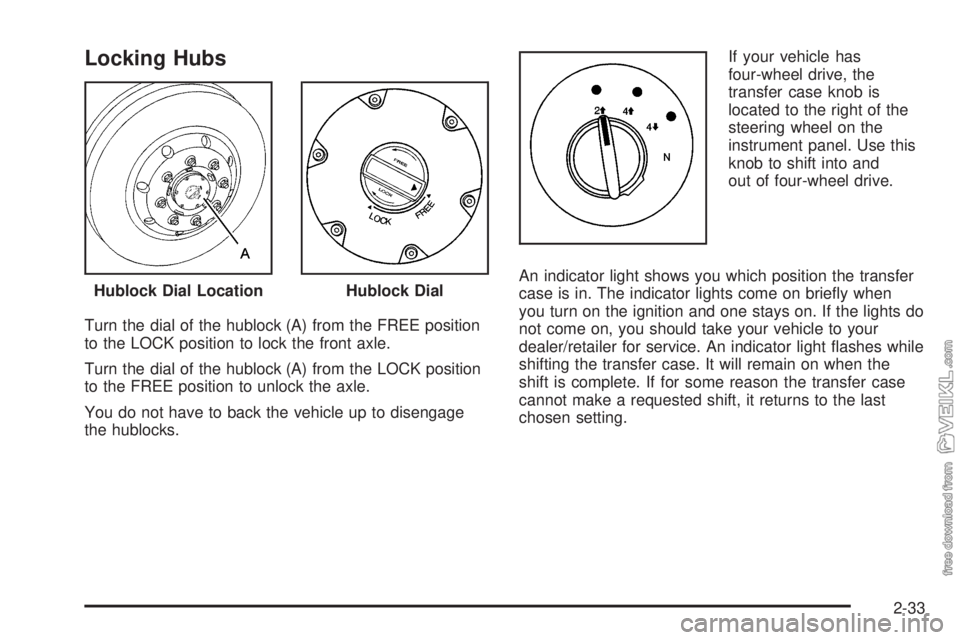
Turn the dial of the hublock (A) from the FREE position
to the LOCK position to lock the front axle.
Turn the dial of the hublock (A) from the LOCK position
to the FREE position to unlock the axle.
You do not have to back the vehicle up to disengage
the hublocks.If your vehicle has
four-wheel drive, the
transfer case knob is
located to the right of the
steering wheel on the
instrument panel. Use this
knob to shift into and
out of four-wheel drive.
An indicator light shows you which position the transfer
case is in. The indicator lights come on briefly when
you turn on the ignition and one stays on. If the lights do
not come on, you should take your vehicle to your
dealer/retailer for service. An indicator light flashes while
shifting the transfer case. It will remain on when the
shift is complete. If for some reason the transfer case
cannot make a requested shift, it returns to the last
chosen setting. Hublock Dial Location
Hublock Dial
2-33
Page 100 of 384
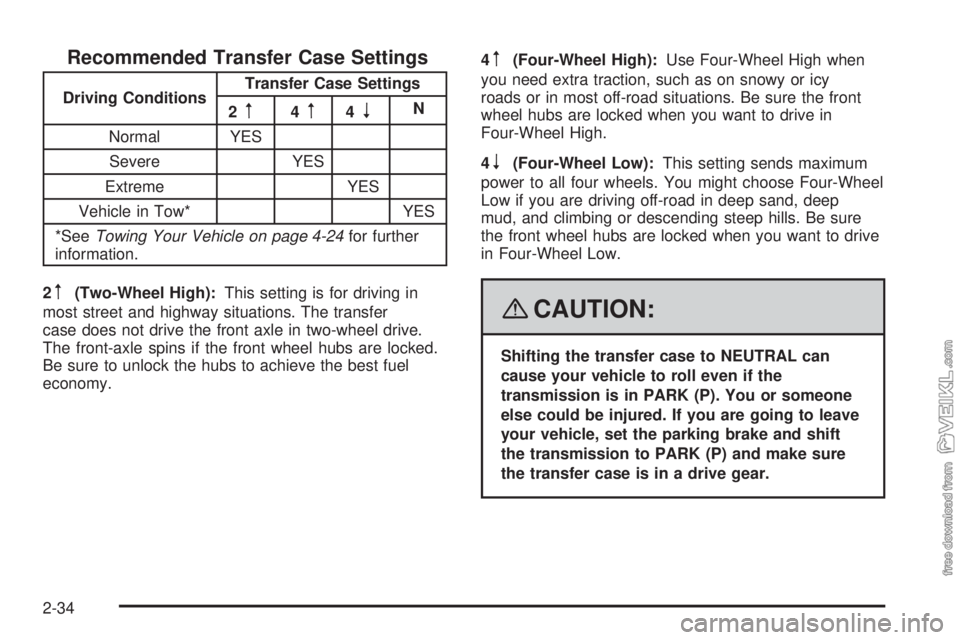
Recommended Transfer Case Settings
Driving ConditionsTransfer Case Settings
2m4m4nN
Normal YES
Severe YES
Extreme YES
Vehicle in Tow* YES
*SeeTowing Your Vehicle on page 4-24for further
information.
2
m(Two-Wheel High):This setting is for driving in
most street and highway situations. The transfer
case does not drive the front axle in two-wheel drive.
The front-axle spins if the front wheel hubs are locked.
Be sure to unlock the hubs to achieve the best fuel
economy.4
m(Four-Wheel High):Use Four-Wheel High when
you need extra traction, such as on snowy or icy
roads or in most off-road situations. Be sure the front
wheel hubs are locked when you want to drive in
Four-Wheel High.
4
n(Four-Wheel Low):This setting sends maximum
power to all four wheels. You might choose Four-Wheel
Low if you are driving off-road in deep sand, deep
mud, and climbing or descending steep hills. Be sure
the front wheel hubs are locked when you want to drive
in Four-Wheel Low.
{CAUTION:
Shifting the transfer case to NEUTRAL can
cause your vehicle to roll even if the
transmission is in PARK (P). You or someone
else could be injured. If you are going to leave
your vehicle, set the parking brake and shift
the transmission to PARK (P) and make sure
the transfer case is in a drive gear.
2-34
Page 101 of 384
Notice:If your vehicle has an Allison®transmission
and you try to put the transmission in PARK (P)
while the transfer case is in Four-Wheel Low,
the transmission might not go into PARK (P) and
could damage your vehicle. When parking your
vehicle, make sure the transfer case is in Two-Wheel
High or Four-Wheel High.
NEUTRAL:Shift the vehicle’s transfer case to
NEUTRAL only when towing your vehicle.
Shifting Into Four-Wheel High
Turn the knob to four-wheel high. This can be done at
3 mph or less, while you are shifting out of Four-Wheel
Low. The indicator light flashes while shifting. It
remains on after the shift is complete. Be sure to lock
your front hubs.
Shifting Into Two-Wheel High
Turn the knob to Two-Wheel High. This can be done
at 3 mph or less, while you are shifting out of
Four-Wheel Low.
Shifting Into Four-Wheel Low
To shift to Four-Wheel Low, the vehicle’s engine must
be running and the vehicle must be stopped or
moving less than 3 mph (5 km/h) with the transmission
in NEUTRAL (N). The preferred method for shifting
into Four-Wheel Low is to have your vehicle moving
1 or 2 mph (1.6 to 3.2 km/h). Turn the knob to
Four-Wheel Low. You must wait for the Four-Wheel Low
indicator light to stop flashing and remain on before
shifting the transmission into gear. Be sure to lock the
front hubs.
Notice:Shifting the transmission into gear before
the Four-Wheel Drive Low indicator light has stopped
�ashing could damage the transfer case. To help
avoid damaging your vehicle, always wait for the
Four-Wheel Drive Low indicator light to stop �ashing
before shifting the transmission into gear.
If you turn the knob to Four-Wheel Low while your
vehicle is in gear and/or moving, the Four-Wheel Low
indicator light flashes for 30 seconds and does not
complete the shift unless your vehicle is moving less
than 3 mph (4.8 km/h) and the transmission is in
NEUTRAL (N). After 30 seconds, the transfer case
returns to the setting last chosen. If your vehicle is in
gear and moving less than 3 mph (4.8 km/h), the
transfer case shifts to Four-Wheel High.
2-35
Page 102 of 384
Shifting Out of Four-Wheel Low
To shift from Four-Wheel Low to Four-Wheel High or
Two-Wheel High, your vehicle must be stopped or
moving less than 3 mph (5 km/h) with the transmission in
NEUTRAL (N) and the engine running. The preferred
method for shifting out of Four-Wheel Low is to have your
vehicle moving 1 or 2 mph (1.6 to 3.2 km/h). Turn the
knob to Four-Wheel High or Two-Wheel High. You must
wait for the Four-Wheel High or Two-Wheel High
indicator light to stop flashing and remain on before
shifting the transmission into gear.
Notice:Shifting the transmission into gear before
the Four-Wheel High or Two-Wheel High indicator
light has stopped �ashing could damage the transfer
case. To help avoid damaging your vehicle, always
wait for the Four-Wheel High or Two-Wheel High
indicator light to stop �ashing before shifting
the transmission into gear.
If the knob is turned to Four-Wheel High or Two-Wheel
High while your vehicle is in gear and/or moving, the
Four-Wheel High or Two-Wheel high indicator light
flashes for 30 seconds. It will not complete the shift
unless your vehicle is moving less than 3 mph (5 km/h)
with the transmission in NEUTRAL (N).
Shifting Into NEUTRAL
Before shifting the transfer case to NEUTRAL, first
make sure the vehicle is parked so that it will not roll.
1. Set the parking brake. SeeParking Brake (With
Hydraulic Brakes) on page 2-38orParking Brake
(With Air Brakes) on page 2-41for parking
brake apply procedure.
2. Start the vehicle.
3. Put the transmission in NEUTRAL (N).
4. Shift the transfer case to Two-Wheel High.
5. Turn the transfer case knob all of the way past
Four-Wheel Low and hold it there for a minimum of
10 seconds. The NEUTRAL indicator light comes on.
6. Shift the transmission to REVERSE (R) for
one second, then shift the transmission to
DRIVE (D) for one second.
7. Turn the ignition to OFF.
8. Place the transmission shift lever in PARK (P).
9. Turn the ignition to LOCK.
2-36
Page 125 of 384
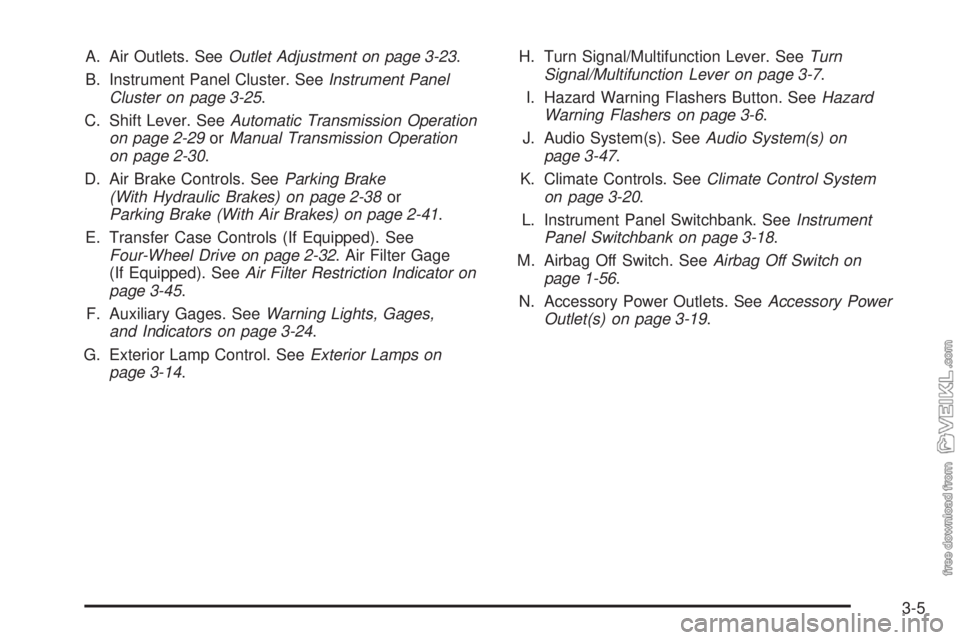
A. Air Outlets. SeeOutlet Adjustment on page 3-23.
B. Instrument Panel Cluster. SeeInstrument Panel
Cluster on page 3-25.
C. Shift Lever. SeeAutomatic Transmission Operation
on page 2-29orManual Transmission Operation
on page 2-30.
D. Air Brake Controls. SeeParking Brake
(With Hydraulic Brakes) on page 2-38or
Parking Brake (With Air Brakes) on page 2-41.
E. Transfer Case Controls (If Equipped). See
Four-Wheel Drive on page 2-32. Air Filter Gage
(If Equipped). SeeAir Filter Restriction Indicator on
page 3-45.
F. Auxiliary Gages. SeeWarning Lights, Gages,
and Indicators on page 3-24.
G. Exterior Lamp Control. SeeExterior Lamps on
page 3-14.H. Turn Signal/Multifunction Lever. SeeTurn
Signal/Multifunction Lever on page 3-7.
I. Hazard Warning Flashers Button. SeeHazard
Warning Flashers on page 3-6.
J. Audio System(s). SeeAudio System(s) on
page 3-47.
K. Climate Controls. SeeClimate Control System
on page 3-20.
L. Instrument Panel Switchbank. SeeInstrument
Panel Switchbank on page 3-18.
M. Airbag Off Switch. SeeAirbag Off Switch on
page 1-56.
N. Accessory Power Outlets. SeeAccessory Power
Outlet(s) on page 3-19.
3-5
Page 182 of 384
Braking
SeeBrake System Warning Light on page 3-32.
Braking action involves perception time and reaction
time. First, you have to decide to push on the brake
pedal. That is perception time. Then you have to bring
up your foot and do it. That is reaction time.
Average reaction time is about three-fourths of a
second. But that is only an average. It might be less
with one driver and as long as two or three seconds or
more with another. Age, physical condition, alertness,
coordination and eyesight all play a part. So do alcohol,
drugs and frustration. But even in three-fourths of a
second, a vehicle moving at 60 mph (100 km/h) travels
66 feet (20 m). That could be a lot of distance in an
emergency, so keeping enough space between
your vehicle and others is important.
And, of course, actual stopping distances vary greatly
with the surface of the road, whether it is pavement
or gravel; the condition of the road, whether it is wet,
dry or icy; tire tread; the condition of the brakes; the
weight of the vehicle; the weight of the load; and
the amount of brake force applied.
Avoid needless heavy braking. Some people drive
in spurts — heavy acceleration followed by heavy
braking — rather than keeping pace with traffic. This is
a mistake. The brakes might not have time to cool
between hard stops. The brakes will wear out muchfaster if you do a lot of heavy braking. If you keep pace
with the traffic and allow realistic following distances,
you will eliminate a lot of unnecessary braking.
That means better braking and longer brake life.
If your vehicle’s engine ever stops while you are driving,
brake normally but do not pump the brakes. If you do, the
pedal could get harder to push down. If the engine stops,
you will still have some power brake assist. But you will
use it when you brake. Once the power assist is used up,
it can take longer to stop and the brake pedal will be
harder to push.
Hydraulic Brake Systems
If the engine stops running, or if the primary brake system
stops working, your vehicle has a reserve power assist
system to help you slow down. Just slowly and steadily
apply the brake pedal until you can safely get off the road.
The pedal will seem harder to push down. Do not pump
the pedal; the system will not work well that way.
You might find that the steering wheel seems hard to turn
when you are turning and braking at the same time. Also,
the primary brake warning light might come on and the
warning tone might sound. This is normal because the
main hydraulic brake system and power steering both use
the power steering pump. If this ever happens, let up on
the brake pedal a little. When you let up on the brake
pedal in that situation, it lets the steering get a little more
help from the pump.
4-4
Page 194 of 384
•Stay in your own lane. Do not swing wide or cut
across the center of the road. Drive at speeds
that let you stay in your own lane.
•Top of hills: Be alert — something could be in your
lane (stalled car, accident).
•Pay attention to special road signs (falling rocks
area, winding roads, long grades, passing or
no-passing zones) and take appropriate action.
Winter Driving
Here are some tips for winter driving:
•Be sure the vehicle is in good shape for winter.
•You might want to put winter emergency supplies in
your vehicle.
Include an ice scraper, a small brush or broom, a
supply of windshield washer fluid, a rag, some winter
outer clothing, a small shovel, a flashlight, a red
cloth, and reflective warning triangles. And, if you will be
driving under severe conditions, include a small bag
of sand, a piece of old carpet, or a couple of burlap bags
to help provide traction. Be sure you properly secure
these items in your vehicle.
Also seeTires on page 5-82.
Driving on Snow or Ice
Most of the time, those places where the tires meet the
road probably have good traction.
However, if there is snow or ice between the tires and
the road, you can have a very slippery situation.
You have a lot less traction, or grip, and need to be
very careful.
What is the worst time for this? Wet ice. Very cold snow
or ice can be slick and hard to drive on. But wet ice
can be even more trouble because it can offer the least
traction of all. You can get wet ice when it is about
freezing, 32°F (0°C), and freezing rain begins to fall. Try
to avoid driving on wet ice until salt and sand crews
can get there.
Whatever the condition — smooth ice, packed, blowing,
or loose snow — drive with caution.
If you have a four-wheel-drive vehicle, shift into 4HI.
SeeFour-Wheel Drive on page 2-32.
4-16