CHEVROLET KODIAK 2009 Owners Manual
Manufacturer: CHEVROLET, Model Year: 2009, Model line: KODIAK, Model: CHEVROLET KODIAK 2009Pages: 376, PDF Size: 5.39 MB
Page 271 of 376
When to Change Lubricant
Refer to the Maintenance Schedule to determine how
often to change the lubricant. SeeScheduled
Maintenance on page 6-5.
What to Use
Refer to the Maintenance Schedule to determine what
kind of lubricant to use. SeePart C: Recommended
Fluids and Lubricants on page 6-31.
Front Axle
When to Check Lubricant
It is not necessary to regularly check front axle fluid
unless you suspect there is a leak or you hear an
unusual noise. A fluid loss could indicate a problem.
Have it inspected and repaired.
Notice:If you drive your vehicle through deep water
that is higher than the front or rear axle, water may
enter the axle housing and cause the axle lubricant to
break down. This could damage the gears inside.
Avoid driving your vehicle through deep water.
You should avoid driving your vehicle through deep
puddles or standing water. If you must drive through
water that is higher than the front or rear axle, see your
dealer immediately afterward to have the condition of
the axle lubricant checked.
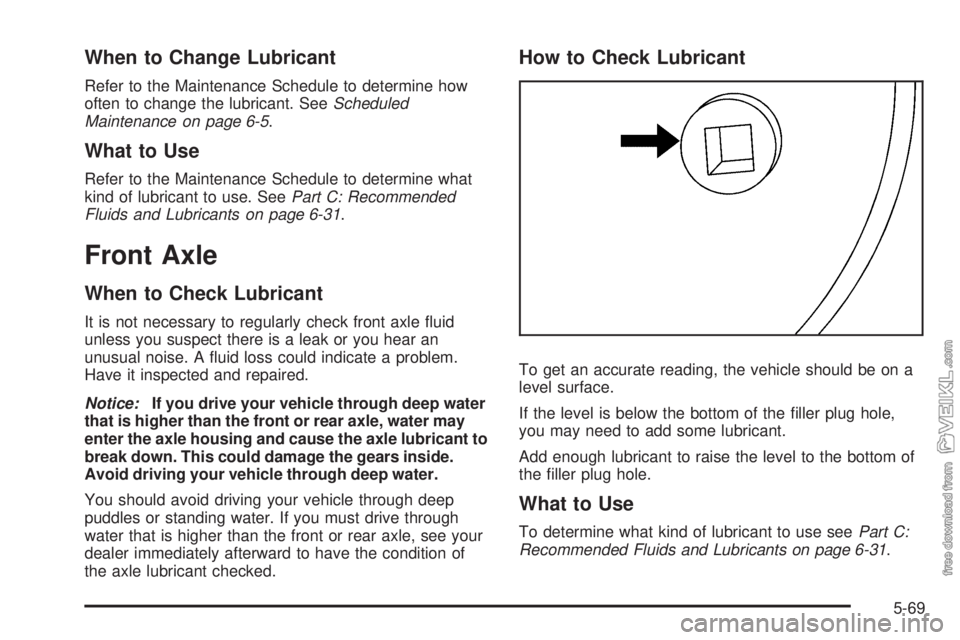
How to Check Lubricant
To get an accurate reading, the vehicle should be on a
level surface.
If the level is below the bottom of the filler plug hole,
you may need to add some lubricant.
Add enough lubricant to raise the level to the bottom of
the filler plug hole.
What to Use
To determine what kind of lubricant to use seePart C:
Recommended Fluids and Lubricants on page 6-31.
5-69
Page 272 of 376
Noise Control System
Tampering with Noise Control
System Prohibited
The following information relates to compliance with
federal noise emission standards for vehicles with a
Gross Vehicle Weight Rating (GVWR) of more than
10,000 lbs (4 536 kg). The Maintenance Schedule
provides information on maintaining the noise control
system to minimize degradation of the noise emission
control system during the life of your vehicle. The noise
control system warranty is given in your warranty booklet.
These standards apply only to vehicles sold in the
United States.
Federal law prohibits the following acts or the causing
thereof:
1. The removal or rendering inoperative by any person,
other than for purposes of maintenance, repair or
replacement, of any device or element of design
incorporated into any new vehicle for the purpose of
noise control, prior to its sale or delivery to the
ultimate purchaser or while it is in use; or
2. The use of the vehicle after such device or element
of design has been removed or rendered inoperative
by any person.Among those acts presumed to constitute tampering are
the acts listed below.
Insulation:
•
Removal of the noise shields or any underhood
insulation.
Engine:
•
Removal or rendering engine speed governor, if the
vehicle has one, inoperative so as to allow engine
speed to exceed manufacturer specifications.
Fan and Drive:
•
Removal of fan clutch, if the vehicle has one, or
rendering clutch inoperative.
•Removal of the fan shroud, if the vehicle has one.
Air Intake:
•
Removal of the air cleaner silencer.
•Modification of the air cleaner.
Exhaust:
•
Removal of the muffler or resonator.
•Removal of the exhaust pipes and exhaust pipe
clamps.
•Removal of the DOC converter, the Diesel
Particulate Filter, or the diesel exhaust gas cooler
device.
5-70
Page 273 of 376
Bulb Replacement
It is recommended that all bulbs be replaced by your
dealer/retailer.
Windshield Wiper Blade
Replacement
Windshield wiper blades should be inspected at least
twice a year for wear or cracking. See “Wiper Blade
Check” underAt Least Twice a Year on page 6-27for
more information.
Replacement blades come in different types and are
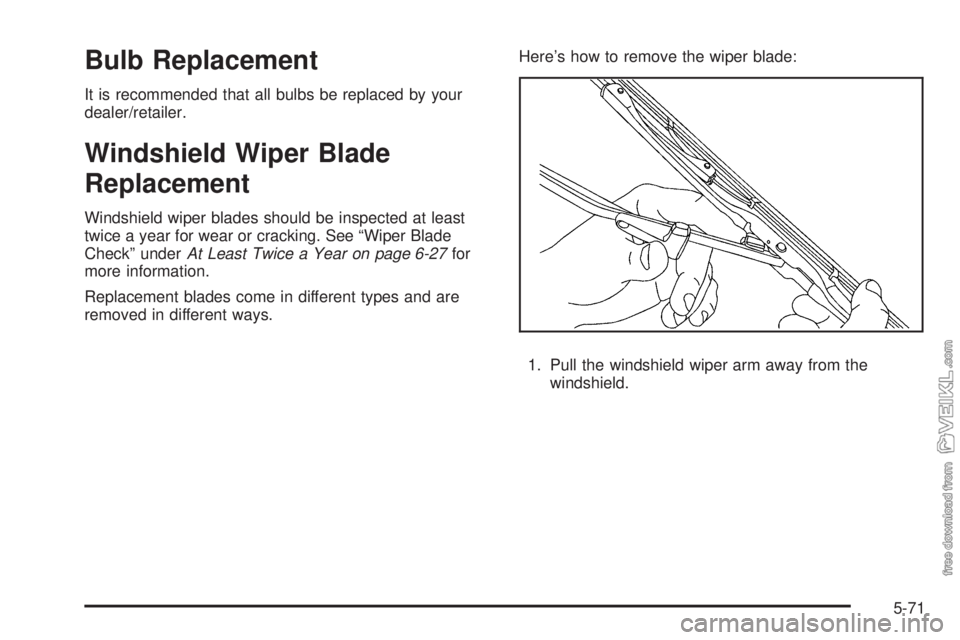
removed in different ways.Here’s how to remove the wiper blade:
1. Pull the windshield wiper arm away from the
windshield.
5-71
Page 274 of 376
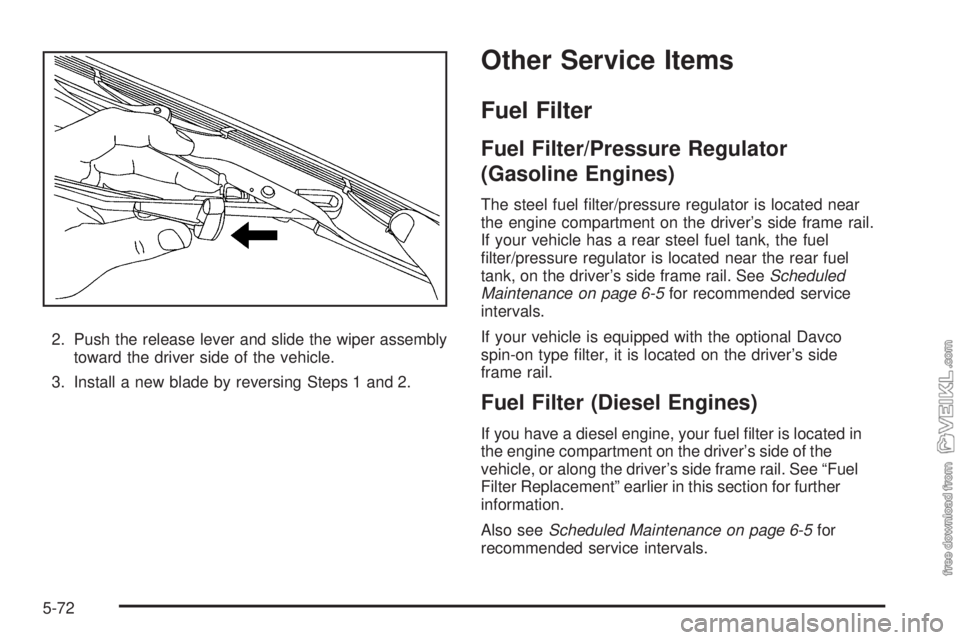
2. Push the release lever and slide the wiper assembly
toward the driver side of the vehicle.
3. Install a new blade by reversing Steps 1 and 2.
Other Service Items
Fuel Filter
Fuel Filter/Pressure Regulator
(Gasoline Engines)
The steel fuel filter/pressure regulator is located near
the engine compartment on the driver’s side frame rail.
If your vehicle has a rear steel fuel tank, the fuel
filter/pressure regulator is located near the rear fuel
tank, on the driver’s side frame rail. SeeScheduled
Maintenance on page 6-5for recommended service
intervals.
If your vehicle is equipped with the optional Davco
spin-on type filter, it is located on the driver’s side
frame rail.
Fuel Filter (Diesel Engines)
If you have a diesel engine, your fuel filter is located in
the engine compartment on the driver’s side of the
vehicle, or along the driver’s side frame rail. See “Fuel
Filter Replacement” earlier in this section for further
information.
Also seeScheduled Maintenance on page 6-5for
recommended service intervals.
5-72
Page 275 of 376
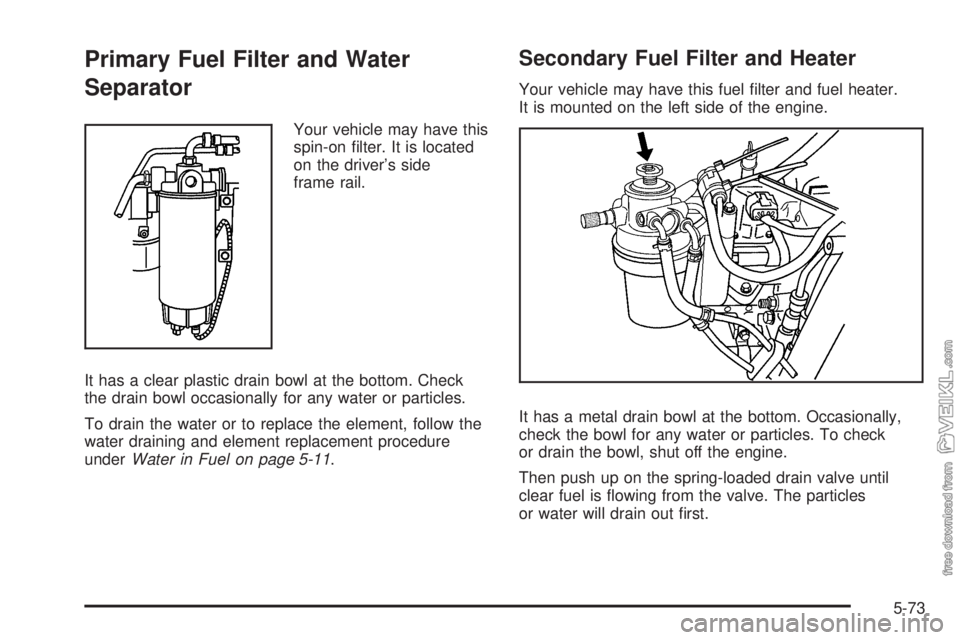
Primary Fuel Filter and Water
Separator
Your vehicle may have this
spin-on filter. It is located
on the driver’s side
frame rail.
It has a clear plastic drain bowl at the bottom. Check
the drain bowl occasionally for any water or particles.
To drain the water or to replace the element, follow the
water draining and element replacement procedure
underWater in Fuel on page 5-11.
Secondary Fuel Filter and Heater
Your vehicle may have this fuel filter and fuel heater.
It is mounted on the left side of the engine.
It has a metal drain bowl at the bottom. Occasionally,
check the bowl for any water or particles. To check
or drain the bowl, shut off the engine.
Then push up on the spring-loaded drain valve until
clear fuel is flowing from the valve. The particles
or water will drain out first.
5-73
Page 276 of 376
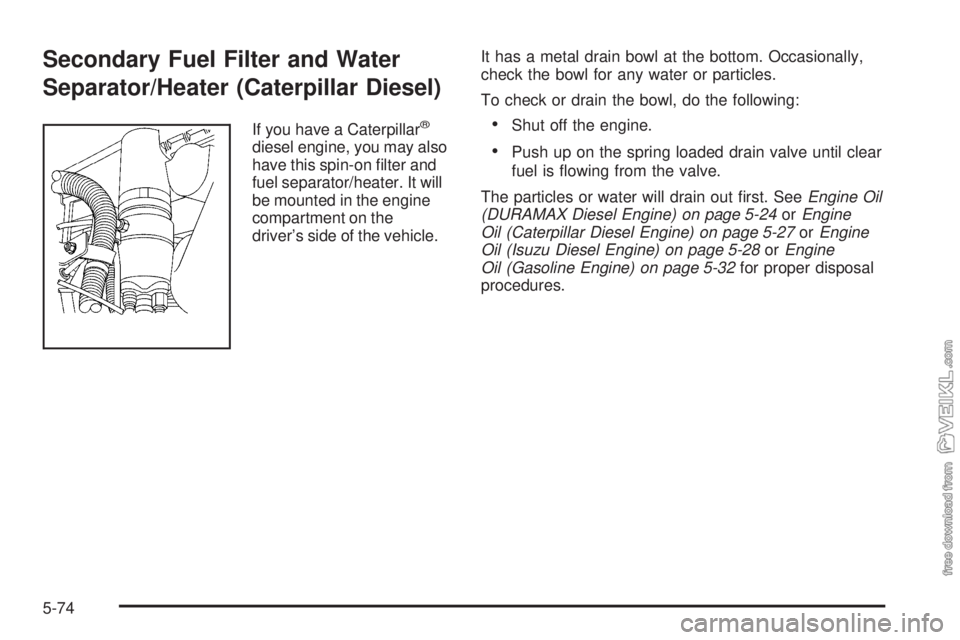
Secondary Fuel Filter and Water
Separator/Heater (Caterpillar Diesel)
If you have a Caterpillar®
diesel engine, you may also
have this spin-on filter and
fuel separator/heater. It will
be mounted in the engine
compartment on the
driver’s side of the vehicle.It has a metal drain bowl at the bottom. Occasionally,
check the bowl for any water or particles.
To check or drain the bowl, do the following:
•Shut off the engine.
•Push up on the spring loaded drain valve until clear
fuel is flowing from the valve.
The particles or water will drain out first. SeeEngine Oil
(DURAMAX Diesel Engine) on page 5-24orEngine
Oil (Caterpillar Diesel Engine) on page 5-27orEngine
Oil (Isuzu Diesel Engine) on page 5-28orEngine
Oil (Gasoline Engine) on page 5-32for proper disposal
procedures.
5-74
Page 277 of 376
Front Wheel Bearings with
Oil-Filled Hubs
Notice:If you drive your vehicle through deep water
that is higher than the front or rear axle, water may
enter the axle housing and cause the axle lubricant to
break down. This could damage the gears inside.
Avoid driving your vehicle through deep water.
You should avoid driving your vehicle through deep
puddles or standing water. If you must drive through
water that is higher than the front or rear axle, see your
dealer immediately afterward to have the condition of
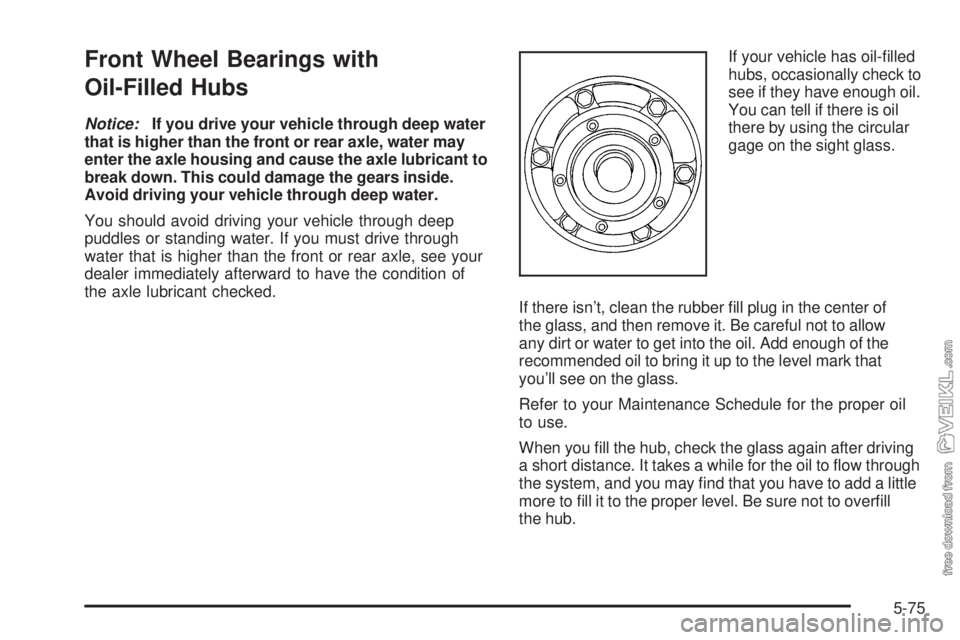
the axle lubricant checked.If your vehicle has oil-filled
hubs, occasionally check to
see if they have enough oil.
You can tell if there is oil
there by using the circular
gage on the sight glass.
If there isn’t, clean the rubber fill plug in the center of
the glass, and then remove it. Be careful not to allow
any dirt or water to get into the oil. Add enough of the
recommended oil to bring it up to the level mark that
you’ll see on the glass.
Refer to your Maintenance Schedule for the proper oil
to use.
When you fill the hub, check the glass again after driving
a short distance. It takes a while for the oil to flow through
the system, and you may find that you have to add a little
more to fill it to the proper level. Be sure not to overfill
the hub.
5-75
Page 278 of 376
Tires
Your new vehicle comes with high-quality tires
made by a leading tire manufacturer. If you ever
have questions about your tire warranty and where
to obtain service, see your vehicle Warranty booklet
for details. For additional information refer to the tire
manufacturer.
{CAUTION:
Poorly maintained and improperly used tires
are dangerous.
•Overloading your vehicle’s tires can
cause overheating as a result of too
much flexing. You could have an air-out
and a serious accident. SeeLoading the
Vehicle on page 4-20.
CAUTION: (Continued)
CAUTION: (Continued)
•
Underinflated tires pose the same danger
as overloaded tires. The resulting accident
could cause serious injury. Check all tires
frequently to maintain the recommended
pressure. Tire pressure should be
checked when your vehicle’s tires are
cold. SeeInflation - Tire Pressure on
page 5-77.
•Overinflated tires are more likely to be
cut, punctured, or broken by a sudden
impact — such as when you hit a pothole.
Keep tires at the recommended pressure.
•Worn, old tires can cause accidents. If the
tire’s tread is badly worn, or if your
vehicle’s tires have been damaged,
replace them.
5-76
Page 279 of 376
Inflation - Tire Pressure
Tires need the correct amount of air pressure to operate
effectively. The Certification or Tire Information label
shows the correct inflation pressures for your tires
when they are cold. Cold means your vehicle has been
sitting for at least three hours or driven no more than
1 mile (1.6 km).
Notice:Do not let anyone tell you that
under-inflation or over-inflation is all right. It is
not. If your tires do not have enough air
(under-inflation), you can get the following:
•Too much flexing
•Too much heat
•Tire overloading
•Premature or irregular wear
•Poor handling
•Reduced fuel economy
If your tires have too much air (over-inflation),
you can get the following:
•Unusual wear
•Poor handling
•Rough ride
•Needless damage from road hazards
When to Check
Check your tires once a month or more.
Also, check the tire pressure of the spare tire if your
vehicle has one.
How to Check
Use a good quality pocket-type gage to check tire
pressure. You cannot tell if your vehicle’s tires are
properly inflated simply by looking at them. Radial
tires may look properly inflated even when they are
underinflated. Check the tire’s inflation pressure when
the tires are cold. Cold means your vehicle has been
sitting for at least three hours or driven no more than
1 mile (1.6 km).
Remove the valve cap from the tire valve stem. Press
the tire gage firmly onto the valve to get a pressure
measurement. If the cold tire inflation pressure matches
the recommended pressure on the Certification or Tire
Information label, no further adjustment is necessary.
If the inflation pressure is low, add air until you reach the
recommended amount. If you overfill the tire, release air
by pushing on the metal stem in the center of the tire
valve. Re-check the tire pressure with the tire gage.
Be sure to put the valve caps back on the valve stems.
They help prevent leaks by keeping out dirt and moisture.
5-77
Page 280 of 376
Wheel Loading
Wheels are stamped with a maximum load and cold
inflation rating. Be sure you do not exceed these limits.
Dual Tire Operation
When the vehicle is new, check the wheel nut tightness
on all wheels with a torque wrench after your first
100 miles (160 km) and then 1,000 miles (1 600 km) after
that. Whenever a wheel, wheel bolt or wheel nut is
removed or serviced, repeat the 100 miles (160 km), and
then 1,000 mile (1 600 km) wheel nut tightness check.
SeeTightening the Wheel Nuts on page 5-80for wheel
nut tightening information and proper torque values.
{CAUTION:
If you operate your vehicle with a tire that is badly
underinflated, the tire can overheat. An overheated
tire can lose air suddenly or catch fire. You or
others could be injured. Be sure all tires (including
the spare, if any) are properly inflated.
SeeTires on page 5-76andInflation - Tire Pressure on
page 5-77for more information on proper tire inflation.
When It Is Time for New Tires
Various factors, such as maintenance, temperatures,
driving speeds, vehicle loading, and road conditions,
influence when you need new tires.
Replace your tires when the tread depth is down to
1/8 of an inch (3.2 mm) for the front tires, or 1/16 of an
inch (1.6 mm) for a rear tire. Also, you need a new
tire if:
•You can see cord or fabric showing through the
tire’s rubber.
•The tread or sidewall is cracked, cut, or snagged
deep enough to show cord or fabric.
•The tire has a bump, bulge, or split.
•The tire has a puncture, cut, or other damage that
cannot be repaired well because of the size or
location of the damage.
The rubber in tires degrades over time, even if they are
not being used. This is also true for the spare tire, if your
vehicle has one. Multiple conditions affect how fast this
aging takes place, including temperatures, loading
conditions, and inflation pressure maintenance. With
proper care and maintenance tires will typically wear out
before they degrade due to age. If you are unsure about
the need to replace your tires as they get older, consult
the tire manufacturer for more information.
5-78