oil capacities CHEVROLET KODIAK 2009 Owners Manual
[x] Cancel search | Manufacturer: CHEVROLET, Model Year: 2009, Model line: KODIAK, Model: CHEVROLET KODIAK 2009Pages: 376, PDF Size: 5.39 MB
Page 204 of 376
Windshield Wiper Blade Replacement..............5-71
Other Service Items........................................5-72
Fuel Filter....................................................5-72
Primary Fuel Filter and Water Separator..........5-73
Secondary Fuel Filter and Water Separator/
Heater (Caterpillar Diesel)............................5-74
Front Wheel Bearings with
Oil-Filled Hubs..........................................5-75
Tires..............................................................5-76
Inflation - Tire Pressure.................................5-77
Wheel Loading.............................................5-78
Dual Tire Operation.......................................5-78
When It Is Time for New Tires.......................5-78
Buying New Tires.........................................5-79
Wheel Alignment and Tire Balance..................5-80
Tightening the Wheel Nuts.............................5-80
Wheel Replacement......................................5-84
If a Tire Goes Flat........................................5-85
Appearance Care............................................5-87
Interior Cleaning...........................................5-87
Fabric/Carpet...............................................5-88
Instrument Panel, Vinyl, and Other
Plastic Surfaces........................................5-89
Care of Safety Belts......................................5-89
Weatherstrips...............................................5-89
Washing Your Vehicle...................................5-90Cleaning Exterior Lamps/Lenses.....................5-90
Finish Care..................................................5-90
Windshield and Wiper Blades.........................5-91
Aluminum or Chrome-Plated Wheels
and Trim..................................................5-92
Tires...........................................................5-92
Sheet Metal Damage.....................................5-93
Finish Damage.............................................5-93
Underbody Maintenance................................5-93
Chemical Paint Spotting.................................5-93
Vehicle Identification
......................................5-94
Vehicle Identification Number (VIN).................5-94
Service Parts Identification Label.....................5-94
Electrical System............................................5-95
Add-On Electrical Equipment..........................5-95
Headlamp Wiring..........................................5-95
Windshield Wiper Fuses................................5-95
Fusible Links................................................5-95
Power Windows and Other Power Options..........5-96
Fuses and Circuit Breakers............................5-96
Instrument Panel Fuse Block..........................5-96
Underhood Fuse Block..................................5-99
Capacities and Specifications........................5-102
Normal Maintenance Replacement Parts.........5-108
Maintenance Replacement Parts...................5-108
Engine Drive Belt Routing............................5-110
Section 5 Service and Appearance Care
5-2
Page 227 of 376
2. Pull out the dipstick and clean it with a paper towel
or a cloth, then push it back in all the way.
3. Remove the dipstick again, keeping the tip down,
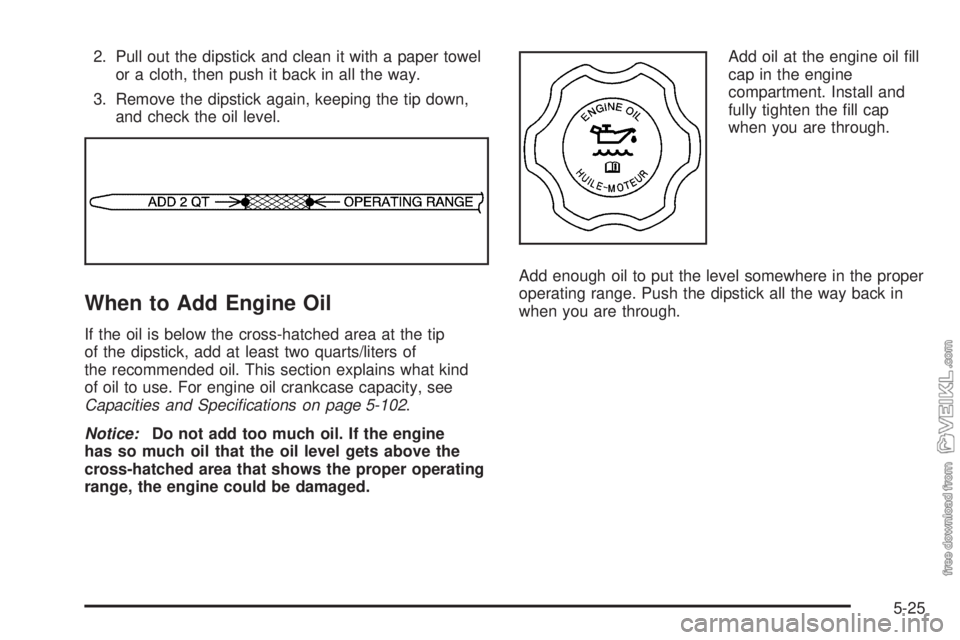
and check the oil level.
When to Add Engine Oil
If the oil is below the cross-hatched area at the tip
of the dipstick, add at least two quarts/liters of
the recommended oil. This section explains what kind
of oil to use. For engine oil crankcase capacity, see
Capacities and Specifications on page 5-102.
Notice:Do not add too much oil. If the engine
has so much oil that the oil level gets above the
cross-hatched area that shows the proper operating
range, the engine could be damaged.Add oil at the engine oil fill
cap in the engine
compartment. Install and
fully tighten the fill cap
when you are through.
Add enough oil to put the level somewhere in the proper
operating range. Push the dipstick all the way back in
when you are through.
5-25
Page 231 of 376
When to Add Engine Oil
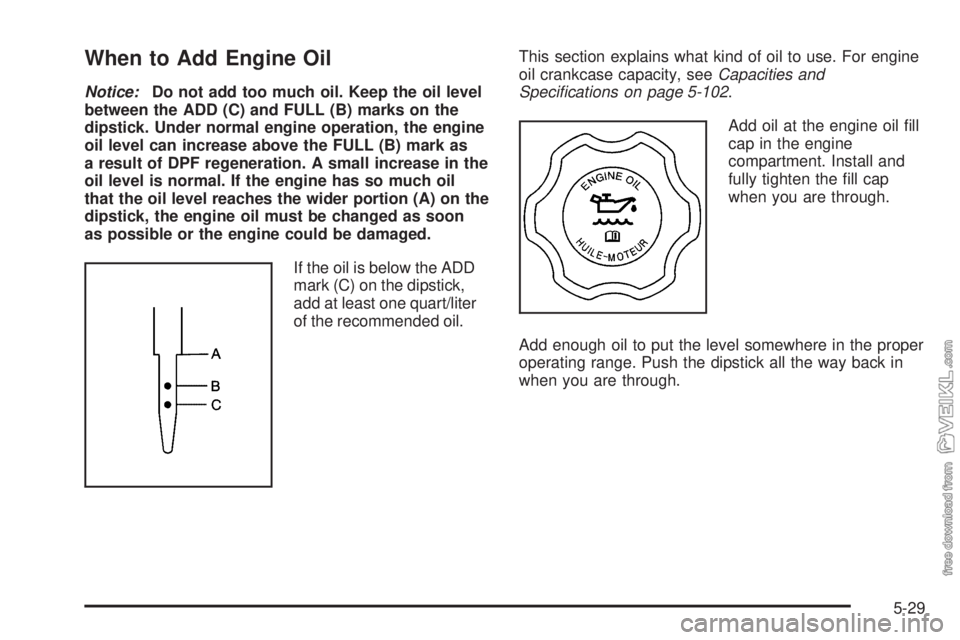
Notice:Do not add too much oil. Keep the oil level
between the ADD (C) and FULL (B) marks on the
dipstick. Under normal engine operation, the engine
oil level can increase above the FULL (B) mark as
a result of DPF regeneration. A small increase in the
oil level is normal. If the engine has so much oil
that the oil level reaches the wider portion (A) on the
dipstick, the engine oil must be changed as soon
as possible or the engine could be damaged.
If the oil is below the ADD
mark (C) on the dipstick,
add at least one quart/liter
of the recommended oil.This section explains what kind of oil to use. For engine
oil crankcase capacity, seeCapacities and
Specifications on page 5-102.
Add oil at the engine oil fill
cap in the engine
compartment. Install and
fully tighten the fill cap
when you are through.
Add enough oil to put the level somewhere in the proper
operating range. Push the dipstick all the way back in
when you are through.
5-29
Page 235 of 376
When to Add Engine Oil
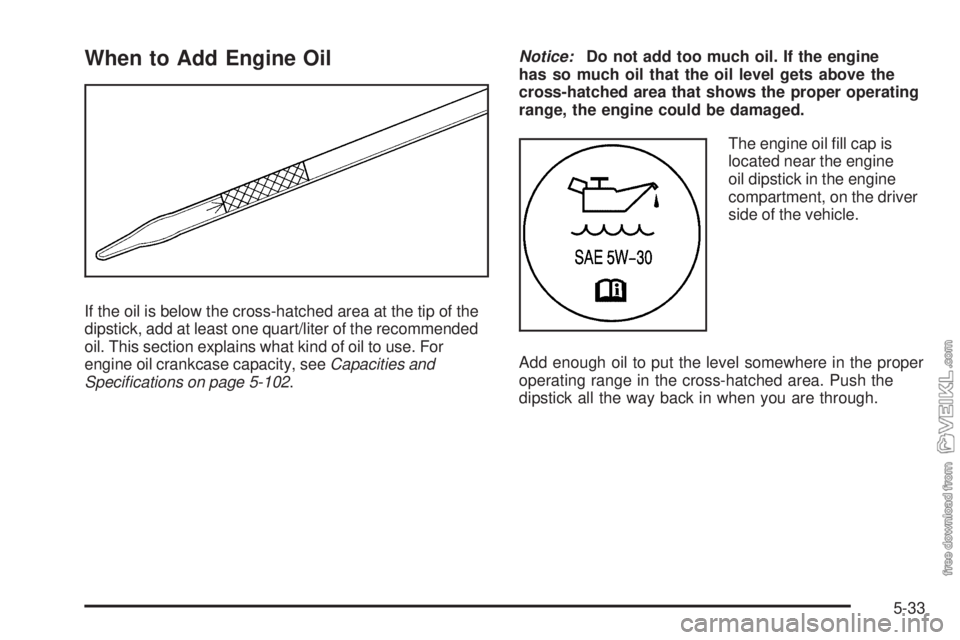
If the oil is below the cross-hatched area at the tip of the
dipstick, add at least one quart/liter of the recommended
oil. This section explains what kind of oil to use. For
engine oil crankcase capacity, seeCapacities and
Specifications on page 5-102.Notice:Do not add too much oil. If the engine
has so much oil that the oil level gets above the
cross-hatched area that shows the proper operating
range, the engine could be damaged.
The engine oil fill cap is
located near the engine
oil dipstick in the engine
compartment, on the driver
side of the vehicle.
Add enough oil to put the level somewhere in the proper
operating range in the cross-hatched area. Push the
dipstick all the way back in when you are through.
5-33
Page 305 of 376
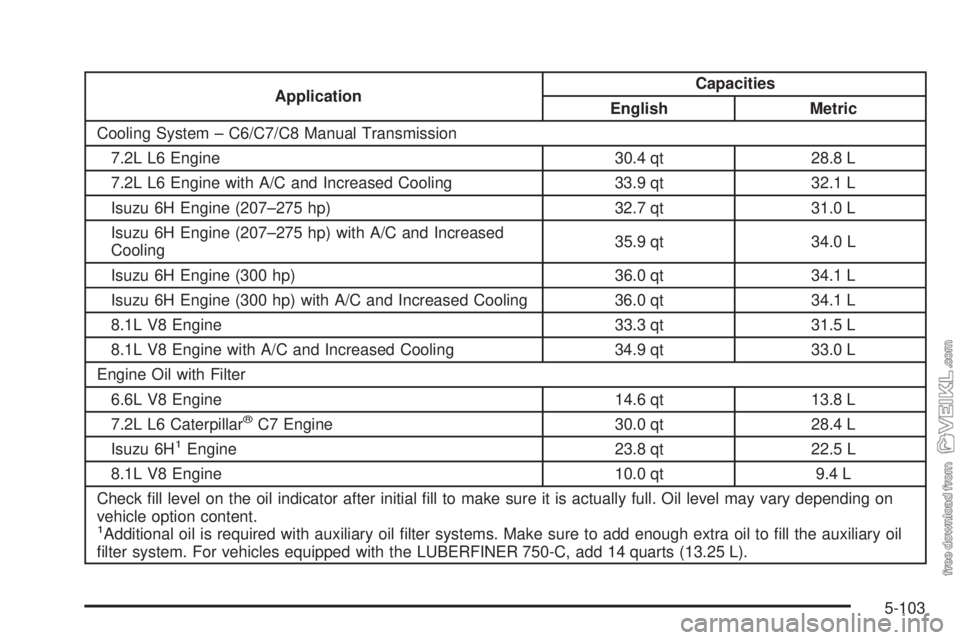
ApplicationCapacities
English Metric
Cooling System – C6/C7/C8 Manual Transmission
7.2L L6 Engine 30.4 qt 28.8 L
7.2L L6 Engine with A/C and Increased Cooling 33.9 qt 32.1 L
Isuzu 6H Engine (207–275 hp) 32.7 qt 31.0 L
Isuzu 6H Engine (207–275 hp) with A/C and Increased
Cooling35.9 qt 34.0 L
Isuzu 6H Engine (300 hp) 36.0 qt 34.1 L
Isuzu 6H Engine (300 hp) with A/C and Increased Cooling 36.0 qt 34.1 L
8.1L V8 Engine 33.3 qt 31.5 L
8.1L V8 Engine with A/C and Increased Cooling 34.9 qt 33.0 L
Engine Oil with Filter
6.6L V8 Engine 14.6 qt 13.8 L
7.2L L6 Caterpillar
®C7 Engine 30.0 qt 28.4 L
Isuzu 6H
1Engine 23.8 qt 22.5 L
8.1L V8 Engine 10.0 qt 9.4 L
Check fill level on the oil indicator after initial fill to make sure it is actually full. Oil level may vary depending on
vehicle option content.
1Additional oil is required with auxiliary oil filter systems. Make sure to add enough extra oil to fill the auxiliary oil
filter system. For vehicles equipped with the LUBERFINER 750-C, add 14 quarts (13.25 L).
5-103