low beam CHEVROLET MALIBU 1998 Owners Manual
[x] Cancel search | Manufacturer: CHEVROLET, Model Year: 1998, Model line: MALIBU, Model: CHEVROLET MALIBU 1998Pages: 362, PDF Size: 19.35 MB
Page 94 of 362
Downloaded from www.Manualslib.com manuals search engine Turn SignaVMultifunction Lever
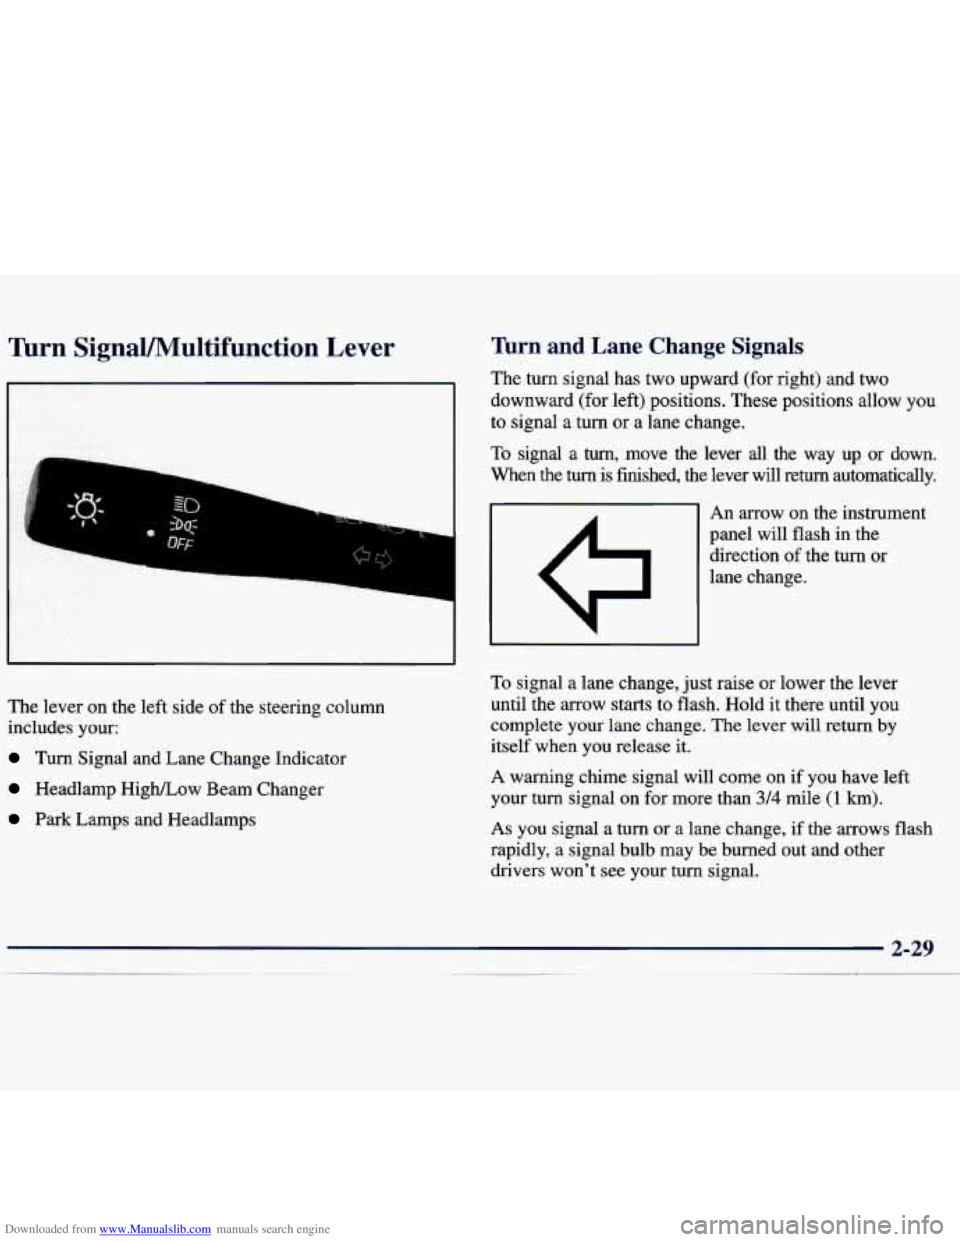
The lever on the left side of the steering column
includes your:
Turn Signal and Lane Change Indicator
Headlamp HigWLow Beam Changer
Park Lamps and Headlamps
firn and Lane Change Signals
The turn signal has two upward (for right) and two
downward (for left) positions. These positions allow you
to signal a turn or a lane change.
To signal a turn, move the lever all the way up or down.
When the
turn is finished, the lever will return automatically.
An arrow on the instrument
panel will flash in the
direction of the turn or
lane change.
To signal a lane change, just raise or lower the lever
until the arrow starts to flash.
Hold it there until you
complete your lane change.
The lever will return by
itself when you release it.
A warning chime signal will come on if you have left
your turn signal on for more than
3/4 mile (1 km).
As you signal a turn or a lane change, if the arrows flash
rapidly, a signal bulb may be burned out and other
drivers won't see your turn signal.
Page 95 of 362
Downloaded from www.Manualslib.com manuals search engine If a bulb is burned out, replace it to help avoid an
accident. If the arrows don’t
go on at all when you
signal a turn, check for burned-out bulbs and then check
the fuse (see “Fuses and Circuit Breakers” in the Index).
Windshield Wipers
Headlamp High/Low Beam
To change the headlamps
from low-beam to
high-beam, push forward on the turn signaUmultifunction lever.
To change the headlamps from high-beam to low-beam,
pull the turn signal lever backward. When the high-beams
are on, a light on the instrument panel also
will be on.
Flash to Pass
This feature lets you use your high-beam headlamps to
signal a driver in front of you that you want to pass.
To use it, pull the turn signaVmultifunction lever toward
you until the high-beam headlamps come on, then
release the lever to turn them off. You
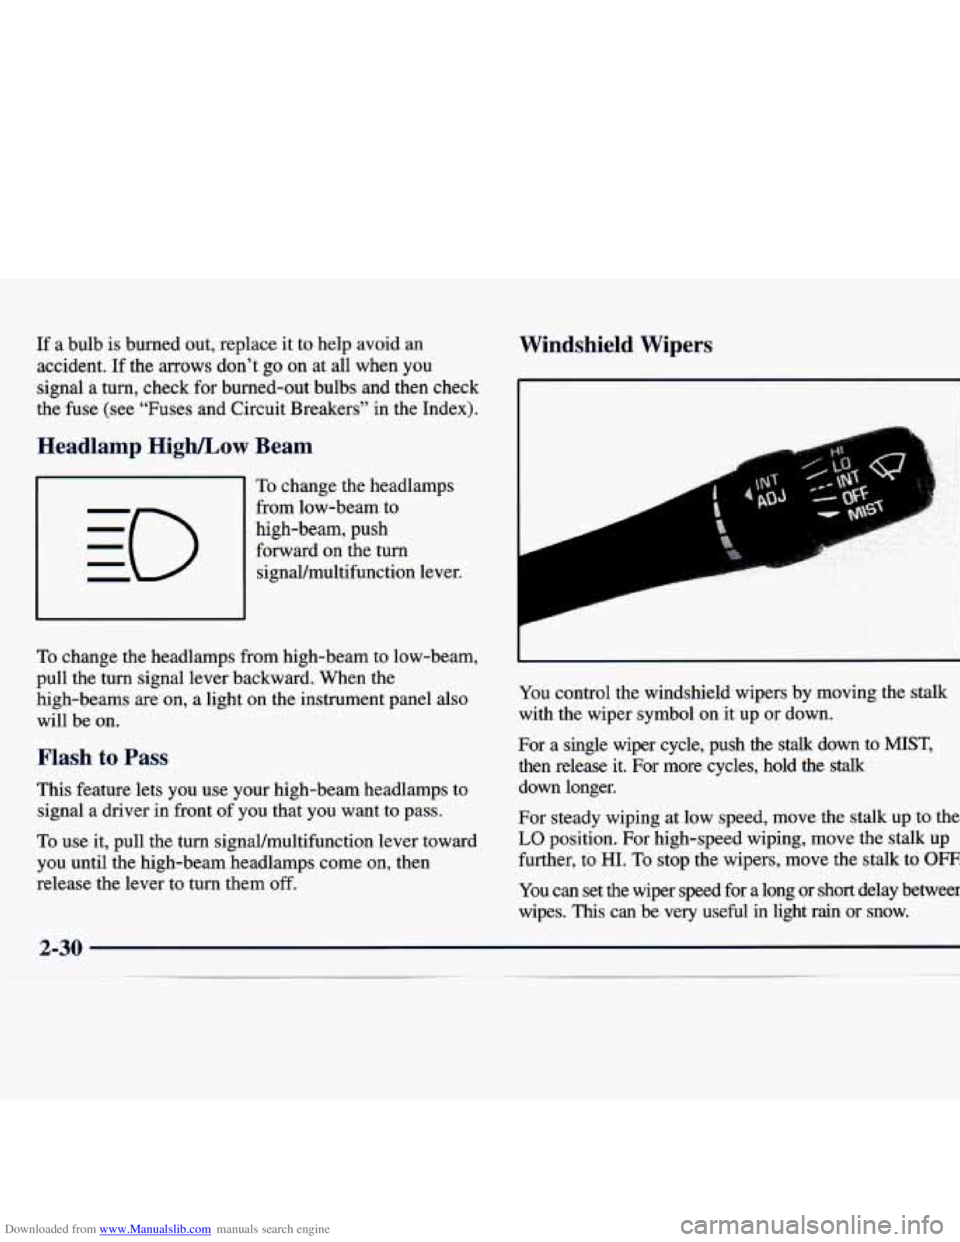
control the windshield wipers by moving the stalk
with the wiper symbol on it up or down.
For a single wiper cycle, push the
stalk down to MIST,
then release it. For more cycles, hold the stalk
down longer.
For steady wiping at low speed, move the stalk up to the
LO position. For high-speed wiping, move the stalk up
further, to
HI. To stop the wipers, move the stalk to OFF.
You can set the wiper speed for a long or short delay between
wipes.
This can be very useful in light rain or snow.
Page 102 of 362
Downloaded from www.Manualslib.com manuals search engine Daytime Running Lamps
Daytime Running Lamps (DRL) can make it easier for
others to see the front of your vehicle during the day.
DRL can be helpful in many different driving
conditions, but they can be especially helpful in the
short periods after dawn and before sunset.
Automatic Light Control (A I )
When it is dark enough outside, your Automatic Light
Control
(LC) will turn on your headlamps at the
normal brightness along with other lamps such as the
taillamps, sidemarker, park lamps and the instrument
panel lights. The radio lights will also be dim.
The
DJXL system will make your low-beam headlamps
come on at a reduced brightness when:
The ignition is on,
The headlamp switch is in the OFF position or you
have turned
on your parking lamps
The light sensor detects daytime light,
The parking brake is released and
The shift lever is not in PARK (P).
When the DRL system is on, the taillamps, sidemarker,
park lamps and instrument panel lights will not
be illuminated.
The DRL system will remain off any time your vehicle
is in PARK (P) or the parking brake is engaged.
As with any vehicle, you should turn on the regular
headlamp system when you need it. Your
vehicle is equipped with a light sensor on the top
of the instrument panel under the defroster grill,
so be
sure it is not covered which will cause the ALC system
to be on whenever the ignition is on.
The ALC system may also be on when driving through a
parking garage, heavy overcast weather,
a tunnel or
fueling your vehicle in a low light area. This is normal.
There is a delay in the transition between the daytime
and nighttime operation of the DRL and the
ALC
systems so that driving under bridges or bright overhead
street lights does not affect
the system. The DRL and
ALC systems will only be affected when the light sensor
sees a change in lighting lasting longer than this delay.
To idle your vehicle with the ALC system
off, set the
park brake while the ignition is
off. Then start the
vehicle. The ALC system will stay off until you release
the park brake.
As with any vehicle, you should turn on the regular
headlamp system when
you need it.
2-37
Page 103 of 362
Downloaded from www.Manualslib.com manuals search engine Fog Lamps (If Equipped)
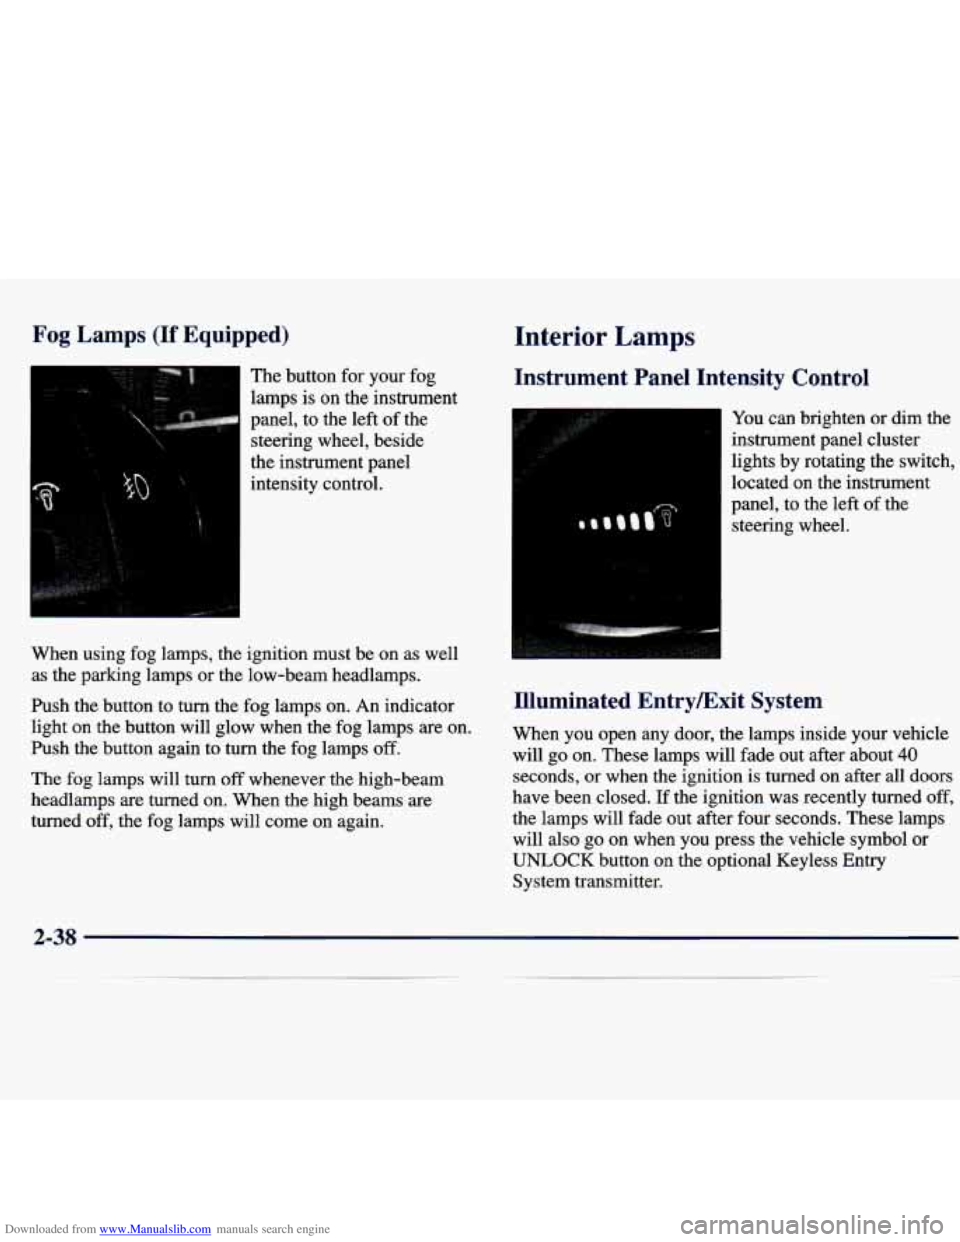
The button for your fog
lamps
is on the instrument
panel, to the left
of the
steering wheel, beside
the instrument panel
intensity control.
When using fog lamps, the ignition must be on as well
as the parlung lamps or the low-beam headlamps.
Push the button to
turn the fog lamps on. An indicator
light on the button will glow when the fog lamps are on.
Push the button again to turn the fog lamps
off.
The fog lamps will turn off whenever the high-beam
headlamps
are turned on. When the high beams are
turned off, the fog lamps will come on again.
Interior Lamps
Instrument Panel Intensity Control
You can brighten or dim the
instrument panel cluster
lights by rotating the switch,
located on the instrument
panel, to the left of the
steering wheel.
Illuminated EntryExit System
When you open any door, the lamps inside your vehicle
will go on. These lamps will fade out after about
40
seconds, or when the ignition is turned on after all doors
have been closed.
If the ignition was recently turned off,
the lamps will fade out after four seconds. These lamps
will also go on when you press the vehicle symbol
or
UNLOCK button on the optional Keyless Entry
System transmitter.
2-38
Page 166 of 362
Downloaded from www.Manualslib.com manuals search engine Here are some tips on night driving.
0
0
0
0
0
0
0
Drive defensively.
Don’t drink and drive.
Adjust your inside rearview mirror to reduce the
glare from headlamps behind you.
Since you can’t see as well, you may need to
slow down and keep more space between you and
other vehicles.
Slow down, especially on higher speed roads. Your
headlamps can light up only
so much road ahead.
In remote areas, watch for animals.
If you’re tired, pull off the road in a safe place
and rest.
Night Vision
No one can see as well at night as in the daytime. But as
we get older these differences increase. A 50-year-old
driver may require at least twice as much light to see the
same thing at night as a 20-year-old.
What you do in the daytime can also affect your night
vision. For example, if you spend the day in bright
sunshine
you are wise to wear sunglasses. Your eyes will
have less trouble adjusting to night. But if you’re
driving, don’t wear sunglasses at night. They may cut down on glare
from headlamps, but they also make a lot
of things invisible.
You can be temporarily blinded by approaching
headlamps. It can take a second or two, or even several
seconds, for your eyes to readjust to the dark. When you
are faced with severe glare (as from a driver who
doesn’t lower the high beams, or a vehicle with
misaimed headlamps), slow down a little. Avoid staring
directly into the approaching headlamps.
Keep your windshield and all the glass on your vehicle
clean
-- inside and out. Glare at night is made much
worse by dirt on the glass. Even the inside
of the glass
can build up a film caused by dust. Dirty glass makes
lights dazzle and flash more than clean glass would,
making the pupils
of your eyes contract repeatedly.
Remember that your headlamps light up far less
of a
roadway when you are in a turn or curve. Keep your
eyes moving; that way, it’s easier
to pick out dimly
lighted objects. Just as your headlamps should be
checked regularly for proper aim,
so should your eyes
be examined regularly. Some drivers suffer from night
blindness
-- the inability to see in dim light -- and aren’t
even aware of it.
4-15
--
Page 256 of 362
Downloaded from www.Manualslib.com manuals search engine Bulb Replacement
This section describes bulb changing procedures for
some of your interior and exterior lamps. For bulb sizes,
see “Replacement Bulbs” in the Index. For any bulbs not
listed in this section, contact your Chevrolet dealer
service department.
Halogen Bulbs
A CAUTION
-- I
Halogen bulbs have pressurized gas inside and
can burst
if you drop or scratch the bulb. You or
others could be injured. Be sure to read and
follow the instructions on the bulb package.
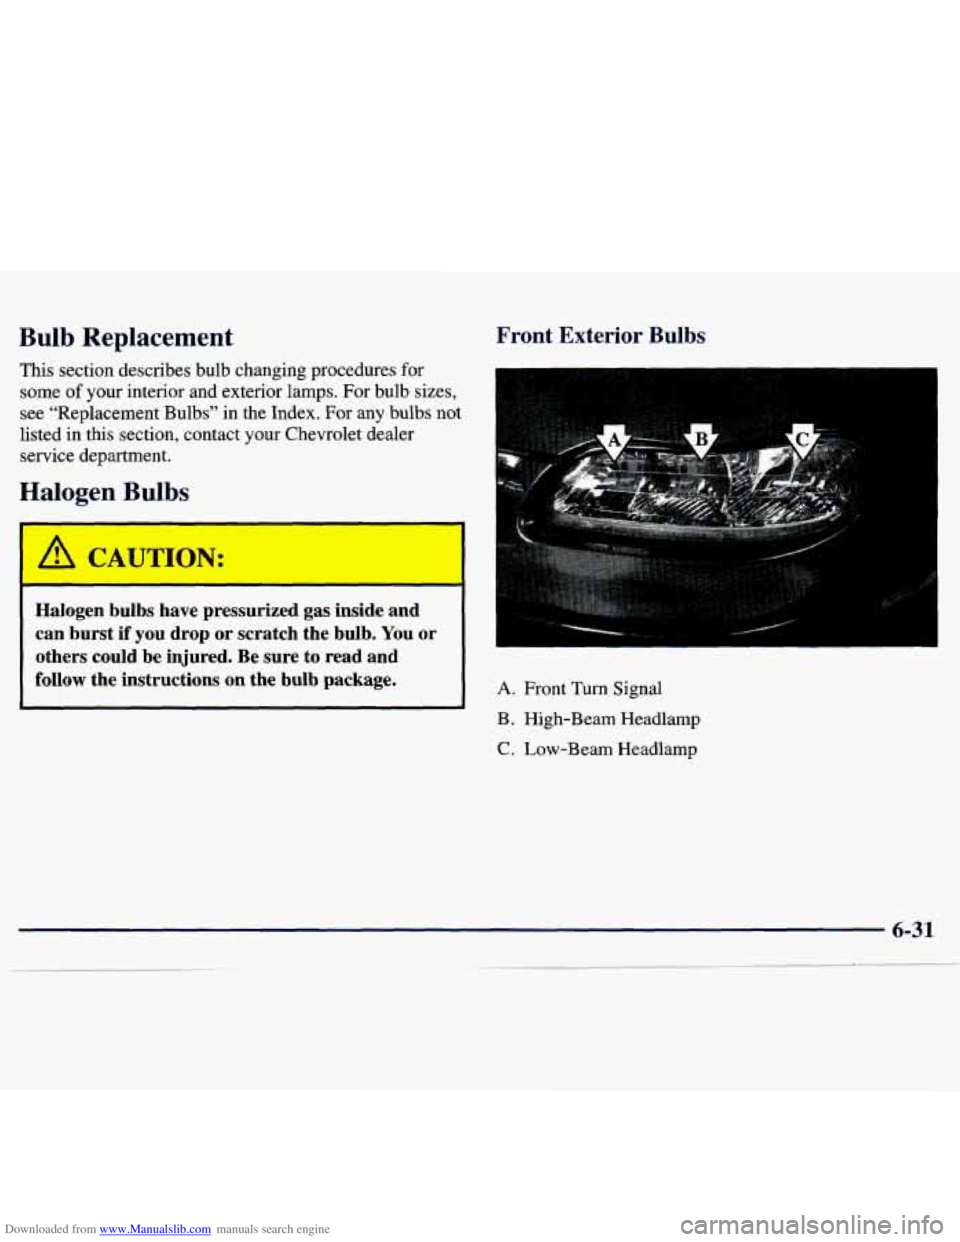
Front Exterior Bulbs
A. Front Turn Signal
B. High-Beam Headlamp
C. Low-Beam Headlamp
Page 257 of 362
Downloaded from www.Manualslib.com manuals search engine Headlamp and Front nrn Signal Lamp
Bulb Replacement
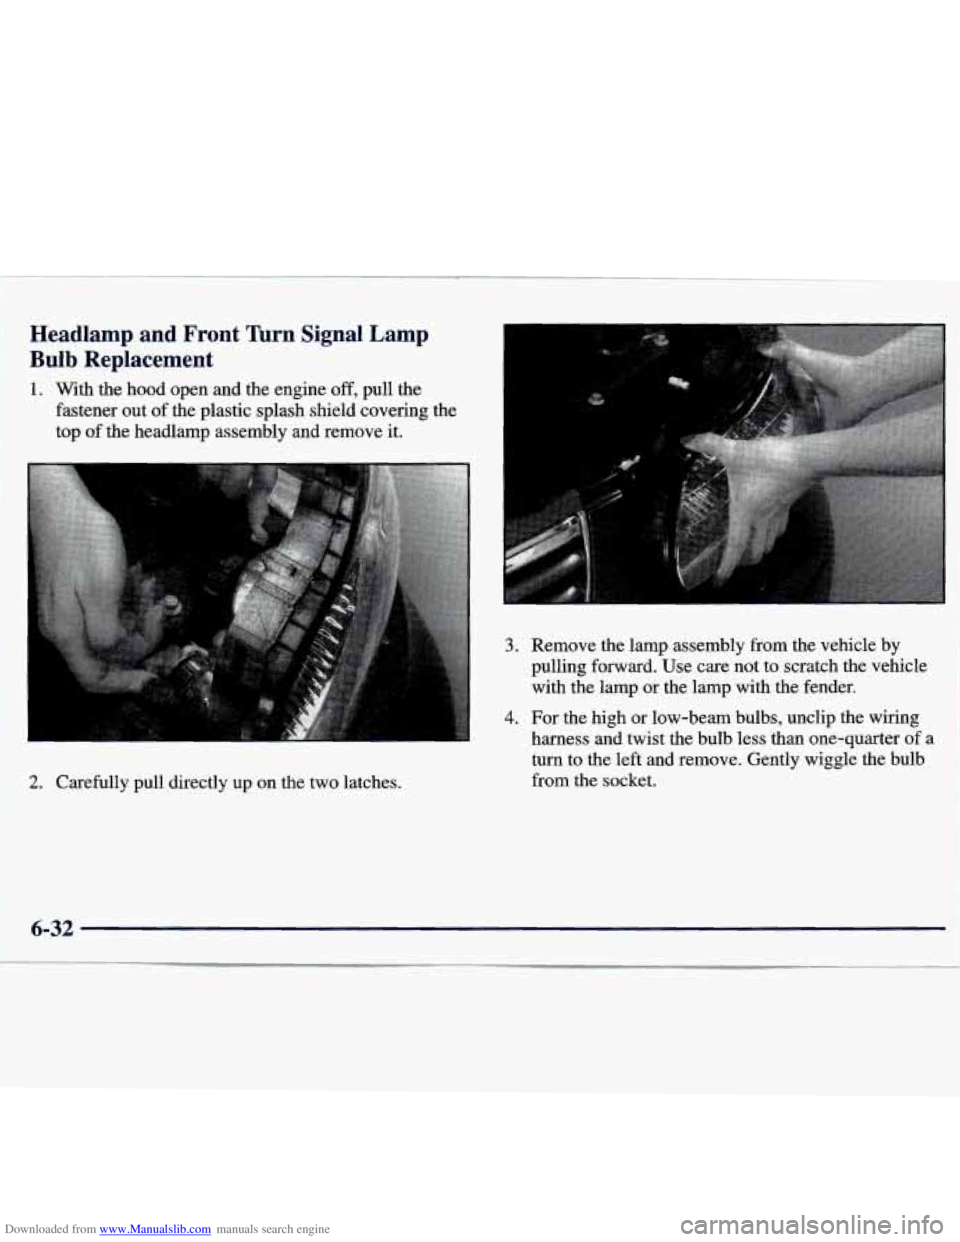
1. With the hood open and the engine off, pull the
fastener out of the plastic splash shield covering the
top of the headlamp assembly and remove it.
2. Carefully pull directly up on the two latches.
3. Remove the lamp assembly from the vehicle by
pulling forward. Use care not to scratch the vehicle
with the lamp or the lamp with the fender.
4. For the high or low-beam bulbs, unclip the wiring
harness
and twist the bulb less than one-quarter of a
turn to the left and remove. Gently wiggle the bulb
from the socket.
6-32
Page 258 of 362
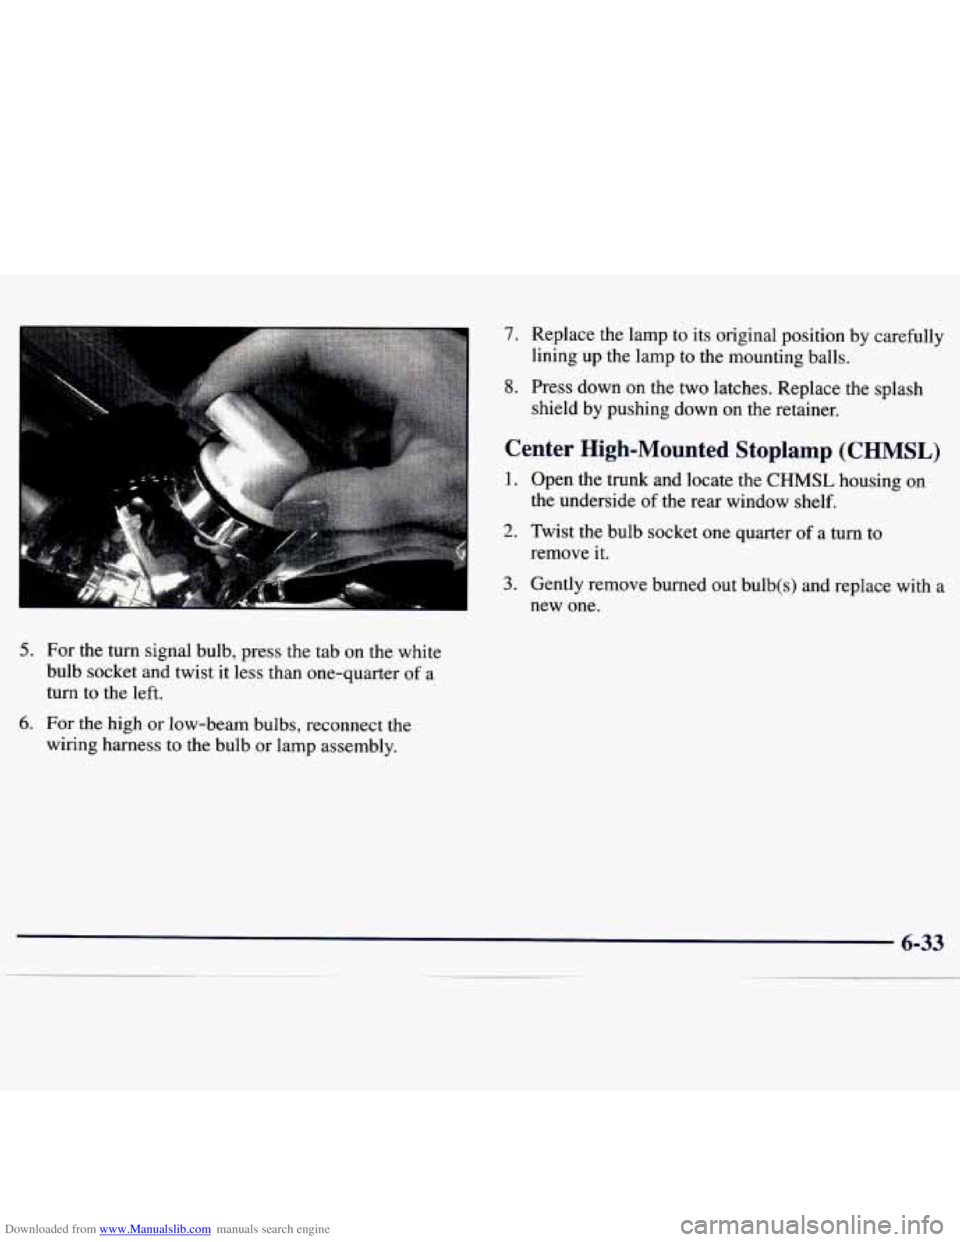
Downloaded from www.Manualslib.com manuals search engine 5. For the turn signal bulb, press the tab on the white
bulb socket and twist it less than one-quarter
of a
turn to the left.
6. For the high or low-beam bulbs, reconnect the
wiring harness to the bulb or lamp assembly.
7. Replace the lamp to its original position by carefully
lining up the lamp to the mounting balls.
8. Press down on the two latches. Replace the splash
shield by pushing down on the retainer.
Center High-Mounted Stoplamp (CHMSL)
1. Open the trunk and locate the CHMSL housing on
the underside of the rear window shelf.
2. Twist the bulb socket one quarter of a turn to
remove it.
3. Gently remove burned out bulb(s) and replace with a
new one.
Page 286 of 362
Downloaded from www.Manualslib.com manuals search engine Fuse
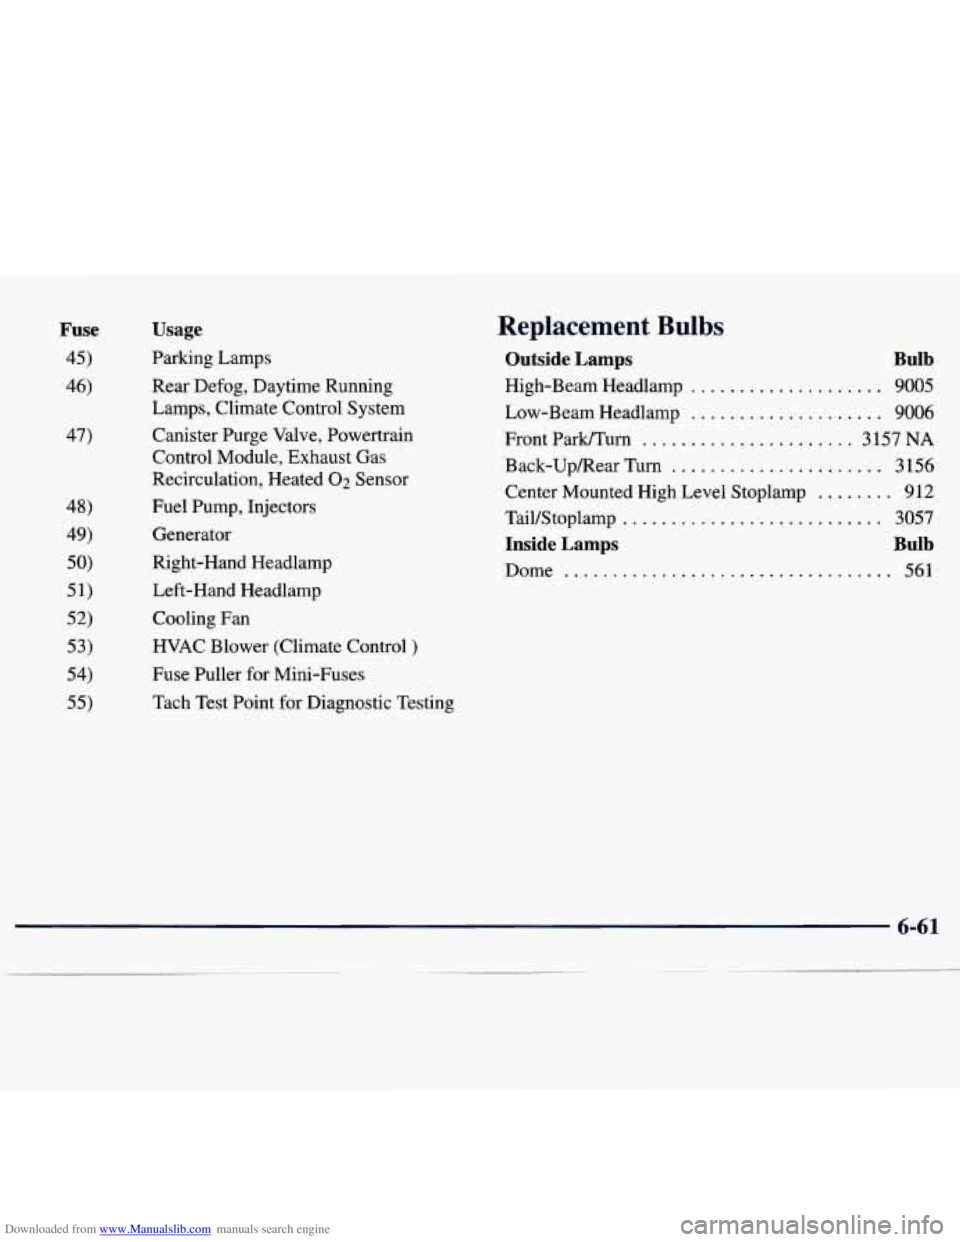
45)
46)
47)
Usage
Parking Lamps
Rear Defog, Daytime Running
Lamps, Climate Control System
Canister Purge Valve, Powertrain
Control Module, Exhaust Gas
Recirculation, Heated
02 Sensor
Fuel Pump, Injectors
Generator
Right-Hand Headlamp
Left-Hand Headlamp
Cooling Fan
HVAC Blower (Climate Control
)
Fuse Puller for Mini-Fuses
Tach Test Point
for Diagnostic Testing
Replacement Bulbs
Outside Lamps Bulb
High-Beam Headlamp .................... 9005
Low-Beam Headlamp
.................... 9006
Front Park/Turn
...................... 3157 NA
Back-UpRear Turn ...................... 3156
Center Mounted High Level Stoplamp
........ 912
Tail/Stoplamp
........................... 3057
Inside Lamps Bulb
Dome .................................. 561
6-61
Page 350 of 362
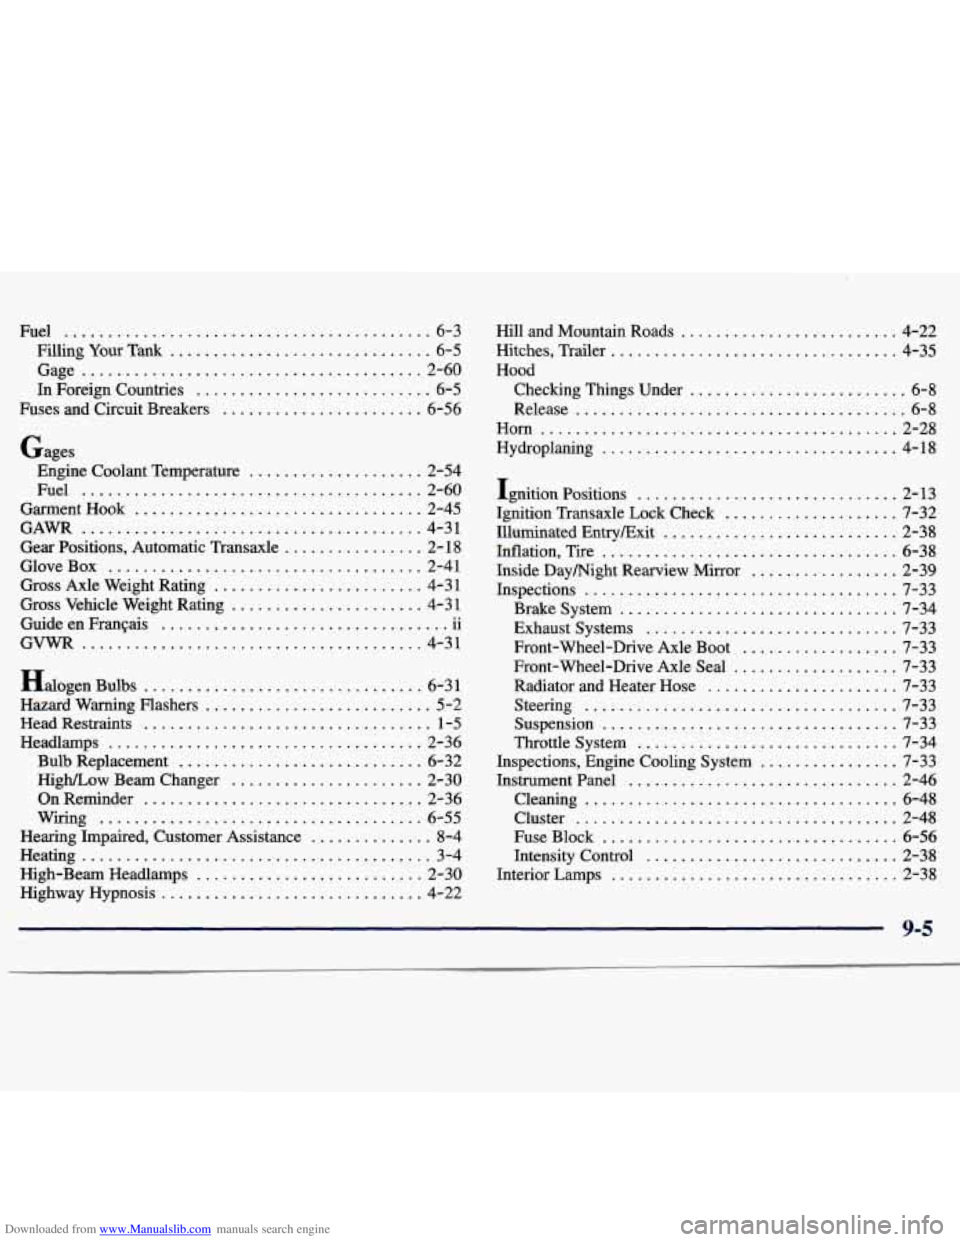
Downloaded from www.Manualslib.com manuals search engine Fuel .......................................... 6-3
FillingYourTank
.............................. 6-5
Gage
....................................... 2-60
In Foreign Countries ........................... 6-5
Fuses and Circuit Breakers
....................... 6-56
Gages Engine Coolant Temperature
.................... 2-54
Fuel
....................................... 2-60
GarmentHook
................................. 2-45
GAM
....................................... 4-31
Gear Positions. Automatic Transaxle
................ 2- 18
GloveBox
.................................... 2-41
Gross Axle Weight Rating
........................ 4-31
Gross Vehicle Weight Rating
...................... 4-31
Guide en Francais
u
GVWR ....................................... 4-31
.. .................................
Halogen Bulbs ................................ 6-31
Hazard Warning Flashers
.......................... 5-2
Head Restraints
................................. 1-5
Headlamps .................................... 2-36
Bulb Replacement
............................ 6-32
High/Low Beam Changer
...................... 2-30
OnReminder
................................ 2-36
Wiring
..................................... 6-55
Hearing Impaired. Customer Assistance
.............. 8-4
Heating
........................................ 3-4
High-BeamHeadlamps
.......................... 2-30
Highway Hypnosis
.............................. 4-22 HillandMountainRoads
......................... 4-22
Hitches. Trailer
................................. 4-35
Hood Checking Things Under
......................... 6-8
Release
...................................... 6-8
Horn
......................................... 2-28
Hydroplaning
.................................. 4-18
Ignition Positions
..............
Ignition Transaxle Lock Check ....
Illuminated Entryfixit ...........
Inflation. Tire ..................
Inside Daymight Rearview Mirror .
Inspections ....................
Brake System ................
Exhaust Systems .............
Front-Wheel-Drive Axle Boot . .
Front-Wheel-Drive Axle Seal ...
Radiator and Heater Hose ......
Steering ....................
Suspension ..................
Throttle System ..............
Inspections. Engine Cooling System
Instrument Panel
...............
Cleaning ....................
Cluster .....................
Fuse Block ..................
Intensity Control .............
Interior Lamps .................
................ 2-13
................ 7-32
................ 2-38
................ 6-38
................ 2-39
................ 7-33
................ 7-34
................ 7-33
................ 7-33
................ 7-33
................ 7-33
................ 7-33
................ 7-33
................ 7-34
................ 7-33
................ 2-46
................ 6-48
................ 2-48
................ 6-56
................ 2-38
................ 2-38