headlamp CHEVROLET MALIBU 2004 5.G Owners Manual
[x] Cancel search | Manufacturer: CHEVROLET, Model Year: 2004, Model line: MALIBU, Model: CHEVROLET MALIBU 2004 5.GPages: 426, PDF Size: 3.98 MB
Page 75 of 426
V(Remote Trunk Release):The trunk or liftgate
will open when this button on the transmitter is pressed
and held. You can open the trunk with the transmitter
when the vehicle is in PARK (P) or NEUTRAL (N). The
interior lamps will come on for 10 seconds or until
the ignition switch is turned to ON.
7(Vehicle Locator/Panic Alarm):Press this button
to locate your vehicle. The horn will chirp three times
and the headlamps and parking lamps will �ash
three times. Press and hold the button for three seconds
to sound the panic alarm. The horn will chirp and the
headlamps and parking lamps will �ash for two minutes.
Press the button again to cancel the panic alarm.
Programmable Horn Chirp
Through the DIC, you may choose whether or not to
have a horn chirp when you use the remote keyless
entry transmitter to lock or unlock the doors.
SeeDIC Operation and Displays on page 3-46for more
information.
Matching Transmitter(s) to Your
Vehicle
Each remote keyless entry transmitter is coded to
prevent another transmitter from unlocking your vehicle.
If a transmitter is lost or stolen, a replacement can
be purchased through your dealer. Remember to bring
any remaining transmitters with you when you go to
your dealer. When the dealer matches the replacement
transmitter to your vehicle, any remaining transmitters
must also be matched. Once your dealer has coded the
new transmitter, the lost transmitter will not unlock
your vehicle. Each vehicle can have a maximum of four
transmitters matched to it.
2-7
Page 103 of 426
Mirrors
Manual Rearview Mirror
This mirror can be adjusted two ways. First, to adjust
the angle of the mirror, move the mirror to a position that
allows you to see out of the back window. To adjust
the height of the mirror, adjust the arm that connects the
mirror to the windshield.
To reduce glare from lights behind you, move the lever
toward you to the night position.
Manual Rearview Mirror with
OnStar
®
If your vehicle has this feature, this mirror has a knob
located at the bottom of the mirror. It is used to change
the mirror from day to night position. To reduce glare
from headlamps behind you while driving at night, rotate
the knob clockwise. For daytime driving rotate the
knob counterclockwise.
There are also three OnStar
®buttons located at the
bottom of the mirror face. See your dealer for more
information on the system and how to subscribe
to OnStar
®. SeeOnStar®System on page 2-38for
more information about the services OnStar®provides.
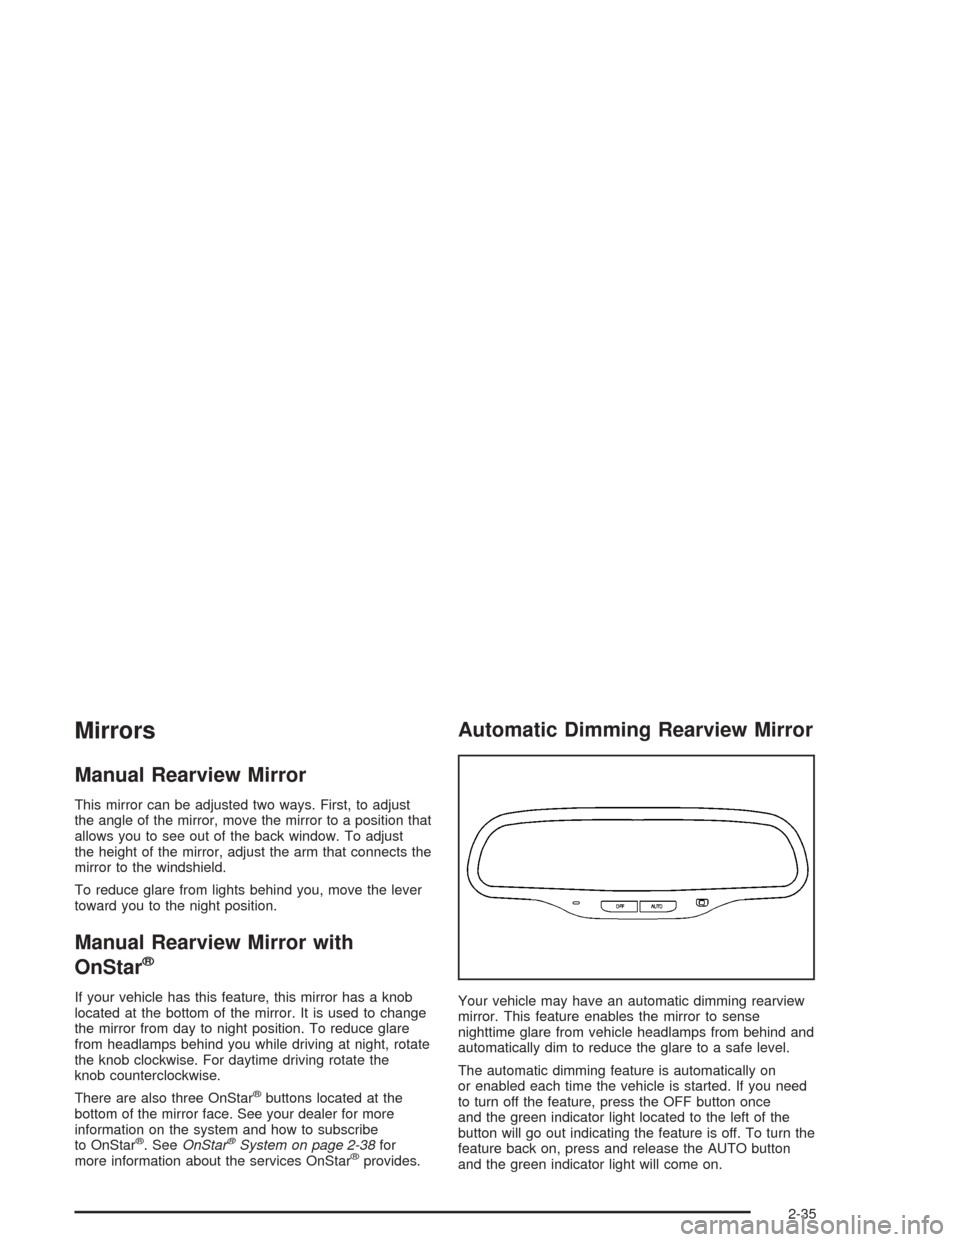
Automatic Dimming Rearview Mirror
Your vehicle may have an automatic dimming rearview
mirror. This feature enables the mirror to sense
nighttime glare from vehicle headlamps from behind and
automatically dim to reduce the glare to a safe level.
The automatic dimming feature is automatically on
or enabled each time the vehicle is started. If you need
to turn off the feature, press the OFF button once
and the green indicator light located to the left of the
button will go out indicating the feature is off. To turn the
feature back on, press and release the AUTO button
and the green indicator light will come on.
2-35
Page 124 of 426
Turn Signal/Multifunction Lever
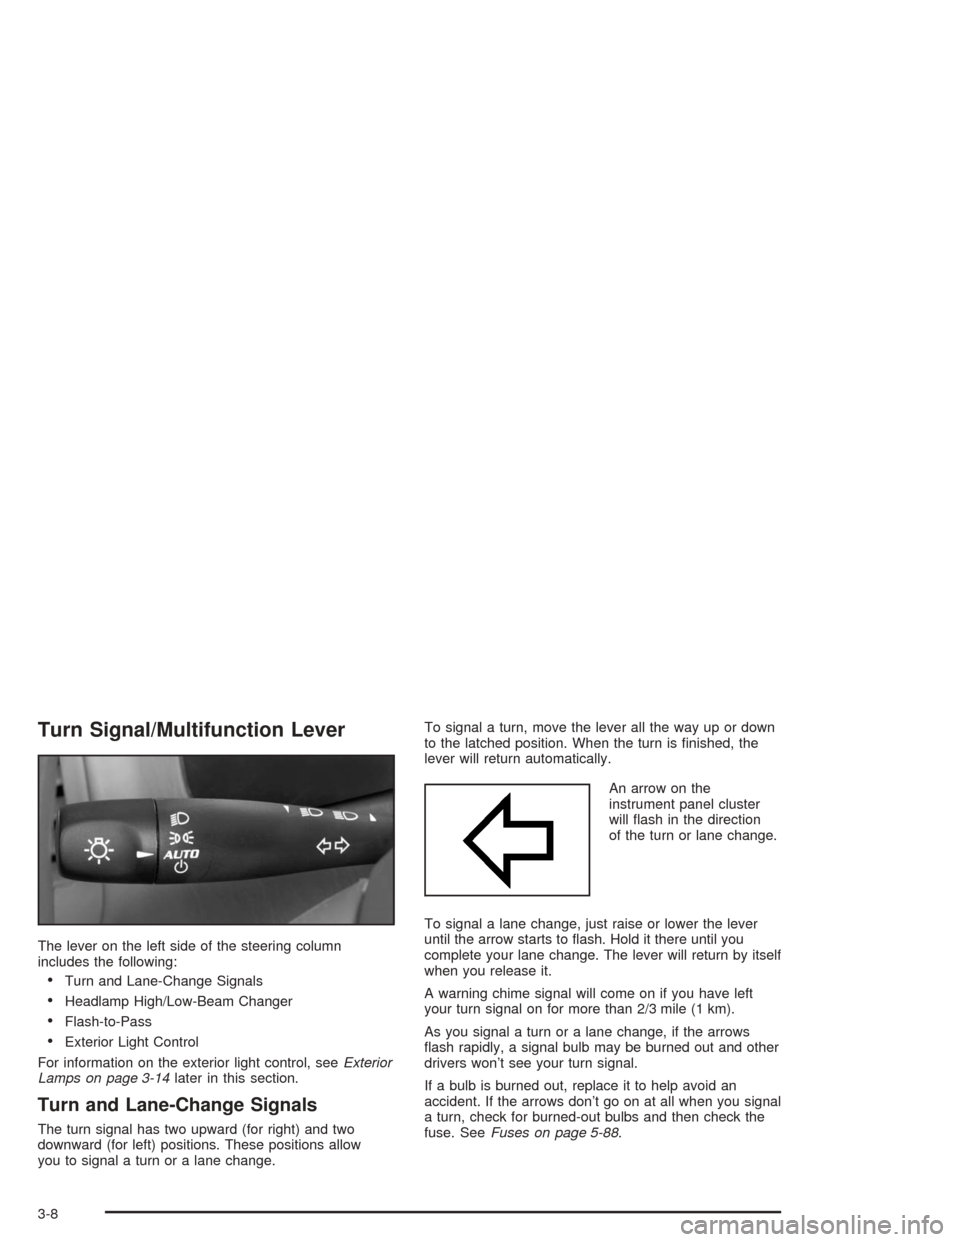
The lever on the left side of the steering column
includes the following:
Turn and Lane-Change Signals
Headlamp High/Low-Beam Changer
Flash-to-Pass
Exterior Light Control
For information on the exterior light control, seeExterior
Lamps on page 3-14later in this section.
Turn and Lane-Change Signals
The turn signal has two upward (for right) and two
downward (for left) positions. These positions allow
you to signal a turn or a lane change.To signal a turn, move the lever all the way up or down
to the latched position. When the turn is �nished, the
lever will return automatically.
An arrow on the
instrument panel cluster
will �ash in the direction
of the turn or lane change.
To signal a lane change, just raise or lower the lever
until the arrow starts to �ash. Hold it there until you
complete your lane change. The lever will return by itself
when you release it.
A warning chime signal will come on if you have left
your turn signal on for more than 2/3 mile (1 km).
As you signal a turn or a lane change, if the arrows
�ash rapidly, a signal bulb may be burned out and other
drivers won’t see your turn signal.
If a bulb is burned out, replace it to help avoid an
accident. If the arrows don’t go on at all when you signal
a turn, check for burned-out bulbs and then check the
fuse. SeeFuses on page 5-88.
3-8
Page 125 of 426
Headlamp High/Low-Beam Changer
To change the headlamps from low beam to high beam,
push the turn signal/multifunction lever away from you.
When the high beams
are on, a light on the
instrument panel cluster
also will be on if the
ignition is in ON.
To change the headlamps from high beam to low beam,
pull the turn signal lever toward you.
Headlamps On Reminder
If you open the driver’s door and turn off the ignition while
leaving the lamps on, you will hear a warning chime.
Flash-to-Pass Feature
This feature lets you use your high-beam headlamps
momentarily to signal a driver in front of you that
you want to pass.
To use it, pull the turn signal/multifunction lever toward
you until the high-beam headlamps come on, then
release the lever to turn them off.
Windshield Wipers
Use this lever located on the right side of the steering
wheel to operate the windshield wipers.
9(Off):Move the lever to this position to turn off the
windshield wipers.
&(Intermittent):Move the lever to this position to
choose a delayed wiping cycle. Turn the intermittent
adjust band down for a longer delay or up for a shorter
delay. The wiper speed can only be manually adjusted
when the lever is in this position.
&(Speed Sensitive Wipers):Move the lever to
this position for speed sensitive operation. When you
select this position, the delay will change with your
vehicle’s speed. The delay will decrease as you
go faster and increase as you go slower.
3-9
Page 126 of 426
6(Low Speed):Move the lever up to the �rst
setting past intermittent, for steady wiping at low speed.
1(High Speed):Move the lever up to the second
setting past intermittent, for wiping at high speed.
8(Mist):Move the lever all the way down to this
position for a single wiping cycle. Hold it there until the
windshield wipers start; then let go. The windshield
wipers will stop after one wipe. If you want more wipes,
hold the lever down longer.
Remember that damaged wiper blades may prevent
you from seeing well enough to drive safely. To avoid
damage, be sure to clear ice and snow from the
wiper blades before using them.
If they’re frozen to the windshield, carefully loosen or
thaw them. If your blades do become damaged, get new
blades or blade inserts.
Heavy snow or ice can overload your wiper motor.
A circuit breaker will stop the motor until it cools.
Clear away snow or ice to prevent an overload.
If the motor gets stuck turn the wipers off, clear away
the snow or ice, and then turn the wipers back on.
As an added safety feature, if the wipers are on for more
than thirty seconds, the vehicle’s headlamps will turn
on automatically. They will turn off when the wipers are
turned off.
Windshield Washer
To wash your windshield, push in the button at the end
of the stalk until the washers begin.
{CAUTION:
In freezing weather, do not use your washer
until the windshield is warmed. Otherwise the
washer �uid can form ice on the windshield,
blocking your vision.
When you release the button, the washers will stop,
but the wipers will continue to wipe for about three
cycles and will either stop or will resume the speed
you were using before.
Cruise Control
If your vehicle has cruise control, you can maintain a
speed of about 25 mph (40 km/h) or more without
keeping your foot on the accelerator. This can really
help on long trips. Cruise control does not work at
speeds below 25 mph (40 km/h).
3-10
Page 130 of 426
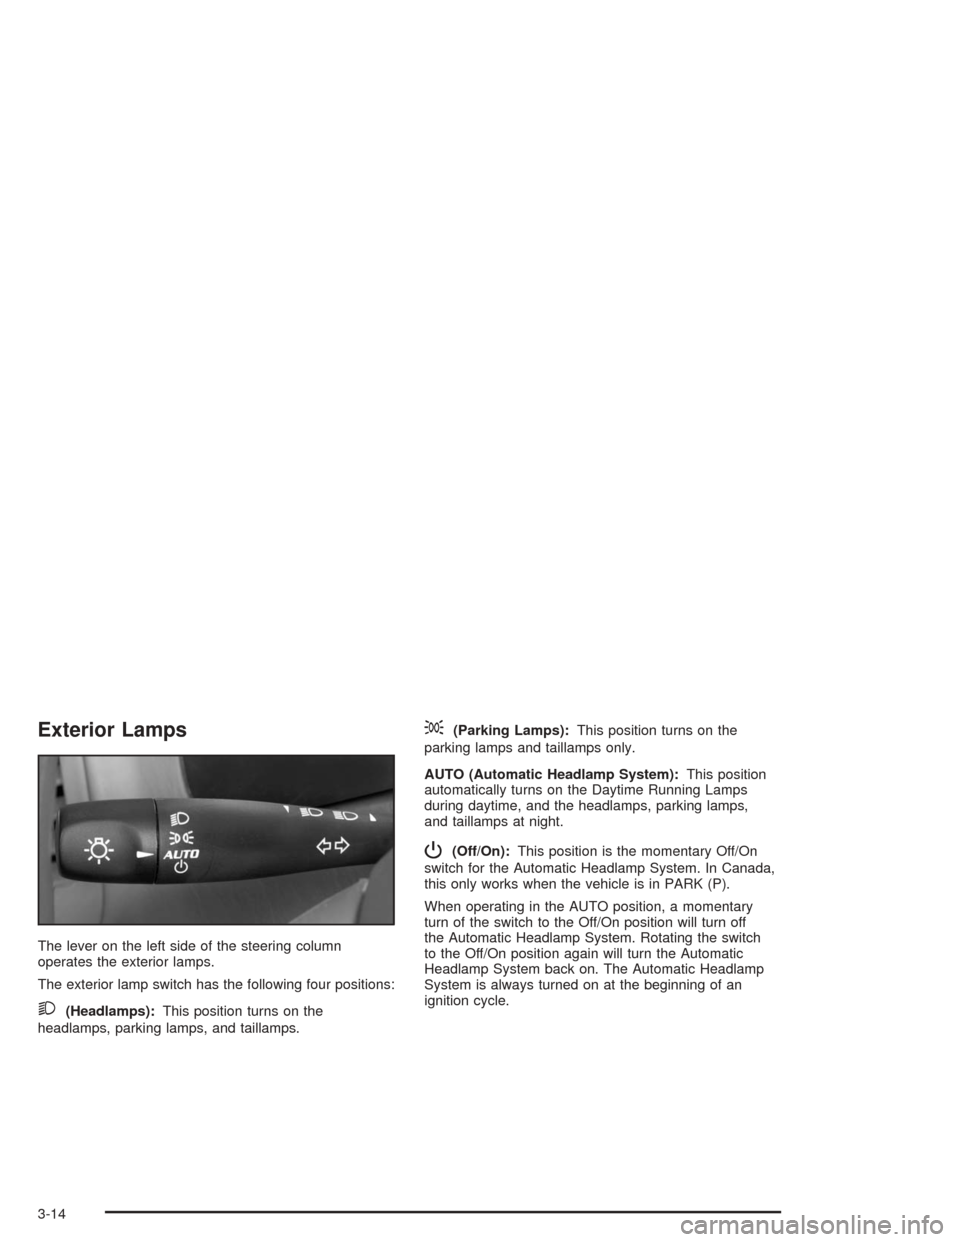
Exterior Lamps
The lever on the left side of the steering column
operates the exterior lamps.
The exterior lamp switch has the following four positions:
2(Headlamps):This position turns on the
headlamps, parking lamps, and taillamps.
;(Parking Lamps):This position turns on the
parking lamps and taillamps only.
AUTO (Automatic Headlamp System):This position
automatically turns on the Daytime Running Lamps
during daytime, and the headlamps, parking lamps,
and taillamps at night.
P(Off/On):This position is the momentary Off/On
switch for the Automatic Headlamp System. In Canada,
this only works when the vehicle is in PARK (P).
When operating in the AUTO position, a momentary
turn of the switch to the Off/On position will turn off
the Automatic Headlamp System. Rotating the switch
to the Off/On position again will turn the Automatic
Headlamp System back on. The Automatic Headlamp
System is always turned on at the beginning of an
ignition cycle.
3-14
Page 131 of 426
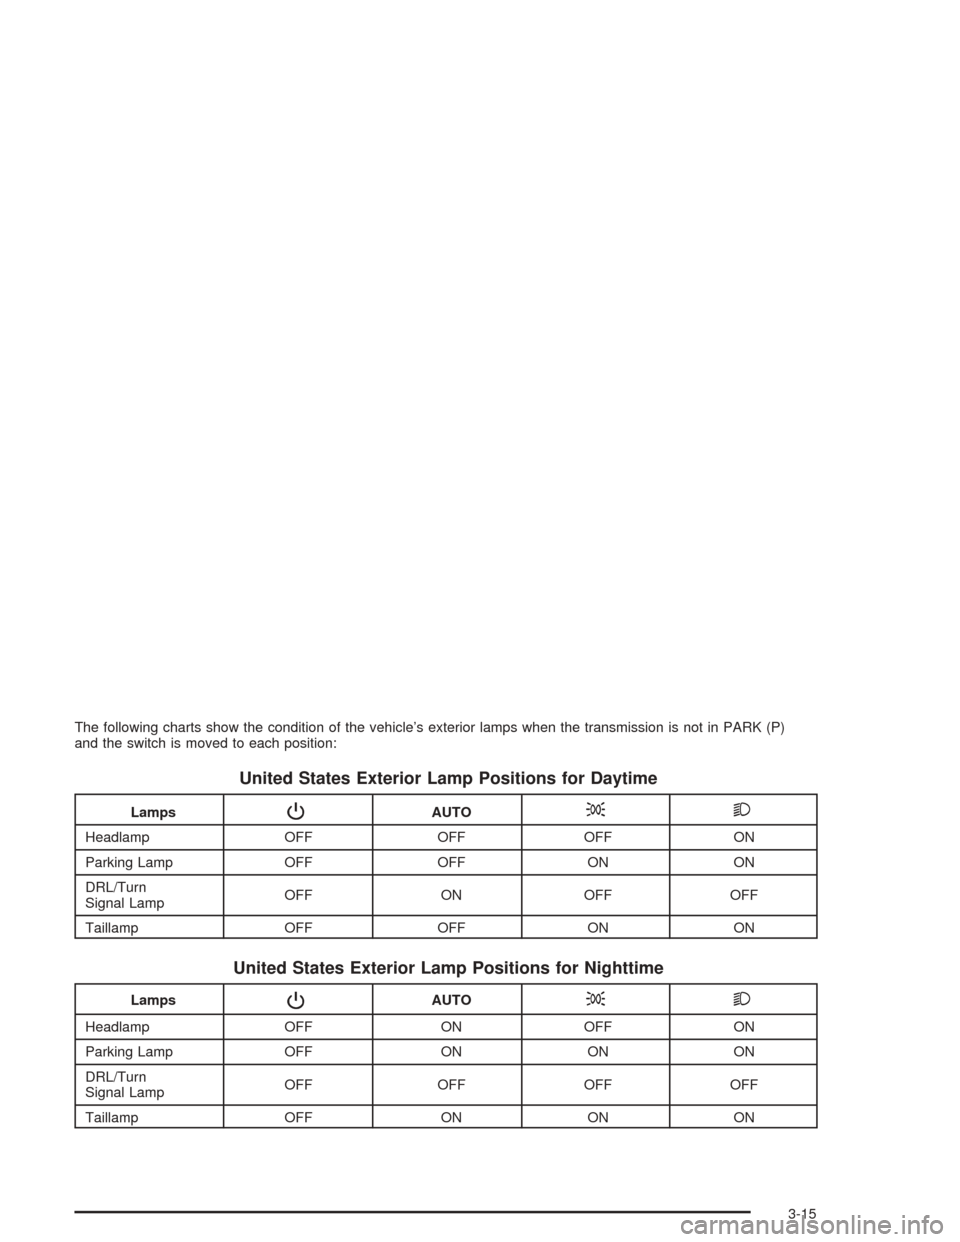
The following charts show the condition of the vehicle’s exterior lamps when the transmission is not in PARK (P)
and the switch is moved to each position:
United States Exterior Lamp Positions for Daytime
LampsPAUTO;2
Headlamp OFF OFF OFF ON
Parking Lamp OFF OFF ON ON
DRL/Turn
Signal LampOFF ON OFF OFF
Taillamp OFF OFF ON ON
United States Exterior Lamp Positions for Nighttime
LampsPAUTO;2
Headlamp OFF ON OFF ON
Parking Lamp OFF ON ON ON
DRL/Turn
Signal LampOFF OFF OFF OFF
Taillamp OFF ON ON ON
3-15
Page 132 of 426
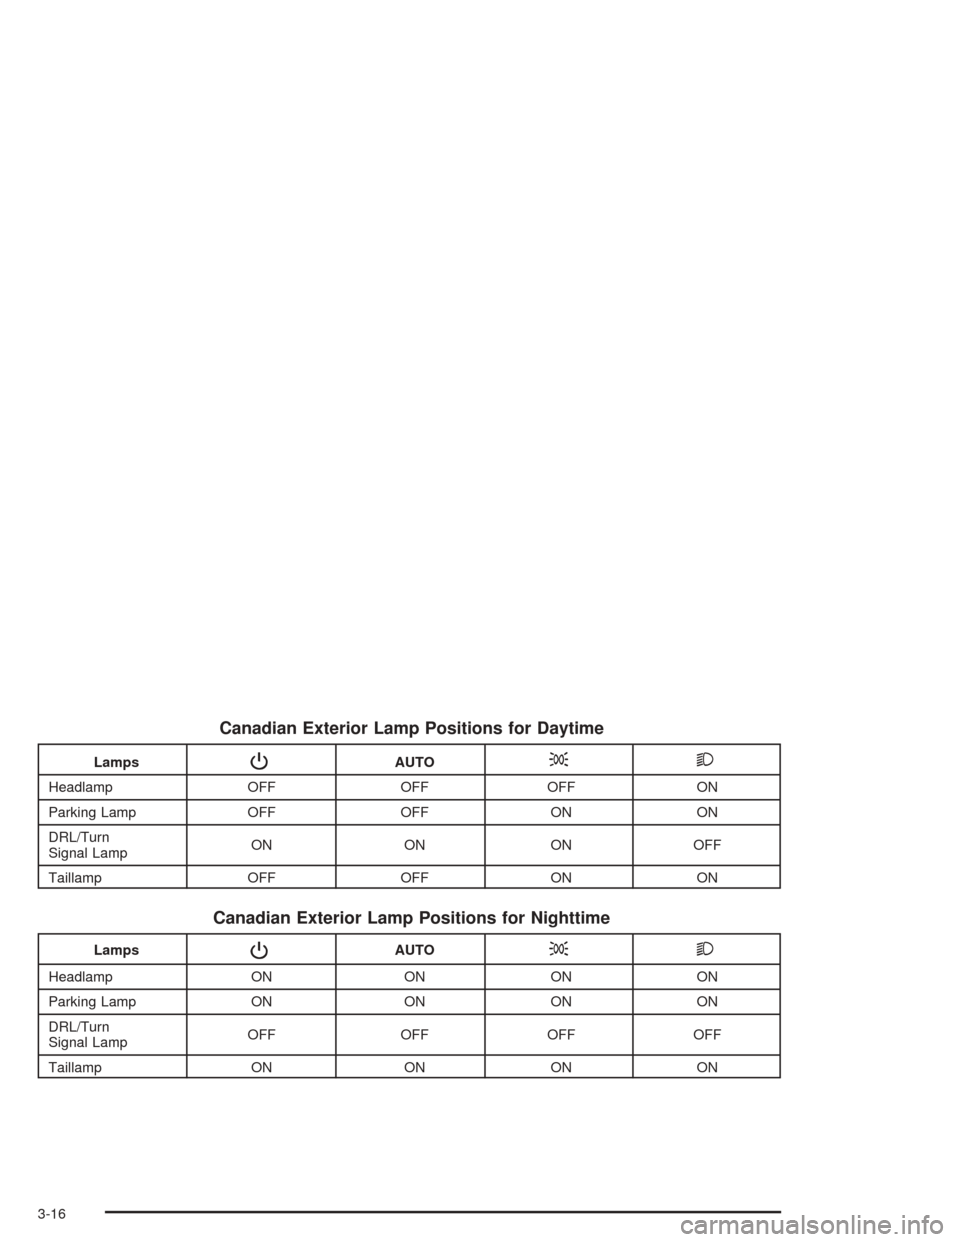
Canadian Exterior Lamp Positions for Daytime
LampsPAUTO;2
Headlamp OFF OFF OFF ON
Parking Lamp OFF OFF ON ON
DRL/Turn
Signal LampON ON ON OFF
Taillamp OFF OFF ON ON
Canadian Exterior Lamp Positions for Nighttime
LampsPAUTO;2
Headlamp ON ON ON ON
Parking Lamp ON ON ON ON
DRL/Turn
Signal LampOFF OFF OFF OFF
Taillamp ON ON ON ON
3-16
Page 133 of 426
Daytime Running Lamps (DRL)
Daytime Running Lamps (DRL) can make it easier for
others to see the front of your vehicle during the day. DRL
can be helpful in many different driving conditions, but
they can be especially helpful in the short periods after
dawn and before sunset. Fully functional daytime running
lamps are required on all vehicles �rst sold in Canada.
The DRL system will make both front turn signal lamps
turn on when the following conditions are met:
The ignition is on.
The exterior lamp control is turned to AUTO.
In addition, Canadian vehicles DRL will also turn
on if you have turned on your parking lamps.
The light sensor detects daytime light.
The shift lever is not in PARK (P).
While the DRL system is on, the taillamps, sidemarker
lamps, and instrument panel lights will not be illuminated.
The DRL system will be off any time your vehicle is in
PARK (P). The DRL system on U.S. vehicles can
also be turned off by using the Off/On switch for one
ignition cycle.
As with any vehicle, you should turn on the regular
headlamp system when you need it.
Automatic Headlamp System
When it is dark enough outside, your automatic system
will turn on your headlamps at the normal brightness
along with other lamps such as the taillamps, sidemarker,
parking lamps, instrument panel lights, and interior
switch backlighting.
Your vehicle is equipped with a light sensor on the top of
the instrument panel that inputs to the ACC, so be sure it
is not covered which will cause the system to be on
whenever the ignition is on.
The system may also be on when driving through a
parking garage, heavy overcast weather or a tunnel.
This is normal.
There is a delay in the transition between the daytime
and nighttime operation of the automatic lamp control
system so that driving under bridges or bright overhead
street lights does not affect the system. The automatic
lamp control system will only be affected when the light
sensor sees a change in lighting lasting longer than
this delay.
If you start your vehicle in a dark garage, the automatic
lamp system will come on immediately. Once you leave
the garage, it will take about one minute for the automatic
lamp system to change to DRL if it is light outside.
3-17
Page 134 of 426
During that delay, your instrument panel cluster may
not be as bright as usual. Make sure your instrument
panel brightness control is in the full bright position.
See “Instrument Panel Brightness Control” underInterior
Lamps on page 3-19.
To idle your vehicle with the system off, turn the
ignition on and rotate the exterior light switch to the
Off/On position. For Canadian vehicles, the transmission
must stay in PARK (P) for this function.
As with any vehicle, you should turn on the regular
headlamps when you need them.
Headlamps Off in Park (P)
This feature works when the ignition is on and it is
dark outside. To turn the headlamps off when it is
dark outside but keep other exterior lights on, turn
the exterior lamp control to the parking lamp position.
In this position, the parking lamps, sidemarker
lamps, taillamps, license plate lamps and instrument
panel lights will be on, but the headlamps will be off.
To turn on the headlamps along with the other
lamps when it is dark outside, turn the exterior lamp
control to the AUTO or headlamp position.
This feature will work for Canadian vehicles if the
vehicle is in PARK (P).
Delayed Headlamps
The delayed headlamps feature will continue to illuminate
the headlamps for 20 seconds after the key is turned to
OFF at night. Then the headlamps will automatically
turn off.
To override the 20 second delayed headlamp feature
while it is active turn the switch at the end of the
turn signal/multifunction lever to the Off/On position.
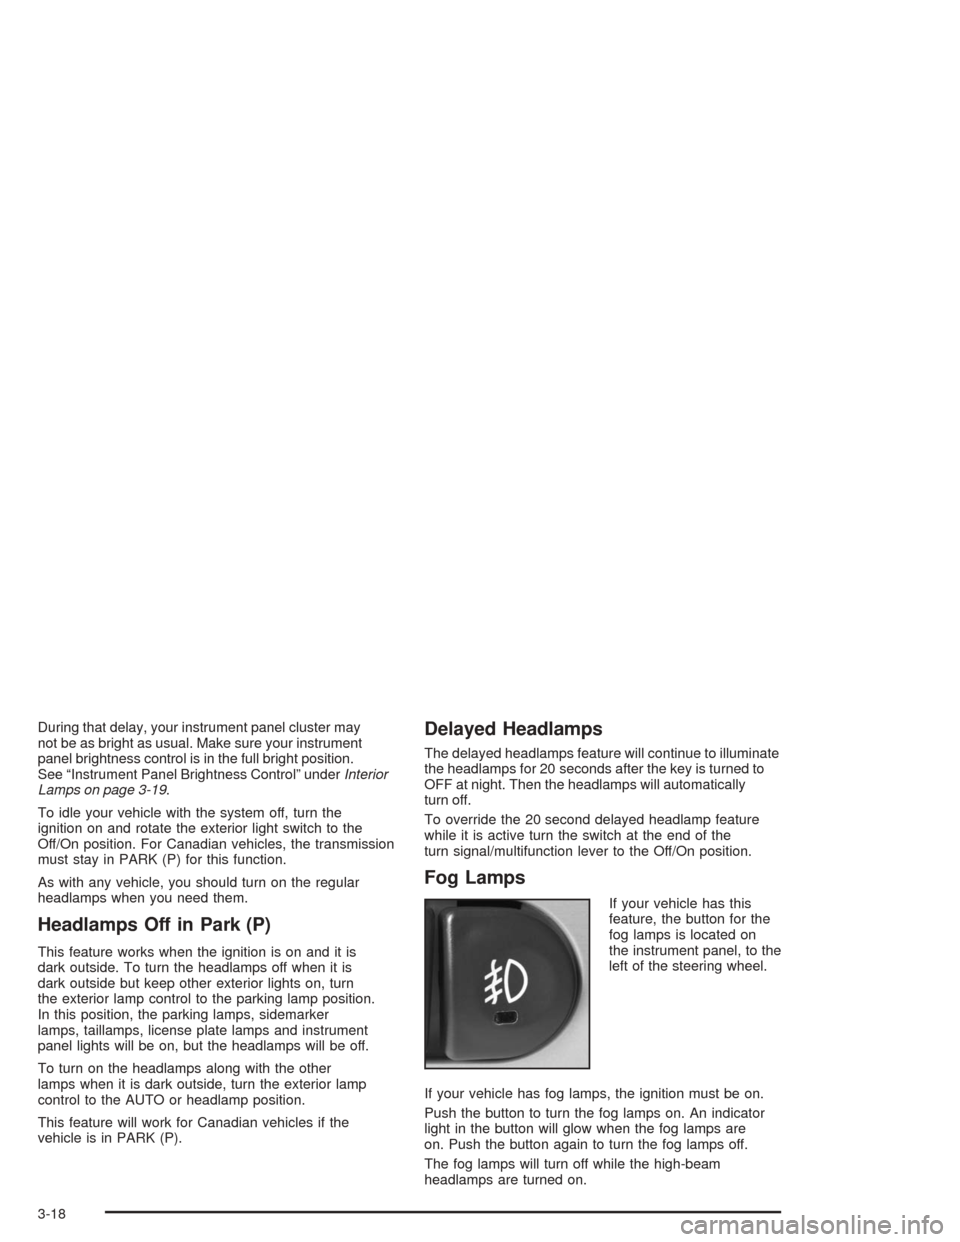
Fog Lamps
If your vehicle has this
feature, the button for the
fog lamps is located on
the instrument panel, to the
left of the steering wheel.
If your vehicle has fog lamps, the ignition must be on.
Push the button to turn the fog lamps on. An indicator
light in the button will glow when the fog lamps are
on. Push the button again to turn the fog lamps off.
The fog lamps will turn off while the high-beam
headlamps are turned on.
3-18