radio controls CHEVROLET MALIBU 2005 5.G Owners Manual
[x] Cancel search | Manufacturer: CHEVROLET, Model Year: 2005, Model line: MALIBU, Model: CHEVROLET MALIBU 2005 5.GPages: 434, PDF Size: 2.61 MB
Page 106 of 434
Adjustable Throttle and Brake Pedal
If your vehicle has this feature, you can change the
position of the throttle and brake pedals. This feature is
designed for shorter drivers, since the pedals cannot
move farther away from the standard position, but can
move rearward for better pedal reach.
The vehicle must be in PARK (P) or have the ignition off
for this feature to operate. If the system senses unusually
high resistance while the pedals are being adjusted, such
as a driver’s foot pushing the brake pedal, it is designed
to disable the switch. Simply remove the obstruction and
try to adjust the pedals again.
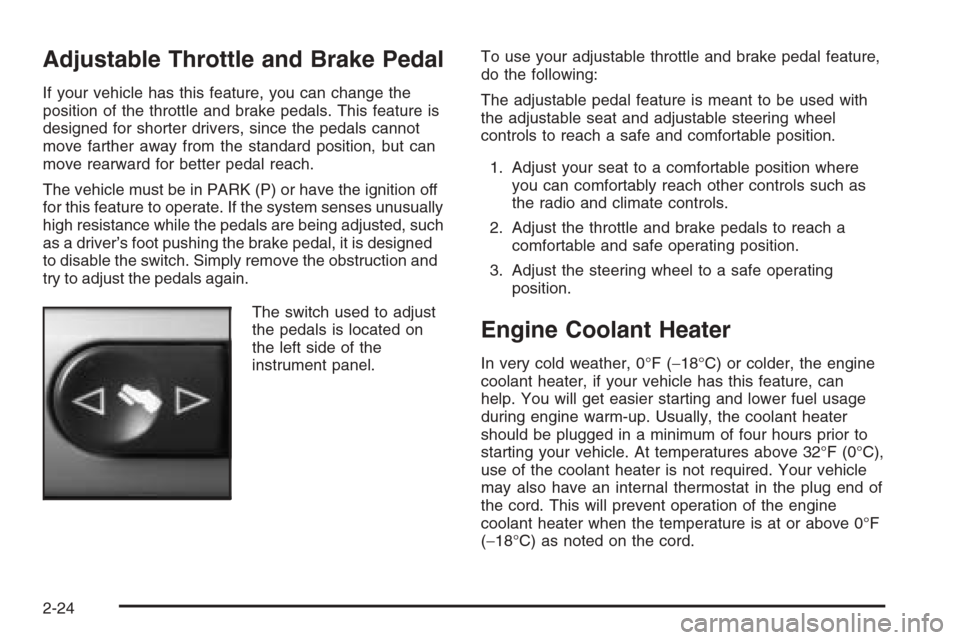
The switch used to adjust
the pedals is located on
the left side of the
instrument panel.To use your adjustable throttle and brake pedal feature,
do the following:
The adjustable pedal feature is meant to be used with
the adjustable seat and adjustable steering wheel
controls to reach a safe and comfortable position.
1. Adjust your seat to a comfortable position where
you can comfortably reach other controls such as
the radio and climate controls.
2. Adjust the throttle and brake pedals to reach a
comfortable and safe operating position.
3. Adjust the steering wheel to a safe operating
position.
Engine Coolant Heater
In very cold weather, 0°F (−18°C) or colder, the engine
coolant heater, if your vehicle has this feature, can
help. You will get easier starting and lower fuel usage
during engine warm-up. Usually, the coolant heater
should be plugged in a minimum of four hours prior to
starting your vehicle. At temperatures above 32°F (0°C),
use of the coolant heater is not required. Your vehicle
may also have an internal thermostat in the plug end of
the cord. This will prevent operation of the engine
coolant heater when the temperature is at or above 0°F
(−18°C) as noted on the cord.
2-24
Page 132 of 434
Oil Pressure Light.........................................3-44
Security Light...............................................3-44
Cruise Control Light......................................3-45
Highbeam On Light.......................................3-45
Service Vehicle Soon Light............................3-45
Fuel Gage...................................................3-46
Driver Information Center (DIC).......................3-47
DIC Operation and Displays...........................3-47
DIC Warnings and Messages.........................3-52
Audio System(s).............................................3-54
Setting the Time for Radios without Radio
Data Systems (RDS)..................................3-54
Setting the Time for Radios with Radio Data
Systems (RDS).........................................3-55
Radio with CD (Base Level)...........................3-55
Radio with CD (Up Level)..............................3-60Radio with Cassette and CD..........................3-71
Radio with Six-Disc CD.................................3-84
Rear Seat Entertainment System....................3-99
Rear Seat Audio (RSA) (Without Rear
Seat Entertainment).................................3-115
Rear Seat Audio (RSA) (With Entertainment
System)..................................................3-117
Theft-Deterrent Feature................................3-118
Audio Steering Wheel Controls......................3-119
Radio Reception.........................................3-120
Care of the Cassette Tape Player.................3-120
Care of Your CDs and DVDs........................3-121
Care of the CD and DVD Player...................3-121
Fixed Mast Antenna (MAXX Only).................3-122
Backglass Antenna (Sedan Only)..................3-122
XM™ Satellite Radio Antenna System............3-122
Section 3 Instrument Panel
3-2
Page 188 of 434
Audio System(s)
Notice:Before adding any sound equipment to
your vehicle, such as an audio system, CD player,
CB radio, mobile telephone, or two-way radio, make
sure that it can be added by checking with your
dealer. Also, check federal rules covering mobile
radio and telephone units. If sound equipment can
be added, it is very important to do it properly.
Added sound equipment may interfere with
the operation of your vehicle’s engine, radio, or
other systems, and even damage them. Your
vehicle’s systems may interfere with the operation
of sound equipment that has been added.
Figure out which audio system is in your vehicle, �nd
out what your audio system can do, and how to operate
all of its controls.
Your vehicle has a feature called Retained Accessory
Power (RAP). With RAP, the audio system can be
played even after the ignition is turned off. SeeRetained
Accessory Power (RAP) on page 2-22for more
information.
Setting the Time for Radios without
Radio Data Systems (RDS)
To set the hour, press the clock button. The clock
symbol will appear on the display and the hour number
will �ash. Then turn the ADJ knob to increase or to
decrease. To set the minutes, press the clock button
again. The minute numbers will �ash. Then turn the ADJ
knob to increase or to decrease. The time can be set
with the ignition on or off.
3-58
Page 191 of 434
Setting the Tone (Bass/Treble)
TONE /P/Q(Bass/Treble):To adjust the bass or the
treble, press and release the tone button until BASS
or TREB appears on the display. Turn the ADJ knob to
increase or to decrease. If a station is weak or noisy,
decrease the treble.
To adjust bass or treble to the middle position, select
BASS or TREB. Then press and hold the tone button for
more than two seconds. You will hear a beep and the
level will be adjusted to the middle position.
To adjust the tone controls to the middle position, �rst
end out of tone by pressing another button, causing the
radio to perform that function, or by waiting �ve seconds
for the display to return to the default display. Then
press and hold the tone button for more than
two seconds until you hear a beep. ALL CENTERED
will appear on the display.
Adjusting the Speakers (Balance/Fade)
BAL/FADE /S(Balance/Fade):To adjust the
balance between the right and the left speakers, press
and release the balance and fade button until BAL
appears on the display. Turn the ADJ knob to move the
sound toward the right or the left speakers.
To adjust the fade between the front and the rear
speakers, press and release the balance and fade
button until FADE appears on the display. Then turn the
ADJ knob to move the sound toward the front or the
rear speakers.
To adjust the balance or the fade to the middle position,
select BAL or FADE. Then press and hold the balance
and fade button for more than two seconds. You
will hear a beep and the level will be adjusted to the
middle position.
To adjust the speaker controls to the middle position,
�rst end out of balance and fade by pressing another
button, causing the radio to perform that function, or by
waiting �ve seconds for the display to return to the
default display. Then press and hold the balance and
fade button for more than two seconds until you hear a
beep. ALL CENTERED will appear on the display.
3-61
Page 197 of 434
Setting Preset Stations
Up to 30 stations (six FM1, six FM2, and six AM,
six XM1 and six XM2 (if equipped)), can be programmed
on the six numbered pushbuttons, by performing the
following steps:
1. Turn the radio on.
2. Press BAND to select FM1, FM2, AM, or XM1
or XM2.
3. Tune in the desired station.
4. Press AUTO TONE or AUTO EQ to select the
equalization.
5. Press and hold one of the six numbered
pushbuttons until you hear a beep. Whenever that
numbered pushbutton is pressed, the station
that was set will return and the equalization that
was selected will be stored for that pushbutton.
6. Repeat the steps for each pushbutton.
Setting the Tone
(Bass/Midrange/Treble)
TONE /P/Q(Bass/Treble):Press and release this
button until BASS, MID, or TREB appears on the
display. Turn the ADJ knob to increase or to decrease.
The display will show the bass, midrange, or treble
level. If a station is weak or noisy, decrease the treble.
To adjust bass, midrange, or treble to the middle
position, select BASS, MID, or TREB. Then press and
hold the tone button for more than two seconds. You will
hear one beep and the tone control will be adjusted to
the middle position.
To adjust all tone controls to the middle position, press
and hold the tone button when no tone control is
displayed. ALL CENTERED will appear on the display
and you will hear a beep. The bass, midrange, and
treble will be adjusted to the middle position.
AUTO TONE/AUTO EQ (Automatic Equalization):
Press this button to select customized equalization
settings designed for country, jazz, talk, pop, rock, and
classical.
To return to the manual mode, press the AUTO TONE
or AUTO EQ button until CUSTOM appears on the
display. You can also manually adjust the bass,
midrange, and treble using the tone button.
3-67
Page 198 of 434
Adjusting the Speakers (Balance/Fade)
BAL/FADE /S(Balance/Fade):To adjust
the balance between the right and the left speakers,
push and release the balance and fade button until BAL
appears on the display. Turn the ADJ knob to move
the sound toward the right or the left speakers.
To adjust the fade between the front and the rear
speakers, push and release the balance and fade button
until FADE appears on the display. Turn the ADJ
knob to move the sound toward the front or the rear
speakers.
To adjust balance or fade to the middle position, select
BAL or FADE. Then press and hold the balance and
fade button for more than two seconds. You will
hear one beep and the speaker control will be adjusted
to the middle position.
To adjust both speaker controls to the middle position,
push and hold the tone button when no speaker
control is displayed. ALL CENTERED will appear on the
display and you will hear one beep. The balance and
fade will be adjusted to the middle position.
Finding a Program Type (PTY) Station
(RDS and XM™)
To select and �nd a desired PTY perform the following:
1. Press the P-TYPE button to activate program
type select mode. PTY for FM or PTYPE for XM and
a program type will appear on the display.
2. Turn the ADJ knob to select a PTY.
3. Once the desired PTY is displayed, press the
SEEK up arrow to select the PTY and to take you to
the PTY’s �rst station.
4. To go to another station within that PTY press the
SEEK up arrow again. If the radio cannot �nd the
desired PTY, NONE FOUND will appear on
the display and the radio will return to the last
station you were listening to.
After 15 seconds of inactivity or if the P-TYPE
button is pressed again, the radio will exit program
type select mode.
3-68
Page 208 of 434
Setting Preset Stations
Up to 30 stations (six FM1, six FM2, and six AM,
six XM1 and six XM2 (if equipped)), can be programmed
on the six numbered pushbuttons, by performing the
following steps:
1. Turn the radio on.
2. Press BAND to select FM1, FM2, AM, or XM1
or XM2.
3. Tune in the desired station.
4. Press AUTO TONE or AUTO EQ to select the
equalization.
5. Press and hold one of the six numbered
pushbuttons until you hear a beep. Whenever that
numbered pushbutton is pressed, the station
that was set will return and the equalization that
was selected will be stored for that pushbutton.
6. Repeat the steps for each pushbutton.
Setting the Tone
(Bass/Midrange/Treble)
TONE /P/Q(Bass/Treble):Press and release this
button until BASS, MID, or TREB appears on the
display. Turn the ADJ knob to increase or to decrease.
The display will show the bass, mid, or treble level.
If a station is weak or noisy, decrease the treble.
To adjust bass, midrange, or treble to the middle
position, select BASS, MID, or TREB. Then press and
hold the tone button for more than two seconds. You will
hear one beep and the tone control will be adjusted to
the middle position.
To adjust all tone controls to the middle position, press
and hold the tone button when no tone control is
displayed. ALL CENTERED will appear on the display
and you will hear a beep. The bass, midrange, and
treble will be adjusted to the middle position.
3-78
Page 221 of 434
Setting Preset Stations
Up to 30 stations (six FM1, six FM2, and six AM,
six XM1 and six XM2 (if equipped)), can be programmed
on the six numbered pushbuttons, by performing the
following steps:
1. Turn the radio on.
2. Press BAND to select FM1, FM2, AM, or XM1
or XM2.
3. Tune in the desired station.
4. Press AUTO TONE or AUTO EQ to select the
equalization.
5. Press and hold one of the six numbered
pushbuttons until you hear a beep. Whenever that
numbered pushbutton is pressed, the station
that was set will return and the equalization that
was selected will be stored for that pushbutton.
6. Repeat the steps for each pushbutton.
Setting the Tone
(Bass/Midrange/Treble)
TONE /P/Q(Bass/Treble):Press and release this
button until BASS, MID, or TREB appears on the
display. Turn the ADJ knob to increase or to decrease.
The display will show the bass, mid, or treble level.
If a station is weak or noisy, decrease the treble.
To adjust bass, midrange, or treble to the middle
position, select BASS, MID, or TREB. Then press and
hold the tone button for more than two seconds.
The display level will be adjusted to the middle position
and you will hear a beep.
To adjust all tone controls to the middle position, press
and hold the tone button when no tone control is
displayed. ALL CENTERED will appear on the display
and you will hear a beep.
3-91
Page 249 of 434
Rear Seat Audio (RSA) (Without
Rear Seat Entertainment)
This feature allows rear seat passengers to listen to and
control any of the sources: radio, cassette, and CDs.
An audio or radio source may be listened to but cannot
be changed from the RSE if the front seat passengers
have selected the same source from the front seat
controls. (For example, the radio station selected with
the front seat controls cannot be changed by the
rear seat control(s)).
The front seat audio controls always have priority over
the RSA controls. If the front seat passengers switch
to the same source as the RSA, the RSA will no longer
control the source.You can operate the RSA when the main radio is off.
You can use wired headphones (not included) or
the wireless headphones. The wired headphones
connect to the outlets on the RSA system. The rear seat
passengers have control of the volume for each set of
wired headphones. Adjust the volume on the wireless
headphones by turning the volume control on each
headset.
Primary Radio Controls
The following function is controlled by the main radio:
PWR (Power):Front seat passengers can turn the RSA
off by quickly pressing this knob twice.
3-119
Page 250 of 434

Rear Seat Radio Controls
The following functions are controlled by the RSA
system:
n(Volume):Turn this knob to increase or to
decrease the volume. The left knob controls the left
headphones and the right knob controls the right
headphones.
O(Power):Press this button to turn the system on or
off. The rear speakers will be muted when the RSA
power is turned on.
SRCE (Source):Press this button to play a cassette
tape or CD when listening to the radio. The inactive tape
or CD will remain safely inside the radio for future
listening.
BAND:Press this button to switch between FM1, FM2,
AM, or XM1 or XM2 (if equipped).1–6 (Preset):Press this button to go to the next preset
radio station. This function is inactive if the front seat
passengers are listening to the radio.
When a cassette tape is playing, press this button to go
to the other side of the tape.
When a CD is playing in the six-disc CD changer, press
this button to select the next CD, if multiple CDs are
loaded. This function is inactive if the front seat
passengers are listening to a CD.
©¨(Seek):When listening to the radio, press the
left or the right arrow to go to the next or the previous
station and stay there. This function is inactive if
the front seat passengers are listening to the radio.
When a cassette tape is playing, press the left or the
right arrow to hear the next or the previous selection.
This function is inactive if the front seat passengers are
listening to a cassette tape.
When a CD is playing, press the left arrow to go to the
start of the current track if more than eight seconds
have played. Press the right arrow to go to the next track
on the CD. This function is inactive if the front seat
passengers are listening to a CD.
3-120