low beam CHEVROLET MALIBU 2006 6.G Owners Manual
[x] Cancel search | Manufacturer: CHEVROLET, Model Year: 2006, Model line: MALIBU, Model: CHEVROLET MALIBU 2006 6.GPages: 442, PDF Size: 2.61 MB
Page 133 of 442
Instrument Panel Overview...............................3-4
Hazard Warning Flashers................................3-6
Other Warning Devices...................................3-6
Horn .............................................................3-6
Tilt and Telescopic Steering Wheel...................3-6
Turn Signal/Multifunction Lever.........................3-7
Turn and Lane-Change Signals........................3-8
Headlamp High/Low-Beam Changer..................3-8
Flash-to-Pass.................................................3-8
Windshield Wipers..........................................3-9
Windshield Washer.......................................3-10
Rear Window Wiper/Washer (MAXX Model)......3-10
Cruise Control..............................................3-11
Exterior Lamps.............................................3-14
Headlamps on Reminder................................3-16
Headlamps Off in PARK (P)...........................3-16
Delayed Headlamps......................................3-16
Daytime Running Lamps (DRL).......................3-16
Automatic Headlamp System..........................3-17
Fog Lamps ..................................................3-18
Instrument Panel Brightness...........................3-19
Dome Lamp .................................................3-19
Entry/Exit Lighting.........................................3-19Parade Dimming...........................................3-19
Front Reading Lamps....................................3-20
Rear Reading Lamps....................................3-20
Trunk Lamp.................................................3-20
Cargo Lamp.................................................3-20
Battery Run-Down Protection..........................3-20
Accessory Power Outlet(s).............................3-21
Cigarette Lighter...........................................3-22
Climate Controls............................................3-22
Climate Control System.................................3-22
Automatic Climate Control System...................3-27
Outlet Adjustment.........................................3-31
Warning Lights, Gages, and Indicators............3-32
Instrument Panel Cluster................................3-33
Speedometer and Odometer...........................3-34
Trip Odometer..............................................3-34
Tachometer.................................................3-34
Safety Belt Reminder Light.............................3-34
Airbag Readiness Light..................................3-35
Charging System Light..................................3-36
Brake System Warning Light..........................3-36
Anti-Lock Brake System Warning Light.............3-37
Section 3 Instrument Panel
3-1
Page 139 of 442

The lever that allows you to tilt and telescope the steering
wheel is located on the left side of the steering column.
To tilt and telescope the wheel, pull down the lever. Then
move the wheel to a comfortable position, pull up the
lever to lock the wheel in place. The wheel can be
adjusted up and down as well as forward and backward.Turn Signal/Multifunction Lever
The lever on the left side of the steering column
includes the following:
Turn and Lane-Change Signals. SeeTurn and
Lane-Change Signals on page 3-8.
Headlamp High/Low-Beam Changer. SeeHeadlamp
High/Low-Beam Changer on page 3-8.
Flash-to-Pass. SeeFlash-to-Pass on page 3-8.
Exterior Light Control. SeeExterior Lamps
on page 3-14.
3-7
Page 140 of 442

Turn and Lane-Change Signals
The turn signal has two upward (for right) and
two downward (for left) positions. These positions
allow you to signal a turn or a lane change.
To signal a turn, move the lever all the way up or
down to the latched position. When the turn is nished,
the lever will return automatically.
An arrow on the instrument
panel cluster will ash
in the direction of the turn
or lane change.
To signal a lane change, just raise or lower the lever
until the arrow starts to ash. Hold it there until you
complete your lane change. The lever will return by
itself when you release it.
A warning chime signal will come on if you have left
your turn signal on for more than 2/3 mile (1 km).
As you signal a turn or a lane change, if the arrows
ash rapidly, a signal bulb may be burned out and
other drivers won’t see your turn signal.If a bulb is burned out, replace it to help avoid an
accident. If the arrows don’t go on at all when you signal
a turn, check for burned-out bulbs and then check the
fuse. SeeFuses on page 5-99.
Headlamp High/Low-Beam Changer
To change the headlamps from low beam to high beam,
push the turn signal/multifunction lever away from you.
When the high beams
are on, a light on the
instrument panel cluster
also will be on if the
ignition is in ON.
To change the headlamps from high beam to low beam,
pull the turn signal lever toward you.
Flash-to-Pass
This feature lets you use your high-beam headlamps
momentarily to signal a driver in front of you that
you want to pass.
To use it, pull the turn signal/multifunction lever toward
you until the high-beam headlamps come on, then
release the lever to turn them off.
3-8
Page 149 of 442
The DRL system will turn your low-beam headlamps on
at a reduced brightness when the following conditions
are met:
The ignition is on.
The exterior lamp control is turned to AUTO.
In addition, Canadian vehicles DRL will also turn
on if you have turned on your parking lamps.
The light sensor detects daytime light. See the
end of this section for more information on the
light sensor.
The shift lever is not in PARK (P).
While the DRL system is on, the taillamps, sidemarker
lamps, and instrument panel lights will not be
illuminated.
The DRL system will be off any time your vehicle is
in PARK (P). The DRL system on U.S. vehicles can
also be turned off by using the off/on switch for
one ignition cycle.
As with any vehicle, you should turn on the regular
headlamp system when you need it.
Light Sensor
Your vehicle has a light sensor on top of the instrument
panel. Make sure it is not covered or the headlamps
may remain on when you do not need them. The light
sensor for the DRL and Automatic Headlamp features
is located on top of the instrument panel.
The automatic headlamp system may be on when
driving through a parking garage, heavy outcast
weather, or a tunnel. This is normal.
Automatic Headlamp System
When it is dark enough outside, your automatic
system will turn on your headlamps at the normal
brightness along with other lamps such as the
taillamps, sidemarker, parking lamps, instrument
panel lights, and interior switch backlighting.
Make sure the light sensor is not covered. See “Light
Sensor” inDaytime Running Lamps (DRL) on page 3-16.
3-17
Page 150 of 442
There is a delay in the transition between the daytime
and nighttime operation of the automatic lamp control
system so that driving under bridges or bright overhead
street lights does not affect the system. The automatic
lamp control system will only be affected when the light
sensor sees a change in lighting lasting longer than
this delay.
If you start your vehicle in a dark garage, the automatic
lamp system will come on immediately. Once you
leave the garage, it will take about one minute for
the automatic lamp system to change to DRL if it is light
outside. During that delay, your instrument panel
cluster may not be as bright as usual. Make sure your
instrument panel brightness control is in the full
bright position. SeeInstrument Panel Brightness on
page 3-19.
To idle your vehicle with the system off, turn the
ignition on and turn the exterior light switch to the
off/on position. For Canadian vehicles, the transaxle
must stay in PARK (P) for this function.
As with any vehicle, you should turn on the regular
headlamps when you need them.Fog Lamps
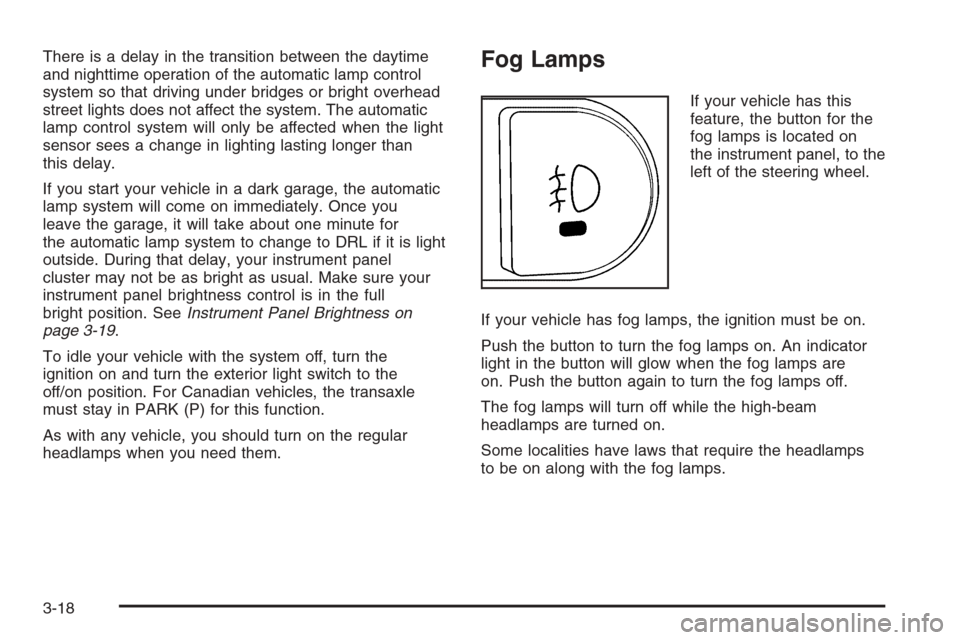
If your vehicle has this
feature, the button for the
fog lamps is located on
the instrument panel, to the
left of the steering wheel.
If your vehicle has fog lamps, the ignition must be on.
Push the button to turn the fog lamps on. An indicator
light in the button will glow when the fog lamps are
on. Push the button again to turn the fog lamps off.
The fog lamps will turn off while the high-beam
headlamps are turned on.
Some localities have laws that require the headlamps
to be on along with the fog lamps.
3-18
Page 177 of 442

Security Light
For information
regarding this light,
seeTheft-Deterrent
Systems on page 2-18.
Cruise Control Light
This light comes on
whenever you set your
cruise control.
The light will go out when the cruise control is turned
off. SeeCruise Control on page 3-11for more
information.
Highbeam On Light
This light will come on
when the high-beam
headlamps are in use.
SeeHeadlamp High/Low-Beam Changer on page 3-8.
3-45
Page 259 of 442

No one can see as well at night as in the daytime.
But as we get older these differences increase.
A 50-year-old driver may require at least twice as much
light to see the same thing at night as a 20-year-old.
What you do in the daytime can also affect your
night vision. For example, if you spend the day in
bright sunshine you are wise to wear sunglasses.
Your eyes will have less trouble adjusting to night.
But if you are driving, do not wear sunglasses at night.
They may cut down on glare from headlamps, but
they also make a lot of things invisible.
You can be temporarily blinded by approaching
headlamps. It can take a second or two, or even
several seconds, for your eyes to re-adjust to the dark.
When you are faced with severe glare, as from a
driver who does not lower the high beams, or a vehicle
with misaimed headlamps, slow down a little. Avoid
staring directly into the approaching headlamps.Keep the windshield and all the glass on your vehicle
clean — inside and out. Glare at night is made
much worse by dirt on the glass. Even the inside of
the glass can build up a lm caused by dust. Dirty glass
makes lights dazzle and ash more than clean glass
would, making the pupils of your eyes contract
repeatedly.
Remember that the headlamps light up far less of a
roadway when you are in a turn or curve. Keep
your eyes moving; that way, it is easier to pick out
dimly lighted objects. Just as the headlamps should
be checked regularly for proper aim, so should
your eyes be examined regularly. Some drivers suffer
from night blindness — the inability to see in
dim light — and are not even aware of it.
4-19
Page 336 of 442

Headlamps, Front Turn Signal, and
Parking Lamps
A. High-Beam Headlamp
B. Low-Beam Headlamp/DRL
C. Front Turn Signal/Parking LampTo replace one of these bulbs, do the following:
1. Open the hood. SeeHood Release on page 5-11
for more information.
2. Remove the two bolts attaching the headlamp
assembly to the vehicle.
3. Remove the headlamp assembly from the vehicle
by pulling it forward. Use care not to scratch the
vehicle with the lamp or the lamp with the fender.
5-48
Page 339 of 442

6. Pull the bulb to remove
it from the socket.
Replace the old bulb
with a new one.
7. Reverse the steps to attach the taillamp assembly
to the vehicle.
When securing the lamp assembly back into place,
align the assembly so that the trunk lid doesn’t
contact it.Replacement Bulbs
Exterior Lamp Bulb Number
Back-Up Lamp 921
Front Parking/Turn Signal Lamp 3157KX
Headlamps
High-Beam H9
Low-Beam/DRL H11
Stoplamp/Taillamp/
Turn Signal Lamp3057
For replacement bulbs not listed here, contact your
dealer.
5-51
Page 391 of 442

Fuses Usage
1 Air Conditioning Clutch
2 Electronic Throttle Control
3 Ignition Module
4 Transmission
5 Fuel Injectors
6 Emission 1
7 Left Headlamp Low-Beam
8 Horn
9 Right Headlamp Low-Beam
10 Front Fog Lamps
11 Left Headlamp High-Beam
12 Right Headlamp High-Beam
13 Powertrain Control Module (Batt)
14 Windshield Wiper
15 Anti-lock Brake System
16 Powertrain Control Module (IGN 1)
17 Cooling Fan 1Fuses Usage
18 Cooling Fan 2
19 Run Relay
20 IBCM 1
21 IBCM (R/C)
22 Rear Electrical Center 1
23 Rear Electrical Center 2
24 Anti-lock Brake System
25 IBCM 2
26 Starter
27 (DIODE) Windshield Wiper
41 Electric Power Steering
42 Transmission Control Module
43 Ignition Module
44 Fuel Injectors
45 Intake Tuning Valve
46 (Resistor) Brake Lamp Diagnostic
47 Daytime Running Lamps
5-103