ECO mode CHEVROLET MALIBU 2008 6.G Owners Manual
[x] Cancel search | Manufacturer: CHEVROLET, Model Year: 2008, Model line: MALIBU, Model: CHEVROLET MALIBU 2008 6.GPages: 412, PDF Size: 2.22 MB
Page 95 of 412
Express Window Anti-Pinch Feature
If any object is in the path of the window when the
express-up is active, the window stops at the obstruction
and auto-reverse to a preset factory position. Weather
conditions such as severe icing may also cause the
window to auto-reverse. The window returns to normal
operation once the obstruction or condition is removed.
Express Window Anti-Pinch Override
{CAUTION:
If express override is activated, the window
will not reverse automatically. You or others
could be injured and the window could be
damaged. Before you use express override,
make sure that all people and obstructions are
clear of the window path.In an emergency, the anti-pinch feature can be
overridden in a supervised mode. Hold the window
switch all the way up to the second position. The window
rises for as long as the switch is held. Once the
switch is released, the express mode is re-activated.
In this mode, the window can still close on an object in
its path. Use care when using the override mode.
Window Lockout
The driver’s power window controls also include a
lockout button.
o(Window Lockout):Press the lockout button to
stop the rear passengers from using their window
switches. The driver and front passenger can still
operate all the windows with the lock on. When the
red part of the switch is visible you have returned
to normal window operation.
2-17
Page 110 of 412
NEUTRAL (N):In this position, your engine does not
connect with the wheels. To restart when you are
already moving, use NEUTRAL (N) only. Also, use
NEUTRAL (N) when your vehicle is being towed.
{CAUTION:
Shifting into a drive gear while the engine is
running at high speed is dangerous. Unless
your foot is �rmly on the brake pedal, the
vehicle could move very rapidly. You could
lose control and hit people or objects. Do not
shift into a drive gear while the engine is
running at high speed.Notice:Shifting out of P (Park) or N (Neutral) with
the engine running at high speed may damage
the transmission. The repairs would not be covered
by the vehicle warranty. Be sure the engine is
not running at high speed when shifting the vehicle.
DRIVE (D):This position is for normal driving.
It provides the best fuel economy for your vehicle.
If you need more power for passing, and you are:Going less than 35 mph (56 km/h), push your
accelerator pedal about halfway down.
Going about 35 mph (56 km/h) or more,
push the accelerator all the way down.
MANUAL MODE (M):This position, allows you to
change gears similar to a manual transmission. If your
vehicle has this feature, see Driver Shift Control (DSC).
2-32
Page 112 of 412
Second or Third Gear Start Feature
When accelerating your vehicle from a stop in snowy
and icy conditions, you may want to shift the gear select
tap switch into Second or Third gear. A higher gear
allows you to gain more traction on slippery surfaces.
With the DSC feature, the vehicle can be set to pull
away in Second or Third gear.
1. Move the shift lever from DRIVE (D) into the
MANUAL MODE (M).
2. With the vehicle stopped, press (+) end of the button
to select Second or Third gear. The vehicle will start
from a stop position in Second or Third gear.
3. Once moving select the desired drive gear.
Parking Brake
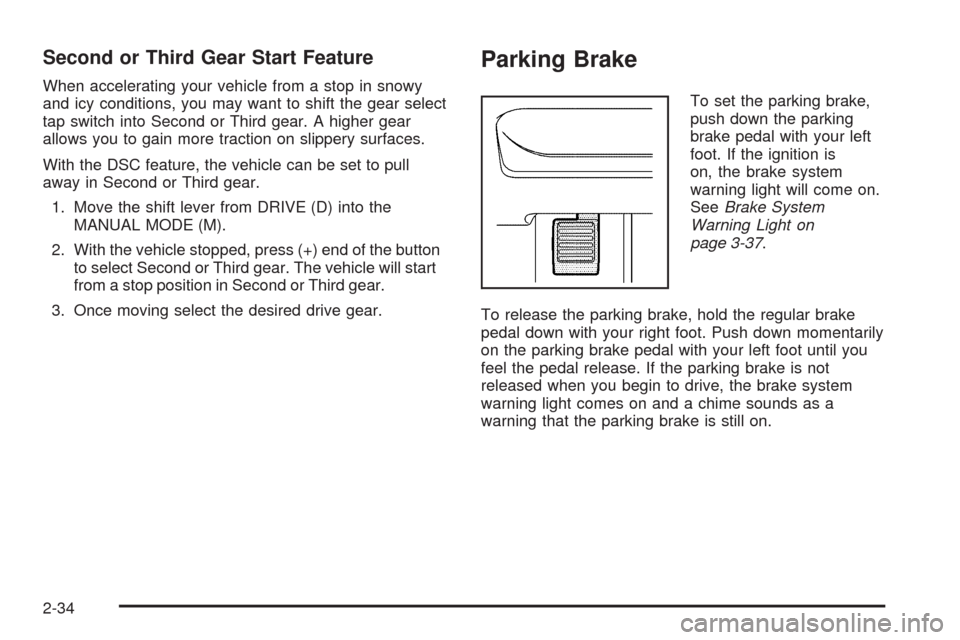
To set the parking brake,
push down the parking
brake pedal with your left
foot. If the ignition is
on, the brake system
warning light will come on.
SeeBrake System
Warning Light on
page 3-37.
To release the parking brake, hold the regular brake
pedal down with your right foot. Push down momentarily
on the parking brake pedal with your left foot until you
feel the pedal release. If the parking brake is not
released when you begin to drive, the brake system
warning light comes on and a chime sounds as a
warning that the parking brake is still on.
2-34
Page 128 of 412
2. Write down the eight to 12 switch settings from left
to right as follows:
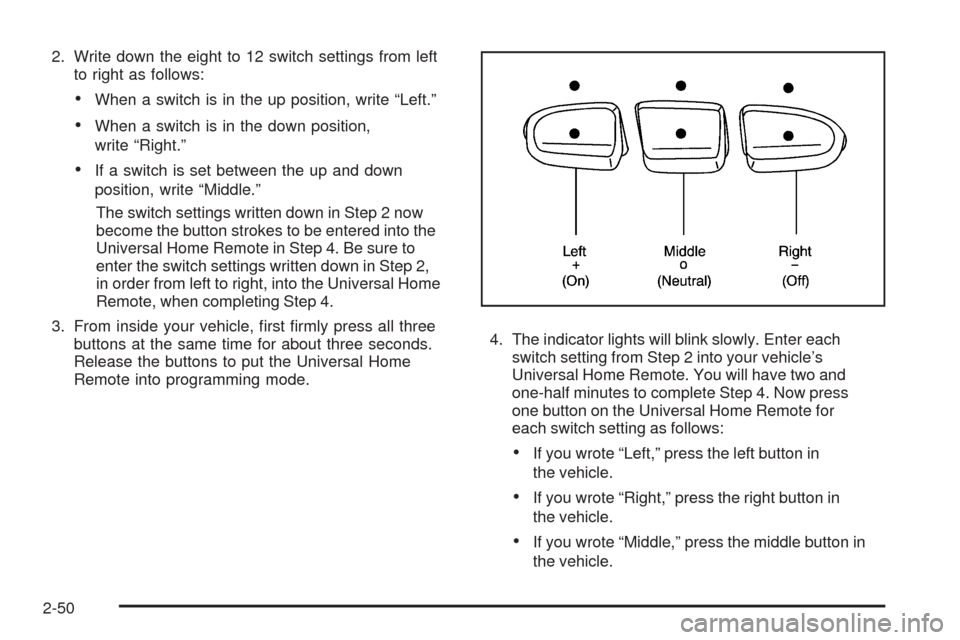
When a switch is in the up position, write “Left.”
When a switch is in the down position,
write “Right.”
If a switch is set between the up and down
position, write “Middle.”
The switch settings written down in Step 2 now
become the button strokes to be entered into the
Universal Home Remote in Step 4. Be sure to
enter the switch settings written down in Step 2,
in order from left to right, into the Universal Home
Remote, when completing Step 4.
3. From inside your vehicle, �rst �rmly press all three
buttons at the same time for about three seconds.
Release the buttons to put the Universal Home
Remote into programming mode.4. The indicator lights will blink slowly. Enter each
switch setting from Step 2 into your vehicle’s
Universal Home Remote. You will have two and
one-half minutes to complete Step 4. Now press
one button on the Universal Home Remote for
each switch setting as follows:
If you wrote “Left,” press the left button in
the vehicle.
If you wrote “Right,” press the right button in
the vehicle.
If you wrote “Middle,” press the middle button in
the vehicle.
2-50
Page 149 of 412
Dome Lamp
If the vehicle has a dome lamp with a switch, the
following are the settings.
9(Off):Move the lever to this position to turn the
lamp off, even when a door is open.
1(Door):Move the lever to this position so that the
lamp comes on when a door is opened.
+(On):Move the lever to this position to turn the
dome lamp on.
Entry/Exit Lighting
The lamps inside the vehicle come on when any door is
opened. These lamps fade out about 20 seconds
after all of the doors have been closed or when the
ignition is turned to ON/RUN. They also come on when
the unlock symbol button or the horn symbol is
pressed on the Remote Keyless Entry (RKE) system
transmitter.
The lamps inside the vehicle stay on for about
20 seconds after the key is removed from the ignition to
provide light as you exit.
Parade Dimming
Parade dimming is a separate lighting mode that comes
on while the parking lamps are turned on during the
day. It prevents the display lights and indicator
lights from being dim, while the parking lamps are
used during the day.
Front Reading Lamps
Press the lens to turn the reading lamps on and off.
The reading lamps will turn on when the door is open
if the dome lamp is in the door position. The reading
lamps will also turn on with the dome lamp switch in the
on position. The lamps will not turn on if the door is
open and the dome lamp is in the off position.
Overhead Console Reading Lamps
The vehicle may have reading lamps on the overhead
console. These lamps come on when the doors are
opened if the lamp switch is not in the OFF position.
Press the side of each lamp to turn them on and
off, while the doors are closed.
3-17
Page 154 of 412
Pressing this button will cancel the outside air mode.
When switching to the defog or defrost modes the
system automatically moves from recirculation to outside
air. When the vehicle or fan is turned off and back on,
the system defaults to outside air automatically.
Only use recirculation mode when it is needed for
comfort, since window fogging can occur.
Temperature Control:Turn the center knob clockwise
or counterclockwise to increase or decrease the
temperature inside the vehicle.
When it is cold outside 0°F (−18°C) or lower, use the
engine coolant heater, if vehicle has one, to provide
warmer air faster to the vehicle. An engine coolant
heater warms the coolant the engine uses that provides
heat to warm the inside of the vehicle. For more
information, seeEngine Coolant Heater on page 2-27.
#(Air Conditioning):Press this button to turn
the air conditioning system on or off. An indicator light
comes on to show it is activated.
The air-conditioning system removes moisture from the
air, so a small amount of water might drip under the
vehicle while it is idling or after the engine is turned off
is normal.
Maximum Air Conditioning
On hot days, open the windows to let hot inside air
escape; then close them. This helps reduce the time it
takes for the vehicle to cool down. It also helps the
air conditioning system operate more efficiently.
For quick cool down on hot days, do the following:
1. Select the
Cvent mode.
2. Select the highest fan speed.
3. Select
#air conditioning.
4. Select the
?recirculation mode.
5. Select the coolest temperature.
Using these settings together for long periods of time can
cause the air inside of the vehicle to become too dry. To
prevent this from happening, after the air in the vehicle
has cooled, turn the recirculation mode off.
3-22
Page 157 of 412
Automatic Operation
AUTO (Automatic):Select AUTO on both the fan
speed control and the air delivery mode control knobs to
activate the automatic system. When automatic
operation is active the system controls the inside
temperature and air delivery.
Use the steps below to place the entire system in
automatic mode:
1. Turn the fan knob and the mode knob to the AUTO
position.
The current set temperature displays. When AUTO
is selected, the air conditioning operation and air
inlet is automatically controlled. The air conditioning
compressor runs while the outside temperature is
over about 40°F (4°C). The air inlet will normally be
set to outside air. If it is hot outside, the air inlet
may automatically switch to recirculate inside air to
help quickly cool down the vehicle.2. Set the temperature.
An initial setting of 73°F (23°C) is recommended.
Allow about 20 minutes for the system to regulate.
Press the up or down arrow temperature buttons
to adjust the temperature setting as necessary.
If the temperature is set at 60°F (15°C) the system
remains at the maximum cooling setting. If the
temperature is set at 90°F (32°C) the system
remains at the maximum heat setting. Choosing
either maximum setting does not cause the vehicle
to heat or cool any faster.
Be careful not to cover the sensor located on the
top of the instrument panel near the windshield.
This sensor regulates air temperature based on the
intensity of the sun.
Also do not cover the sensor grille on the lower
right side of the climate control faceplate, as
this regulates the inside temperature.
To avoid blowing cold air at engine start-up in cold
weather, the system delays turning on the fan
until warm air is available. The length of delay
depends on the engine coolant temperature.
Turning the fan knob overrides this delay and
changes the fan to the selected speed.
3-25
Page 178 of 412
Driver Information Center (DIC)
Your vehicle has a Driver Information Center (DIC).
The DIC display gives you the status of many of your
vehicle’s systems. The DIC is also used to display driver
personalization menu modes and warning/status
messages. All messages will appear in the DIC display,
located at the bottom of the instrument panel cluster.
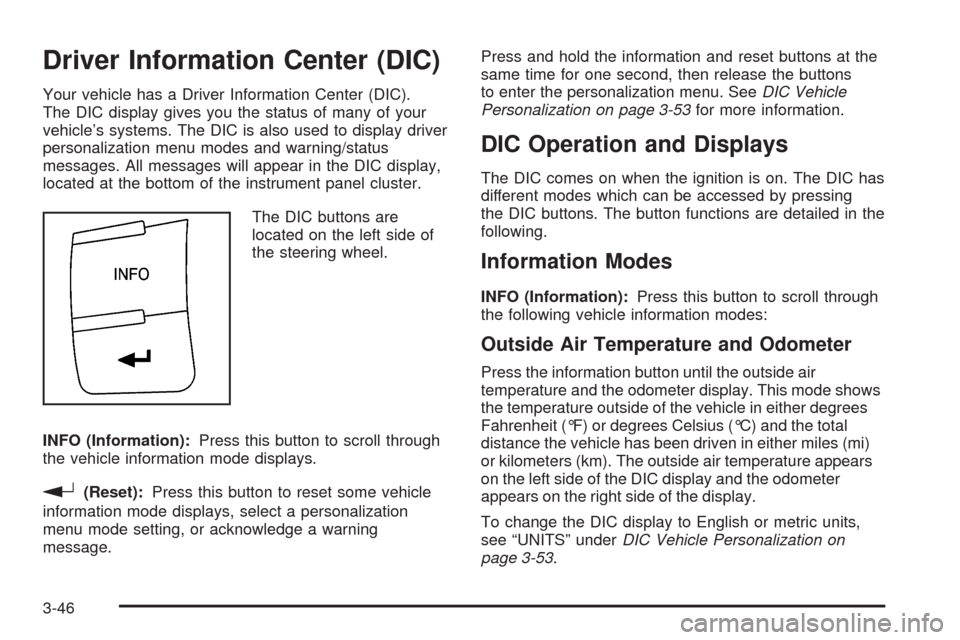
The DIC buttons are
located on the left side of
the steering wheel.
INFO (Information):Press this button to scroll through
the vehicle information mode displays.
r(Reset):Press this button to reset some vehicle
information mode displays, select a personalization
menu mode setting, or acknowledge a warning
message.Press and hold the information and reset buttons at the
same time for one second, then release the buttons
to enter the personalization menu. SeeDIC Vehicle
Personalization on page 3-53for more information.
DIC Operation and Displays
The DIC comes on when the ignition is on. The DIC has
different modes which can be accessed by pressing
the DIC buttons. The button functions are detailed in the
following.
Information Modes
INFO (Information):Press this button to scroll through
the following vehicle information modes:
Outside Air Temperature and Odometer
Press the information button until the outside air
temperature and the odometer display. This mode shows
the temperature outside of the vehicle in either degrees
Fahrenheit (°F) or degrees Celsius (°C) and the total
distance the vehicle has been driven in either miles (mi)
or kilometers (km). The outside air temperature appears
on the left side of the DIC display and the odometer
appears on the right side of the display.
To change the DIC display to English or metric units,
see “UNITS” underDIC Vehicle Personalization on
page 3-53.
3-46
Page 179 of 412
TRIP A or TRIP B
Press the information button until TRIP A or TRIP B
display. These modes show the current distance
traveled since the last reset for each trip odometer in
either miles (mi) or kilometers (km). Both odometers can
be used at the same time.
To reset the trip odometer to zero, press and hold the
reset button for a few seconds while the desired
trip odometer is displayed.
FUEL RANGE
Press the information button until FUEL RANGE
displays. This mode shows the remaining distance you
can drive without refueling in either miles (mi) or
kilometers (km). It is based on fuel economy and the
fuel remaining in the tank.
When the fuel level is low, FUEL RANGE LOW displays.
The fuel economy data used to determine fuel range
is an average of recent driving conditions. As your
driving conditions change, this data is gradually updated.
The FUEL RANGE mode cannot be reset.
MPG (L/100 KM) AVG (Average)
Press the information button until MPG (L/100 KM) AVG
displays. This mode shows how many miles per
gallon (mpg) or liters per 100 kilometers (L/100 km) your
vehicle is getting based on current and past driving
conditions.
To reset the average fuel economy, press and hold the
reset button while MPG (L/100 KM) AVG is displayed.
Average fuel economy is then calculated starting
from that point. If the average fuel economy is not reset,
it is continually updated each time you drive.
MPG (L/100 KM) INST (Instantaneous)
Press the information button until MPG (L/100 KM) INST
displays. This mode shows the current fuel economy
at a particular moment and changes frequently as
driving conditions change. This mode shows the
instantaneous fuel economy in miles per gallon (mpg) or
liters per 100 kilometers (L/100 km). Unlike average
fuel economy, this screen cannot be reset.
AV (Average) SPEED
Press the information button until AV SPEED displays.
This mode shows the vehicle’s average speed in
miles per hour (mph) or kilometers per hour (km/h).
To reset the average vehicle speed, press and hold the
reset button while AV SPEED is displayed.
3-47
Page 185 of 412
TRACTION OFF
If your vehicle has the Traction Control System (TCS),
this message displays and the ESC/TCS light on
the instrument panel cluster comes on solid when the
system is turned off. Adjust your driving accordingly.
SeeTraction Control System (TCS) on page 4-6
andElectronic Stability Control (ESC)/Traction Control
System (TCS) Indicator/Warning Light on page 3-39
for more information.
TRUNK AJAR
This message displays when the trunk is not closed
completely. Make sure that the trunk is closed
completely. SeeTrunk on page 2-13for more
information.
DIC Vehicle Personalization
Your vehicle has personalization capabilities that allow
you to program certain features to a preferred setting.
All of the features listed may not be available on
your vehicle. Only the features available will be
displayed on the DIC.The default settings for the features were set when your
vehicle left the factory, but may have been changed
from their default state since that time.
To change feature settings, use the following procedure:
Entering Personalization Menu
1. Turn the ignition on while the vehicle is stopped.
To avoid excessive drain on the battery, it is
recommended that the headlamps are turned off.
2. Press and hold the information and reset buttons at
the same time for one second, then release to enter
the personalization menu.
If the vehicle speed is greater than 2 mph (3 km/h),
only the UNITS menu will be accessible.
3. Press the information button to scroll through the
available personalization menu modes.
Press the reset button to scroll through the available
settings for each mode.
If you do not make a selection within ten seconds,
the display will go back to the previous information
displayed.
3-53